This is the full developer documentation for Patchstack Docs
# Welcome to Patchstack Docs
> Patchstack is a powerful tool that helps to protect your WordPress applications from attacks and identify security vulnerabilities within all your WordPress plugins, themes, and core. It is powered by the WordPress ecosystem's most active community of ethical hackers. Patchstack is trusted by leading WordPress experts such as GoDaddy, Hostinger, Pagely, GridPane, Plesk, and others.
## Learn more
[Section titled “Learn more”](#learn-more)
[](/getting-started/start-using-patchstack/)
Get started: protect your site
[](/patchstack-plugin/patchstack-connector/introduction/)
Solutions for WordPress, Joomla & Drupal
[](/api-solutions/threat-intelligence-api/enterprise/)
Database API for enterprises
[](/faq-troubleshooting/)
Frequently asked questions
# Patchstack App API
*Patchstack App API is available for the Developer and Business plan users*
Patchstack App API enables users to run all the Patchstack App account actions remotely over an API. It allows you to access protection logs, generate security reports, manage site settings, add new sites, create custom rules, and much more.
### Documentation and endpoints
[Section titled “Documentation and endpoints”](#documentation-and-endpoints)
Find all the Patchstack App API endpoints with examples from the documentation here:
### Example use cases
[Section titled “Example use cases”](#example-use-cases)
Some example use cases for Patchstack App API are listed below:
* Integrate Patchstack to your email marketing software to send out monthly security reports to your customers.
* Integrate Patchstack inside your own product and let your customers enable (and control) Patchstack directly from your platform without them leaving your service.
* Pull IP addresses of attackers that try to exploit vulnerabilities into your DNS firewall to block them on the network layer.
* Integrate with Enterprise SIEM/SOC tools and pull vulnerability data and logs directly into it.
* Build any kind of automations with Zapier, IFTTT, etc.
### How to get Patchstack App API key?
[Section titled “How to get Patchstack App API key?”](#how-to-get-patchstack-app-api-key)
To get the API key, log in to your Patchstack account, go to account settings and navigate to the [**Integrations**](https://app.patchstack.com/settings/integrations) page.

# API properties
# Introduction
[Section titled “Introduction”](#introduction)
This document will provide information on the properties of the different endpoints as part of the API of the vulnerability database and will also provide an example on a potential integration to match the result set against WordPress software.
These examples will be shown using PHP, but can easily be implemented using any programming language. If you have any questions, feel free to send an email to .
# Data Structure
[Section titled “Data Structure”](#data-structure)
Some of the JSON properties as part of the result set can be null so it is important to handle these properties accordingly. Note that we may speak of “product” in the result set, which is essentially the same as a “component”.
This is JSON example for 1 plugin, 1 theme and 1 WordPress core vulnerability.
```json
{
"vulnerabilities": [
{
"id": 8728,
"product_id": 497,
"title": "WordPress Ninja Forms plugin <= 3.6.10 - Unauthenticated PHP Object Injection vulnerability",
"description": "Unauthenticated PHP Object Injection vulnerability discovered in WordPress Ninja Forms plugin (versions <= 3.6.10).",
"disclosure_date": "2022-06-15 14:46:03",
"disclosed_at": "2022-06-15T14:46:03+00:00",
"created_at": "2022-06-17T09:00:05+00:00",
"url": "wordpress-ninja-forms-plugin-3-6-10-unauthenticated-php-object-injection-vulnerability",
"product_slug": "ninja-forms",
"product_name": "Ninja Forms",
"product_name_premium": null,
"product_type": "Plugin",
"vuln_type": "PHP Object Injection",
"cvss_score": 9.8,
"cve": [],
"is_exploited": false,
"patch_priority": 3,
"affected_in": "<= 3.6.10",
"fixed_in": "3.6.11",
"patched_in_ranges": [
{
"from_version": "3.0",
"to_version": "3.0.34.1",
"fixed_in": "3.0.34.2"
},
{
"from_version": "3.1",
"to_version": "3.1.9",
"fixed_in": "3.1.10"
},
{
"from_version": "3.2",
"to_version": "3.2.27",
"fixed_in": "3.2.28"
},
{
"from_version": "3.3",
"to_version": "3.3.21.3",
"fixed_in": "3.3.21.4"
},
{
"from_version": "3.4",
"to_version": "3.4.34.1",
"fixed_in": "3.4.34.2"
},
{
"from_version": "3.5",
"to_version": "3.5.8.3",
"fixed_in": "3.5.8.4"
}
],
"direct_url": "https://patchstack.com/database/vulnerability/ninja-forms/wordpress-ninja-forms-plugin-3-6-10-unauthenticated-php-object-injection-vulnerability"
},
{
"id": 5793,
"product_id": 3547,
"title": "WordPress WooRockets Nitro premium theme <= 1.7.9 - Unauthenticated Arbitrary Plugin Installation vulnerability",
"description": "Unauthenticated Arbitrary Plugin Installation vulnerability discovered by Brad Patton in WordPress WooRockets Nitro premium theme (versions <= 1.7.9).",
"disclosure_date": "2021-11-03 00:00:00",
"disclosed_at": "2021-11-03T00:00:00+00:00",
"created_at": "2022-01-06T15:31:02+00:00",
"url": "wordpress-woorockets-nitro-premium-theme-1-7-9-unauthenticated-arbitrary-plugin-installation-vulnerability",
"product_slug": "wr-nitro",
"product_name": "WooRockets Nitro",
"product_name_premium": null,
"product_type": "Theme",
"vuln_type": "Other Vulnerability Type",
"cvss_score": 8.2,
"cve": [],
"patch_priority": 3,
"affected_in": "<= 1.7.9",
"fixed_in": "",
"patched_in_ranges": [],
"direct_url": "https://patchstack.com/database/vulnerability/wr-nitro/wordpress-woorockets-nitro-premium-theme-1-7-9-unauthenticated-arbitrary-plugin-installation-vulnerability"
},
{
"id": 5814,
"product_id": 8,
"title": "WordPress <= 5.8.2 - Authenticated Object Injection in Multisites",
"description": "Authenticated Object Injection in Multisites discovered by Simon Scannell (SonarSource) in WordPress (versions <= 5.8.2).",
"disclosure_date": "2022-01-06 00:00:00",
"disclosed_at": "2022-01-06T00:00:00+00:00",
"created_at": "2022-01-07T15:05:04+00:00",
"url": "wordpress-5-8-2-authenticated-object-injection-in-multisites",
"product_slug": "wordpress",
"product_name": "WordPress",
"product_name_premium": null,
"product_type": "WordPress",
"vuln_type": "Other Vulnerability Type",
"cvss_score": 6.6,
"cve": [
"2022-21663"
],
"is_exploited": false,
"patch_priority": 2,
"affected_in": "<= 5.8.2",
"fixed_in": "5.8.3",
"patched_in_ranges": [
{
"from_version": "5.8",
"to_version": "5.8.2",
"fixed_in": "5.8.3"
},
{
"from_version": "5.7",
"to_version": "5.7.4",
"fixed_in": "5.7.5"
},
{
"from_version": "5.6",
"to_version": "5.6.6",
"fixed_in": "5.6.7"
},
{
"from_version": "5.5",
"to_version": "5.5.7",
"fixed_in": "5.5.8"
},
{
"from_version": "5.4",
"to_version": "5.4.8",
"fixed_in": "5.4.9"
},
{
"from_version": "5.3",
"to_version": "5.3.10",
"fixed_in": "5.3.11"
},
{
"from_version": "5.2",
"to_version": "5.2.13",
"fixed_in": "5.2.14"
},
{
"from_version": "5.1",
"to_version": "5.1.11",
"fixed_in": "5.1.12"
},
{
"from_version": "5.0",
"to_version": "5.0.14",
"fixed_in": "5.0.15"
},
{
"from_version": "4.9",
"to_version": "4.9.18",
"fixed_in": "4.9.19"
},
{
"from_version": "4.8",
"to_version": "4.8.17",
"fixed_in": "4.8.18"
},
{
"from_version": "4.7",
"to_version": "4.7.21",
"fixed_in": "4.7.22"
},
{
"from_version": "4.6",
"to_version": "4.6.21",
"fixed_in": "4.6.22"
},
{
"from_version": "4.5",
"to_version": "4.5.24",
"fixed_in": "4.5.25"
},
{
"from_version": "4.4",
"to_version": "4.4.25",
"fixed_in": "4.4.26"
},
{
"from_version": "4.3",
"to_version": "4.3.26",
"fixed_in": "4.3.27"
},
{
"from_version": "4.2",
"to_version": "4.2.30",
"fixed_in": "4.2.31"
},
{
"from_version": "4.1",
"to_version": "4.1.33",
"fixed_in": "4.1.34"
},
{
"from_version": "4.0",
"to_version": "4.0.33",
"fixed_in": "4.0.34"
},
{
"from_version": "3.9",
"to_version": "3.9.34",
"fixed_in": "3.9.35"
},
{
"from_version": "3.8",
"to_version": "3.8.36",
"fixed_in": "3.8.37"
},
{
"from_version": "3.7",
"to_version": "3.7.36",
"fixed_in": "3.7.37"
}
],
"direct_url": "https://patchstack.com/database/vulnerability/wordpress/wordpress-5-8-2-authenticated-object-injection-in-multisites"
}
]
}
```
* **id → integer**
* Holds the unique numeric identifier of the vulnerability
* **product\_id → integer**
* Holds the unique numeric identifier of the product
* **title → string**
* The title of the vulnerability, including the product name, version, and vulnerability type
* **description → string**
* A short description about the vulnerability
* **disclosure\_date → datetime → YYYY-MM-DD HH:MM:SS**
* Date of when the vulnerability was publicly disclosed
* **disclosed\_at → datetime → ISO 8601 format**
* Date of when the vulnerability was publicly disclosed
* **created\_at → datetime → ISO 8601 format**
* Date of when the vulnerability was created and added to the database
* **url → string**
* The slug of the vulnerability which is used for the URL
* **product\_slug → string**
* The slug of the product
* The slug will be in lowercase, so make sure to convert your own slugs to lowercase before doing any comparison to this property
* **product\_name → string**
* The title / name of the product
* **product\_name\_premium → string → nullable**
* The title / name of the product
* This is used in rare scenarios where a developer of a plugin has 2 versions of their plugin but with the same slug but different product names.
* **product\_type → string**
* The type of the product. Can be Plugin, Theme or WordPress
* **vuln\_type → string**
* The vulnerability type, some examples are SQL Injection and Cross Site Scripting
* **cvss\_score → decimal → nullable**
* The CVSS score of the vulnerability, between 1 and 10. Can be null, the older vulnerabilities in the database have not been classified yet.
* **cve → array of strings → can be an empty array**
* Contains an array of CVE ID’s bound to the vulnerability. One vulnerability could have multiple CVE ID’s. There are also vulnerabilities without CVE ID’s.
* **affected\_in → string**
* The versions which are affected by this vulnerability.
* Formats:
* <= x.x.x (affecting versions up to and including)
* < x.x.x (affecting versions up to)
* x.x.x-x.x.x (affecting a specific range of versions, inclusive)
* x.x.x,x.x.x (affecting specific versions)
* x.x.x (affecting one version)
* WordPress does not force plugin developers to stick to a certain versioning format. There are versions out there in an unusual format which is out of our control. Some plugins use a version in the form of a date such as 20220202, some use letters such as 2.0.2a, some just keep adding a number to the version e.g. 4.0000002. However, for the most part it’s in the usual format of x.x.x or x.x or x.x.xx
* **fixed\_in → string → can be empty**
* The oldest version which has the vulnerability fixed
* This can be empty, which implies that we have not recorded a fixed version for this vulnerability yet
* **patched\_in\_ranges → array of strings → can be an empty array**
* In case the WordPress core, plugin or theme have patched sub-versions, this will hold an array of versions in the format of:
* from\_version → string
* Starting version, inclusive
* to\_version → string
* Ending version, inclusive
* fixed\_in → string
* The version which has the patch applied
* You see this often in WordPress core vulnerabilities as they still support older versions such as 5.1, 5.2, 5.3, etc. Bigger plugins such as WooCommerce and Ninja Forms also do this.
* **direct\_url → string**
* The direct URL of the vulnerability hosted at the Patchstack database frontend.
* **is\_exploited → boolean**
* Whether or not the vulnerability is known to be exploited by Patchstack
* **patch\_priority → integer → nullable**
* The patch priority value of the vulnerability which implies how soon the developer needs to patch the vulnerability and how soon the customers need to be protected.
* NULL = unknown
* 1 = Low → patch within 30 days
* 2 = Medium → patch within 7 days
* 3 or higher = High → patch immediately
# Implementation
[Section titled “Implementation”](#implementation)
Since some of these properties must be kept in mind while determining if a component is vulnerable or not, we have an example PHP script below which will explain the flow. In particular, the following properties must be used: product\_slug, product\_name\_premium, affected\_in, patched\_in\_ranges.
Note that it is an example implementation and should not be copied 1:1 for internal use, you’ll likely want to call the /all API endpoint using a different HTTP library and store the JSON response somewhere else (such as a memory based cache). The example will utilize Laravel’s collect function and Guzzle. The composer.json file which was used for this example is also included below.
```json
{
"require": {
"illuminate/collections": "^8.83",
"guzzlehttp/guzzle": "7.0"
}
}
```
```php
where('product_slug', $slug)->where('product_type', getProductType($type));
if ($vulns->count() === 0) {
return false;
}
// Now we will loop through the vulnerabilities and return upon the first match.
foreach ($vulns as $vuln) {
// Get the current version, remove "v" as some components put this in place.
$currentVersion = str_replace('v', '', strtolower($currentVersion));
// The patched in ranges hold priority.
if (count($vuln['patched_in_ranges']) > 0) {
// Loop through all the present ranges.
foreach ($vuln['patched_in_ranges'] as $range) {
if (version_compare($currentVersion, $range['from_version'], '>=') && version_compare($currentVersion, $range['to_version'], '<=') && isMatchingName($name, $vuln['product_name_premium'])) {
return true;
}
}
// If the patched in ranges exist and no match was made, we assume it's a fixed in the given version at this point.
continue;
}
// Ignore empty affected in version, should never happen but best to catch it.
$affectedIn = trim($vuln['affected_in']);
if (empty($affectedIn)) {
continue;
}
// Match against <= or <.
if (strpos($affectedIn, '<= ') !== false || strpos($affectedIn, '< ') !== false) {
$t = explode(' ', $affectedIn);
$comparison = $t[0];
$version = $t[1];
if (version_compare($currentVersion, $version, $comparison) && isMatchingName($name, $vuln['product_name_premium'])) {
return true;
}
continue;
}
// Match against versions separated by commas.
if (strpos($affectedIn, ',') !== false) {
$versions = explode(',', $affectedIn);
foreach ($versions as $version) {
$version = trim($version);
if ($version == $currentVersion && isMatchingName($name, $vuln['product_name_premium'])) {
return true;
}
}
continue;
}
// Match against a range of versions.
if (strpos($affectedIn, '-') !== false) {
$t = explode('-', $affectedIn);
$start = $t[0];
$end = $t[1];
if (version_compare($currentVersion, $start, '>=') && version_compare($currentVersion, $end, '<=') && isMatchingName($name, $vuln['product_name_premium'])) {
return true;
}
continue;
}
// Otherwise we are likely matching against one single version.
if ($currentVersion == $affectedIn && isMatchingName($name, $vuln['product_name_premium'])) {
return true;
}
}
return false;
}
/**
* If the premium field is filled in, match if it equals.
* If it's empty, we will always return true.
*
* @param string $name
* @param mixed $premiumName
* @return bool
*/
function isMatchingName(string $name, mixed $premiumName): bool
{
if (empty($premiumName)) {
return true;
}
return $name === $premiumName;
}
/**
* Convert the product type to how it's stored in the API.
*
* @param string $type
* @return string
*/
function getProductType(string $type): string
{
switch (strtolower($type)) {
case 'plugin':
return 'Plugin';
case 'theme':
return 'Theme';
case 'wordpress':
return 'WordPress';
default:
return 'Plugin';
}
}
// Send the HTTP request, you'll likely want to cache this for an hour at a minimum.
if (!file_exists('db.cache')) {
try {
$client = new Client([
'base_uri' => 'https://patchstack.com/database/api/v2/'
]);
$response = $client->request('GET', 'all', [
'headers' => [
'PSKey' => ''
]
]);
file_put_contents('db.cache', (string) $response->getBody());
} catch (\Throwable $e) {
echo $e->getMessage();
exit;
}
}
// Get the vulnerabilities from the cache.
$vulnerabilities = json_decode(file_get_contents('db.cache'), true)['vulnerabilities'];
// Turn it into a collection.
$vulnerabilities = collect($vulnerabilities);
// The component we want to check, this is taken from your own dataset.
$component = [
'name' => 'Ninja Forms', // The name of the component
'slug' => 'ninja-forms', // The slug of the component
'version' => '3.6.9', // The current version of the component
'type' => 'plugin' // The component type
];
// Should return true.
var_dump(isVulnerable($component['name'], $component['slug'], $component['version'], $component['type'], $vulnerabilities));
// Should return false.
$component['version'] = '3.6.10';
var_dump(isVulnerable($component['name'], $component['slug'], $component['version'], $component['type'], $vulnerabilities));
// The component we want to check, this is taken from your own dataset.
$component = [
'name' => 'WooRockets Nitro', // The name of the component
'slug' => 'wr-nitro', // The slug of the component
'version' => '1.7.5', // The current version of the component
'type' => 'theme' // The component type
];
// Should return true.
var_dump(isVulnerable($component['name'], $component['slug'], $component['version'], $component['type'], $vulnerabilities));
// Should return false.
$component['version'] = '1.7.10';
var_dump(isVulnerable($component['name'], $component['slug'], $component['version'], $component['type'], $vulnerabilities));
// The component we want to check, this is taken from your own dataset.
$component = [
'name' => 'WordPress', // The name of the component
'slug' => 'wordpress', // The slug of the component
'version' => '5.8.2', // The current version of the component
'type' => 'wordpress' // The component type
];
// Should return true.
var_dump(isVulnerable($component['name'], $component['slug'], $component['version'], $component['type'], $vulnerabilities));
// Should return false.
$component['version'] = '5.8.3';
var_dump(isVulnerable($component['name'], $component['slug'], $component['version'], $component['type'], $vulnerabilities));
// Should return true.
$component['version'] = '5.9';
var_dump(isVulnerable($component['name'], $component['slug'], $component['version'], $component['type'], $vulnerabilities));
// Should return false.
$component['version'] = '5.9.2'
var_dump(isVulnerable($component['name'], $component['slug'], $component['version'], $component['type'], $vulnerabilities));
```
Running this script with the proper PSKey injected on line 147 should result in the following response:
```plaintext
bool(true)
bool(false)
bool(true)
bool(false)
bool(true)
bool(false)
bool(true)
bool(false)
```
# Enterprise API
*The purpose of this document is to provide information about the extended Enterprise API functionality of the Patchstack vulnerability database (Threat Intelligence). Enterprise API is available for the Enterprise plan customers with extended access to the Threat Intelligence API.*
## API Usage
[Section titled “API Usage”](#api-usage)
### Information
[Section titled “Information”](#information)
The base URL of the API is
All responses are in the JSON format. For performance reasons, responses are cached until we update the database after which the appropriate caches are cleared.
An API key is required. This API key should be present in the **PSKey HTTP request header**. You can request an API key by reaching out to us on this page:
Explanation of the API response properties can be found here [here](/api-solutions/threat-intelligence-api/api-properties/).
### Latest Vulnerabilities
[Section titled “Latest Vulnerabilities”](#latest-vulnerabilities)
**Description:** Retrieve the latest 20 vulnerabilities which have been added to the database.\
**Endpoint:** /latest\
**Method:** GET
**Example Response (Trimmed)**
```json
{
"vulnerabilities": [
{
"id": 7976,
"product_id": 2175,
"title": "WordPress File Upload plugin <= 4.16.2 - Contributor+ Path Traversal vulnerability leading to Remote Code Execution (RCE)",
"description": "Contributor+ Path Traversal vulnerability leading to Remote Code Execution (RCE) discovered by apple502j in WordPress File Upload plugin (versions <= 4.16.2).",
"disclosure_date": "2022-03-01 00:00:00",
"disclosed_at": "2022-03-01T00:00:00+00:00",
"created_at": "2022-03-07T11:17:05+00:00",
"url": "wordpress-file-upload-plugin-4-16-2-contributor-path-traversal-vulnerability-leading-to-remote-code-execution-rce",
"product_slug": "wp-file-upload",
"product_name": "WordPress File Upload",
"product_name_premium": null,
"product_type": "Plugin",
"vuln_type": "Directory Traversal",
"cvss_score": 8.8,
"cve": [
"2021-24962"
],
"is_exploited": false,
"patch_priority": 3,
"affected_in": "<= 4.16.2",
"fixed_in": "4.16.3",
"patched_in_ranges": [],
"direct_url": "https://patchstack.com/database/vulnerability/wp-file-upload/wordpress-file-upload-plugin-4-16-2-contributor-path-traversal-vulnerability-leading-to-remote-code-execution-rce"
},
{
"id": 7957,
"product_id": 3808,
"title": "WordPress All in One Invite Codes plugin <= 1.0.12 - Sensitive Information Disclosure vulnerability",
"description": "Sensitive Information Disclosure vulnerability discovered in WordPress All in One Invite Codes plugin (versions <= 1.0.12).",
"disclosure_date": "2022-02-28 00:00:00",
"disclosed_at": "2022-02-28T00:00:00+00:00",
"created_at": "2022-03-03T13:25:05+00:00",
"url": "wordpress-all-in-one-invite-codes-plugin-1012-sensitive-information-disclosure-vulnerability",
"product_slug": "all-in-one-invite-codes",
"product_name": "All in One Invite Codes",
"product_name_premium": null,
"product_type": "Plugin",
"vuln_type": "Information Disclosure",
"cvss_score": 4.3,
"cve": [],
"is_exploited": false,
"patch_priority": 1,
"affected_in": "<= 1.0.12",
"fixed_in": "",
"patched_in_ranges": [],
"direct_url": "https://patchstack.com/database/vulnerability/all-in-one-invite-codes/wordpress-all-in-one-invite-codes-plugin-1012-sensitive-information-disclosure-vulnerability"
}
]
}
```
### Find Vulnerability
[Section titled “Find Vulnerability”](#find-vulnerability)
**Description:** Retrieve vulnerabilities of a specific plugin, theme or WordPress core version.\
**Endpoint:** /product/TYPE/NAME/VERSION/EXISTS?\
**Method:** GET
**TYPE** = theme, plugin, wordpress\
**NAME** = Slug of the theme, slug of the plugin, or “wordpress” in case TYPE is set to wordpress\
**VERSION** = Version to check for vulnerabilities\
**EXISTS** = Optional flag that will not return all vulnerabilities but only a boolean response whether or not there are vulnerabilities. This flag being present results in a faster response.
**Example Response**
```json
{
"vulnerabilities": [
{
"id": 4253,
"product_id": 2642,
"title": "WordPress Tutor LMS plugin <= 1.5.2 - Cross-Site Request Forgery (CSRF) vulnerability",
"description": "Cross-Site Request Forgery (CSRF) vulnerability found by Jinson Varghese Behanan in WordPress Tutor LMS plugin (versions <= 1.5.2).",
"disclosure_date": "2020-02-04 00:00:00",
"disclosed_at": "2020-02-04T00:00:00+00:00",
"created_at": "2021-01-08T13:50:05+00:00",
"url": "wordpress-tutor-lms-plugin-1-5-2-cross-site-request-forgery-csrf-vulnerability",
"product_slug": "tutor",
"product_name": "Tutor LMS",
"product_name_premium": null,
"product_type": "Plugin",
"vuln_type": "Cross Site Request Forgery (CSRF)",
"cvss_score": null,
"cve": [
"2020-8615"
],
"is_exploited": false,
"patch_priority": 1,
"affected_in": "<= 1.5.2",
"fixed_in": "1.5.3",
"direct_url": "https://patchstack.com/database/vulnerability/tutor/wordpress-tutor-lms-plugin-1-5-2-cross-site-request-forgery-csrf-vulnerability"
},
{
"id": 4386,
"product_id": 2642,
"title": "WordPress Tutor LMS plugin <= 1.7.6 - Multiple Blind/Time-based SQL Injection (SQLi) vulnerabilities",
"description": "Multiple Blind/Time-based SQL Injection (SQLi) vulnerabilities were discovered by WordFence in the WordPress Tutor LMS plugin (versions <= 1.7.6).",
"disclosure_date": "2021-03-15 00:00:00",
"disclosed_at": "2021-03-15T00:00:00+00:00",
"created_at": "2021-06-07T10:12:03+00:00",
"url": "wordpress-tutor-lms-plugin-1-7-6-multiple-blind-time-based-sql-injection-sqli-vulnerabilities",
"product_slug": "tutor",
"product_name": "Tutor LMS",
"product_name_premium": null,
"product_type": "Plugin",
"vuln_type": "SQL Injection",
"cvss_score": 5.4,
"cve": [],
"is_exploited": false,
"patch_priority": 2,
"affected_in": "<= 1.7.6",
"fixed_in": "1.7.7",
"direct_url": "https://patchstack.com/database/vulnerability/tutor/wordpress-tutor-lms-plugin-1-7-6-multiple-blind-time-based-sql-injection-sqli-vulnerabilities"
},
{
"id": 4387,
"product_id": 2642,
"title": "WordPress Tutor LMS plugin <= 1.8.2 - Multiple Union SQL Injection (SQLi) vulnerabilities",
"description": "Multiple Union SQL Injection (SQLi) vulnerabilities were discovered by WordFence in the WordPress Tutor LMS plugin (versions <= 1.8.2).",
"disclosure_date": "2021-03-15 00:00:00",
"disclosed_at": "2021-03-15T00:00:00+00:00",
"created_at": "2021-03-16T08:48:03+00:00",
"url": "wordpress-tutor-lms-plugin-1-8-2-multiple-union-sql-injection-sqli-vulnerabilities",
"product_slug": "tutor",
"product_name": "Tutor LMS",
"product_name_premium": null,
"product_type": "Plugin",
"vuln_type": "SQL Injection",
"cvss_score": null,
"cve": [],
"is_exploited": false,
"patch_priority": 2,
"affected_in": "<= 1.8.2",
"fixed_in": "1.8.3",
"direct_url": "https://patchstack.com/database/vulnerability/tutor/wordpress-tutor-lms-plugin-1-8-2-multiple-union-sql-injection-sqli-vulnerabilities"
},
{
"id": 4388,
"product_id": 2642,
"title": "WordPress Tutor LMS plugin <= 1.7.6 - Unprotected AJAX Action to Privilege Escalation vulnerability",
"description": "Unprotected AJAX Action to Privilege Escalation vulnerability discovered by WordFence in WordPress Tutor LMS plugin (versions <= 1.7.6).",
"disclosure_date": "2021-03-15 00:00:00",
"disclosed_at": "2021-03-15T00:00:00+00:00",
"created_at": "2021-08-31T08:00:05+00:00",
"url": "wordpress-tutor-lms-plugin-1-7-6-unprotected-ajax-action-to-privilege-escalation-vulnerability",
"product_slug": "tutor",
"product_name": "Tutor LMS",
"product_name_premium": null,
"product_type": "Plugin",
"vuln_type": "Privilege Escalation",
"cvss_score": null,
"cve": [],
"is_exploited": false,
"patch_priority": 3,
"affected_in": "<= 1.7.6",
"fixed_in": "1.7.7",
"direct_url": "https://patchstack.com/database/vulnerability/tutor/wordpress-tutor-lms-plugin-1-7-6-unprotected-ajax-action-to-privilege-escalation-vulnerability"
},
{
"id": 4549,
"product_id": 2642,
"title": "WordPress Tutor LMS plugin <= 1.8.7 - Authenticated Local File Inclusion vulnerability",
"description": "Authenticated Local File Inclusion vulnerability discovered by sasa in WordPress Tutor LMS plugin (versions <= 1.8.7)",
"disclosure_date": "2021-04-05 00:00:00",
"disclosed_at": "2021-04-05T00:00:00+00:00",
"created_at": "2021-04-19T09:28:03+00:00",
"url": "wordpress-tutor-lms-plugin-1-8-7-authenticated-local-file-inclusion-vulnerability",
"product_slug": "tutor",
"product_name": "Tutor LMS",
"product_name_premium": null,
"product_type": "Plugin",
"vuln_type": "Local File Inclusion",
"cvss_score": 4.9,
"cve": [
"2021-24242"
],
"is_exploited": false,
"patch_priority": 1,
"affected_in": "<= 1.8.7",
"fixed_in": "1.8.8",
"direct_url": "https://patchstack.com/database/vulnerability/tutor/wordpress-tutor-lms-plugin-1-8-7-authenticated-local-file-inclusion-vulnerability"
},
{
"id": 5082,
"product_id": 2642,
"title": "WordPress Tutor LMS plugin <= 1.9.5 - Reflected Cross-Site Scripting (XSS) vulnerability",
"description": "Reflected Cross-Site Scripting (XSS) vulnerability discovered by WPScanTeam in WordPress Tutor LMS plugin (versions <= 1.9.5).",
"disclosure_date": "2021-08-09 00:00:00",
"disclosed_at": "2021-08-09T00:00:00+00:00",
"created_at": "2021-08-20T06:35:01+00:00",
"url": "wordpress-tutor-lms-plugin-1-9-5-reflected-cross-site-scripting-xss-vulnerability",
"product_slug": "tutor",
"product_name": "Tutor LMS",
"product_name_premium": null,
"product_type": "Plugin",
"vuln_type": "Cross Site Scripting (XSS)",
"cvss_score": 7.1,
"cve": [],
"is_exploited": false,
"patch_priority": 2,
"affected_in": "<= 1.9.5",
"fixed_in": "1.9.6",
"direct_url": "https://patchstack.com/database/vulnerability/tutor/wordpress-tutor-lms-plugin-1-9-5-reflected-cross-site-scripting-xss-vulnerability"
},
{
"id": 5388,
"product_id": 2642,
"title": "WordPress Tutor LMS plugin <= 1.9.8 - Multiple Stored Cross-Site Scripting (XSS) vulnerabilities",
"description": "Multiple Stored Cross-Site Scripting (XSS) vulnerabilities were discovered by Shivam Rai in the WordPress Tutor LMS plugin (versions <= 1.9.8).",
"disclosure_date": "2021-09-20 00:00:00",
"disclosed_at": "2021-09-20T00:00:00+00:00",
"created_at": "2021-10-22T12:54:01+00:00",
"url": "wordpress-tutor-lms-plugin-1-9-8-multiple-stored-cross-site-scripting-xss-vulnerabilities",
"product_slug": "tutor",
"product_name": "Tutor LMS",
"product_name_premium": null,
"product_type": "Plugin",
"vuln_type": "Cross Site Scripting (XSS)",
"cvss_score": 6.9,
"cve": [
"2021-24740"
],
"is_exploited": false,
"patch_priority": 2,
"affected_in": "<= 1.9.8",
"fixed_in": "1.9.9",
"direct_url": "https://patchstack.com/database/vulnerability/tutor/wordpress-tutor-lms-plugin-1-9-8-multiple-stored-cross-site-scripting-xss-vulnerabilities"
}
]
}
```
**Example Response**
```json
{
"vulnerable": true
}
```
### Bulk Find Vulnerability
[Section titled “Bulk Find Vulnerability”](#bulk-find-vulnerability)
**Description:** Retrieve vulnerabilities in bulk of a number of plugins, themes or WordPress versions.\
**Endpoint:** /batch\
**Method:** POST\
**Payload:** Raw JSON payload, same format as the individual vulnerability endpoint. This payload should contain no more than 50 objects.
**Payload Example 1**
This payload example will determine if WooCommerce version 3.0.0 has vulnerabilities and if WordPress version 3.0.0 has vulnerabilities. It will also only return a boolean response.
```json
[
{"name":"easy-digital-downloads1","version":"1.0.0","type":"plugin","exists":true},
{"name":"wordpress","version":"3.0.0","type":"wordpress","exists":true}
]
```
**Example Response 1**
```json
{
"vulnerabilities": {
"easy-digital-downloads1": true,
"wordpress": true
}
}
```
**Payload Example 2**
This payload example will determine if WooCommerce version 3.0.0 has vulnerabilities and if WordPress version 3.0.0 has vulnerabilities. For WooCommerce it will return all vulnerabilities and for WordPress if it will return a boolean response.
```json
[
{"name":"easy-digital-downloads1","version":"1.0.0","type":"plugin","exists":false},
{"name":"wordpress","version":"3.0.0","type":"wordpress","exists":true}
]
```
**Example Response 2**
```json
{
"vulnerabilities": {
"easy-digital-downloads1": [
{
"id": 4532,
"product_id": 1572,
"title": "WordPress Easy Digital Downloads plugin <= 2.10.2 - Cross-Site Request Forgery (CSRF) vulnerability",
"description": "Cross-Site Request Forgery (CSRF) vulnerability discovered by WPScan team in WordPress Easy Digital Downloads plugin (versions <= 2.10.2).",
"disclosure_date": "2021-04-16 00:00:00",
"disclosed_at": "2021-04-16T00:00:00+00:00",
"created_at": "2021-04-19T04:43:04+00:00",
"url": "wordpress-easy-digital-downloads-plugin-2-10-2-cross-site-request-forgery-csrf-vulnerability",
"product_slug": "easy-digital-downloads1",
"product_name": "Easy Digital Downloads",
"product_name_premium": null,
"product_type": "Plugin",
"vuln_type": "Cross Site Request Forgery (CSRF)",
"cvss_score": 6.5,
"cve": [],
"is_exploited": false,
"affected_in": "<= 2.10.2",
"fixed_in": "2.10.3",
"direct_url": "https://patchstack.com/database/vulnerability/easy-digital-downloads1/wordpress-easy-digital-downloads-plugin-2-10-2-cross-site-request-forgery-csrf-vulnerability"
},
{
"id": 5410,
"product_id": 1572,
"title": "WordPress Easy Digital Downloads plugin <= 2.11.2 - Authenticated Reflected Cross-Site Scripting (XSS) vulnerability",
"description": "Authenticated Reflected Cross-Site Scripting (XSS) vulnerability discovered by Thinkland Security Team in WordPress Easy Digital Downloads plugin (versions <= 2.11.2).",
"disclosure_date": "2021-10-21 00:00:00",
"disclosed_at": "2021-10-21T00:00:00+00:00",
"created_at": "2021-10-22T12:54:01+00:00",
"url": "wordpress-easy-digital-downloads-plugin-2-11-2-authenticated-reflected-cross-site-scripting-xss-vulnerability",
"product_slug": "easy-digital-downloads1",
"product_name": "Easy Digital Downloads",
"product_name_premium": null,
"product_type": "Plugin",
"vuln_type": "Cross Site Scripting (XSS)",
"cvss_score": 4.8,
"cve": [
"2021-39354"
],
"is_exploited": false,
"affected_in": "<= 2.11.2",
"fixed_in": "2.11.2.1",
"direct_url": "https://patchstack.com/database/vulnerability/easy-digital-downloads1/wordpress-easy-digital-downloads-plugin-2-11-2-authenticated-reflected-cross-site-scripting-xss-vulnerability"
}
],
"wordpress": true
}
}
```
### Find Specific Vulnerability By Id
[Section titled “Find Specific Vulnerability By Id”](#find-specific-vulnerability-by-id)
**Description:** Find a specific vulnerability by vulnerability id.\
**Endpoint:** /vulnerability/ID\
**Method:** GET
**ID** = Numeric identifier or PSID of the vulnerability.
**Example Response 1**
```json
{
"vulnerability": {
"title": "WordPress Spam protection, AntiSpam, FireWall by CleanTalk plugin <= 5.153.3 - Unauthenticated Time-Based Blind SQL Injection (SQLi) vulnerability",
"description": "Unauthenticated Time-Based Blind SQL Injection (SQLi) vulnerability discovered by WordFence in WordPress Spam protection, AntiSpam, FireWall by CleanTalk plugin (versions <= 5.153.3).",
"disclosure_date": "2021-05-03 00:00:00",
"disclosed_at": "2021-05-03T00:00:00+00:00",
"created_at": "2021-09-28T14:17:02+00:00",
"is_exploited": true,
"url": "wordpress-spam-protection-antispam-firewall-by-cleantalk-plugin-5-153-3-unauthenticated-time-based-blind-sql-injection-sqli-vulnerability",
"direct_url": "https://patchstack.com/database/vulnerability/cleantalk-spam-protect/wordpress-spam-protection-antispam-firewall-by-cleantalk-plugin-5-153-3-unauthenticated-time-based-blind-sql-injection-sqli-vulnerability"
},
"product": {
"name": "Spam protection, AntiSpam, FireWall by CleanTalk",
"slug": "cleantalk-spam-protect",
"type": "Plugin"
},
"type": "SQL Injection",
"cvss": {
"score": 7.5,
"vector": "CVSS:3.1/AV:N/AC:L/PR:N/UI:N/S:U/C:H/I:N/A:N",
"description": ""
},
"owasp": "A1: Injection",
"references_url": [
{
"url": "https://cve.mitre.org/cgi-bin/cvename.cgi?name=CVE-2021-24295",
"title": "CVE"
},
{
"url": "https://www.wordfence.com/blog/2021/05/sql-injection-vulnerability-patched-in-cleantalk-antispam-plugin/",
"title": "Vulnerability details"
},
{
"url": "https://wordpress.org/plugins/cleantalk-spam-protect/#developers",
"title": "Plugin changelog"
}
],
"cve": [
"2021-24295"
],
"versions": {
"affected_in": "<= 5.153.3",
"fixed_in": "5.153.4"
},
"versions_list": null,
"credit": {
"name": "WordFence",
"url": "https://twitter.com/wordfence"
},
"submitter": null
}
```
**Example Response 2**
```json
{
"vulnerability": {
"title": "WordPress Simple File List plugin <= 4.2.2 - Unauthenticated Arbitrary File Upload vulnerability leading to Remote Code Execution (RCE)",
"description": "Unauthenticated Arbitrary File Upload vulnerability leading to Remote Code Execution (RCE) discovered by h00die and coiffeur in WordPress Simple File List plugin (versions <= 4.2.2).",
"disclosure_date": "2020-04-27 00:00:00",
"disclosed_at": "2020-04-27T00:00:00+00:00",
"created_at": "2021-04-23T15:55:02+00:00",
"is_exploited": false,
"url": "wordpress-simple-file-list-plugin-4-2-2-unauthenticated-arbitrary-file-upload-vulnerability-leading-to-remote-code-execution-rce",
"direct_url": "https://patchstack.com/database/vulnerability/simple-file-list/wordpress-simple-file-list-plugin-4-2-2-unauthenticated-arbitrary-file-upload-vulnerability-leading-to-remote-code-execution-rce"
},
"product": {
"name": "Simple File List",
"slug": "simple-file-list",
"type": "Plugin"
},
"type": "SQL Injection",
"cvss": {
"score": 9.8,
"vector": "CVSS:3.1/AV:N/AC:L/PR:N/UI:N/S:U/C:H/I:H/A:H",
"description": ""
},
"owasp": "A1: Injection",
"references_url": [
{
"url": "https://packetstormsecurity.com/files/160221/",
"title": "Vulnerability details"
},
{
"url": "https://wordpress.org/plugins/simple-file-list/#developers",
"title": "Plugin changelog"
}
],
"cve": [],
"versions": {
"affected_in": "<= 4.2.2",
"fixed_in": "4.2.3"
},
"versions_list": null,
"credit": {
"name": "coiffeur",
"url": "https://packetstormsecurity.com/files/author/14922/"
},
"submitter": {
"name": "h00die",
"url": "https://packetstormsecurity.com/files/author/7166/"
}
}
```
**Example Response 3**
```json
{
"vulnerability": {
"title": "WordPress Redux Framework <= 4.1.23 - Cross-Site Request Forgery (CSRF) Nonce Validation Bypass vulnerability",
"description": "Cross-Site Request Forgery (CSRF) Nonce Validation Bypass vulnerability found by ErwanLR in WordPress Redux Framework (versions 4.1.22 - 4.1.23).",
"disclosure_date": "2020-12-15 00:00:00",
"disclosed_at": "2020-12-15T00:00:00+00:00",
"created_at": "2020-12-15T18:36:01+00:00",
"is_exploited": false,
"url": "wordpress-redux-framework-4-1-23-cross-site-request-forgery-csrf-nonce-validation-bypass-vulnerability",
"direct_url": "https://patchstack.com/database/vulnerability/redux-framework/wordpress-redux-framework-4-1-23-cross-site-request-forgery-csrf-nonce-validation-bypass-vulnerability"
},
"product": {
"name": "Redux Framework",
"slug": "redux-framework",
"type": "Plugin"
},
"type": "SQL Injection",
"cvss": null,
"owasp": "A1: Injection",
"references_url": [
{
"url": "https://plugins.trac.wordpress.org/changeset/2437953/redux-framework/trunk/redux-core/inc/classes/class-redux-ajax-save.php?old=2405408",
"title": "Vulnerability details"
},
{
"url": "https://github.com/reduxframework/redux-framework-4/blob/master/CHANGELOG.md",
"title": "Plugin changelog"
}
],
"cve": [],
"versions": {
"affected_in": "<= 4.1.23",
"fixed_in": "4.1.24"
},
"versions_list": "4.1.23, 4.1.22",
"credit": {
"name": "ErwanLR",
"url": "https://profiles.wordpress.org/erwanlr/"
},
"submitter": null
}
```
## More information about Enterprise API
[Section titled “More information about Enterprise API”](#more-information-about-enterprise-api)
You can find more information about Enterprise API here:\
[](https://patchstack.com/for-hosts)
# Overview
### Standard Threat Intelligence API
[Section titled “Standard Threat Intelligence API”](#standard-threat-intelligence-api)
The standard Threat Intelligence API allows you access to the API endpoint to query the version of one particular product. For example to get the vulnerability information of 1 plugin of a particular version. Access to this API can be purchased through the [Patchstack App](https://app.patchsatck.com/billing/subscription).
[Standard Threat Intelligence API Documentation](/api-solutions/threat-intelligence-api/standard/)
### Enterprise Threat Intelligence API
[Section titled “Enterprise Threat Intelligence API”](#enterprise-threat-intelligence-api)
The Enterprise Threat Intelligence API allows you access to more API endpoints that also return more information on the vulnerabilities. For access to these API endpoints, please [contact us here](https://patchstack.com/for-hosts/).
[Enterprise Threat Intelligence API Documentation](/api-solutions/threat-intelligence-api/enterprise/)
# Standard API
*If you’re looking for an API that has a complete data coverage and could be used commercially, please look at the commercial API [here](https://patchstack.com/for-hosts).*
## Introduction
[Section titled “Introduction”](#introduction)
The purpose of this document is to provide information about the standard API functionality of the Patchstack vulnerability database (Threat Intelligence).
## API Usage
[Section titled “API Usage”](#api-usage)
The Standard Threat Intelligence API is limited to 5000 requests per 24 hours.
The base URL of the API is
All responses are in JSON format. For performance reasons, responses are cached until we update the database after which the appropriate caches are cleared.
An API key is required. This API key should be present in the *PSKey* HTTP request header. You can request an API key by logging into your Patchstack App account and then by going to the Upgrades page .
Explanation of the API response properties can be found here [here](/api-solutions/threat-intelligence-api/api-properties/).
## Find Vulnerability
[Section titled “Find Vulnerability”](#find-vulnerability)
**Description:** Retrieve vulnerabilities of a specific plugin, theme or WordPress core version.\
**Endpoint:** /product/TYPE/NAME/VERSION/EXISTS?\
**Method:** GET
**TYPE** = theme, plugin, wordpress\
**NAME** = Slug of the theme, slug of the plugin, or “wordpress” in case TYPE is set to wordpress\
**VERSION** = Version to check for vulnerabilities\
**EXISTS** = Optional flag that will not return all vulnerabilities but only a boolean response whether or not there are vulnerabilities. This flag being present results in a faster response.
Example response ():
```json
{
"vulnerabilities": [
{
"id": 4253,
"title": "WordPress Tutor LMS plugin <= 1.5.2 - Cross-Site Request Forgery (CSRF) vulnerability",
"disclosed_at": "2020-02-04T00:00:00+00:00",
"created_at": "2022-05-27T10:23:01+00:00",
"product_slug": "tutor",
"product_name": "Tutor LMS",
"product_name_premium": null,
"product_type": "Plugin",
"fixed_in": "1.5.3",
"direct_url": "https://patchstack.com/database/vulnerability/tutor/wordpress-tutor-lms-plugin-1-5-2-cross-site-request-forgery-csrf-vulnerability"
},
{
"id": 4386,
"title": "WordPress Tutor LMS plugin <= 1.7.6 - Multiple Blind/Time-based SQL Injection (SQLi) vulnerabilities",
"disclosed_at": "2021-03-15T00:00:00+00:00",
"created_at": "2022-05-27T10:23:01+00:00",
"product_slug": "tutor",
"product_name": "Tutor LMS",
"product_name_premium": null,
"product_type": "Plugin",
"fixed_in": "1.7.7",
"direct_url": "https://patchstack.com/database/vulnerability/tutor/wordpress-tutor-lms-plugin-1-7-6-multiple-blind-time-based-sql-injection-sqli-vulnerabilities"
}
]
}
```
Example response ():
```json
{
"vulnerable": true
}
```
# Frequently Asked Questions
* [Billing & Refunds](/faq-troubleshooting/billing-refunds)
* [Others](/faq-troubleshooting/other)
* [Account & Profile](/faq-troubleshooting/account-profile)
* [Pricing Plans](/faq-troubleshooting/pricing-plans)
* [Alerts & Notifications](/faq-troubleshooting/alerts-notifications)
* [Reports](/faq-troubleshooting/reports)
* [Technical](/faq-troubleshooting/technical)
* [Errors](/faq-troubleshooting/errors)
* [Firewall](/faq-troubleshooting/firewall)
* [Plugin](/faq-troubleshooting/plugin)
# Account & Profile - Frequently Asked Questions
* [2FA recovery](/faq-troubleshooting/account-profile/2fa-recovery)
# 2FA recovery
If you have lost the ability to log in with 2FA (two factor authentication), we can remove it from your Patchstack account manually.
To request removing the 2FA from your account:
1. Write an email stating that you wish to remove 2FA from your account. In the email, write down 3 domains that you protect with Patchstack, that are active on your account. In case you have less domains, write these all down.
2. Email must be sent from the same email address that your Patchstack account is registered with.
3. Send your email to .
4. For faster processing, you can also notify us about it via our [support chat](#).
# Alerts & Notifications - Frequently Asked Questions
* [How to send email notifications to all my team members?](/faq-troubleshooting/alerts-notifications/how-to-send-notifications-to-all-my-team-members)
# How to send email notifications to all my team members?
Currently, Patchstack sends notifications only to the user, who is the **owner** or **manager** of the site. But in case you would like to get notified to other email addresses, you can set up the custom alerts!
Note that custom alerts is a feature for Developer or Business plan accounts only.
## Setting up an email alert
[Section titled “Setting up an email alert”](#setting-up-an-email-alert)
1. Navigate to the [**Alerts**](https://app.patchstack.com/alerts/latest) page from Patchstack App
2. On the top right corner, click on **+ Create Trigger** button
3. Give your trigger a title (e.g. Notification to Joe)
4. Choose the condition of when the alert is triggered. If you want to alert this email about found vulnerabilities, pick "Vulnerable" from the list
5. Choose **Email Notification** and enter the email
If you have multiple people you wish to send notifications to, you will need to repeat the process and add another email address.
[Click here to read more about creating custom alert triggers!](/patchstack-app/alerts/creating-a-trigger/)
# Billing & Refunds - Frequently Asked Questions
* [Do you offer refunds?](/faq-troubleshooting/billing-refunds/do-you-offer-refunds)
# Do you offer refunds?
Patchstack offers refunds within 30 days of the first payment.
To request a refund, please open the new chat in our support channel. After your refund request, we will check your account and let you know about the process of refunding.
# Errors - Frequently Asked Questions
* [Error: Blocked as suspected bot](/faq-troubleshooting/errors/error-blocked-as-suspected-bot)
* [Error: Cannot activate plugin because of: SSL routines:SSL23\_GET\_SERVER\_HELLO:sslv3 alert handshake failure](/faq-troubleshooting/errors/error-cannot-activate-plugin-because-of-ssl-routinesssl23_get_server_hellosslv3-alert-handshake-failure)
* [Error: "Cannot redeclare class Patchstack in…"](/faq-troubleshooting/errors/error-cannot-redeclare-class-patchstack-in)
* [Error code 23](/faq-troubleshooting/errors/error-code-23)
* [Error code 22](/faq-troubleshooting/errors/error-code-22)
* [Error code 24](/faq-troubleshooting/errors/error-code-24)
* [Error code 7](/faq-troubleshooting/errors/error-code-7)
* [Error code 5529](/faq-troubleshooting/errors/error-code-5529)
* [Error: "CSRF token missing or mismatch"](/faq-troubleshooting/errors/error-csrf-token-missing-or-mismatch)
* [Error: The site \ cannot be added since it is invalid or blocks Patchstack from accessing the site.](/faq-troubleshooting/errors/error-the-site-url-cannot-be-added-since-it-is-invalid-or-blocks-patchstack-from-accessing-the-site)
* [Error: "Sorry, this file type is not permitted for security reasons"](/faq-troubleshooting/errors/error-sorry-this-file-type-is-not-permitted-for-security-reasons)
* [Error: "The URL \ cannot be added since it returned a 5xx error code, this indicates an internal server error on your site. Please make sure it is accessible and not in maintenance mode."](/faq-troubleshooting/errors/error-the-url-url-cannot-be-added-since-it-returned-a-5xx-error-code-this-indicates-an-internal-server-error-on-your-site-please-make-sure-it-is-accessible-and-not-in-maintenance-mode)
* [Error: "The URL \ cannot be added since it timed-out or resulted in a server error. Is it currently online?"](/faq-troubleshooting/errors/error-the-url-url-cannot-be-added-since-it-timed-out-or-resulted-in-a-server-error-is-it-currently-online)
* [Error: "Warning: Cannot modify header information - headers already sent by"](/faq-troubleshooting/errors/error-warning-cannot-modify-header-information-headers-already-sent-by)
* [Error: You have entered an incorrect reCAPTCHA value on Login Page](/faq-troubleshooting/errors/error-you-have-entered-an-incorrect-recaptcha-value-on-login-page)
# Error: Blocked as suspected bot
This error might show up if visitors try to leave a comment on your site.
It is not caused by Patchstack but by a plugin called “MOJO Marketplace” or “Bluehost” as part of your Bluehost WordPress installation.
Either deactivate these plugins or reach out to your hosting company for more information as to why visitors are getting that error when they are trying to submit a comment.
# Error: Cannot activate plugin because of: SSL routines:SSL23_GET_SERVER_HELLO:sslv3 alert handshake failure
When you see this error when you attempt to activate Patchstack:
1. Check, if your server is using TLS 1.2 protocol activated. You can easily test it here: In case it is disabled, you should activate it in your hosting environment.
2. Ask your host to upgrade cURL/OpenSSL on your server to the latest version.
# Error: "Cannot redeclare class Patchstack in…"
There are many reasons why this can happen, usually, it’s because of an .htaccess issue or because the Patchstack plugin does not work properly with one of your other plugins.
First, please copy and paste the PHP error that you are facing and send it to us [through our chatbox](#) at the bottom right corner of the page. This will help us to resolve your issue.
Secondly, if you can still access your WordPress admin panel, go to **Plugins**, find **Patchstack Security** and click on **Deactivate**. After that, if your site still shows the fatal error, go back to **Plugins** and click **Delete** under **Patchstack Security**.
If you cannot access your WordPress admin area at all, we recommend deleting the plugin manually. For that, follow the instructions [here](/faq-troubleshooting/plugin/how-to-delete-the-patchstack-plugin-manually/).
# Error code 22
Error code 22 is the internal code we use for “temporary IP ban”. If you see this error even though you are a legitimate visitor, there can be multiple causes.
Mostly this error is caused by the Generic OWASP firewall module. This provides very aggressive protection and has a higher chance of false positives, so it is only recommended to enable this on sites with a low number of plugins and do not run some sort of e-commerce environment such as WooCommerce.
You can turn the Generic OWASP module off, when you navigate to **Sites** > **yourdomain.com** > **Protection**.
However, if that didn’t help, check the next steps:
1. The real visitor's IP address is not properly forwarded to your application, either due to a proxy server or another plugin that overrides it. This causes the IP address of the server or proxy to be logged for all visitors which can block all traffic.\
We have a setting to override the IP header we use to retrieve the IP address. To find it, go to **Patchstack App** > **yoursite.com** > **Protection** > **Additional settings** > Scroll down to **IP address header override** setting. For example, if your host tells you it's in $\_SERVER\['IP-Header-X'] then you enter IP-Header-X in the text field.
2. You have a plugin installed which sends a suspicious payload behind the scenes which ultimately triggers our temporary IP ban feature.
3. The error page is cached by a caching plugin. We send error code 403 when this error is shown so this should never really happen unless the cache server is configured incorrectly.
4. Make sure that you have whitelisted the proper user roles for your site. Check the user roles whitelist settings, by navigating to **Patchstack App** > **yoursite.com** > **Protection** > **Additional settings**.
The temporary IP ban usually lifts within 30 minutes. You can [start a chat with us](#), make sure to provide the URL of your site so we can investigate the exact cause and fix it permanently.
# Error code 23
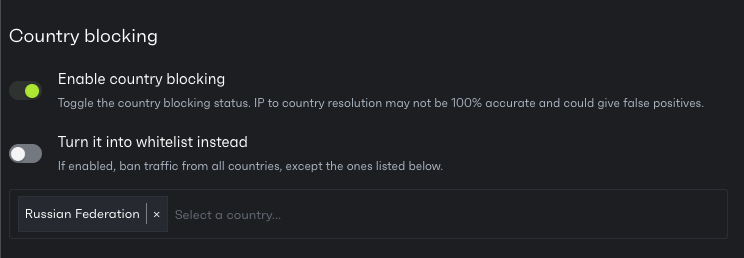
This error means that the country you are viewing the website from is blocked by the Patchstack firewall. Please check your country blocking settings, by navigating to **Patchstack App** > **yoursite.com** > **Protection** > **Additional settings**.
# Error code 24
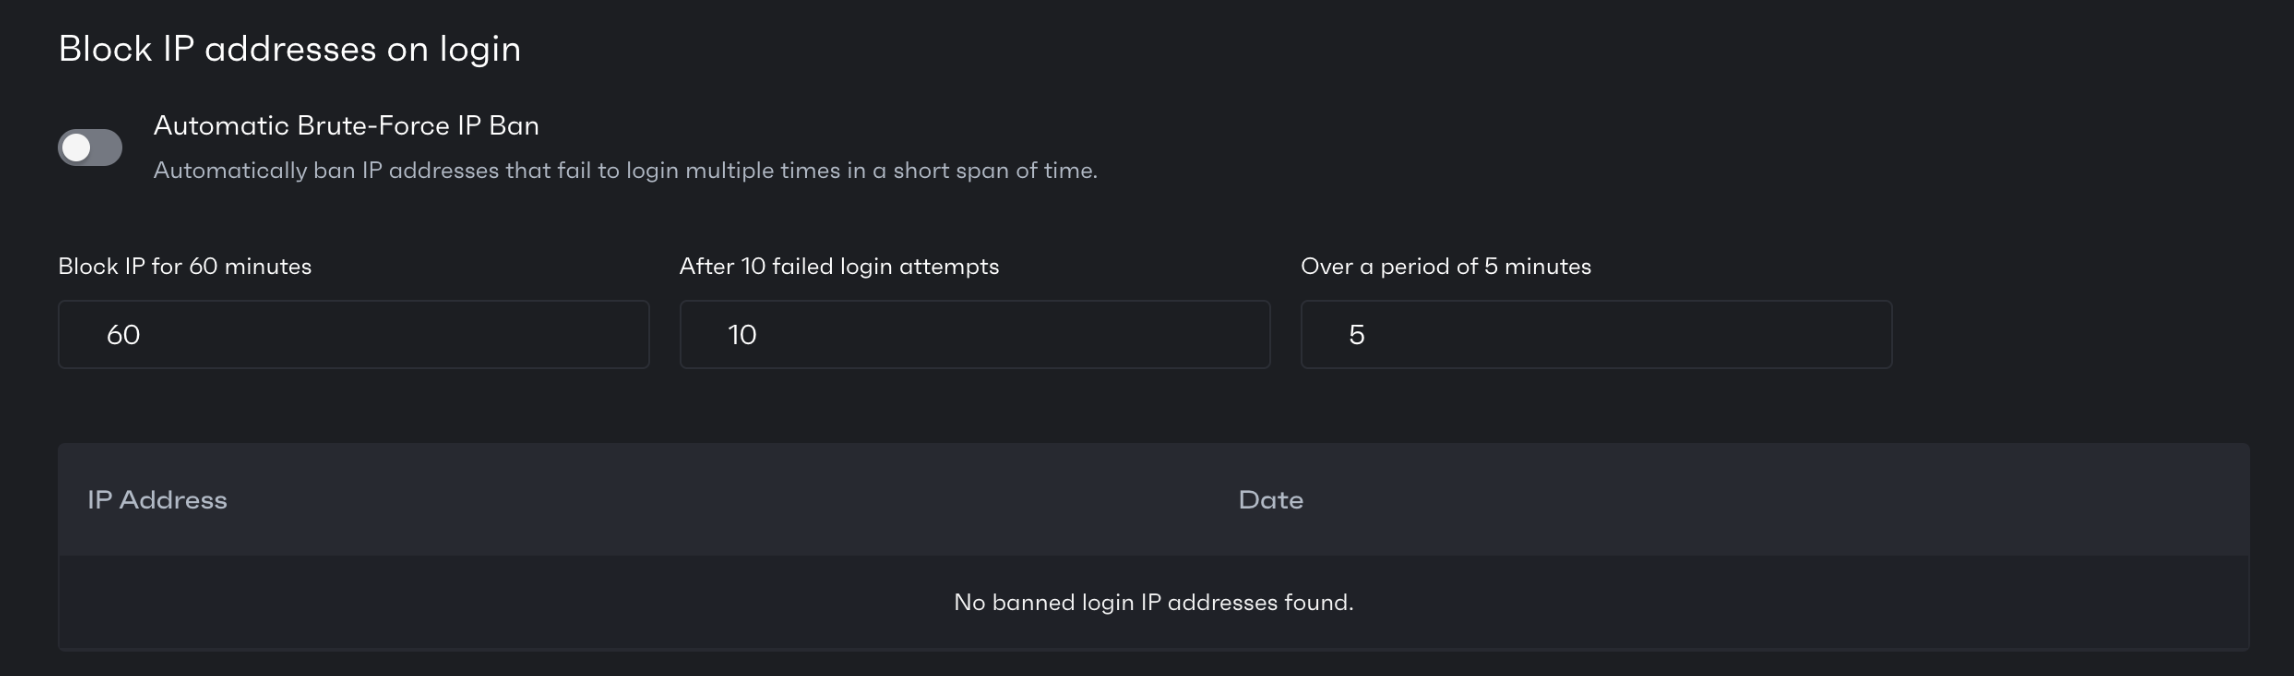
Error code 24 means that there has been too many failed log in attempts. Therefore the IP got temporarily blocked by Patchstack.
You can adjust the threshold for failed log in attempts from Patchstack App, by navigating to **Sites** > **yoursite.com** > **Hardening** > **Login protection**
By scrolling down, you can see the **Block IP addresses on login** section, where you can tweak the settings.
* Enable/disable automatic brute-force IP ban
* Block IP for X minutes; after Y failed login attempts; over a period of Z minutes (where you can define X, Y and Z)
If you need any help, you can [start a chat with us](#), make sure to provide the URL of your site so we can investigate the exact cause and fix it permanently.
# Error code 5529
This error usually means that the visitor got blocked because of a malicious request received by your server.\
If you are sure, it was a false positive blocking, you may whitelist the payload that got blocked.
We recommend you to check the firewall logs on your site. To open the firewall log:
1. Go to **Patchstack App** > **Sites** > **yourdomain.com**
2. Open the **Protection** tab
3. Scroll to the bottom of this page, to find the **Activity** section
4. Open the log entry which has the IP of the person who got blocked
5. Copy the part of the payload that should be whitelisted
Example payload looks like this: `[action] => edit_post`
To whitelist a payload:
1. Navigate to **Patchstack App** > **Sites** > **yoursite.com** > **Protection** > **Additional Settings**.
2. Into the Whitelist textbox, type “PAYLOAD:\[action] => edit\_post”
3. Click **Save settings**
If done correctly, the visitor should not get blocked with such request anymore.
If you have any questions regarding this error, feel free to [chat with our live support](#) here.
# Error code 7
This error is shown when the setting “Forbid proxy comment posting” is enabled. If your website passes through a proxy first then it’s possible that this is causing a false positive.
You can turn this off by following the instructions below:
1. Go to **Patchstack App** > **Sites** > **yoursite.com** > **Hardening** > **.htaccess**
2. Uncheck the **Forbid proxy comment posting**
3. Scroll down and click **Save settings**
# Error: "CSRF token missing or mismatch"
This error might show up on the Patchstack App when you perform certain actions.
Please follow these steps:
1. Refresh the app/page by clicking the refresh button or by pressing F5.
2. Logout from the Patchstack App.
3. Login back into the Patchstack App.
This should resolve the issue. If it does not, please reach out to us so we can further investigate what is going wrong.
# Error: "Sorry, this file type is not permitted for security reasons"
This can happen when you try to upload a file to your site.\
The Patchstack plugin has no feature in place to prevent you from uploading files through the media / file manager, so this caused by a different plugin or by the default WordPress settings.
Take a look at [this article](https://www.elegantthemes.com/blog/wordpress/how-to-fix-the-sorry-this-file-type-is-not-permitted-for-security-reasons-error-in-wordpress) to fix the issue.
# Error: The site cannot be added since it is invalid or blocks Patchstack from accessing the site.
This error often appears when there is no public access to your website. There are 3 main reasons this is happening:
1. Usually, it means that your server is protected using .htaccess and .htpasswd. To install the Patchstack plugin and connect Patchstack App to your website, it has to be publicly accessible for Patchstack as well, so you will have to remove the server authentication.
2. In order for us to properly start monitoring your application, its response when you first add it must not be a 5xx HTTP status code.
3. When your site is in maintenance mode, it will also result in a 5xx HTTP status code and thus will trigger this error.
# Error: "The URL cannot be added since it returned a 5xx error code, this indicates an internal server error on your site. Please make sure it is accessible and not in maintenance mode."
In order for us to properly start monitoring your application, its response when you first add it must not be a 5xx HTTP status code.
When you put your site in maintenance mode, it will also result in a 5xx HTTP status code and thus will trigger this error.
# Error: "The URL cannot be added since it timed-out or resulted in a server error. Is it currently online?"
This error can be shown because of multiple reasons:
* The site is currently offline.
* The site takes too long to load and times out.
Patchstack is blocked from accessing your site because of an IP block from your host, or because you have strict protection in place from a service such as Cloudflare, Incapsula, or Sucuri.
# Error: "Warning: Cannot modify header information - headers already sent by"
There are 2 possible reasons this can happen:
1. Check the very first error that shows up on the screen. If this error occurs in a file that is unrelated to Patchstack then the initial cause of this error is not caused by the Patchstack plugin. Try turning off your plugins one-by-one until the error disappears.
2. If the very first error that shows up on the screen is in a file of the Patchstack plugin, then please copy the error, [start a new chat](#), and paste the error with your site URL. That way we can figure out the cause and fix the error in a future plugin version.
# Error: You have entered an incorrect reCAPTCHA value on Login Page
**Solution 1:** The easiest solution is to clear the cache, try to login from a different browser or incognito/private browser mode.
**Solution 2:** If the first solution doesn’t work, it is necessary to deactivate the plugin manually. Please complete the following steps:
1. Go to the /wp-content/plugins folder via FTP ([see different FTP clients here](https://developer.wordpress.org/advanced-administration/upgrade/ftp/));
2. Find and rename “patchstack” folder into something else, like “deactivate\_patchstack”;
3. After you log into your dashboard, you can rename the folder back from "deactivate\_patchstack" to "patchstack";
4. Disable reCAPTCHA from the settings in Patchstack App, by navigating to\
**Patchstack App** > **Sites** > **yoursite.com** > **Hardening** > **Captcha**
# Firewall - Frequently Asked Questions
* [App is showing the firewall of my site as delayed](/faq-troubleshooting/firewall/app-is-showing-the-firewall-of-my-site-as-delayed)
* [How do I block an IP address from accessing my site?](/faq-troubleshooting/firewall/how-do-i-block-an-ip-address-from-accessing-my-site)
* [I activated the plugin, but still get the message: "Install the plugin to activate the firewall"](/faq-troubleshooting/firewall/i-activated-the-plugin-but-still-get-the-message-install-the-plugin-to-activate-the-firewall)
* [What is the difference between a WAF and vPatching?](/faq-troubleshooting/firewall/what-is-the-difference-between-a-waf-and-virtual-patching)
* [Legitimate visitors or pages are being blocked by the firewall. How do I add these to the whitelist?](/faq-troubleshooting/firewall/legitimate-visitors-or-pages-are-being-blocked-by-the-firewall-how-do-i-add-this-to-the-whitelist)
# App is showing the firewall of my site as delayed
This firewall error might show up on the Patchstack App.
On the Patchstack App, you might see that the firewall is indicating as being “delayed”.\
This can happen due to a few reasons:
1. Scheduled tasks are not running properly on your web application. We attempt to ping our API from your site every three hours. However, since WordPress scheduled tasks run when you have visitors on your site, this might not happen if you have no visitors on your site. It is also possible that scheduled tasks are not running at all on your site even when you have visitors due to an error. You can use a plugin such as [WP Crontrol](https://wordpress.org/plugins/wp-crontrol/) to keep track of your scheduled tasks.
2. You do not have the right API key configured on the license settings page. The API credentials which you can find on the Patchstack App under **Sites** > **yourdomain.com** > **Settings**. API Keys should match the API credentials on your WordPress site at **/wp-admin** > **Settings** > **Security**.
One potential solution to reason 1 is to use a server-based scheduled task that triggers your scheduled tasks even when you have no visitors.
1. Disable the default WordPress cronjob by adding the following to your wp-config.php file in the root folder of your site:
```plaintext
define('DISABLE_WP_CRON', true);
```
2. Set up a cronjob in your hosting account management panel. In cPanel, this can be found under Advanced > Cron Jobs.
3. Set the interval to something between 5 and 15 minutes.
4. Set the cron command to the following (change the URL to your own):
```plaintext
wget -q -O - https://yoursite.com/wp-cron.php?doing_wp_cron >/dev/null 2>&1
```
5. Now click on the **Create new cron job** button.
# How do I block an IP address from accessing my site?
With Patchstack, it is easy to block certain IP addresses from accessing your site.
In order to block an IP address, do the following:
1. Log in to the Patchstack App
2. Go to **Sites** > **yourdomain.com** > **Protection** > **Additional settings**
3. Scroll down to **IP Block List**
4. Enter each IP addresses to a new line
5. The following formats are accepted:
* 127.0.0.1
* 127.0.0.\*
* 127.0.0.0/24
* 127.0.0.0-127.0.0.255
# I activated the plugin, but still get the message: "Install the plugin to activate the firewall"
There is an easy way to fix this issue.
Usually, this is because for some reason we were unable to contact our server to process the activation.
In order to solve this, deactivating and then activating the plugin from the plugin list in the WordPress admin area should fix the issue.
If this still does not work, your host is probably blocking outgoing connections to our server, [](https://api.patchstack.com)
Feel free to [contact our support chat](#) with this issue.
# Legitimate visitors or pages are being blocked by the firewall. How do I add these to the whitelist?
Our whitelist feature makes it easy to whitelist specific requests.
To manage the whitelist:
1. Log in to the Patchstack App
2. Go to **Sites** > **yourdomain.com** > **Protection** > **Additional settings**
3. Scroll down to **Whitelist** text field
This text field supports a specific syntax that you can use to whitelist specific requests. Each definition must be placed on its own line.
We accept the following parameters in this text field:
**Parameters**\
IP:IPADDRESS\
PAYLOAD:someval\
URL:/someurl
**Definitions**\
IP = firewall will not run against the IP\
PAYLOAD = if the entire payload contains the keyword, the firewall will not proceed\
URL = if the URL contains the given URL, the firewall will not proceed
**Example**\
IP:192.168.1.1\
PAYLOAD:contact\_form\
URL:water\
URL:/some-form
In this scenario, the firewall will not run if the IP address is 192.168.1.1 or if the payload contains contact\_form or if the URL contains water, or if the URL contains /some-form.
# What is the difference between a WAF and vPatching?
**WAF** stands for Web Application Firewall, which is a firewall that inspects web traffic and blocks malicious requests. WAFs typically run on the web server software itself and have limited knowledge of the web applications they are protecting. WAFs tend to include and run all firewall rules against all requests, even if it does not apply to the underlying software.
**vPatching** is similar to WAF: blocking known malicious requests but running within the application itself. Patchstack’s vPatching goes a step further and can take into context information that only the application (such as WordPress) itself is aware of, like user authorization, software versions, etc. Patchstack has built the vPatch system, a specific method that provides auto-mitigation to open-source software security vulnerabilities through crowdsourced security research and AI/ML based source code analysis.
This means that vPatches tend to be more efficient and cause less resource usage in the application compared to a WAF because the only rules that are enabled are the ones applicable to each website.
[Read more about vPatching here](https://patchstack.com/articles/virtual-patching/)
# Other - Frequently Asked Questions
* [Can I have other security plugins activated and running next to Patchstack?](/faq-troubleshooting/other/can-i-have-other-security-plugins-activated-and-running-next-to-patchstack)
* [Dashboard shows no attacks blocked](/faq-troubleshooting/other/dashboard-shows-no-attacks-blocked)
* [Data Processing Agreement (DPA) and GDPR](/faq-troubleshooting/other/data-processing-agreement-dpa-and-gdpr)
* [Does Patchstack have a malware scanner?](/faq-troubleshooting/other/does-patchstack-have-a-malware-scanner)
* [Does Patchstack work with LiteSpeed?](/faq-troubleshooting/other/does-patchstack-work-with-litespeed)
* [Does Patchstack work with MarketPlan.io?](/faq-troubleshooting/other/does-patchstack-work-with-marketplanio)
* [How do I add an intranet site to the Patchstack App?](/faq-troubleshooting/other/how-do-i-add-an-intranet-site-to-the-portal)
* [How do I turn on the XML-RPC feature?](/faq-troubleshooting/other/how-do-i-turn-on-the-xml-rpc-feature)
* [How do I connect Patchstack with multisite environment?](/faq-troubleshooting/other/how-do-i-connect-patchstack-with-multisite-environment)
* [How does multisite work and what is the pricing model?](/faq-troubleshooting/other/how-does-multisite-work-and-what-is-the-pricing-model)
* [How does the Patchstack firewall compare to Sucuri or Wordfence?](/faq-troubleshooting/other/how-does-the-patchstack-firewall-compare-to-sucuri-or-wordfence)
* [How to write a review for Patchstack?](/faq-troubleshooting/other/how-to-write-a-review-for-patchstack)
* [I installed the plugin on my site but it still shows I have missing headers on the App. Why is that?](/faq-troubleshooting/other/i-installed-the-plugin-on-my-site-but-it-still-shows-i-have-missing-headers-on-the-portal-why-is-that)
* [List of vulnerability icons with descriptions](/faq-troubleshooting/other/list-of-vulnerability-icons)
* [Missing security headers Permission-Policy or Content-Security-Policy (CSP)](/faq-troubleshooting/other/missing-security-headers-permission-policy-or-content-security-policy-csp)
* [Patchstack shows the plugin is "Up to date" but actually is not](/faq-troubleshooting/other/patchstack-shows-the-plugin-is-up-to-date-but-actually-is-not)
* [Theme editor missing](/faq-troubleshooting/other/theme-editor-missing)
* [What is the best way to resell Patchstack to my customers?](/faq-troubleshooting/other/what-is-the-best-way-to-resell-patchstack-to-my-customers)
* [What is the CVSS score?](/faq-troubleshooting/other/what-is-the-cvss-score)
# Can I have other security plugins activated and running next to Patchstack?
It is possible to run other security plugins next to Patchstack to extend the security features present on your site.
Do note that we cannot guarantee that your site will function properly and smoothly with multiple security plugins installed and activated. Definitely do not enable 2 of the same features, such as login 2FA or login page rename on 2 or more security plugins.
Finally, one thing to keep in mind is that the performance of your site will go down with multiple security plugins installed.
# Dashboard shows no attacks blocked
If you have a lot of sites, it can be a heavy operation to gather information on how many attacks were blocked and which application had the most attacks blocked. In order to reduce server load we cache the data on the dashboard for 60 minutes.
The data you see when you click on your site in the dashboard is never cached, that’s all real-time.
# Data Processing Agreement (DPA) and GDPR
**DEFINITIONS**
Site – website available at patchstack.com\
Services – the services available from and related to the domain and subdomains of the Site\
Patchstack (also referred to as “we”, “our” or “us”) – Patchstack OÜ, a company incorporated and registered under the laws of the Republic of Estonia with registration code 14331217\
User (also referred to as “you” or “your”) – an individual who creates a user account\
General Terms – [terms and conditions of services.](https://patchstack.com/terms-and-conditions/)
We provide services for B2B clients and therefore, privacy regulations (GDPR - General Data Protection Regulation) do not apply for such data, however, we might provide services also for individuals and therefore, we are informing you about personal data processes herein.
Our [Privacy Notice](https://patchstack.com/privacy-policy/) describes how we collect, use, process, and disclose your information related to your access to using the Patchstack services.
Our Services include a website security firewall to prevent cyber attacks and to protect your websites. Using Patchstack or any other Services, we do not collect any personal data about users of your website or website owners. In the event, we detect website hacking incidents we are not allocating any personal data because hackers are hiding identity and do not reveal identifiable IP addresses, names, e-mail addresses, or any personal data. Therefore, we are in a position where we are not processing any personal data of the hackers as well.
Therefore as we are not collecting personal data, there is no need to sign a data processing agreement between you and Patchstack.
# Does Patchstack have a malware scanner?
Rather than wait for your software to become infected we focus on preemptive measures. This allows Patchstack to be up to 10x lighter than competing (often bloated) malware scanners and still provide effective security. Plugin-level malware scanners can easily be whitelisted by malware itself, therefore scanning with plugin-level scanner could leave a false impression of site being clean.
We recommend scanning your site with network-level tools like Imunify360 or ClamAV.
[There’s an article of one case-study here](https://snicco.io/blog/wordpress-malware-scanner)
# Does Patchstack work with LiteSpeed?
LiteSpeed has the ability to support .htaccess files as well, so Patchstack will work with LiteSpeed.\
However, make sure your .htaccess file contains the following on top of the file:
```plaintext
CacheLookup public on
```
# Does Patchstack work with MarketPlan.io?
By default, the Patchstack plugin injects certain security headers into the server response of your application. However, these security headers prevent Marketplan.io from working properly on your application.
This most likely happens because they insert your site as an iframe into their application which the X-Frame-Options security header prevents from doing because it prevents clickjacking attacks.
In order to make it work, disable the security headers setting by going to the **Patchstack App** > **Sites** > **yourdomain.com** > **Hardening** > **.htaccess** > Uncheck **Add security headers** > Scroll down and click on the **Save settings** button.
It might take a few minutes before the security headers have been removed from your site.
# How do I add an intranet site to the Patchstack App?
In order to add an intranet site to the Patchstack App, you have to do a few different steps until we properly support it.
We are still working on supporting intranet sites properly:
Because the site is not accessible from the public, you first have to add a random domain name to your account that exists on the public internet. After that, go to **Sites** > **yourdomain.com** > **Settings**. Change the URL to the URL of your intranet site.
After that, refresh the page and install the Patchstack plugin [manually](/getting-started/installing-patchstack/installing-via-wordpress-repository/).
# How do I connect Patchstack with multisite environment?
To connect Patchstack with multisite environment, check the article here:
# How do I turn on the XML-RPC feature?
XML-RPC should no longer be used, but your site might still make use of it.\
As of April 10th 2019, we added a new option that blocks access to XML-RPC by default.
In order to turn it back on:
1. Go to **Patchstack App** > **Sites** > **yourdomain.com** > **Hardening**
2. Scroll down a bit and uncheck the **Restrict XML-RPC access to authenticated users only**
3. Click **Save settings**
# How does multisite work and what is the pricing model?
Once you install the plugin on a multisite network, you will see a page where you can activate Patchstack on the sites that are available on the multisite installation.
Each site will be added to the Patchstack App individually and will take up a slot on your account.
# How does the Patchstack firewall compare to Sucuri or Wordfence?
You can see the comparison with Sucuri here: [](https://patchstack.com/sucuri-alternative/)\
You can see the comparison with Wordfence here: [](https://patchstack.com/wordfence-alternative/)
# How to write a review for Patchstack?
Reviews are a good source for people who are considering trying out Patchstack. When you write a review, try to explain your experience, the features you like the most, and how they helped you.
This will help us and we really appreciate your help in showing the value we create.
**We collect reviews on two different platforms:**
**WordPress.org:** [](https://wordpress.org/support/plugin/patchstack/reviews/)
**G2:** [](https://www.g2.com/products/patchstack/reviews)
When writing a review, remember that you’re reviewing a service that our team poured our heart and soul into to create.
When you have problems with the service, it’s always good to **[open up a support chat](#) to find help from our team first.** Our minimum response time is between a few minutes to a few hours.
# I installed the plugin on my site but it still shows I have missing headers on the App. Why is that?
Certain things are not updated instantly in the Patchstack App, here’s why.
By default, we perform an extended monitoring scan of your site 2 times a day. However, we currently do not perform a new scan yet when the WordPress plugin has been installed on your site.
It is also possible that the .htaccess file on your webserver does not have the proper CHMOD permissions setup so we can write to it. We need to be able to write to the .htaccess file in order to inject the security headers to the response.
After plugin installation, you can also manually check your security headers by using a tool such as .
# List of vulnerability icons with descriptions
There are several icons shown about Patchstack vulnerability entries. Below is a list of what each icon means.

**No update available**\
This software is found vulnerable, but it has no updates yet. It is recommended to turn on Patchstack firewall, or to disable and remove this plugin until update is available.
***

**Update available**\
This plugin has an update available. It is recommended to do this immediately as new software versions usually come with patched code (in case it is found vulnerable).
***

**High patch priority**\
Red exclamation mark indicates that this software version is expected to be mass-exploited or has already known to be exploited vulnerability. It is recommended to turn on Patchstack firewall as high patch priority vulnerabilities receive a vPatch from Patchstack. Update this software as soon as possible.
***

**Medium patch priority**\
Yellow exclamation mark indicates that this software version is not expected to become mass-exploited, but could potentially be exploited in more targeted attacks. It is recommended to turn on Patchstack firewall as medium patch priority vulnerabilities receive a vPatch from Patchstack. Update this software as soon as possible.
***

**Low patch priority**\
Gray exclamation mark indicates that this software version is not expected to become exploited. It is important to update this software when possible, although the security risk is very low. Low patch priority vulnerabilities won’t receive a vPatch from Patchstack.
***
**CVSS score**\
These numbers represent the CVSS score given to the vulnerability. The higher the CVSS score, the more severe is the vulnerability.\
Low (0.0 - 3.9); Medium (4.0 - 6.9); High (7.0 - 8.9); Critical (9.0+)
# Missing security headers Permission-Policy or Content-Security-Policy (CSP)
The reason Patchstack does not add these security headers to your site that both of these headers requires very specific manual configuration for them to operate properly.
**Permission-Policy**\
The permission-policy header defines what API features can be used (such as geolocation, microphone, fullscreen, autoplay, payments) on a website, but Patchstack cannot possibly know what your site is about and what API features it uses. Therefore, it requires manual configuration. You can generate the policy for this HTTP security header here
**Content-Security-Policy (CSP)**\
The content-security-policy header defines how and what resources can load on your website through any kind of HTML tag. The only way to properly generate this policy is the understand every single resource that is loaded on your site through all HTML tags, including images, scripts (such as Google Analytics), iframes, XHR requests, stylesheets, fonts, objects, videos, forms, and many other HTML tags. Patchstack cannot possibly know all resources that your site calls either locally or from a third-party on all pages that are available on your site. More information can be found here
# Patchstack shows the plugin is "Up to date" but actually is not
This can happen due to two reasons:
* This is a premium or pro plugin and uses its own update servers
* Your site is out of sync with the Patchstack App
The information we show about the plugin status in Patchstack App, is synced straight from your WordPress site.
### 1. This is a premium / pro-licensed plugin
[Section titled “1. This is a premium / pro-licensed plugin”](#1-this-is-a-premium--pro-licensed-plugin)
If the plugin shows that it is up-to-date in the Patchstack App, but in reality it is not, then it means that this plugin does not utilize the regular WordPress.org update server but the plugin has its own update server connection integrated. The integration varies and in some cases it does not store the new version in the database, but rather shows it real-time only when you visit the backend of your WordPress site.
### 2. Your site is out of sync with Patchstack App
[Section titled “2. Your site is out of sync with Patchstack App”](#2-your-site-is-out-of-sync-with-patchstack-app)
A missing or wrong version may also show up if your WordPress site is out of sync with the Patchstack App.
* Make sure your site is publicly accessible (so Patchstack can access it)
* Check if you have the correct Patchstack API key inserted into the Patchstack plugin. Navigate to **wp-admin** > **Settings** > **Security**.
* Make sure that you don’t use the same API key across multiple sites
* Make sure that the site URL you have entered on Patchstack App is correct
# Theme editor missing
This security measure is turned on by default in the plugin.\
In order to make this option appear again while having the Patchstack plugin activated, do the following:
1. Go to the **Patchstack App** > **Sites** > **yourdomain.com** > **Hardening**
2. From the submenu choose again **Hardening**
3. Uncheck the **Disable theme editor to protect from potential automated attacks**
4. Scroll down and click **Save settings**
# What is the best way to resell Patchstack to my customers?
Include it in your website price or maintenance fee. Your service will be more professional and usually clients recommend your service to more people when you show that you take the extra mile and care about security and take responsibility.
Patchstack will help you to automate protection, monitor the security, and even lets you know with alerts when maintenance is needed.
[Check out this page](https://patchstack.com/for-agencies/) OR [read an article about how to sell care plans with Patchstack](https://patchstack.com/articles/how-i-started-selling-wordpress-care-plans-to-my-clients/)
# What is the CVSS score?
CVSS or Common Vulnerability Scoring System is a great way to measure and clearly define the danger level of vulnerability.
In other words, we can calculate the impact which can happen by exploiting a particular vulnerability. The latest CVSS version is 3.1, and we’re using this as a standard in our database.
Patchstack calculates only CVSS Base Score. CVSS offers additional scoring schemes like Temporal Score and Environmental Score.
CVSS Base score calculator uses eight parameters to calculate a particular vulnerability’s severity (Attack Vector, Attack Complexity, Privileges Required, User Interaction, Scope, Confidentiality, Integrity, Availability).
It’s easy to understand the simple logic behind this scheme. For example, we have the parameter “Attack Complexity,” there are two possible types of this parameter Low and High.
If an attack has a high complexity, it will add fewer score points because not everyone can execute this type of attack. If an attack is easy to perform (Attack Complexity Low), it adds more score points for vulnerability.
Besides the parameters that give us a clue about the attack complexity, we have three parameters that say what could be impacted (Confidentiality, Integrity, Availability).
It is the so-called CIA Triad (you can read about the CIA Triad here - [](https://en.wikipedia.org/wiki/Information_security))
By adding all these parameters to the CVSS calculator (you can try it yourself here [](https://www.first.org/cvss/calculator/3.1)) we get the base score represented by numbers from 0.0 (zero - no threat) to 10.0 (ten - critical threat), so the bigger number means the bigger problem.
As you can see, CVSS is a very convenient and straightforward way to show the level of danger (similar to the earthquake scale).
# Plugin - Frequently Asked Questions
* [Can I install the same plugin file on all of my sites?](/faq-troubleshooting/plugin/can-i-install-the-same-plugin-file-on-all-of-my-sites)
* [Does the Patchstack plugin work on the server level or on an application level?](/faq-troubleshooting/plugin/does-the-patchstack-plugin-work-on-the-server-level-or-on-an-application-level)
* [How to delete the Patchstack plugin manually?](/faq-troubleshooting/plugin/how-to-delete-the-patchstack-plugin-manually)
* [How often does Patchstack sync with my site?](/faq-troubleshooting/plugin/how-often-does-patchstack-sync-data)
* [How to install or reinstall the plugin?](/faq-troubleshooting/plugin/how-to-install-or-reinstall-the-plugin)
* [Where do I find the API key to connect the Patchstack plugin?](/faq-troubleshooting/plugin/where-do-i-find-the-api-key)
* [Updating Patchstack from <= 2.0.20](/faq-troubleshooting/plugin/updating-patchstack-from-2020)
* [Where is the Patchstack settings page on the plugin?](/faq-troubleshooting/plugin/where-is-the-patchstack-settings-page-on-the-plugin)
* [Why is my site not working after updating the plugin?](/faq-troubleshooting/plugin/why-is-my-site-not-working-after-updating-the-plugin)
# Can I install the same plugin file on all of my sites?
Unfortunately, it is not possible at this time.
Each plugin .zip file you download has its own key that is used to connect your site to the Patchstack App. If you upload the same .zip file to multiple websites, the logged data gets corrupted.
# Does the Patchstack plugin work on the server level or on an application level?
The Patchstack firewall runs on the application layer, the same layer where your website is running. This means you do not need SSH access or root access to install a custom package onto your server.
You install it like any other plugin on WordPress.
# How often does Patchstack sync with my site?
Patchstack syncs with your site on different intervals for different purposes. Here’s a list of how often and for what we sync.
**Logs** are synced every 15 minutes (activity and protection logs)
**Firewall rules** (vPatching and Community IP blocklist) are synced every hour
**Software data** is synced twice a day at random times. Also the software data is synced every time when you update, activate, deactivate, delete any plugin/theme in your WordPress admin
**Ping** - your site is pinged by Patchstack every 3 hours to check if it is still properly connected to the Patchstack App
**Status of subscription** is automatically synced twice a day, to check if your license is still valid.
# How to delete the Patchstack plugin manually?
In order to manually remove the Patchstack plugin from your WordPress site, please login into the FTP of your server first, or if you have access to something such as CPanel/WHM you can find the file manager feature.
Once logged in, head to the following location **/wp-content/plugins/** and delete the folder **patchstack**.
When this is done, Patchstack will be removed from your WordPress site.
# How to install or reinstall the plugin?
## Method 1: Upload Patchstack plugin to your WordPress site
[Section titled “Method 1: Upload Patchstack plugin to your WordPress site”](#method-1-upload-patchstack-plugin-to-your-wordpress-site)
You can get the .zip file and upload the plugin to your WordPress site with the **API Key** already inserted.\
For that:
1. Go to the Patchstack App. Then navigate to **Sites** > **yourdomain.com** > **Settings**
2. Click **Download latest version**
3. Go to your WordPress admin page, click on **Plugins** > **Add New** > **Upload Plugin**
4. Upload the .zip file
Please note that you can use the same .zip file **ONLY ON** that one domain since the API key must be unique for each site added to the Patchstack App.
## Method 2: Install plugin from WordPress repository
[Section titled “Method 2: Install plugin from WordPress repository”](#method-2-install-plugin-from-wordpress-repository)
Another way to install the Patchstack plugin is from WordPress itself. In your WordPress admin area, navigate to **Plugins** > **Add New** > Type “Patchstack” to search.
1. Install and activate the plugin
2. Go to Patchstack App and navigate to **Sites** > **yourdomain.com**
3. Click on the **Settings** from the submenu (image below)
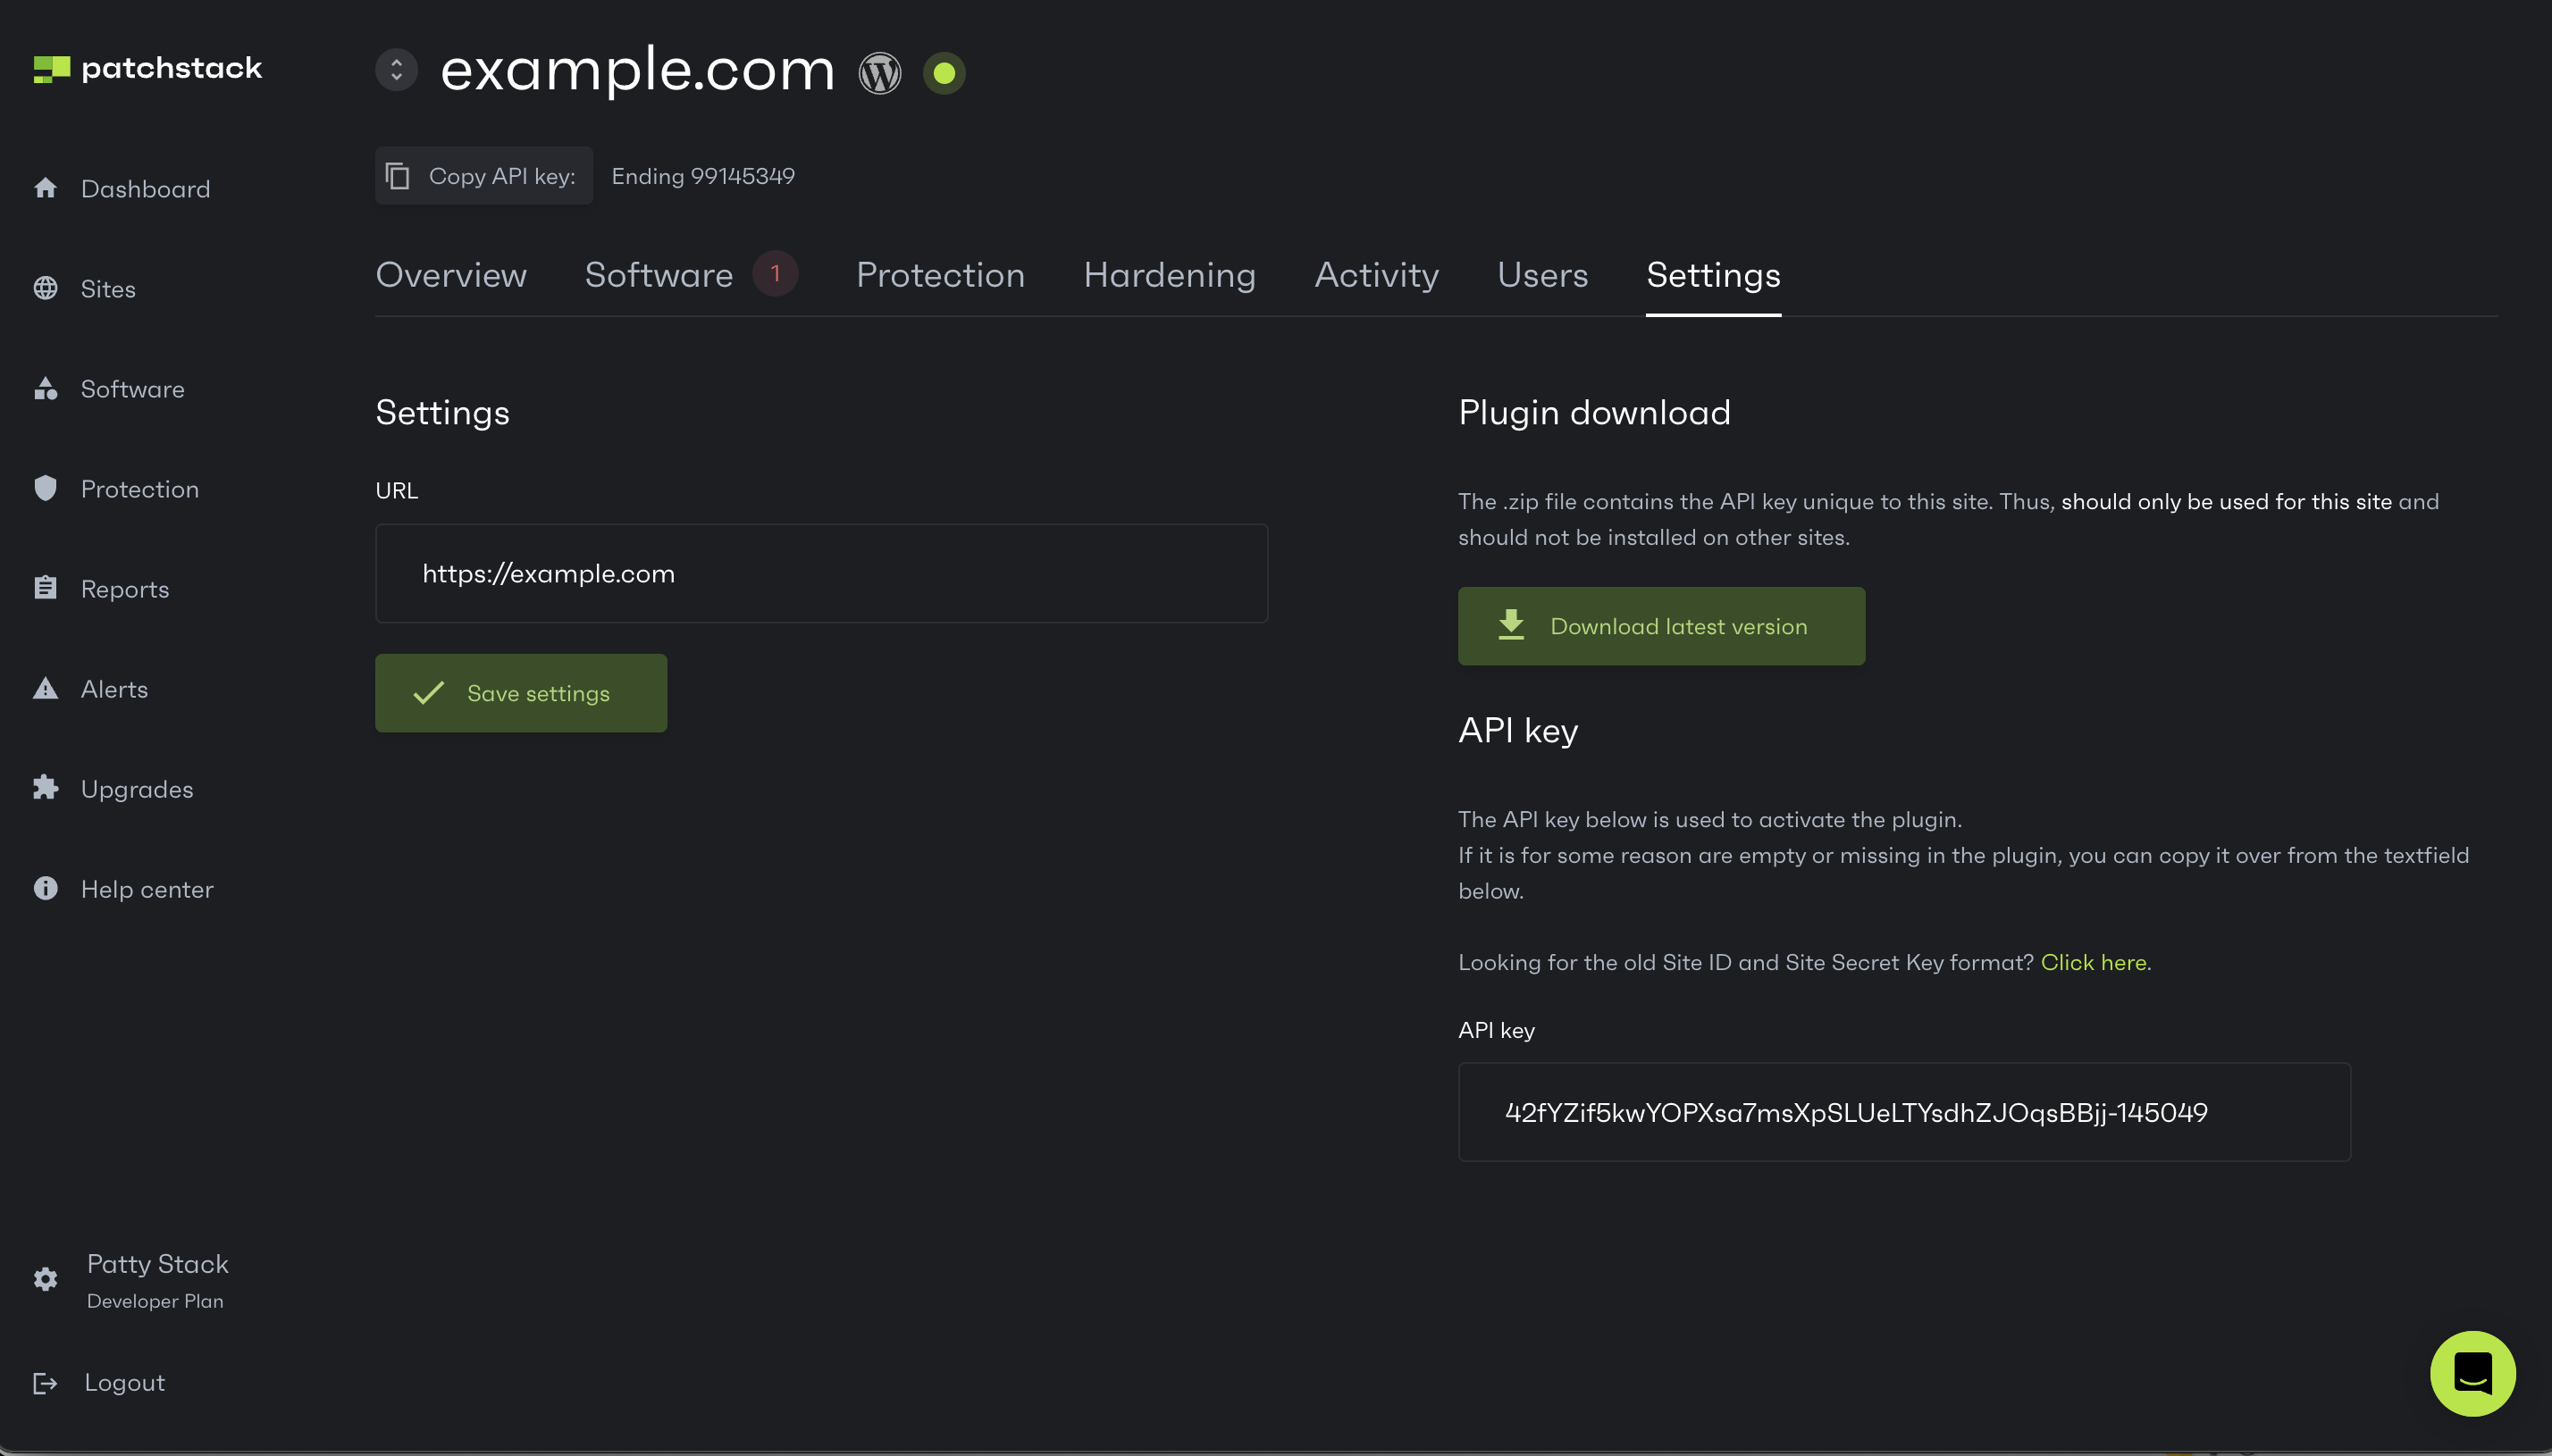
4. Copy the API key from there
5. Go to your WordPress admin, navigate to **Settings** > **Security** and insert the API key there
# Updating Patchstack from <= 2.0.20
Since we’ve rebranded from WebARX to Patchstack, the URL for our plugin in the WordPress plugin repository has changed. This may have caused your site to not show available updates.
To make sure you have the latest version of Patchstack, we recommend following these steps if you have Patchstack version 2.0.20 or lower installed:
1. Deactivate the old WebARX/Patchstack plugin (version 2.0.20 or lower). You can deactivate the Patchstack plugin by navigating to the **Plugins** page of your WordPress site. Find **Patchstack Security or WebARX** and click **Deactivate**
2. Download the newest version of the Patchstack plugin from the Patchstack App.\
Just open your site dashboard on Patchstack App and navigate to **Settings** from the submenu.\
Click **Download latest version**

3. Now navigate to your WordPress admin and go to the **Plugins** page. Click **Add New** from the top navigation. Then click **Upload Plugin**, choose the zip file from your filesystem, and click **Install Now**
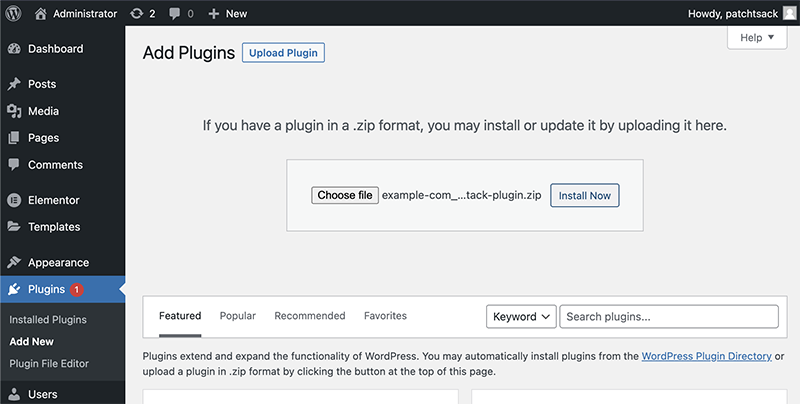
4. As the plugin is installed, scroll down and find **Patchstack Security** and click on **Activate**
5. Once activated, delete the old WebARX/Patchstack plugin (version 2.0.20 or lower)
6. After completing these steps, your site will be updated to the latest version of Patchstack plugin, and new updates will continue to be available in your WordPress admin area
If you have any questions or need assistance with this update, please don’t hesitate to reach out to our support team!
# Where do I find the API key to connect the Patchstack plugin?
To have the plugin connected with your site, you need to enter the API key from Patchstack App into your Patchstack plugin in WordPress. You can find this API key from your site settings on Patchstack App.\
Navigate to [](https://app.patchstack.com). Then
1. Click on **Sites** > **yourdomain.com**
2. From the submenu, click **Settings**
3. You will find the **API key** from the right column
4. Copy and paste it into your WordPress plugin

# Where is the Patchstack settings page on the plugin?
Since version 1.3.5, we moved the Patchstack settings page to its own page.
**Versions 1.3.5 up to 2.1.0**\
When we released version 1.3.5 of the Patchstack plugin, we moved the Patchstack settings page link from its own section to the “Settings” menu of WordPress. It can now be found under the “Security” sub-menu option of the “Settings” main menu.
**Versions 2.1.0+**\
Since version 2.1.0, the Patchstack settings are hidden by default and we encourage you to manage the Patchstack settings of your WordPress site through . If you do not wish to do this, you can go to **/wp-admin** > **Settings** > **Security**, and on this page click on the link at the bottom of the screen to turn on the setting management through WordPress.
**Upcoming version 2.2.13+** Settings management from the plugin is removed.
# Why is my site not working after updating the plugin?
In certain environments, PHP might have the OPCache extension installed which caches PHP scripts. If you update the plugin, it’s possible that a part of the PHP files of the Patchstack plugin is still cached and another part is no longer in the cache. This will cause fatal errors.
A solution to this is to restart the web server and/or PHP on your server.
If this does not fix the issue, please start a new chat with us and provide us with PHP errors from the error logs that are related to Patchstack.
# Pricing Plans - Frequently Asked Questions
* [Does Patchstack have a free version?](/faq-troubleshooting/pricing-plans/does-patchstack-have-a-free-version)
* [How does the annual plan pricing work and how will I be charged?](/faq-troubleshooting/pricing-plans/how-does-the-annual-plan-pricing-work-and-how-will-i-be-charged)
# Does Patchstack have a free version?
Patchstack has a free version available. Free version of Patchstack detects vulnerable software on your websites, and notifies you about these. Free plan comes with 10 site slots, and protection can be applied individually for each site for $5 / month per site.
**With the Community (free) version:**
* You will be the first to know about new vulnerabilities.
* You will save time by monitoring all your websites from a single dashboard.
* You will be notified if any of the installed software has a security issues.
* You will get simple actionable suggestions to secure your websites.
* You will spend fewer resources fixing WordPress security issues (avoid expensive clean-ups).
* You can worry less about your website’s security and focus on your work.
**What does Patchstack Community (Free) version include?**\
**Detect security issues before hackers take over your website:**
* Detect the latest security vulnerabilities in your WordPress, Drupal or Joomla sites.
* Receive real-time alerts to email if any security vulnerabilities are found.
* Have a central security dashboard for up to 10 websites (via the Patchstack App).
**What’s the difference between a free version and paid version?** The free version of Patchstack only detects and notifies you about the vulnerabilities in the software versions your sites use. The paid version of Patchstack will also protect against malicious traffic and attacks exploiting known serious vulnerabilities on your site. The pricing for Patchstack protection starts from $5 / month per site.
### For WordPress
[Section titled “For WordPress”](#for-wordpress)
To use a free version of Patchstack with WordPress, install the [Patchstack plugin](https://wordpress.org/plugins/patchstack/) on your site first, and start the user registration flow from the plugin itself, after activating it on your WordPress.
### For Joomla
[Section titled “For Joomla”](#for-joomla)
To use a free version of Patchstack with Joomla, you’ll need to sign up for the Developer plan trial first. After that, you can downgrade your subscription from Developer plan to Community plan (Free). Add your site to Patchstack App, and go through [this tutorial](https://docs.patchstack.com/patchstack-plugin/patchstack-connector/how-to-install-on-joomla/) to install the Patchstack connector to your Joomla site.
### For Drupal
[Section titled “For Drupal”](#for-drupal)
To use a free version of Patchstack with Drupal, you’ll need to sign up for the Developer plan trial first. After that, you can downgrade your subscription from Developer plan to Community plan (Free). Add your site to Patchstack App, and go through [this tutorial](https://docs.patchstack.com/patchstack-plugin/patchstack-connector/how-to-install-on-drupal/) to install the Patchstack connector to your Drupal site.
### Add protection to your sites
[Section titled “Add protection to your sites”](#add-protection-to-your-sites)
If you are interested in protection, you can either:
* Add up to 10 sites to the Community plan, and activate protection for each site individually for $5 / site per month
* Sign up for the Developer plan to get more features with 50+ site slots
Check out Patchstack’s [pricing page here](https://patchstack.com/pricing/).
# How does the annual plan pricing work and how will I be charged?
**How does it work?**\
Once you start an annual plan with us, you will be charged for the entire amount right away and you will be charged every year for that amount unless you add more sites or activate different upgrades
**What if I add more sites to my account?**\
If you add more WordPress sites to your account after you already paid, we will charge you at the end of the day depending on how many sites you added and how many days are left until the next invoice. For example, if you started your plan on January 1st and add 1 site on July 1st, we will charge you 50% of the amount. Once it’s January 1st again, you will be charged 100% for all sites and other services you have added to your account.
**What if I remove sites from my account?**\
If you have 3 sites and paid for them and you remove 1 site, you will not receive a refund but instead have 1 open slot that can be used to add another site to your account. If you decide to keep 1 slot open then the next invoice will only charge you for 2 sites and the open slot will be removed.
**What if I turn on/turn off upgrades or add more seats?**\
If you turn on upgrades such as the **volume upgrade** and **additional seat upgrade** to your account, you will be charged right away for these upgrades and at the end of the day for team members for the outstanding amount depending on how many days are left until the next invoice, as described above. Because upgrades are dynamic services, they are paid monthly, even if you are on an annual plan.
# Reports - Frequently Asked Questions
* [How to generate security reports?](/faq-troubleshooting/reports/how-to-generate-security-reports)
# How to generate security reports?
You can generate a website security report for each website you have connected with Patchstack App.\
Find the reports by you logging into your account and looking for Reports from your left-side menu in the Patchstack App.
Patchstack offers two types of security reports:
* Snapshot report\
Snapshot report is a current situational report of the website.
* Developer report (for Developer and Business plan users)\
The developer report is a periodic PDF security report. It means you will need to pick a time period (for example a month), in which the data about your site is shown on the report.
[Read more about generating the reports here](/patchstack-app/reports/generating-reports/)
# Technical - Frequently Asked Questions
* [Can I use the same plugin API key for staging environment?](/faq-troubleshooting/technical/can-i-use-the-same-plugin-api-key-for-staging-environment)
* [Do I need to set up a CDN service for setting up the firewall?](/faq-troubleshooting/technical/do-i-need-to-set-up-a-cdn-service-for-setting-up-the-firewall)
* [Does Patchstack incorporate a CDN?](/faq-troubleshooting/technical/does-patchstack-incorporate-a-cdn)
* [Does Patchstack protect from DDoS attacks?](/faq-troubleshooting/technical/does-patchstack-protect-from-ddos-attacks)
* [Does Patchstack work with other captcha plugins?](/faq-troubleshooting/technical/does-patchstack-work-with-other-captcha-plugins)
* [How to configure Patchstack to work with Cloudflare?](/faq-troubleshooting/technical/how-to-configure-patchstack-to-work-with-cloudflare)
* [How to add security headers with Patchstack?](/faq-troubleshooting/technical/how-to-add-security-headers-with-patchstack)
* [List of IP addresses, that Patchstack servers use](/faq-troubleshooting/technical/list-of-ip-addresses-that-patchstack-uses)
* [How to fix "Improper HTTP to HTTPS redirection"?](/faq-troubleshooting/technical/how-to-fix-improper-http-to-https-redirection)
* [Does Patchstack work with nginx?](/faq-troubleshooting/technical/does-patchstack-work-with-nginx)
* [Will Patchstack plugin help my site pass PCI-DSS, SOC2, ISO 127001 or other security checks?](/faq-troubleshooting/technical/will-patchstack-plugin-help-my-site-pass-pci-dss-soc2-iso-127001-or-other-security-checks)
# Can I use the same plugin API key for staging environment?
Patchstack allows you to use the same plugin API key for the staging environment, and production (live) site.
**NB! The only requirement is that your staging site URL needs to contain any of the following phrases**:
```plaintext
'dev.',
'development.',
'staging.',
'beta.',
'alpha.',
'cloudwaysapps.com',
'kinsta.cloud',
'amazonaws.com',
'pantheonsite.io',
'devs',
'demo.',
'stage.',
'test.',
'azurecontainerapps',
'backup.',
'wpengine.com',
'wp-dv',
'optiserver.co.uk',
'azurewebsites.net'
```
### How the staging and production site work with Patchstack?
[Section titled “How the staging and production site work with Patchstack?”](#how-the-staging-and-production-site-work-with-patchstack)
Patchstack will work normally with your live site, if you share the same API key with staging environment - if the staging URL contains any of the phrases given above. Some things to keep in mind:
* Your production (live) site receives all the real-time protection rules
* All custom hardening rules set in Patchstack App are also synced normally
* All the features that Patchstack offers, will work on your live site (like auto-updates, custom rules, etc)
* On the staging site however, only the API key license check will work. Other features and firewall rules are not synced to the staging site
* We recommend turning on the server level protection for your staging site (e.g. htaccess and htpasswd)
**Example case:**
* Live URL is example.com
* Staging URL is staging.example.com
* Only example.com is added to the Patchstack App
* The Patchstack plugin with the same API key will be added to both staging.example.com and example.com
* The domain example.com will have all the firewall rules and other Patchstack features
* The domain staging.example.com will only pass the license checker, but has no protection
* The domain staging.example.com should be protected on server level, so no third person/bot could access it
### How to set up the staging and production (live) environment?
[Section titled “How to set up the staging and production (live) environment?”](#how-to-set-up-the-staging-and-production-live-environment)
1. Add your production (live) site URL to the Patchstack App
2. Download the plugin and install it to your staging site
3. Activate the plugin
4. Push the staging site to production
# Do I need to set up a CDN service for setting up the firewall?
You don’t need to set up a CDN service for setting up the firewall. With Patchstack, you only need to install the plugin to enable the firewall.
# Does Patchstack incorporate a CDN?
Patchstack is fully on the application level to make it as easy as possible to add your applications.
You only need to install a WordPress plugin for firewall and hardening (which is done automatically), vulnerability monitoring, blacklist checks, and all other features that are working remotely via the Patchstack App.
# Does Patchstack protect from DDoS attacks?
Patchstack does not protect from DDoS attacks, but it does limit the intrusions on the IP level. IP’s that do malicious requests get IP block incrementally (30 minutes and each time going up).
Please ask more about network-level DDoS protection from your hosting provider.
# Does Patchstack work with nginx?
If your server runs nginx, then the .htaccess functionality won’t work.
Apache has a feature that allows you to use a .htaccess file to easily implement or override rewrite rules on your site, but nginx does not have such a feature. In order for the rewrite rules to work, you must implement the nginx rules manually.
If you’re not sure how to do this, you should ask your host for further assistance since it varies by the host how the nginx configuration works and is implemented. Some hosts provide you with access to an nginx.conf file in the root of your site, but this is not a universal standard so we do not attempt to write to this file.
The official rewrite rules for nginx can be found below. This needs to be added to the server directive in the nginx configuration file of your site.
```typescript
# Patchstack nginx protection rules.
# Disable directory listing and server signature
autoindex off;
server_tokens off;
# Block access to certain files.
location ~* \.(htaccess|htpasswd|errordocs|logs|log)$ {
return 403;
}
rewrite ^/readme\.html$ /index.php?webarx_fpage=101 break;
rewrite ^/license\.txt$ /index.php?webarx_fpage=102 break;
rewrite ^/wp-config\.php$ /index.php?webarx_fpage=103 break;
rewrite ^/wp-admin/includes/ /index.php?webarx_fpage=201 break;
rewrite ^/wp-includes/[^/]+\.php$ /index.php?webarx_fpage=202 break;
rewrite ^/wp-content/uploads/(.*)\.php$ /index.php?webarx_fpage=202 break;
rewrite ^/wp-includes/js/tinymce/langs/.+\.php /index.php?webarx_fpage=203 break;
rewrite ^/wp-includes/theme-compat/ /index.php?webarx_fpage=204 break;
rewrite ^/debug\.log$ /index.php?webarx_fpage=502 break;
if ($remote_addr != "18.221.197.243"){
rewrite ^/(.*)/plugins/(.*)readme\.(txt|html)$ /index.php?webarx_fpage=19 break;
}
# Prevent proxy comments.
if ($http_cookie !~* "^.*wordpress_logged_in.*$"){
set $blockcomment A;
}
if ($request_method = POST){
set $blockcomment "${blockcomment}B";
}
if ($http_via){
set $blockcomment "${blockcomment}C";
}
if ($http_forwarded){
set $blockcomment "${blockcomment}C";
}
if ($http_useragent_via){
set $blockcomment "${blockcomment}C";
}
if ($http_x_forwarded_for){
set $blockcomment "${blockcomment}C";
}
if ($http_x_forwarded_host){
set $blockcomment "${blockcomment}C";
}
if ($http_proxy_connection){
set $blockcomment "${blockcomment}C";
}
if ($http_xproxy_connection){
set $blockcomment "${blockcomment}C";
}
if ($http_http_pc_remote_addr){
set $blockcomment "${blockcomment}C";
}
if ($http_http_client_ip){
set $blockcomment "${blockcomment}C";
}
if ($blockcomment ~ "ABC"){
rewrite ^/wp-comments-post\.php$ /index.php?webarx_fpage=7 break;
}
```
# Does Patchstack work with other captcha plugins?
Patchstack plugin can add either Google ReCAPTCHA or Cloudflare Turnstile to your login page, but it may not work with other plugins.
Patchstack, by default, has the captcha features turned off. You can pick to which pages you would like to add the capcha — login, register, forgot password, and comments.
Note that Patchstack’s captcha only works with WordPress’s built-in forms and not for other plugins forms (like e-commerce registration forms).
If you turn this feature on and have a different plugin installed that has the same kind of functionality, you may get locked out of your WordPress site. In this scenario, you’d have to delete either plugin to regain access to your site.
# How to add security headers with Patchstack?
If you have the Patchstack plugin installed, we will automatically try to inject the security headers into the response.
If this does not work, perhaps due to an aggressive caching plugin or caching/proxy server, you may have to manually add the .htaccess rules below to your .htaccess file.
## Adding the security headers automatically
[Section titled “Adding the security headers automatically”](#adding-the-security-headers-automatically)
To automatically add the security headers, you need to navigate to the Patchstack App or Patchstack plugin in your WordPress dashboard.
**How to do it in the Patchstack App?**
1. Navigate to your site from the Patchstack App > Sites
2. Click on the Hardening tab
3. Click on the .htaccess sub-tab
4. Switch on the option “Add security headers”
5. Scroll down and click **Save settings**
## Adding the security headers manually
[Section titled “Adding the security headers manually”](#adding-the-security-headers-manually)
You can manually add the following security headers into the .htaccess file if you use **Apache**:
```
Header set Referrer-Policy "strict-origin-when-cross-origin"
Header set X-XSS-Protection "1; mode=block"
Header set X-Content-Type-Options "nosniff"
Header set X-Frame-Options "SAMEORIGIN"
Header set Strict-Transport-Security "max-age=31536000"
Header unset X-Powered-By
```
If you are running **nginx**, add the following to the nginx configuration file and restart or reload nginx:
```
add_header X-Frame-Options SAMEORIGIN;
add_header X-Content-Type-Options nosniff;
add_header X-XSS-Protection "1; mode=block";
add_header Strict-Transport-Security "max-age=31536000";
add_header Referrer-Policy "strict-origin-when-cross-origin";
```
Additionally, in order to permanently remove the X-Powered-By header instead of using the above changes, set the expose\_php value of your PHP configuration to “Off”. You may have to ask your host to make the above changes.
## More help
[Section titled “More help”](#more-help)
A more detailed guide about security headers can be found in this article: [](https://patchstack.com/articles/wordpress-security-headers/)
In case you need help, turn to our support chat - just click the green chat bubble at the bottom right corner!
# How to configure Patchstack to work with Cloudflare?
The following steps should only be taken if your site is properly configured behind a Cloudflare proxy. On misconfigured sites, this could allow for IP address spoofing to exist which could potentially lead to a DoS attack
### IP address header
[Section titled “IP address header”](#ip-address-header)
In order for Patchstack to properly work with Cloudflare, we recommend that you configure the IP address header override option.
1. Go to **Patchstack App** > **Sites** > **yourdomain.com** > **Protection** > **Additional settings**
2. To the **IP Address Header Override** input, type **HTTP\_CF\_CONNECTING\_IP**
3. Save the settings
This will tell Patchstack to grab the real visitors' IP addresses.
### Support for TLS 1.2 is required
[Section titled “Support for TLS 1.2 is required”](#support-for-tls-12-is-required)
Cloudflare supports only TLS 1.3 by default. To use Patchstack, additional support for TLS 1.2 is required. To add support for this TLS version in Cloudflare:
1. Login at Cloudflare, and click on your domain name
2. In the menu, go to SSL/TLS > Edge Certificates
3. Scroll down to the “Minimum TLS Version” section
4. Ensure that it is set to at least TLS 1.2 or lower
### Custom rules
[Section titled “Custom rules”](#custom-rules)
Sometimes due to specific settings in Cloudflare, you may need to whitelist Patchstack’s IP addresses. [Click here](https://docs.patchstack.com/faq-troubleshooting/technical/list-of-ip-addresses-that-patchstack-uses/) to see all the IP addresses that Patchstack servers use.
In case there are still problems with connecting Patchstack, an additional Cloudflare rule that might work is to pass the request if the query string contains “\_wcb” or query parameter “\_wcb” is set.
# How to fix "Improper HTTP to HTTPS redirection"?
When your site does not properly redirect HTTP requests to HTTPS, a Man-In-The-Middle attack may be possible.
It must redirect straight from the HTTP to the HTTPS version of your site with no additional HTTP redirects in between.
In order to fix this on a WordPress site, first make sure your site is available over HTTPS (you might have to ask your host regarding this matter). If it is available over HTTPS, we recommend that you install the “Really Simple SSL” plugin. After the plugin setup, it may take up to 12 hours before the HTTPS/SSL error in the app is resolved.
**Apache**\
If you do not run a WordPress site, you can create a .htaccess file in the root of your website (or modify existing one) through FTP or a file manager in cPanel/WHM/Plesk and add the following (make sure to change the domain name on the last line):
```typescript
RewriteEngine On
RewriteCond %{SERVER_PORT} 80
RewriteRule ^(.*)$ https://www.yourdomain.com/$1 [R,L]
```
**Nginx**\
It’s a bit more technical to do this for Nginx, as you probably need root access to modify the Nginx web server configuration settings.
The easiest way is to set up a listener for port 80 (HTTP), which redirects traffic with a 301 permanent redirect to the port 443 (HTTPS) listener.
# List of IP addresses, that Patchstack servers use
Sometimes you need to whitelist these IP addresses in order to avoid your hosting provider or (secondary) firewall blocking our services.
Note that we may add and remove IP addresses at any time without notice.
* 52.15.237.250/32
* 18.220.35.243/32
* 3.139.103.162/32
* 3.144.148.199/32
* 18.223.119.151/32
* 18.217.98.15/32
* 3.139.73.114/32
* 18.219.161.157/32
* 18.224.116.108/32
* 18.218.106.220/32
* 3.141.189.188/32
* 18.222.238.117/32
* 13.58.168.236/32
* 3.15.143.119/32
You can find the list of IP addresses that Patchstack uses at [patchstack.com/ips-v4](https://patchstack.com/ips-v4/).
# Will Patchstack plugin help my site pass PCI-DSS, SOC2, ISO 127001 or other security checks?
The Patchstack plugin can help, but patching is up to you. The plugin will inform you if your website(s) are running any known insecure components and allow you to be sure your applications are running secure versions before your test or auditing date.
# Adding your first site
In this article, we will show, how you can add and connect your first website with Patchstack App. You can watch this [tutorial video](https://www.youtube.com/watch?v=MFmPFzSaD3I) below, or follow the steps in the next chapter.
## Steps for adding your first site
[Section titled “Steps for adding your first site”](#steps-for-adding-your-first-site)
To add the first site, make sure you are logged into Patchstack App. Then follow these steps.
1. Navigate to [**Dashboard**](https://app.patchstack.com/dashboard). Then, click on the green **Connect site** button.  A dialogue will open asking you for your domain URL.
2. Enter the domain name to the input. You can switch between http/https by clicking on the arrows
3. Click **Continue to plugin sync** 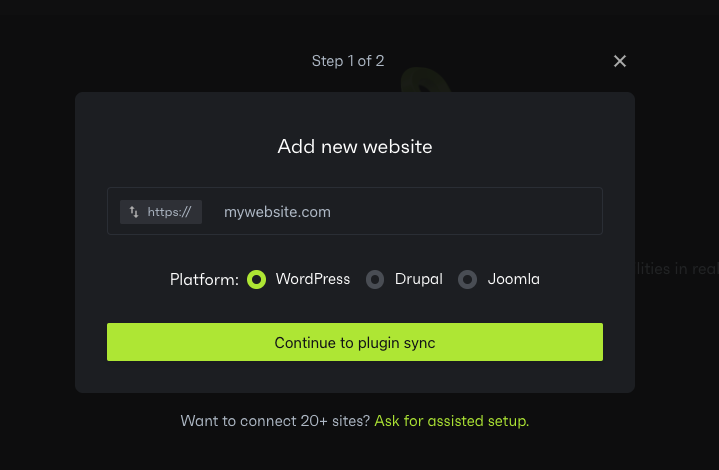
4. You will be taken to the next step, where you can get the API key or download the plugin .zip file.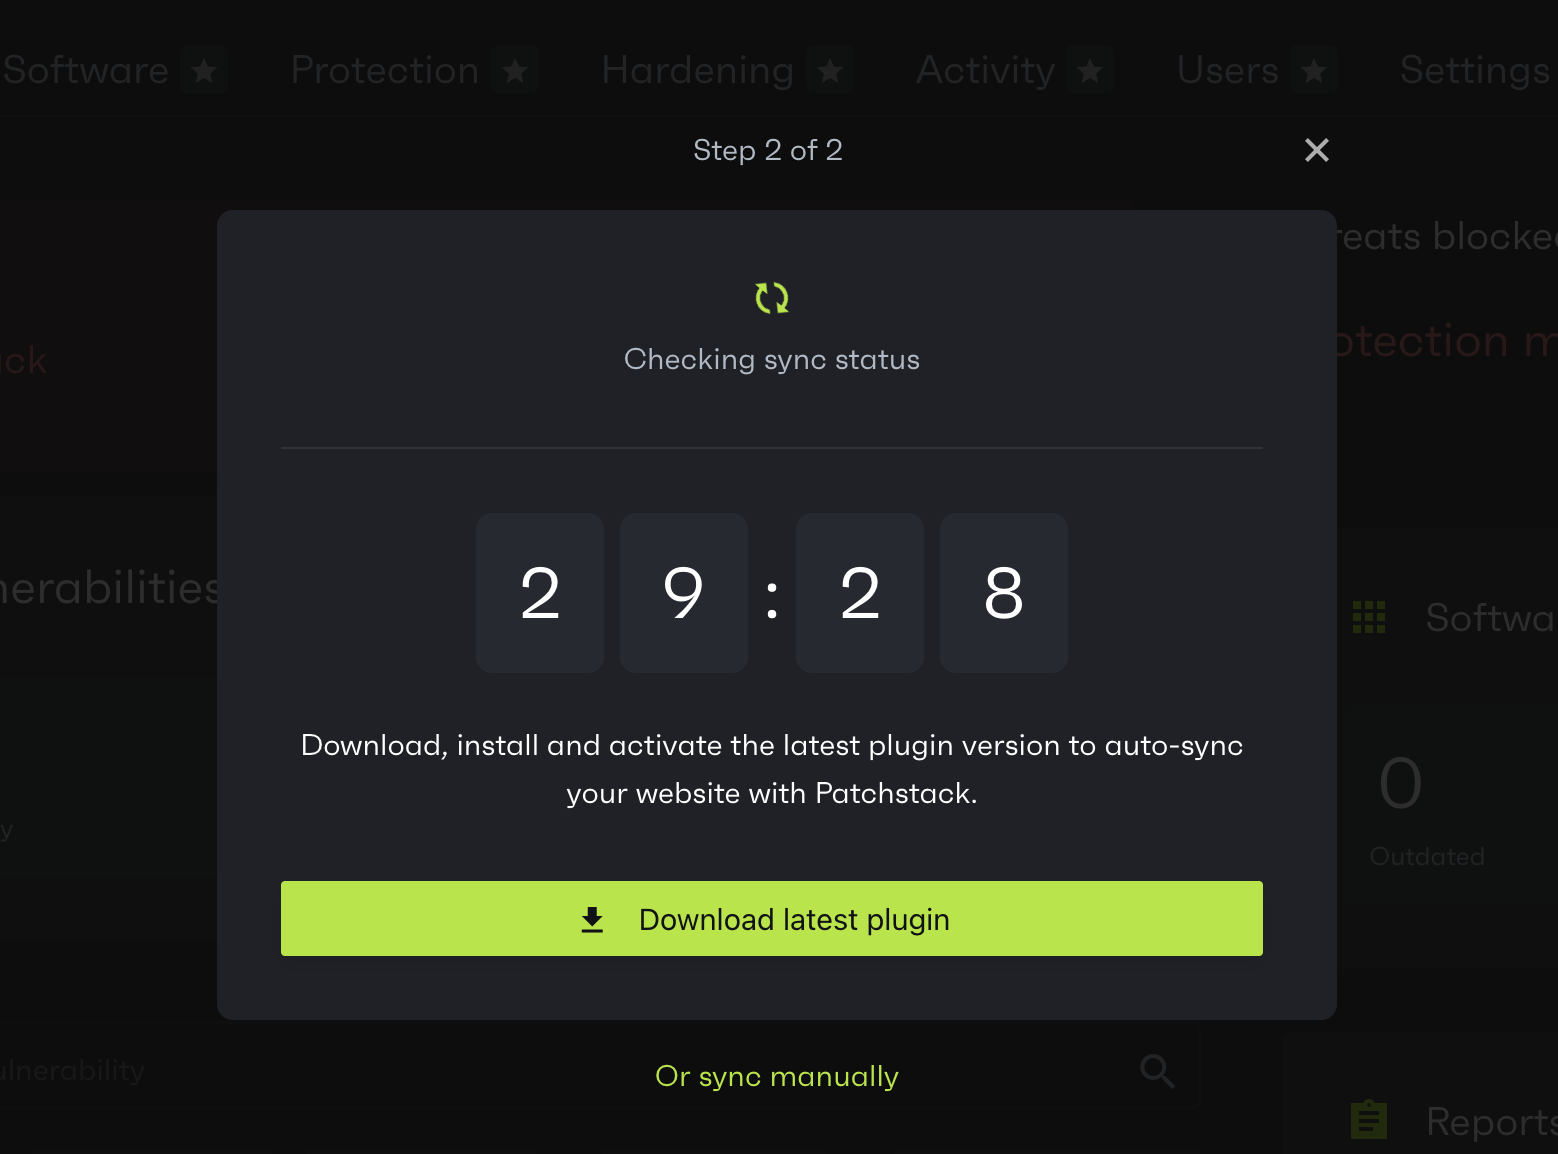
5. If you upload the Patchstack plugin to your site within 30 minutes, Patchstack will automatically sync all the data. In case this 30 minute exceeds, then you need to click **Resync** in the dialogue, after uploading the plugin.
6. To install the plugin, follow [these steps](/getting-started/installing-patchstack/installing-via-zip/).
**What if I already had the Patchstack plugin installed before adding it to Patchstack App?**
If you already have the Patchstack plugin installed on your site, you can click **Or sync manually** in the Patchstack App site adding flow, and get the API key. You will have to insert this API key into your WordPress plugin. To do that, go to wp-admin > Settings > Security > Change API key. Copy the key there and click **Sync**
# Installing the Patchstack plugin
Patchstack can be connected with WordPress in two ways:
* manually uploading the .zip file to your WordPress site (with API key pre-inserted)
* installing the plugin from your WordPress admin and adding the API key manually
*Patchstack plugin itself can be found from WordPress repository: [](https://wordpress.org/plugins/patchstack/)*
# Installing via WordPress repository
Let’s set up the Patchstack plugin through WordPress!\
First, log in to your WordPress.\
Navigate to “Plugins” from the admin menu and click “Add New” from the top.
1. On the right side you see the “Search plugins…” search box.
2. Type **“Patchstack”** to search box
3. Click on **“Install Now”** button
4. Click **“Activate”** 
5. You are now taken to the Patchstack plugin’s setup screen, where you need to enter the Patchstack API key.
6. In Patchstack App, navigate to **My Sites > yourdomain.com > Settings**, to find and copy the **API key**. See image below: 
7. To connect the plugin with Patchstack App, you need to paste your site **API key** into the plugin API field. 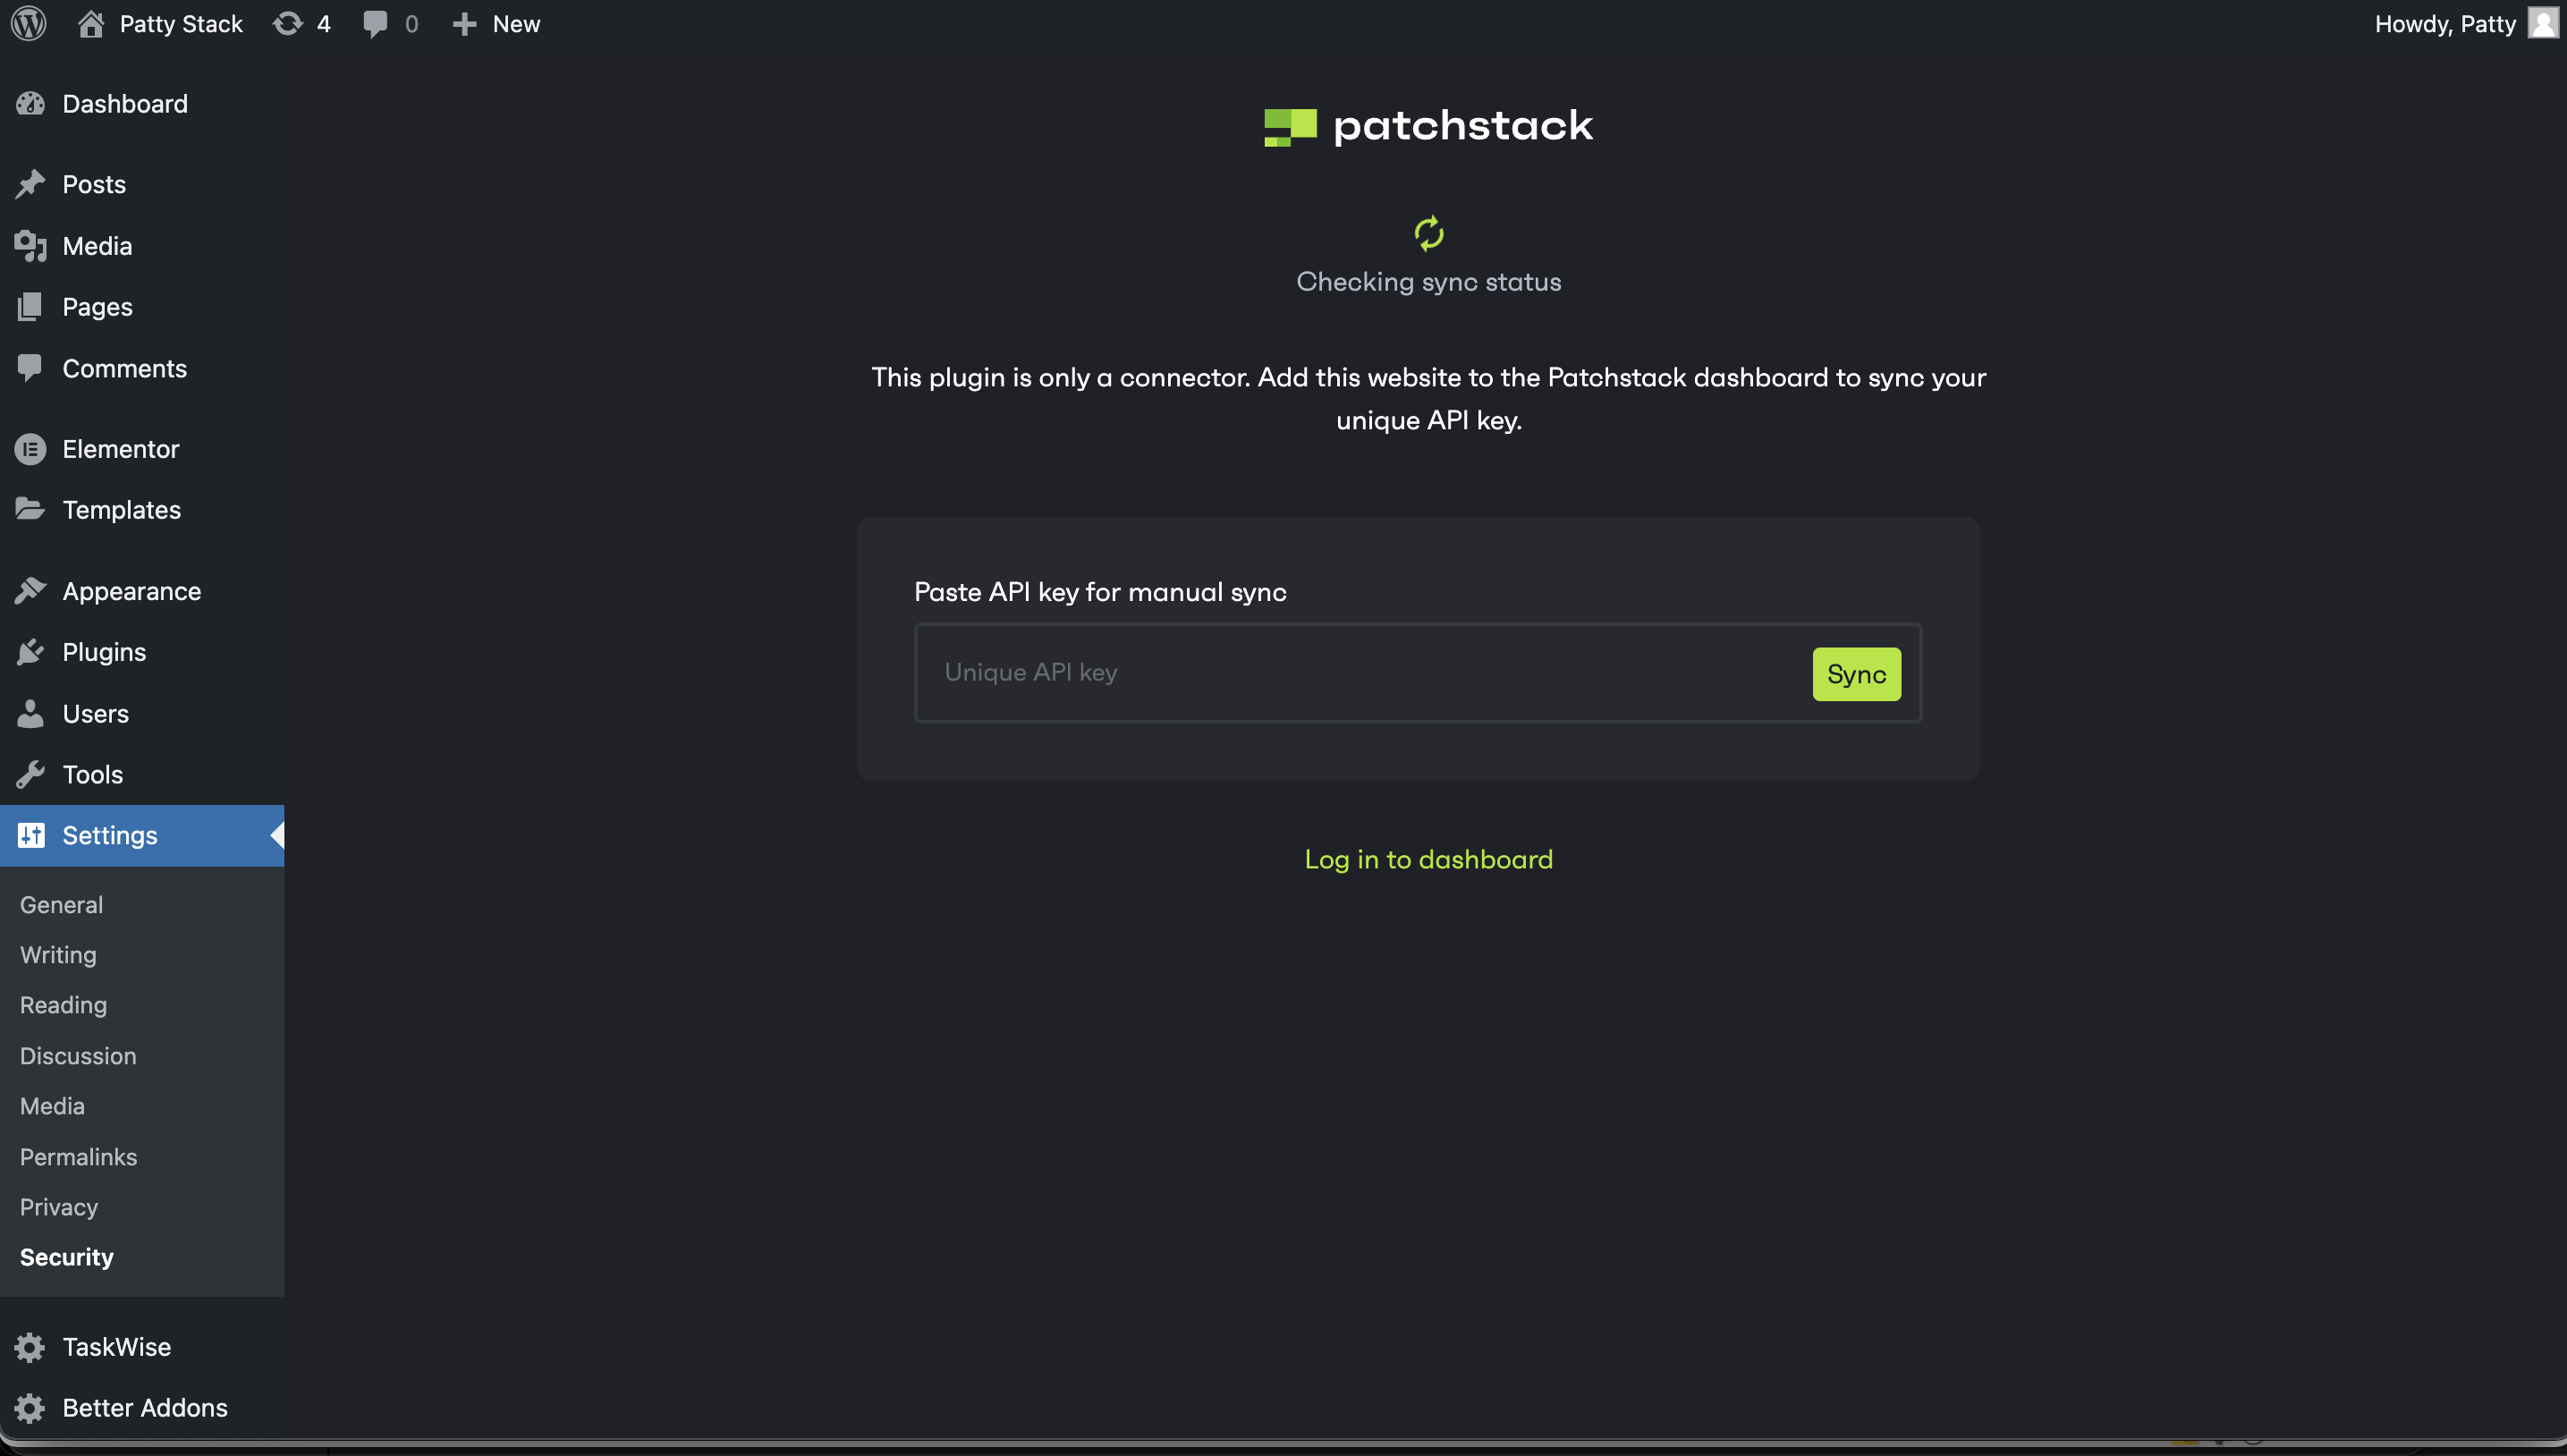
8. Click **Sync** in WordPress plugin.
**Congratulations** - After completing all previous steps, Patchstack should now be up and running on your site!\
If you want to have your site protected by our vPatches and other firewall rules, you can click on **Activate for $5 on the App** button. You will be directed to set up billing to enable the Patchstack protection.
# Installing via .zip
## 1. Download the .zip file
[Section titled “1. Download the .zip file”](#1-download-the-zip-file)
Once you have added your domain name to Patchstack App and clicked **Continue to plugin sync**, you will see a prompt, which lets you download the Patchstack plugin .zip file.\
Click on the **Download latest plugin**. 
Additionally, the plugin file can be found on the **Settings** page of your site in Patchstack. On the settings page, there is a button **Download latest plugin**.
## 2. Upload the plugin to your site
[Section titled “2. Upload the plugin to your site”](#2-upload-the-plugin-to-your-site)
To upload the .zip file to WordPress:
1. Go to your WordPress admin
2. Click **Plugins** > **Add new plugin**
3. Click on **Upload Plugin**
4. Choose the Patchstack plugin .zip file from your computer, and click **Install Now**
5. Once the plugin is installed, click **Activate Plugin**
6. You’ll then see a screen as below, that means the plugin has been successfully connected to the Patchstack App 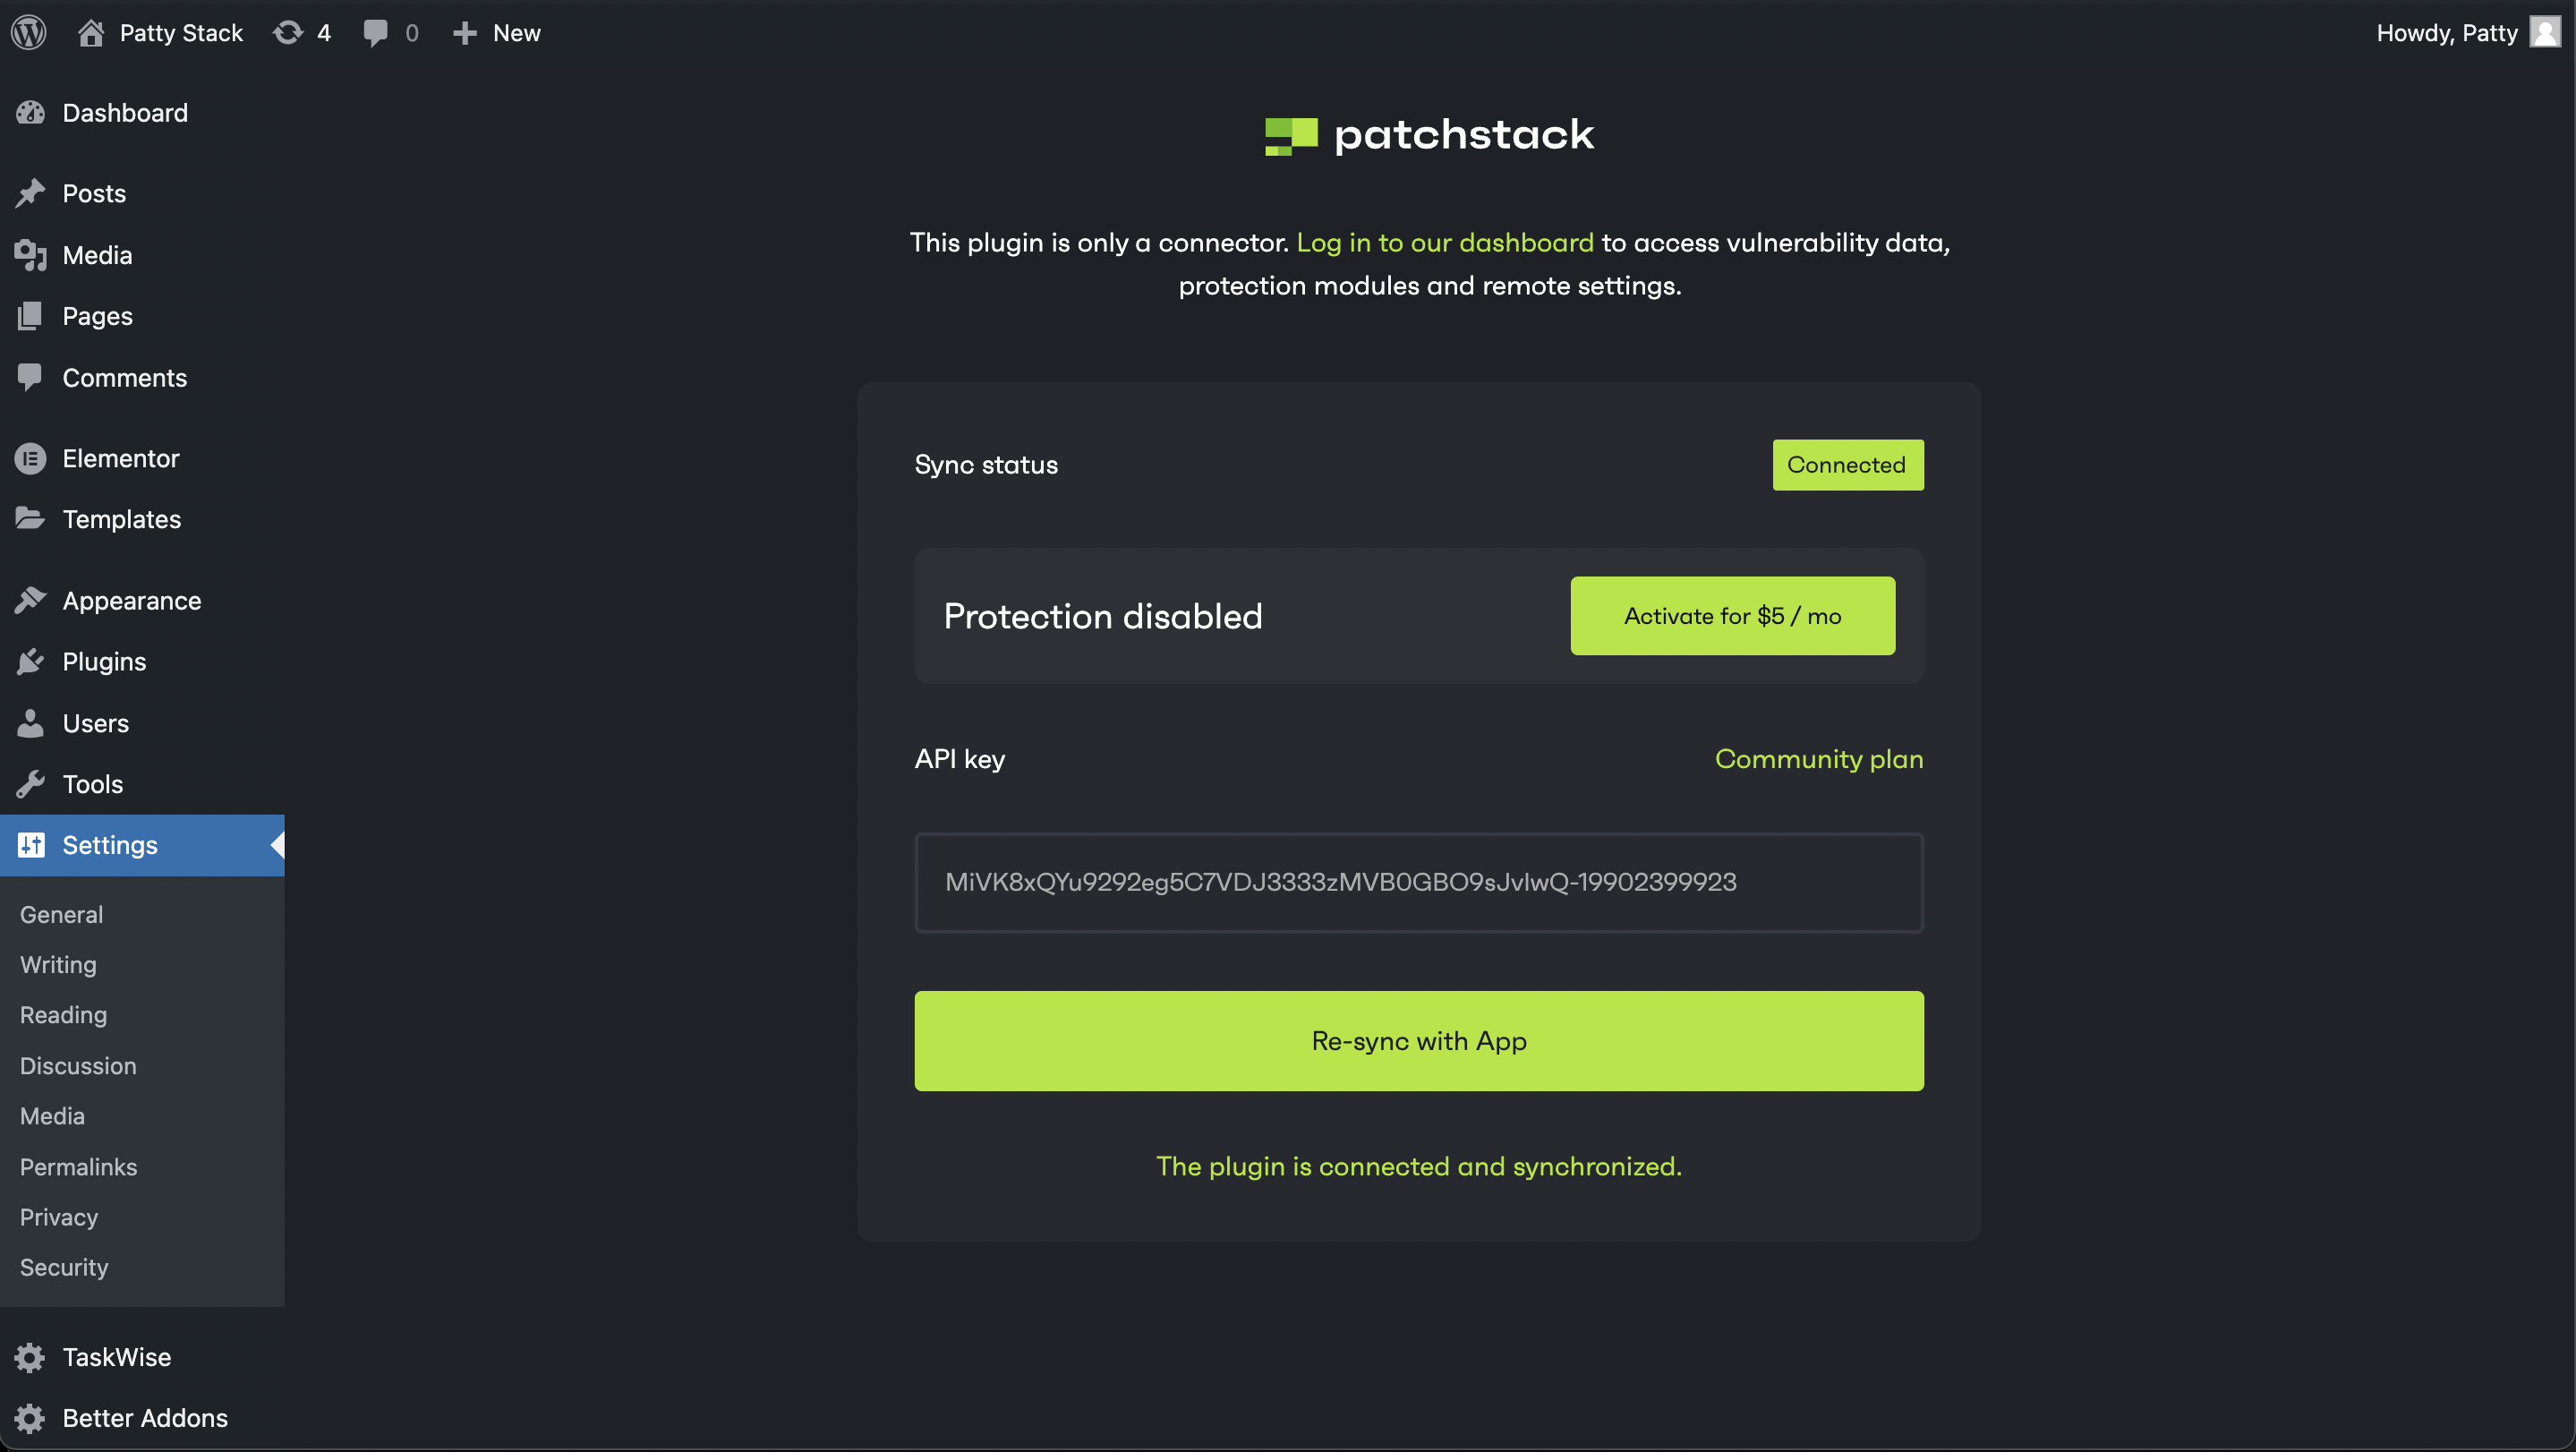
7. Patchstack App will now also automatically show the success message 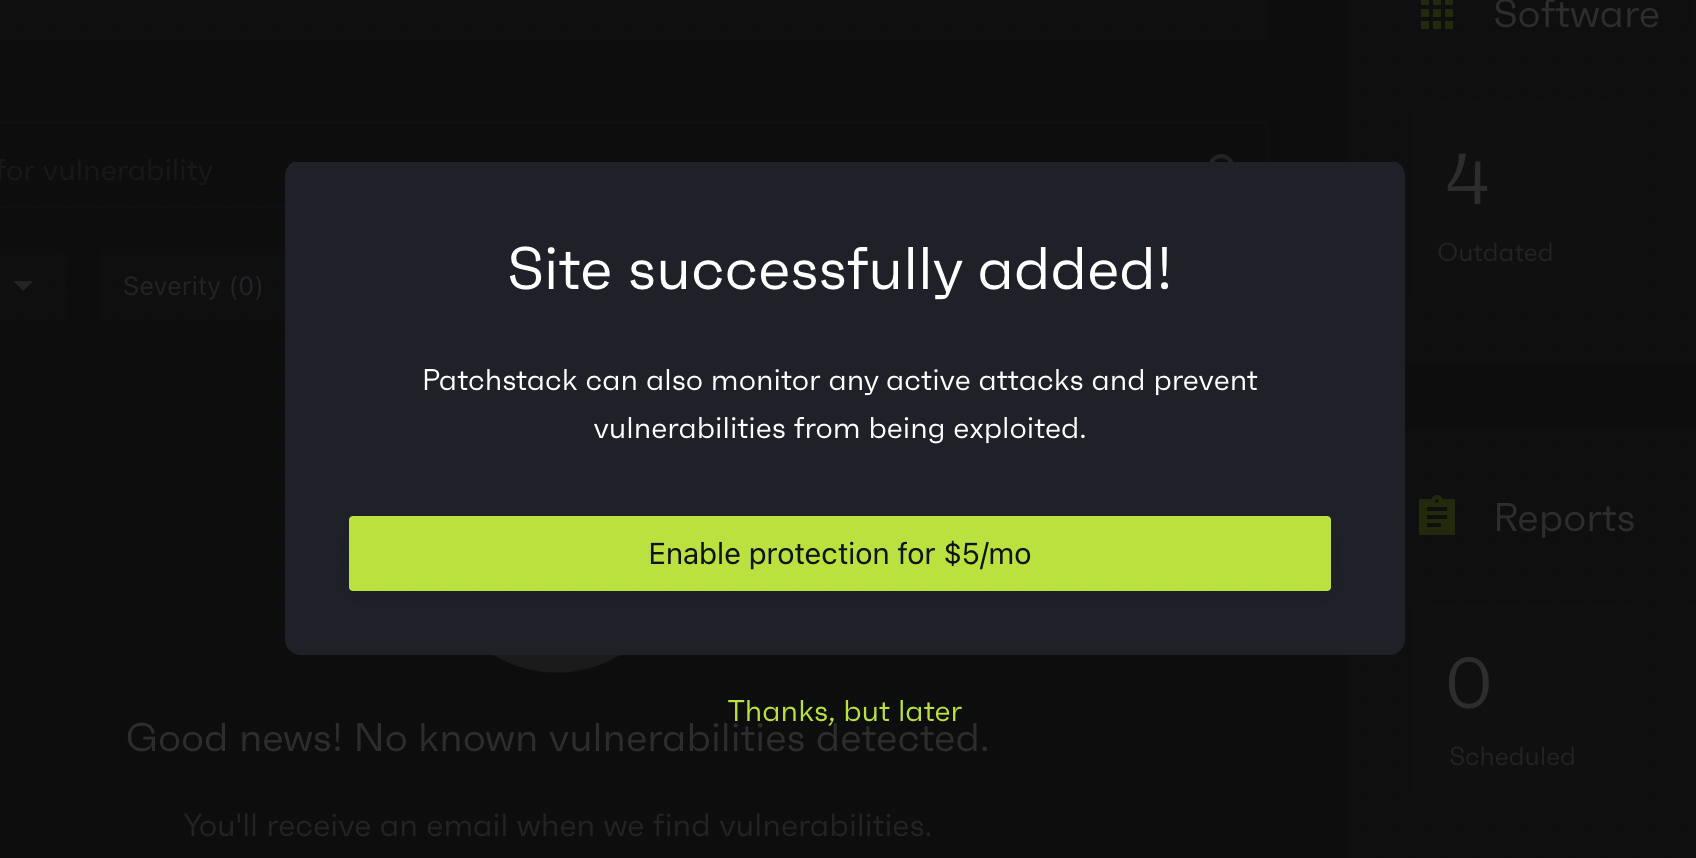
# Pricing plans
Patchstack has two pricing plans available:
* [Developer](https://patchstack.com/pricing/)
* [Enterprise](https://patchstack.com/pricing/)
Whether you are a security enthusiast, business owner, or a web development agency, you should find the perfect plan on our [pricing page](https://patchstack.com/pricing/).
**Below you’ll find more information about each of Patchstack’s pricing plans.**
## Developer plan
[Section titled “Developer plan”](#developer-plan)
The Developer plan is ideal for businesses and agencies who need vulnerability detection & protection for multiple WordPress sites. By default settings, this plan protects your sites with all 4 Patchstack’s [protection modules](/patchstack-app/protection/patchstack-modules/), including [vPatching](https://patchstack.com/articles/virtual-patching), which block malicious traffic until security updates become available. The Developer plan has many easy-to-use extra hardening options for keeping your sites secure.
On this plan, by default you can protect up to 25 sites, but it can be extended with our **Volume Upgrade** feature.
### Developer plan pricing
[Section titled “Developer plan pricing”](#developer-plan-pricing)
* Monthly payment plan: $79 / mo for 25 sites
* Annual payment plan: $69 / mo for 25 sites
* Volume Upgrade feature: $12.50 / mo for **additional 5 sites**
## Enterprise plan
[Section titled “Enterprise plan”](#enterprise-plan)
Best for businesses that require advanced security or maintain high-profile websites. The Enterprise plan offers compliance and security at scale.
The Enterprise plan includes unlimited websites and unlimited team seats. It also includes a signed **Service Level Agreement (SLA)**, a **Data Processing Agreement (DPA)**, **custom billing options**, and **Enterprise-level support**.
### Enterprise plan pricing
[Section titled “Enterprise plan pricing”](#enterprise-plan-pricing)
* Unlimited sites
* Unlimited team seats
* SLA, DPA
* Custom - [reach out to us for a quote](https://share.hsforms.com/1hiWhAMliSmG0tB7ahthqpwsr3ry)
# Signing up
To sign up and start using Patchstack, navigate to [](https://app.patchstack.com/register/)\
From there you can sign up two ways.
## Registering your account manually:
[Section titled “Registering your account manually:”](#registering-your-account-manually)
1. Enter your full name, email address \[comment]: <2. Add your phone number by selecting the dial code and entering the number. This will be used to send you a confirmation SMS>
2. Make sure to add a strong password. You can later enable two-factor authentication
3. Click the sign up button
4. You will be sent a 6 digit code via SMS. Depending on your location, the SMS message will show up under the name Verigator, our SMS integration partner, or under a regular phone number
## Signing up using Google, Github or LinkedIn:
[Section titled “Signing up using Google, Github or LinkedIn:”](#signing-up-using-google-github-or-linkedin)
1. Click on the desired service provider and complete the authentication process.
Below is the screen you can see after successful sign-up. From this view you can [add your first sites to Patchstack](/getting-started/adding-your-first-site/).

# Start using Patchstack
## Getting started guide
[Section titled “Getting started guide”](#getting-started-guide)
**Welcome to Patchstack!**\
Patchstack is a powerful tool that helps to protect your WordPress applications from attacks and identify security vulnerabilities within all your WordPress plugins, themes, and core. It is powered by the WordPress ecosystem’s most active community of ethical hackers. Patchstack is trusted by leading WordPress experts such as GoDaddy, Pagely, Cloudways, GridPane, Plesk, and others.
This guide will walk you through the whole product, showing you how to set up Patchstack on your site and make the most of it in the future.
### Step #1 — Register your account
[Section titled “Step #1 — Register your account”](#step-1--register-your-account)
Sign up for Patchstack App to manage and protect your WordPress sites.\
[Click here to sign up and start your trial](https://app.patchstack.com/register)
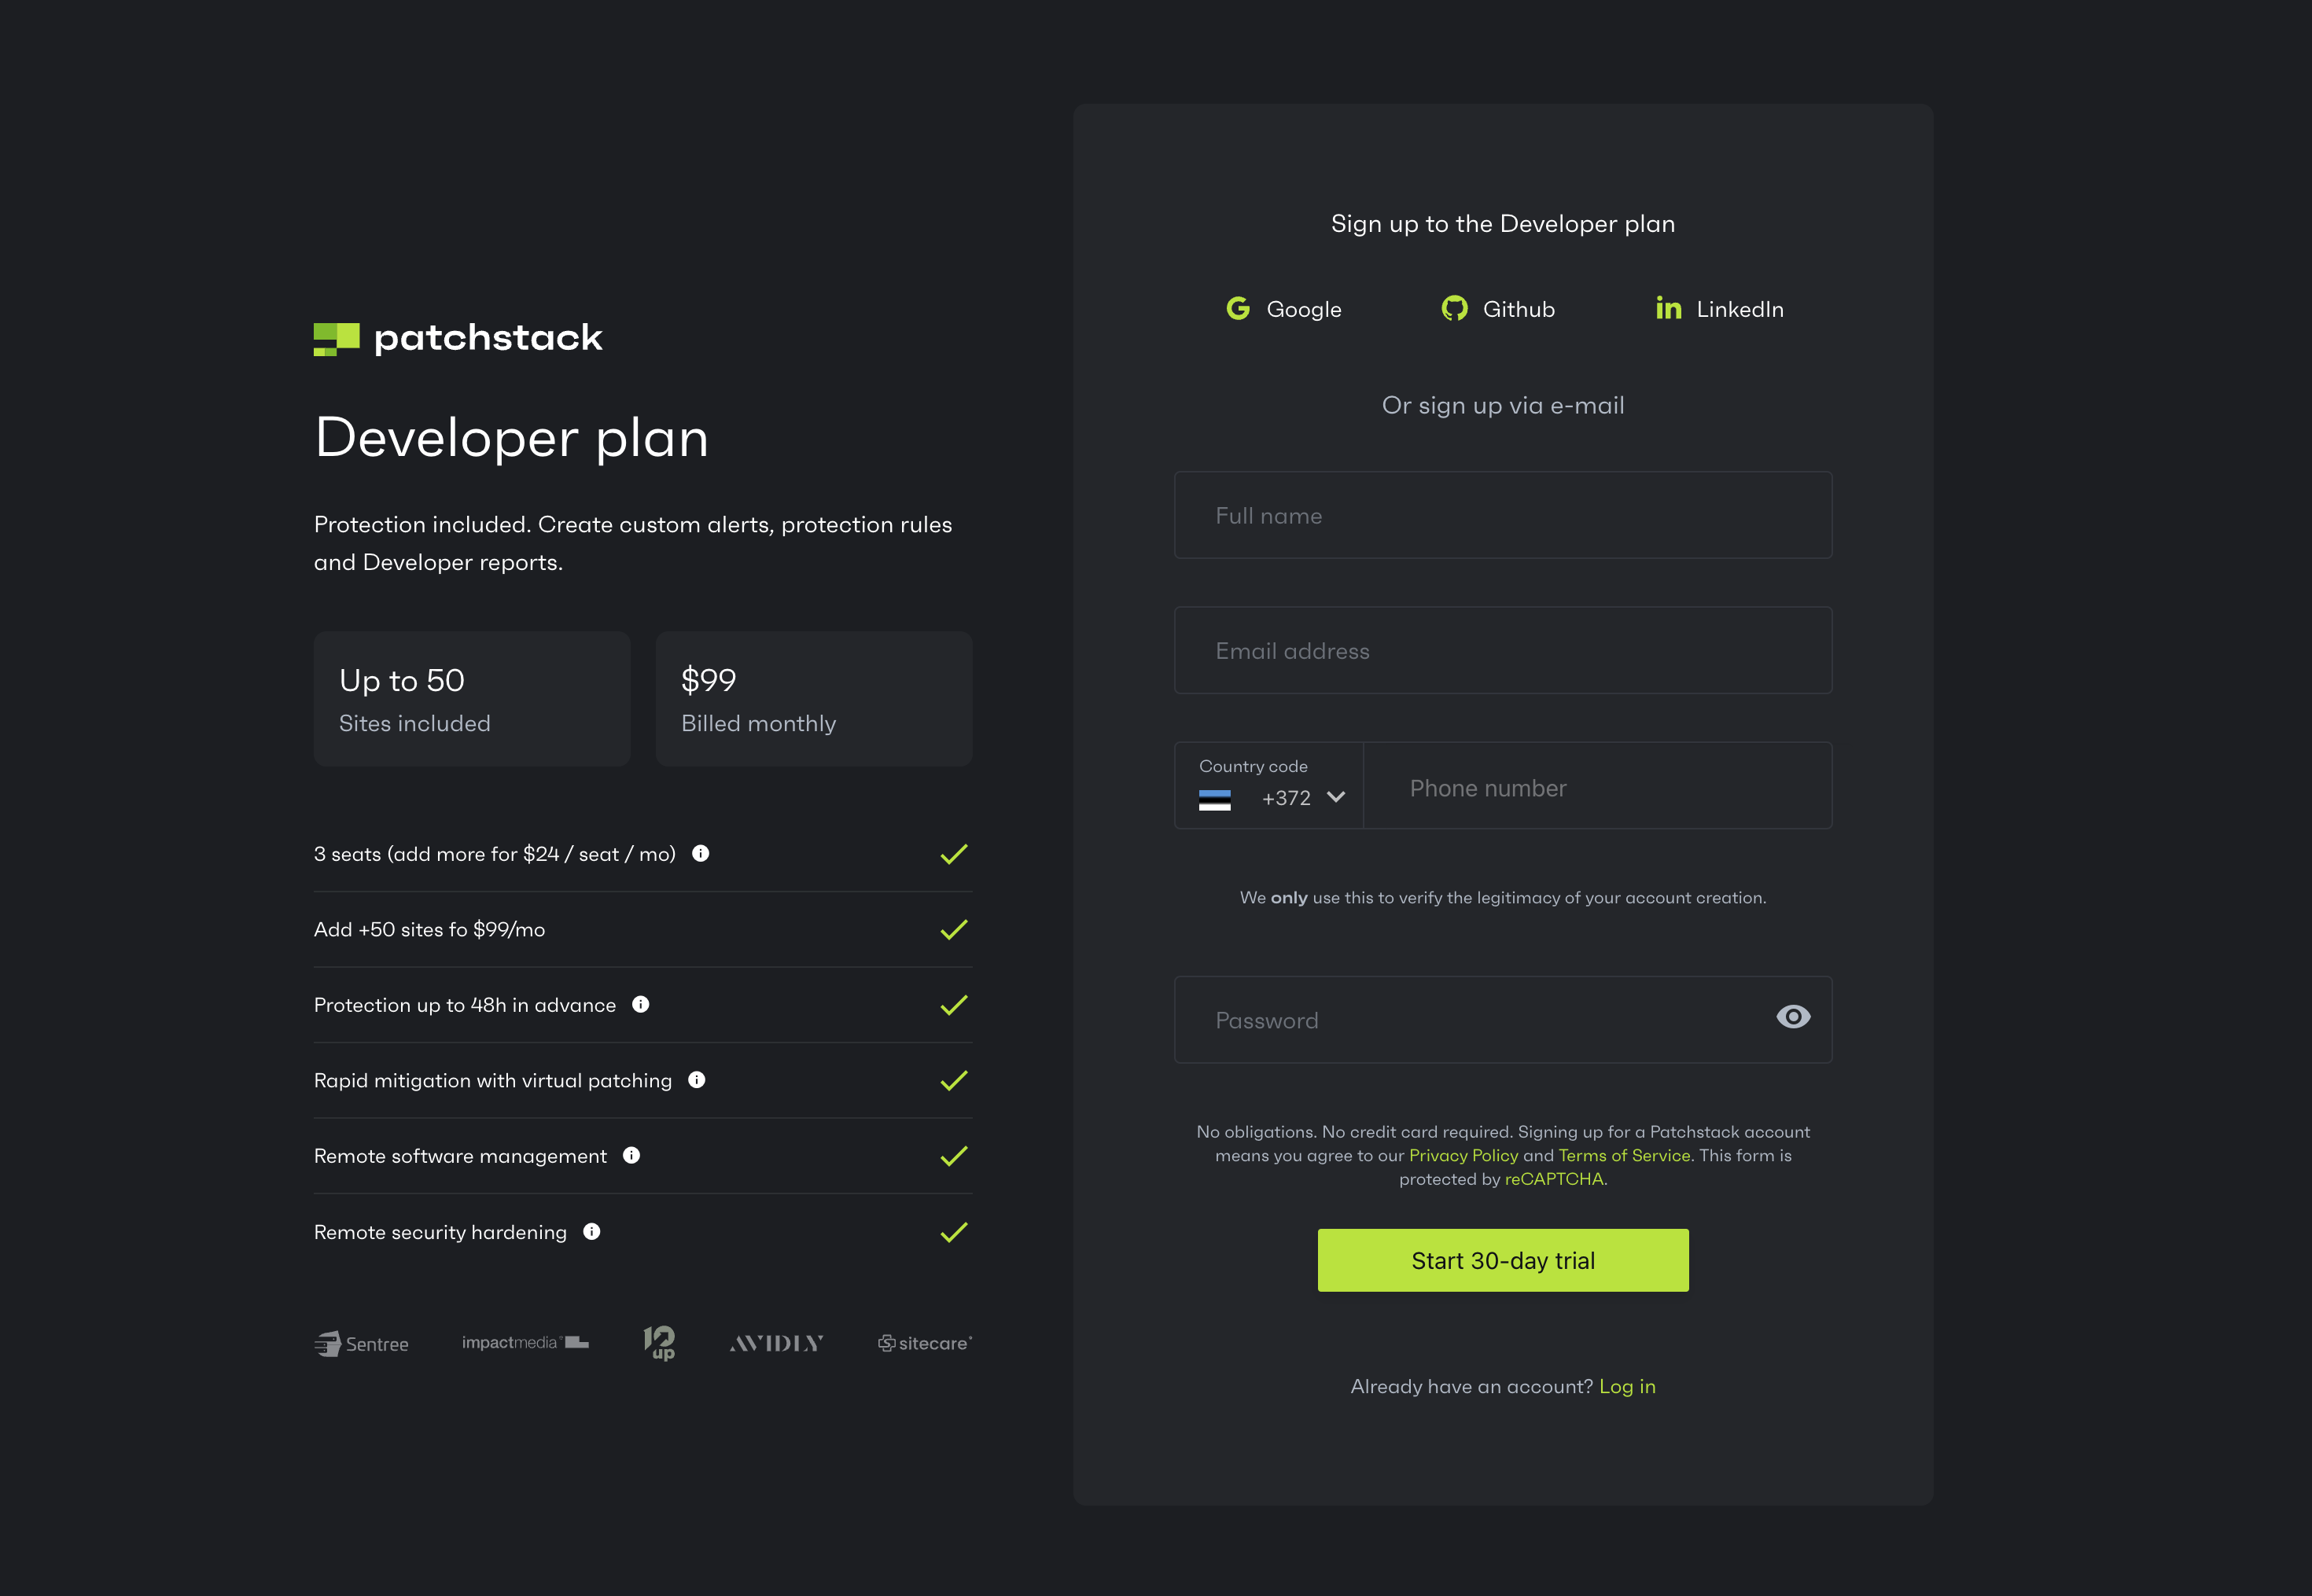
### Step #2 — Add & connect your site(s) to Patchstack
[Section titled “Step #2 — Add & connect your site(s) to Patchstack”](#step-2--add--connect-your-sites-to-patchstack)
Install and sync the Patchstack plugin with your WordPress site(s).\
To add the first site:
1. Navigate to Dashboard
2. Click on the green **Connect site** button.
3. Go through the steps shown in the dialogue
4. Install the plugin .zip file to your WordPress site
[Check the more detailed tutorial here](/getting-started/adding-your-first-site)
### Step #3 — Review vulnerabilities
[Section titled “Step #3 — Review vulnerabilities”](#step-3--review-vulnerabilities)
Patchstack shows your site for existing plugin & theme vulnerabilities. After that, check your dashboard to see a detailed breakdown of vulnerabilities by patch prioriy and severiy score.
Take immediate action on the **High Priority** vulnerabilities.
[Learn more about vulnerabilities](/patchstack-app/dashboard/)
### Step #4 — Check your software for updates
[Section titled “Step #4 — Check your software for updates”](#step-4--check-your-software-for-updates)
Check the status of your plugins and themes. Apply the necessary updates, and decide whether you’d like to:
1. Auto-update only vulnerable software; or
2. Auto-update all software (plugins, themes and/or WordPress core versions)
[Learn more](/patchstack-app/site-dashboard/site-software/)
### Step #5 — Check the protection modules
[Section titled “Step #5 — Check the protection modules”](#step-5--check-the-protection-modules)
Select, which protection modules you’d like to use to protect your site. Patchstack blocks attacks with highly-targeted security rules.
[Learn more about protection modules](/patchstack-app/protection/protection-overview/)
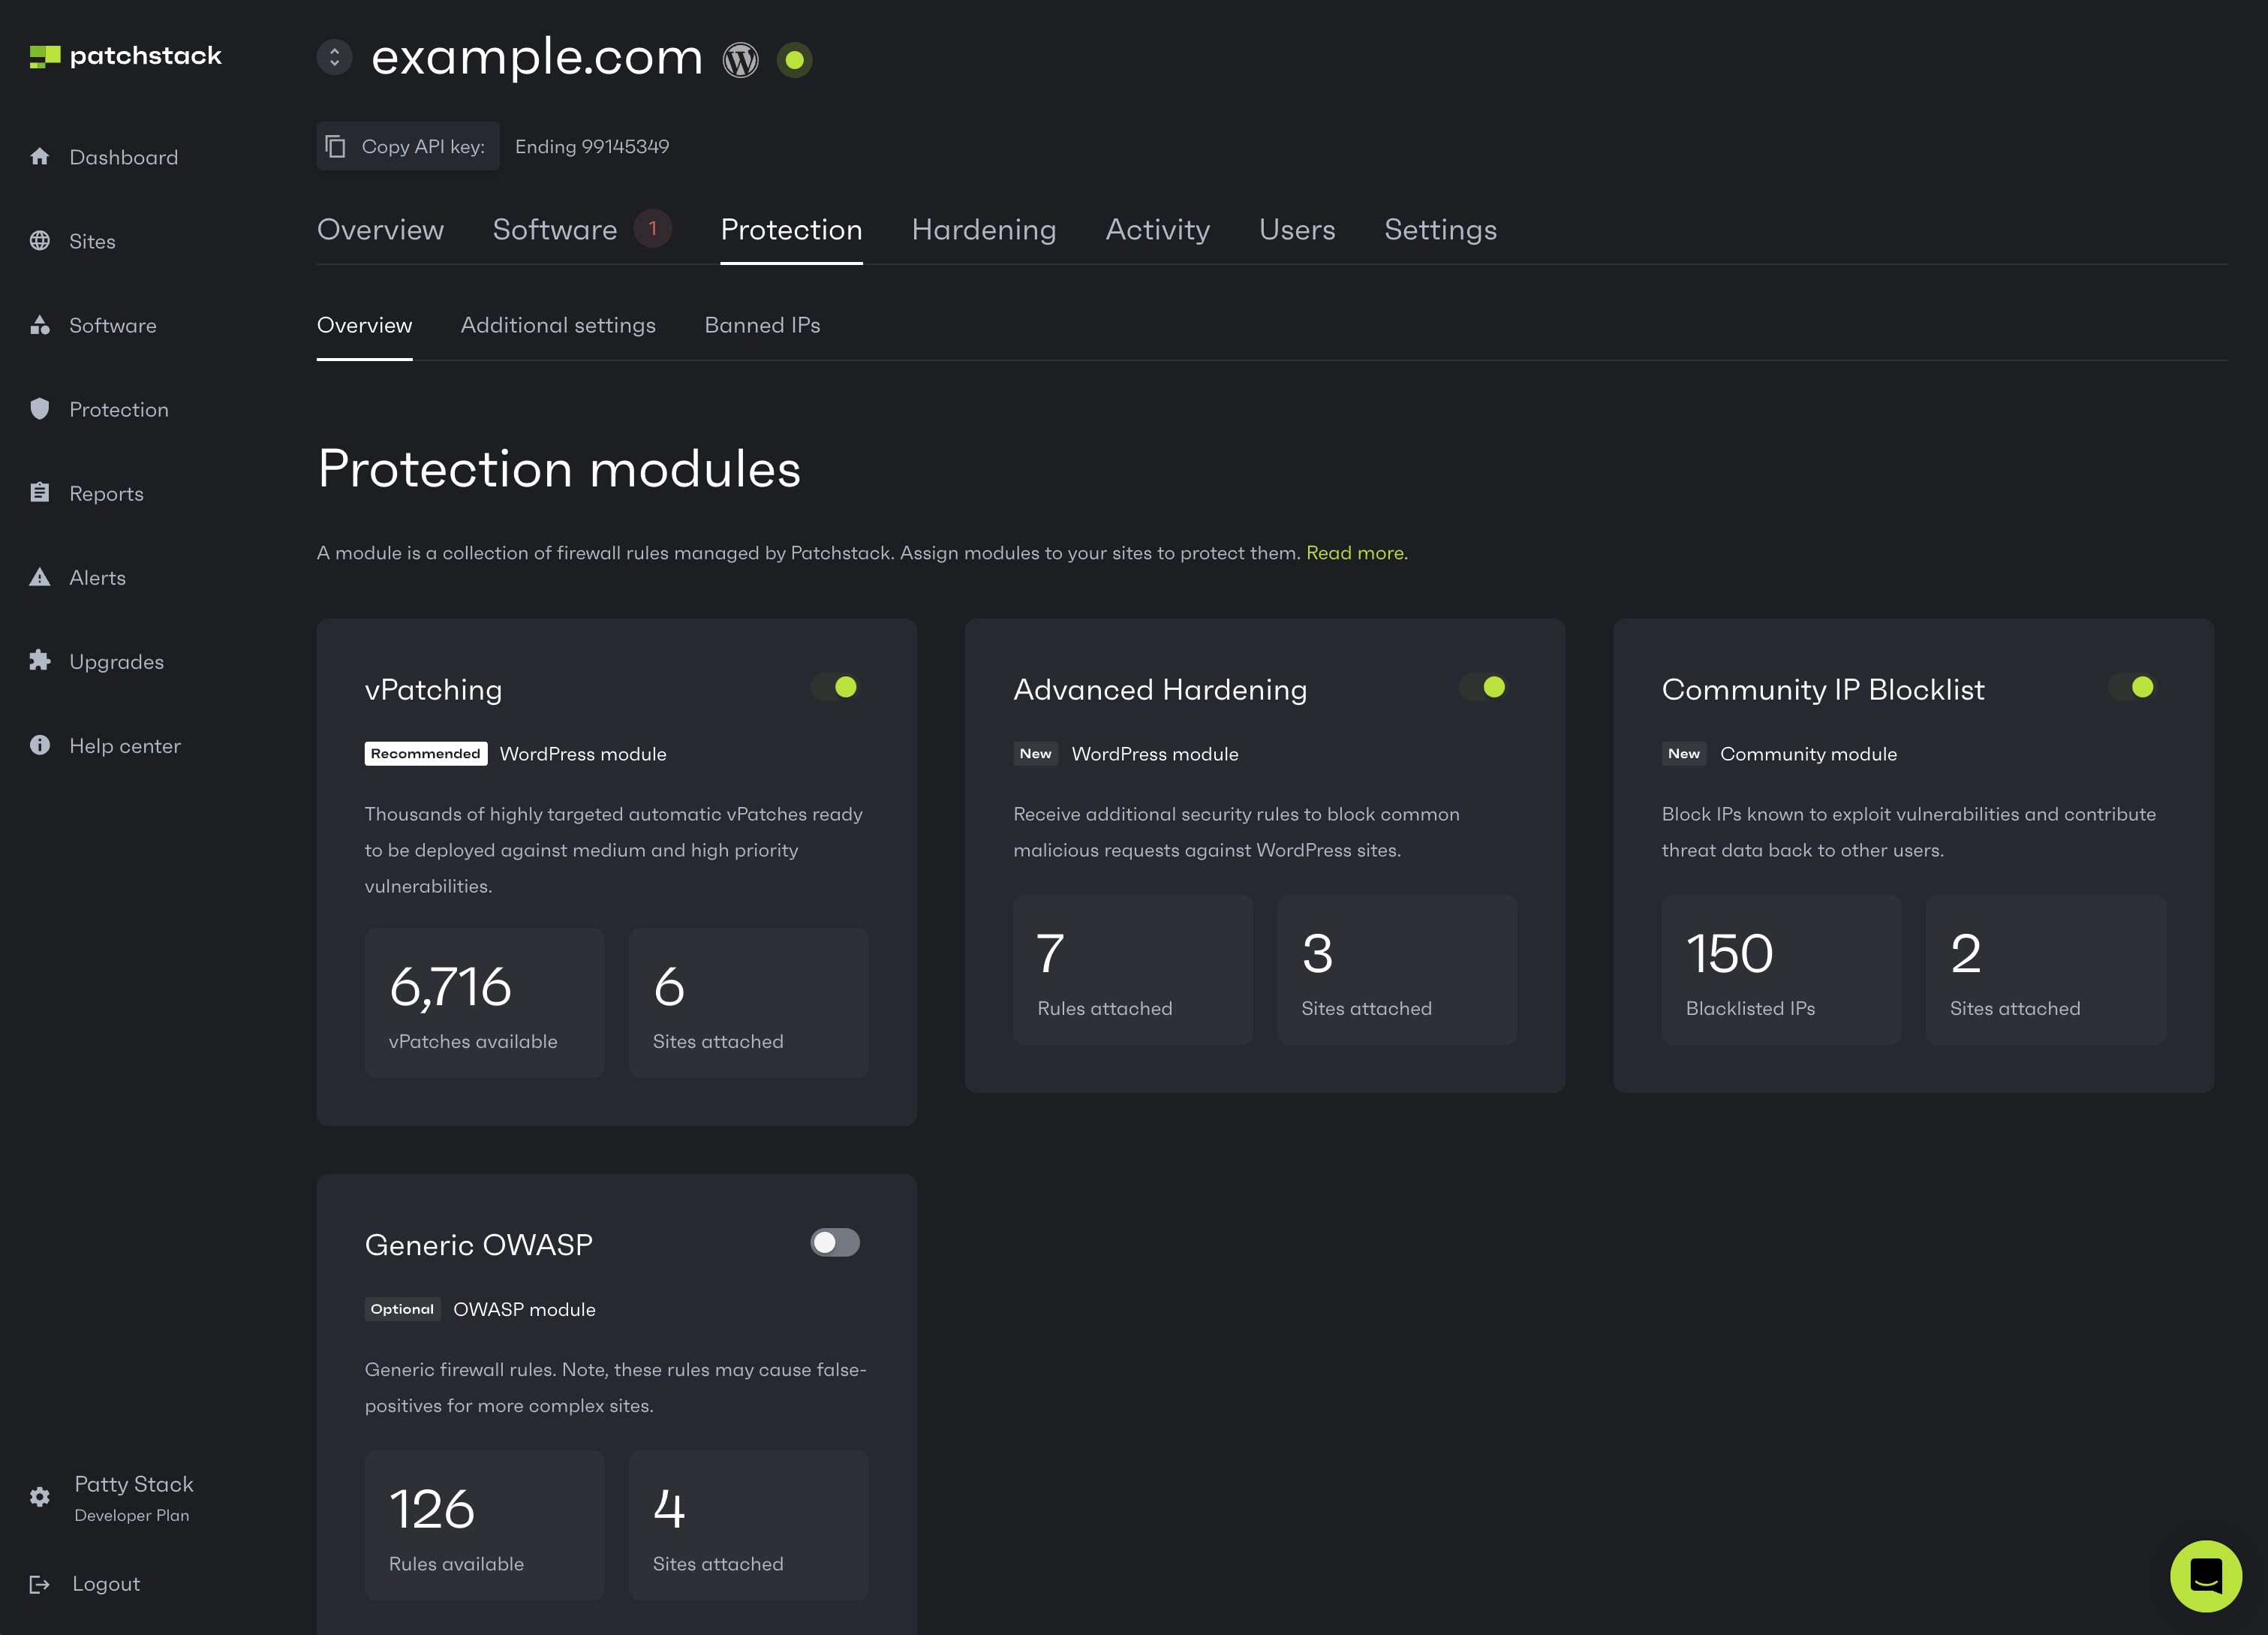
### Step #6 — Set up your WordPress hardening
[Section titled “Step #6 — Set up your WordPress hardening”](#step-6--set-up-your-wordpress-hardening)
Fortify your site(s) against threats with specific WordPress hardening features such as adjusting .htaccess settings, setting up captcha solutions, setting up login protection or two factor authentication.
[Explore hardening](/patchstack-app/site-dashboard/hardening/app-hardening-general/)
### Step #7 — Generate a report
[Section titled “Step #7 — Generate a report”](#step-7--generate-a-report)
Understand your threat activity and how Patchstack protected you with practical reports. Create a PDF security report of your site to have an overiew of the current state of security about your site.
[Using reports](/patchstack-app/reports/reports-overview/)
### Step #8 — Schedule your reports
[Section titled “Step #8 — Schedule your reports”](#step-8--schedule-your-reports)
Get monthly overviews per site for each site in your account. Schedule them to arrive in your inbox just in time for your monthly reporting!
[How to schedule reports in Patchstack](/patchstack-app/reports/scheduling-reports/) 
### Step #9 — Set up your custom alerts
[Section titled “Step #9 — Set up your custom alerts”](#step-9--set-up-your-custom-alerts)
By default, Patchstack will alert you when we identify and vPatch a vulnerability in your plugins, themes or other software components. However, you can also set up custom alerts for firewall hits, attempted logins, and more. On a Developer and Business plan, you can also integrate Slack to send notifications to your Slack channel.
[Creating alert triggers tutorial](/patchstack-app/alerts/creating-a-trigger/)
### Step #10 — Create custom protection rules
[Section titled “Step #10 — Create custom protection rules”](#step-10--create-custom-protection-rules)
In addition to Patchstack’s built-in protection modules, you can write custom JSON-formatted firewall rules, to filter all sorts of traffic.
[Explore custom protection rules](/patchstack-app/protection/create-rule/advanced-rule/)
### Step #11 — Monitor your activity log
[Section titled “Step #11 — Monitor your activity log”](#step-11--monitor-your-activity-log)
Your activity log will show all actions taking place on your WordPress site — perfect when collaborating with a big team.
[Explore the activity log](/patchstack-app/site-dashboard/activity/)
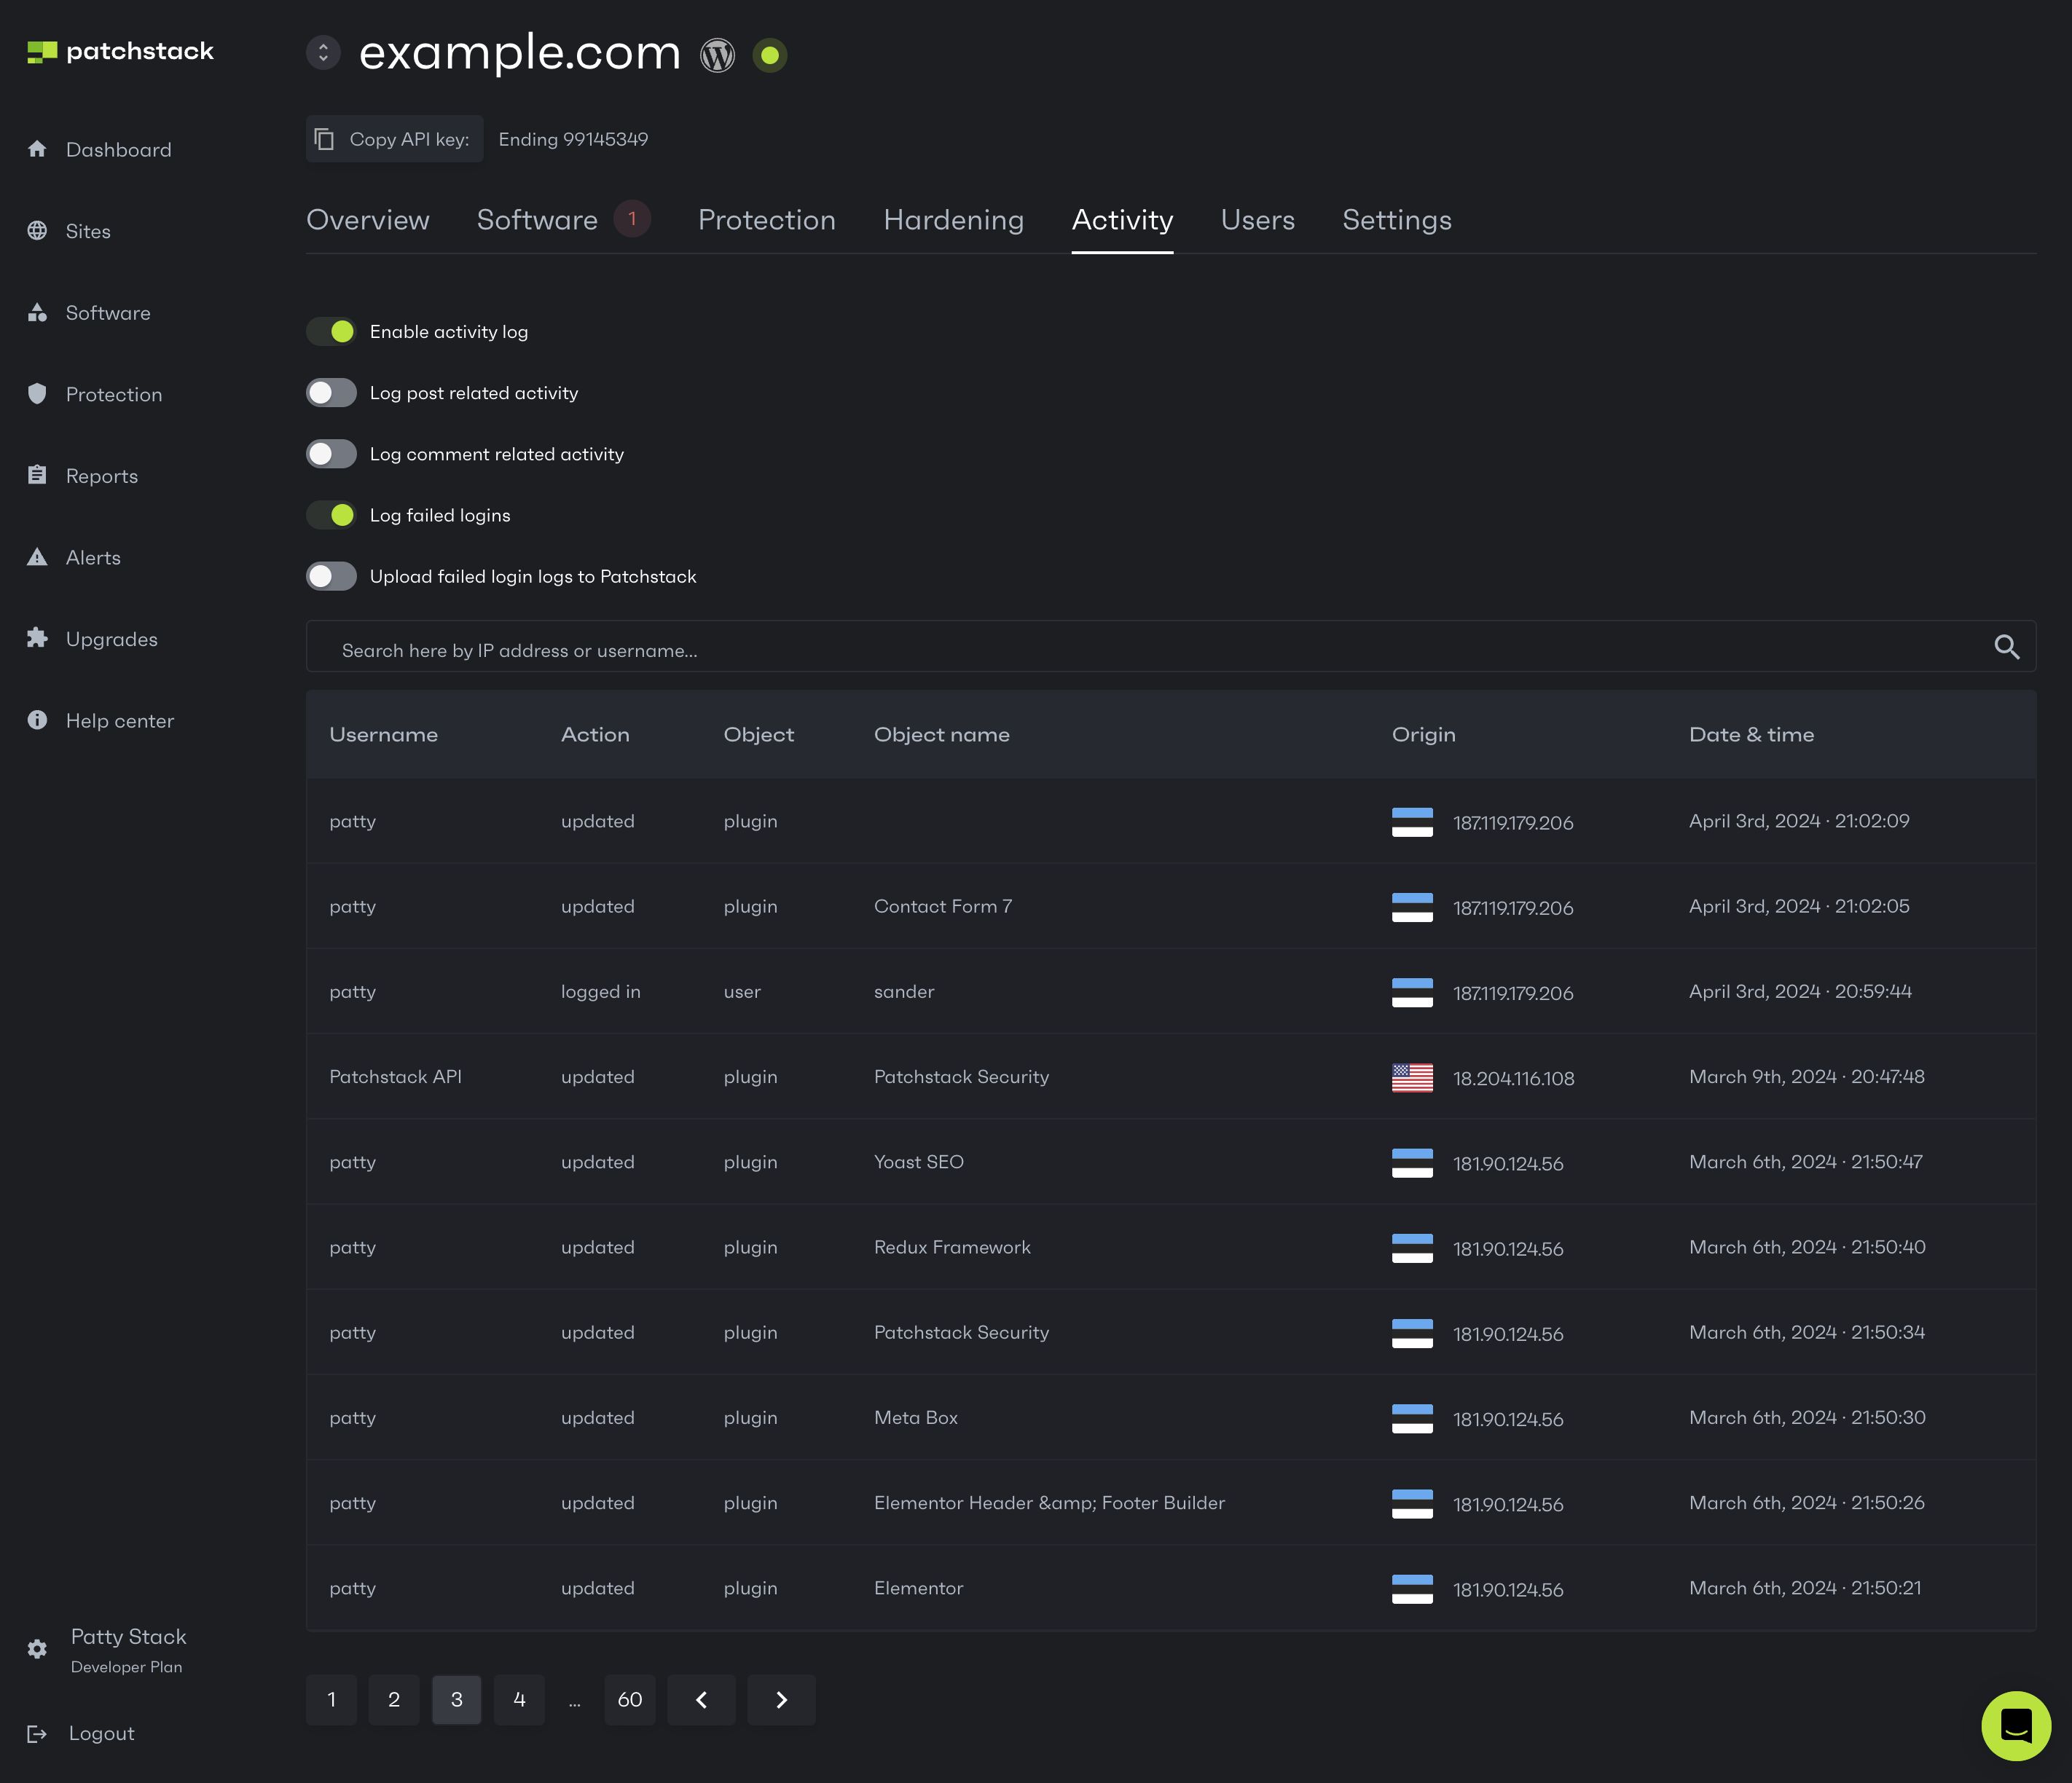
## Anything else?
[Section titled “Anything else?”](#anything-else)
### Need more help
[Section titled “Need more help”](#need-more-help)
Explore around in this [Help Center](/) or contact our team live via [support chat](#).
### Need more sites
[Section titled “Need more sites”](#need-more-sites)
Explore our [Developer plan](https://patchstack.com/pricing) and the [Volume upgrade add-on](/patchstack-app/upgrades/volume-upgrade/). If you need any help, let us know via the support chat!
### Need more seats
[Section titled “Need more seats”](#need-more-seats)
Explore the [Seats](/patchstack-app/upgrades/additional-seat/) upgrade.
# Firewall engine WordPress mu-plugins
In order to block more exploitation attempts of certain vulnerabilities, we can let the firewall engine run as a mu-plugin before it’s run inside of a plugin itself.
In the mu-plugin we can run all firewall rules that do not have a privilege check in the firewall rule (using the current\_user\_cannot matching type). The privilege related firewall rules cannot run in mu-plugin because WordPress core itself has not initialize the session yet at this point. Only in the plugin itself the rules which do have a privilege related firewall rule will run those rules, but not the others which already ran in the mu-plugin.
In order to do this, you can create a file in the mu-plugin folder that contains code similar to below. The example below uses the test extension and fictive data, settings and directory paths.
```php
10,
'autoblockMinutes' => 30,
'autoblockTime' => 60,
'mustUsePluginCall' => true
]
);
// Launch the firewall.
$firewall->launch();
// Important to define as this will let the next firewall run only run privilege related rules.
define( 'PS_FW_MU_RAN', true );
```
Now that it is running as a mu-plugin, you can use similar code to make it run in your own plugin’s file, or init hook. It is important that the *mustUsePluginCall* value is left out or set to false when you make this call from your own plugin or any other WordPress hook.
If for whatever reason the firewall does not run as mu-plugin or the *PS\_FW\_MU\_RAN* constant is not set, all rules will run by default.
# Firewall Rules API
The firewall rules API is used by our partners to pull all the firewall rules that are available to be applied to your own integration of our firewall engine.
It is important that you never send all firewall rules to all sites. Only the sites which actually need the firewall rules need them applied. Otherwise, this comes at the cost of performance and potential false positives.
It is recommended to first fetch all rules and then poll the /latest API endpoint every few hours for updates.
### Request
[Section titled “Request”](#request)
The request should be sent along with the PSKey HTTP header. The PSKey header is the same one used for the vulnerability database API.
To fetch all rules, use the API endpoint below.
```bash
curl --location 'api.patchstack.com/firewall/rules' --header 'PSKey: '
```
```php
''
];
$request = new Request('GET', 'api.patchstack.com/firewall/rules', $headers);
$res = $client->sendAsync($request)->wait();
echo $res->getBody();
```
For pagination, you can send a request to a special paginated API endpoint.
```bash
curl --location 'api.patchstack.com/firewall/rules/paginated?page=1' --header 'PSKey: '
```
```php
''
];
$request = new Request('GET', 'api.patchstack.com/firewall/rules/paginated?page=1', $headers);
$res = $client->sendAsync($request)->wait();
echo $res->getBody();
```
If you only want to fetch the rules which were updated in the past 24 hours, you can use the API endpoint below.
```bash
curl --location 'api.patchstack.com/firewall/rules/latest' --header 'PSKey: '
```
```php
''
];
$request = new Request('GET', 'api.patchstack.com/firewall/latest', $headers);
$res = $client->sendAsync($request)->wait();
echo $res->getBody();
```
### Response
[Section titled “Response”](#response)
An example response of 1 entry of each data array is shown below. The JSON response will hold 2 arrays:
* rules
* This array holds all published virtual patches that are bound to a vulnerability entry.
* rules\_unpublished
* This array holds all published virtual patches that are bound to a report and have not been published to a vulnerability entry yet.
* It is important to note that this array will contain less information in each entry than the rules array. Make sure your integration can handle this accordingly.
The difference between the 2 is that rules\_unpublished will hold virtual patches for new or freshly reported vulnerabilities to us which we cannot deploy to a vulnerability entry yet.
```json
{
"rules": [
{
"vulnerability_id": 8098,
"title": "WordPress Tatsu plugin < 3.3.13 - Unauthenticated Remote Code Execution (RCE) vulnerability",
"created_at": "2023-02-02T14:48:42+00:00",
"updated_at": "2023-02-02T14:48:42+00:00",
"disclosed_at": "2022-03-28T00:00:00+00:00",
"url": "https://patchstack.com/database/tatsu/wordpress-tatsu-plugin-3-3-11-unauthenticated-remote-code-execution-rce-vulnerability",
"product_keys": [
"tatsu/tatsu.php"
],
"product_slug": "tatsu",
"product_name": "Tatsu",
"product_name_premium": null,
"product_type": "Plugin",
"vuln_type": "Remote Code Execution (RCE)",
"cvss_score": 8.1,
"is_exploited": true,
"affected_in": "< 3.3.13",
"fixed_in": "3.3.13",
"patched_in_ranges": [],
"vpatch": "[{\"match\": {\"type\": \"current_user_cannot\", \"value\": \"administrator\"}, \"inclusive\": true, \"parameter\": false}, {\"rules\": [{\"match\": {\"type\": \"equals\", \"value\": \"add_custom_font\"}, \"parameter\": \"get.action\"}, {\"match\": {\"type\": \"equals\", \"value\": \"add_custom_font\"}, \"parameter\": \"post.action\"}], \"inclusive\": true, \"parameter\": \"rules\"}]"
}
],
"rules_unpublished": [
{
"report_id": 1337,
"title": "WordPress Lala Theme Builder theme <= 3.20.1 - Authenticated Privilege Escalation vulnerability",
"created_at": "2023-08-03T14:35:17+00:00",
"updated_at": "2023-08-03T14:35:17+00:00",
"product_keys": [
"lala-theme"
],
"product_slug": "lala-theme",
"product_name": "Lala Theme Builder",
"product_name_premium": null,
"product_type": "Theme",
"vuln_type": "Privilege Escalation",
"cvss_score": "8.8",
"affected_in": "<= 3.20.1",
"fixed_in": "",
"vpatch": "[{\"match\": {\"type\": \"current_user_cannot\", \"value\": \"administrator\"}, \"inclusive\": true, \"parameter\": false}, {\"rules\": [{\"match\": {\"type\": \"equals\", \"value\": \"dismiss_tooltip\"}, \"parameter\": \"get.custom\"}, {\"match\": {\"type\": \"equals\", \"value\": \"dismiss_tooltip\"}, \"parameter\": \"post.custom\"}], \"inclusive\": true, \"parameter\": \"rules\"}]"
}
]
}
```
```json
{
"current_page": 1,
"data": {
"rules": [
{
"vulnerability_id": 8098,
"title": "WordPress Tatsu plugin < 3.3.13 - Unauthenticated Remote Code Execution (RCE) vulnerability",
"created_at": "2023-02-02T14:48:42+00:00",
"updated_at": "2023-02-02T14:48:42+00:00",
"disclosed_at": "2022-03-28T00:00:00+00:00",
"url": "https://patchstack.com/database/tatsu/wordpress-tatsu-plugin-3-3-11-unauthenticated-remote-code-execution-rce-vulnerability",
"product_keys": [
"tatsu/tatsu.php"
],
"product_slug": "tatsu",
"product_name": "Tatsu",
"product_name_premium": null,
"product_type": "Plugin",
"vuln_type": "Remote Code Execution (RCE)",
"cvss_score": 8.1,
"is_exploited": true,
"affected_in": "< 3.3.13",
"fixed_in": "3.3.13",
"patched_in_ranges": [],
"vpatch": "[{\"match\": {\"type\": \"current_user_cannot\", \"value\": \"administrator\"}, \"inclusive\": true, \"parameter\": false}, {\"rules\": [{\"match\": {\"type\": \"equals\", \"value\": \"add_custom_font\"}, \"parameter\": \"get.action\"}, {\"match\": {\"type\": \"equals\", \"value\": \"add_custom_font\"}, \"parameter\": \"post.action\"}], \"inclusive\": true, \"parameter\": \"rules\"}]"
}
],
"rules_unpublished": [
{
"report_id": 1337,
"title": "WordPress Lala Theme Builder theme <= 3.20.1 - Authenticated Privilege Escalation vulnerability",
"created_at": "2023-08-03T14:35:17+00:00",
"updated_at": "2023-08-03T14:35:17+00:00",
"product_keys": [
"lala-theme"
],
"product_slug": "lala-theme",
"product_name": "Lala Theme Builder",
"product_name_premium": null,
"product_type": "Theme",
"vuln_type": "Privilege Escalation",
"cvss_score": "8.8",
"affected_in": "<= 3.20.1",
"fixed_in": "",
"vpatch": "[{\"match\": {\"type\": \"current_user_cannot\", \"value\": \"administrator\"}, \"inclusive\": true, \"parameter\": false}, {\"rules\": [{\"match\": {\"type\": \"equals\", \"value\": \"dismiss_tooltip\"}, \"parameter\": \"get.custom\"}, {\"match\": {\"type\": \"equals\", \"value\": \"dismiss_tooltip\"}, \"parameter\": \"post.custom\"}], \"inclusive\": true, \"parameter\": \"rules\"}]"
}
]
},
"first_page_url": "http://api.patchstack.com/firewall/rules/paginated?page=1",
"from": 1,
"last_page": 3,
"last_page_url": "http://api.patchstack.com/firewall/rules/paginated?page=3",
"links": [
{
"url": null,
"label": "« Previous",
"active": false
},
{
"url": "http://api.patchstack.com/firewall/rules/paginated?page=1",
"label": "1",
"active": true
},
{
"url": "http://api.patchstack.com/firewall/rules/paginated?page=2",
"label": "2",
"active": false
},
{
"url": "http://api.patchstack.com/firewall/rules/paginated?page=3",
"label": "3",
"active": false
},
{
"url": "http://api.patchstack.com/firewall/rules/paginated?page=2",
"label": "Next »",
"active": false
}
],
"next_page_url": "http://api.patchstack.com/firewall/rules/paginated?page=2",
"path": "http://api.patchstack.com/firewall/rules/paginated",
"per_page": 250,
"prev_page_url": null,
"to": 2,
"total": 730
}
```
* **vulnerability\_id → integer**
* Holds the unique numeric identifier of the vulnerability
* **Only** present in the *rules* array output
* **report\_id→ integer**
* Holds the unique numeric identifier of the report.
* **Only** present in the *rules\_unpublished* array output
* **title → string**
* The title of the vulnerability, including the product name, version, and vulnerability type
* **disclosed\_at → datetime → ISO 8601 format**
* Date of when the vulnerability was publicly disclosed
* **Only** present in the *rules* array output
* **created\_at→ datetime → ISO 8601 format**
* Date of when the report or vulnerability has had the firewall rule attached
* **updated\_at → datetime → ISO 8601 format**
* Date of when the report or vulnerability has had the firewall rule updated
* **url→ string**
* The direct URL of the vulnerability hosted at the Patchstack database frontend.
* **Only** present in the *rules* array output.
* **product\_keys → array**
* An array of product keys of the plugin or theme. In WordPress, plugins have their own folder name along with a primary plugin file. The format is /\. For example, for WooCommerce this would be woocommerce/woocommerce.php. This allows you to do more precise matching in order to determine to which sites to send the rules to. Note that if you send rules based on this, it’s possible that sites with a renamed plugin folder may not receive the rule.
* Plugins hold the format: slug/main\_file.php
* Example: woocommerce/woocommerce.php
* Themes hold the format: slug
* Example: twentytwentytwo
* WordPress core holds the literal format: wordpress
* Example: wordpress
* **product\_slug → string**
* The slug of the product
* The slug will be in lowercase, so make sure to convert your own slugs to lowercase before doing any comparison to this property
* **product\_name → string**
* The title / name of the product
* **product\_name\_premium → string → nullable**
* The title / name of the product
* This is used in rare scenarios where a developer of a plugin has 2 versions of their plugin but with the same slug but different product names.
* **product\_type → string**
* The type of the product. Can be Plugin, Theme or WordPress
* **vuln\_type → string**
* The vulnerability type, some examples are SQL Injection and Cross Site Scripting
* **cvss\_score → decimal → nullable**
* The CVSS score of the vulnerability, between 1 and 10. Can be null, the older vulnerabilities in the database have not been classified yet.
* **is\_exploited→ boolean**
* Whether or not the vulnerability is known to be exploited by Patchstack
* **Only** present in the *rules* array output
* **affected\_in → string**
* The versions which are affected by this vulnerability.
* Formats:
* <= x.x.x (affecting versions up to and including)
* < x.x.x (affecting versions up to)
* x.x.x-x.x.x (affecting a specific range of versions, inclusive)
* x.x.x,x.x.x (affecting specific versions)
* x.x.x (affecting one version)
* WordPress does not force plugin developers to stick to a certain versioning format. There are versions out there in an unusual format which is out of our control. Some plugins use a version in the form of a date such as 20220202, some use letters such as 2.0.2a, some just keep adding a number to the version e.g. 4.0000002. However, for the most part it’s in the usual format of x.x.x or x.x or x.x.xx
* **fixed\_in → string → can be empty**
* The oldest version which has the vulnerability fixed
* This can be empty, which implies that we have not recorded a fixed version for this vulnerability yet
* **patched\_in\_ranges → array of strings → can be an empty array**
* In case the WordPress core, plugin or theme have patched sub-versions, this will hold an array of versions in the format of:
* from\_version → string
* Starting version, inclusive
* to\_version → string
* Ending version, inclusive
* fixed\_in → string
* The version which has the patch applied
* You see this often in WordPress core vulnerabilities as they still support older versions such as 5.1, 5.2, 5.3, etc. Bigger plugins such as WooCommerce and Ninja Forms also do this.
* **Only** present in the *rules* array output
* **vpatch → string → JSON encoded**
* The firewall rule that needs to be plugged into the firewall engine. This is JSON encoded (as it’s a JSON string inside of a JSON string).
### Usage in firewall engine
[Section titled “Usage in firewall engine”](#usage-in-firewall-engine)
The firewall engine expects an array of firewall rules to be passed to the second argument of the constructor. This array should be composed of data that is returned from the firewall rules API. An example is shown below.
```json
[
{
"id":1,
"title":"Block test parameter being present in the URL",
"rules":[{"parameter":"get.test","match":{"type":"isset"}}],
"cat":"TEST",
"type":"BLOCK",
"type_params":null
}
]
```
In order to construct this array, the following parameters can be filled from the firewall rules API result set.
* **id → integer**
* Holds the unique numeric identifier of the firewall rule. Can be set to your own identifier or the vulnerability\_id attribute.
* **title → string**
* Holds the title of the firewall rule. Does not need to be passed and is only used for displaying purposes.
* **rules → JSON**
* The vpatch attribute from the firewall rules API.
* **cat → string**
* The category type of the vulnerability. Can be set to vuln\_type attribute. Does not need to be passed and is only used for displaying purposes.
* **type → string**
* The action to perform upon a match. This should always be BLOCK for the result set from the firewall rules API.
* **type\_params → string**
* This is only used when the type attribute is set to REDIRECT. Does not need to be passed.
Using the example result from the firewall rules API above, we can therefore construct it as follows:
```json
[
{
"id":8098,
"title":"WordPress Tatsu plugin < 3.3.13 - Unauthenticated Remote Code Execution (RCE) vulnerability",
"rules":[{"match": {"type": "current_user_cannot", "value": "administrator"}, "inclusive": true, "parameter": false}, {"rules": [{"match": {"type": "equals", "value": "add_custom_font"}, "parameter": "get.action"}, {"match": {"type": "equals", "value": "add_custom_font"}, "parameter": "post.action"}], "inclusive": true, "parameter": "rules"}],
"type":"BLOCK"
}
]
```
# Hosting API
# Hosting API Documentation
[Section titled “Hosting API Documentation”](#hosting-api-documentation)
## Introduction
[Section titled “Introduction”](#introduction)
The information below describes the API URL’s, payloads and authentication necessary to communicate with our API. A special authentication key will have to be supplied in each request (that will be created specifically for the hosting provider) against an endpoint.
All actions (such as adding sites, users, etc.) will be logged and flagged under the name of the hosting provider so only they can access and alter the data that they created.
Each request will respond with JSON containing certain information about the action that was executed.
## Authorization
[Section titled “Authorization”](#authorization)
A HTTP header “HostToken” will have to be supplied in each request against our API. This API key is given upon request.
## Endpoints
[Section titled “Endpoints”](#endpoints)
HTTP endpoint prefix: api.patchstack.com/hosting/
### User
[Section titled “User”](#user)
#### POST /user/add
[Section titled “POST /user/add”](#post-useradd)
Add a new user.
**Request Data**\
name → required|string\
company → optional|string\
email → required|email\
password → required|string|min:6\
password\_confirmation → required|string → must match password input field\
newsletter → required|boolean → 0 or 1\
phone → optional|string
**Response Data**\
**HTTP 401, 403, 404, 422**\
error → Message indicating that bad or missing data was supplied or that the user cannot be added.\
**HTTP 200**\
id → UserID of the user.
#### POST /user/search
[Section titled “POST /user/search”](#post-usersearch)
Find a user by email address.
**Request Data**\
email → required|email
**Response Data**\
**HTTP 401, 403, 422**\
error → Message indicating that bad or missing data was supplied.\
**HTTP 404**\
error → Message indicating that the user could not be found.\
**HTTP 200**\
JSON response example can be found below.
```json
{
"id": 1,
"name": "Dave",
"email": "support@patchstack.com",
"created_at": "2017-10-19T00:00:00.000000Z",
"blocked_attacks": 367,
"expires_at": "2025-01-01 11:11:11",
"class": "premium", // Can be free or premium,
"renew_freq": "monthly" // Can be monthly or annually
}
```
#### POST /user/{userid}/edit
[Section titled “POST /user/{userid}/edit”](#post-useruseridedit)
Modify an existing user.
**Request Data**\
name → optional|string\
company → optional|string\
email → optional|email\
phone → optional|string\
newsletter → optional|boolean → 0 or 1
**Response Data**\
**HTTP 401, 403, 404, 422**\
error → Message indicating that bad or missing data was supplied or that the user cannot be added.\
**HTTP 200**\
success → Message indicating that it updated the user.
#### POST /user{userid}/delete
[Section titled “POST /user{userid}/delete”](#post-useruseriddelete)
Delete an existing user.
**Request Data**\
None
**Response Data**\
**HTTP 401, 403, 404**\
error → Message indicating that bad or missing data was supplied, the user cannot be deleted or the user was not found.\
**HTTP 200**\
success → Message indicating that the user was deleted.
#### POST /user/{userid}/sso
[Section titled “POST /user/{userid}/sso”](#post-useruseridsso)
Returns a URL that can be used by the user to login into the portal. Each user can only have 1 non-expired and unused token which will be valid for 24 hours.
**Request Data**\
None
**Response Data**\
**HTTP 403, 404**\
error → Message indicating that the user cannot be accessed or the user was not found.\
**HTTP 200**\
url → The URL that can be used to login as the user.\
expires\_at → The timestamp in UTC time in the format Y-m-d H:i:s when the token is no longer valid.
#### GET /user/{userid}/view
[Section titled “GET /user/{userid}/view”](#get-useruseridview)
Get information about a user.
**Request Data**\
None
**Response Data**\
**HTTP 401, 404, 404**\
**HTTP 200**\
JSON response example can be found below.
```json
{
"user": {
"id": 1,
"name": "Dave",
"email": "support@patchstack.com",
"created_at": "2017-10-19T00:00:00.000000Z",
"blocked_attacks": 367,
"expires_at": "2025-01-01 11:11:11",
"class": "premium", // Can be free or premium,
"renew_freq": "monthly", // Can be monthly or annually,
"addon_mr": "false", // Malware removal guarantee addon
"addon_wl": "false" // Whitelabel reporting addon
},
"sites": [
{
"id": 315,
"url": "http://wptest.com/singlesite/"
},
{
"id": 16106,
"url": "http://test1.com"
}
]
}
```
### Site
[Section titled “Site”](#site)
#### POST /site/add
[Section titled “POST /site/add”](#post-siteadd)
Add a new site to a specific user.
**Request Data**\
url → required|url → In the form of \
userid → required|integer → The userid of the user to which the URL should be bound to.\
strict → optional|boolean → true|false → Whether or not we should check if the site has already been added globally to Patchstack.
**Response Data**\
**HTTP 403, 404, 422**\
error → Message indicating that bad or missing data was supplied or that the site could not be added.\
**HTTP 200**\
success → Message indicating that the site was added.\
siteid → The ID of the site.\
api → array containing *id* and *secret* for plugin/firewall API authentication
#### POST /site/{siteid}/edit
[Section titled “POST /site/{siteid}/edit”](#post-sitesiteidedit)
Modify an existing site.
**Request Data**\
url → required|url → In the form of
**Response Data**\
**HTTP 401, 403, 404, 422**\
error → Message indicating that bad or missing data was supplied, the site cannot be modified or the site could not be found.\
**HTTP 200**\
success → Message indicating that the site has been updated.
#### POST /site/{siteid}/delete
[Section titled “POST /site/{siteid}/delete”](#post-sitesiteiddelete)
Delete an existing site.
**Request Data**\
None
**Response Data**\
**HTTP 401, 403, 404**\
error → Message indicating that bad or missing data was supplied, the site cannot be deleted or the site could not be found.\
**HTTP 200**\
success → Message indicating that the site has been deleted.
#### GET /site/{siteid}/download
[Section titled “GET /site/{siteid}/download”](#get-sitesiteiddownload)
Download the plugin file that belongs to the site.
**Request Data**\
None
**Response Data**\
**HTTP 401, 403, 404, 422**\
error → Message indicating that bad or missing data was supplied, the plugin could not be downloaded or the site could not be found.\
**HTTP 200**\
Prompts the download of the plugin .zip file that needs to be installed on the site.\
This .zip file contains hardcoded API keys for that specific site, the same .zip file cannot be installed on other sites. However, once this specific plugin .zip file has been installed on a site, the Patchstack plugin can be updated as usual through WordPress.
#### GET /site/{siteid}/view
[Section titled “GET /site/{siteid}/view”](#get-sitesiteidview)
Get information about a site such as the number of attacks blocked in the past day and week.
**Request Data**
None
**Response Data**\
**HTTP 401, 404, 404**\
**HTTP 200**\
JSON response example can be found below.
```json
{
"id": 315,
"url": "https://my-site.com",
"created_at": "2019-01-01",
"user": {
"id": 1,
"name": "Dave",
"email": "dave.jong@patchstack.com",
"created_at": "2017-10-19T00:00:00.000000Z",
"site_count": 25,
"blocked_attacks": 8482
},
"attacks": [
{
"num": 1,
"dateday": "2023-06-30"
},
{
"num": 0,
"dateday": "2023-07-01"
},
{
"num": 0,
"dateday": "2023-07-02"
},
{
"num": 0,
"dateday": "2023-07-03"
},
{
"num": 30,
"dateday": "2023-07-04"
},
{
"num": 0,
"dateday": "2023-07-05"
},
{
"num": 0,
"dateday": "2023-07-06"
},
{
"num": 0,
"dateday": "2023-07-07"
},
{
"num": 0,
"dateday": "2023-07-08"
},
{
"num": 0,
"dateday": "2023-07-09"
},
{
"num": 5,
"dateday": "2023-07-10"
},
{
"num": 0,
"dateday": "2023-07-11"
},
{
"num": 0,
"dateday": "2023-07-12"
},
{
"num": 0,
"dateday": "2023-07-13"
},
{
"num": 0,
"dateday": "2023-07-14"
},
{
"num": 0,
"dateday": "2023-07-15"
},
{
"num": 0,
"dateday": "2023-07-16"
},
{
"num": 0,
"dateday": "2023-07-17"
},
{
"num": 0,
"dateday": "2023-07-18"
},
{
"num": 0,
"dateday": "2023-07-19"
},
{
"num": 0,
"dateday": "2023-07-20"
},
{
"num": 0,
"dateday": "2023-07-21"
},
{
"num": 0,
"dateday": "2023-07-22"
},
{
"num": 0,
"dateday": "2023-07-23"
},
{
"num": 0,
"dateday": "2023-07-24"
},
{
"num": 0,
"dateday": "2023-07-25"
},
{
"num": 0,
"dateday": "2023-07-26"
},
{
"num": 0,
"dateday": "2023-07-27"
},
{
"num": 0,
"dateday": "2023-07-28"
},
{
"num": 0,
"dateday": "2023-07-29"
},
{
"num": 555,
"dateday": "2023-07-30"
},
{
"num": 0,
"dateday": "2023-07-31"
}
],
"api": {
"id": 315,
"secret": "D4ajwfPddOQ6VAhhPYCOR5sggkpe9byNsSCobxxP"
},
"software": [
{
"name": "PHP",
"type": "php",
"version": "7.4.3",
"version_new": null,
"slug": null,
"is_active": true,
"is_outdated": false,
"is_vulnerable": false
},
{
"name": "Akismet Anti-Spam",
"type": "plugin",
"version": "5.0",
"version_new": "5.0.1",
"slug": "akismet",
"is_active": false,
"is_outdated": true,
"is_vulnerable": false
},
{
"name": "Hello Dolly",
"type": "plugin",
"version": "1.7.2",
"version_new": null,
"slug": "hello.php",
"is_active": false,
"is_outdated": false,
"is_vulnerable": false
},
{
"name": "Patchstack Security",
"type": "plugin",
"version": "2.1.22",
"version_new": null,
"slug": "patchstack",
"is_active": true,
"is_outdated": false,
"is_vulnerable": false
},
{
"name": "Twenty Twenty",
"type": "theme",
"version": "2.0",
"version_new": null,
"slug": "twentytwenty",
"is_active": true,
"is_outdated": false,
"is_vulnerable": false
},
{
"name": "Twenty Twenty-One",
"type": "theme",
"version": "1.6",
"version_new": null,
"slug": "twentytwentyone",
"is_active": true,
"is_outdated": false,
"is_vulnerable": false
},
{
"name": "Twenty Twenty-Two",
"type": "theme",
"version": "1.2",
"version_new": null,
"slug": "twentytwentytwo",
"is_active": true,
"is_outdated": false,
"is_vulnerable": false
},
{
"name": "WordPress",
"type": "wordpress",
"version": "6.0.2",
"version_new": "6.0.3",
"slug": null,
"is_active": true,
"is_outdated": true,
"is_vulnerable": true
}
],
"has_vuln_plugin": 1,
"software_outdated": 2,
"software_vulnerable": 1
}
```
# Setting up 2FA for your Patchstack account
To set up the 2FA (two factor authentication) for Patchstack account, click on your name on Patchstack App (at the bottom left corner of the screen), or click here:
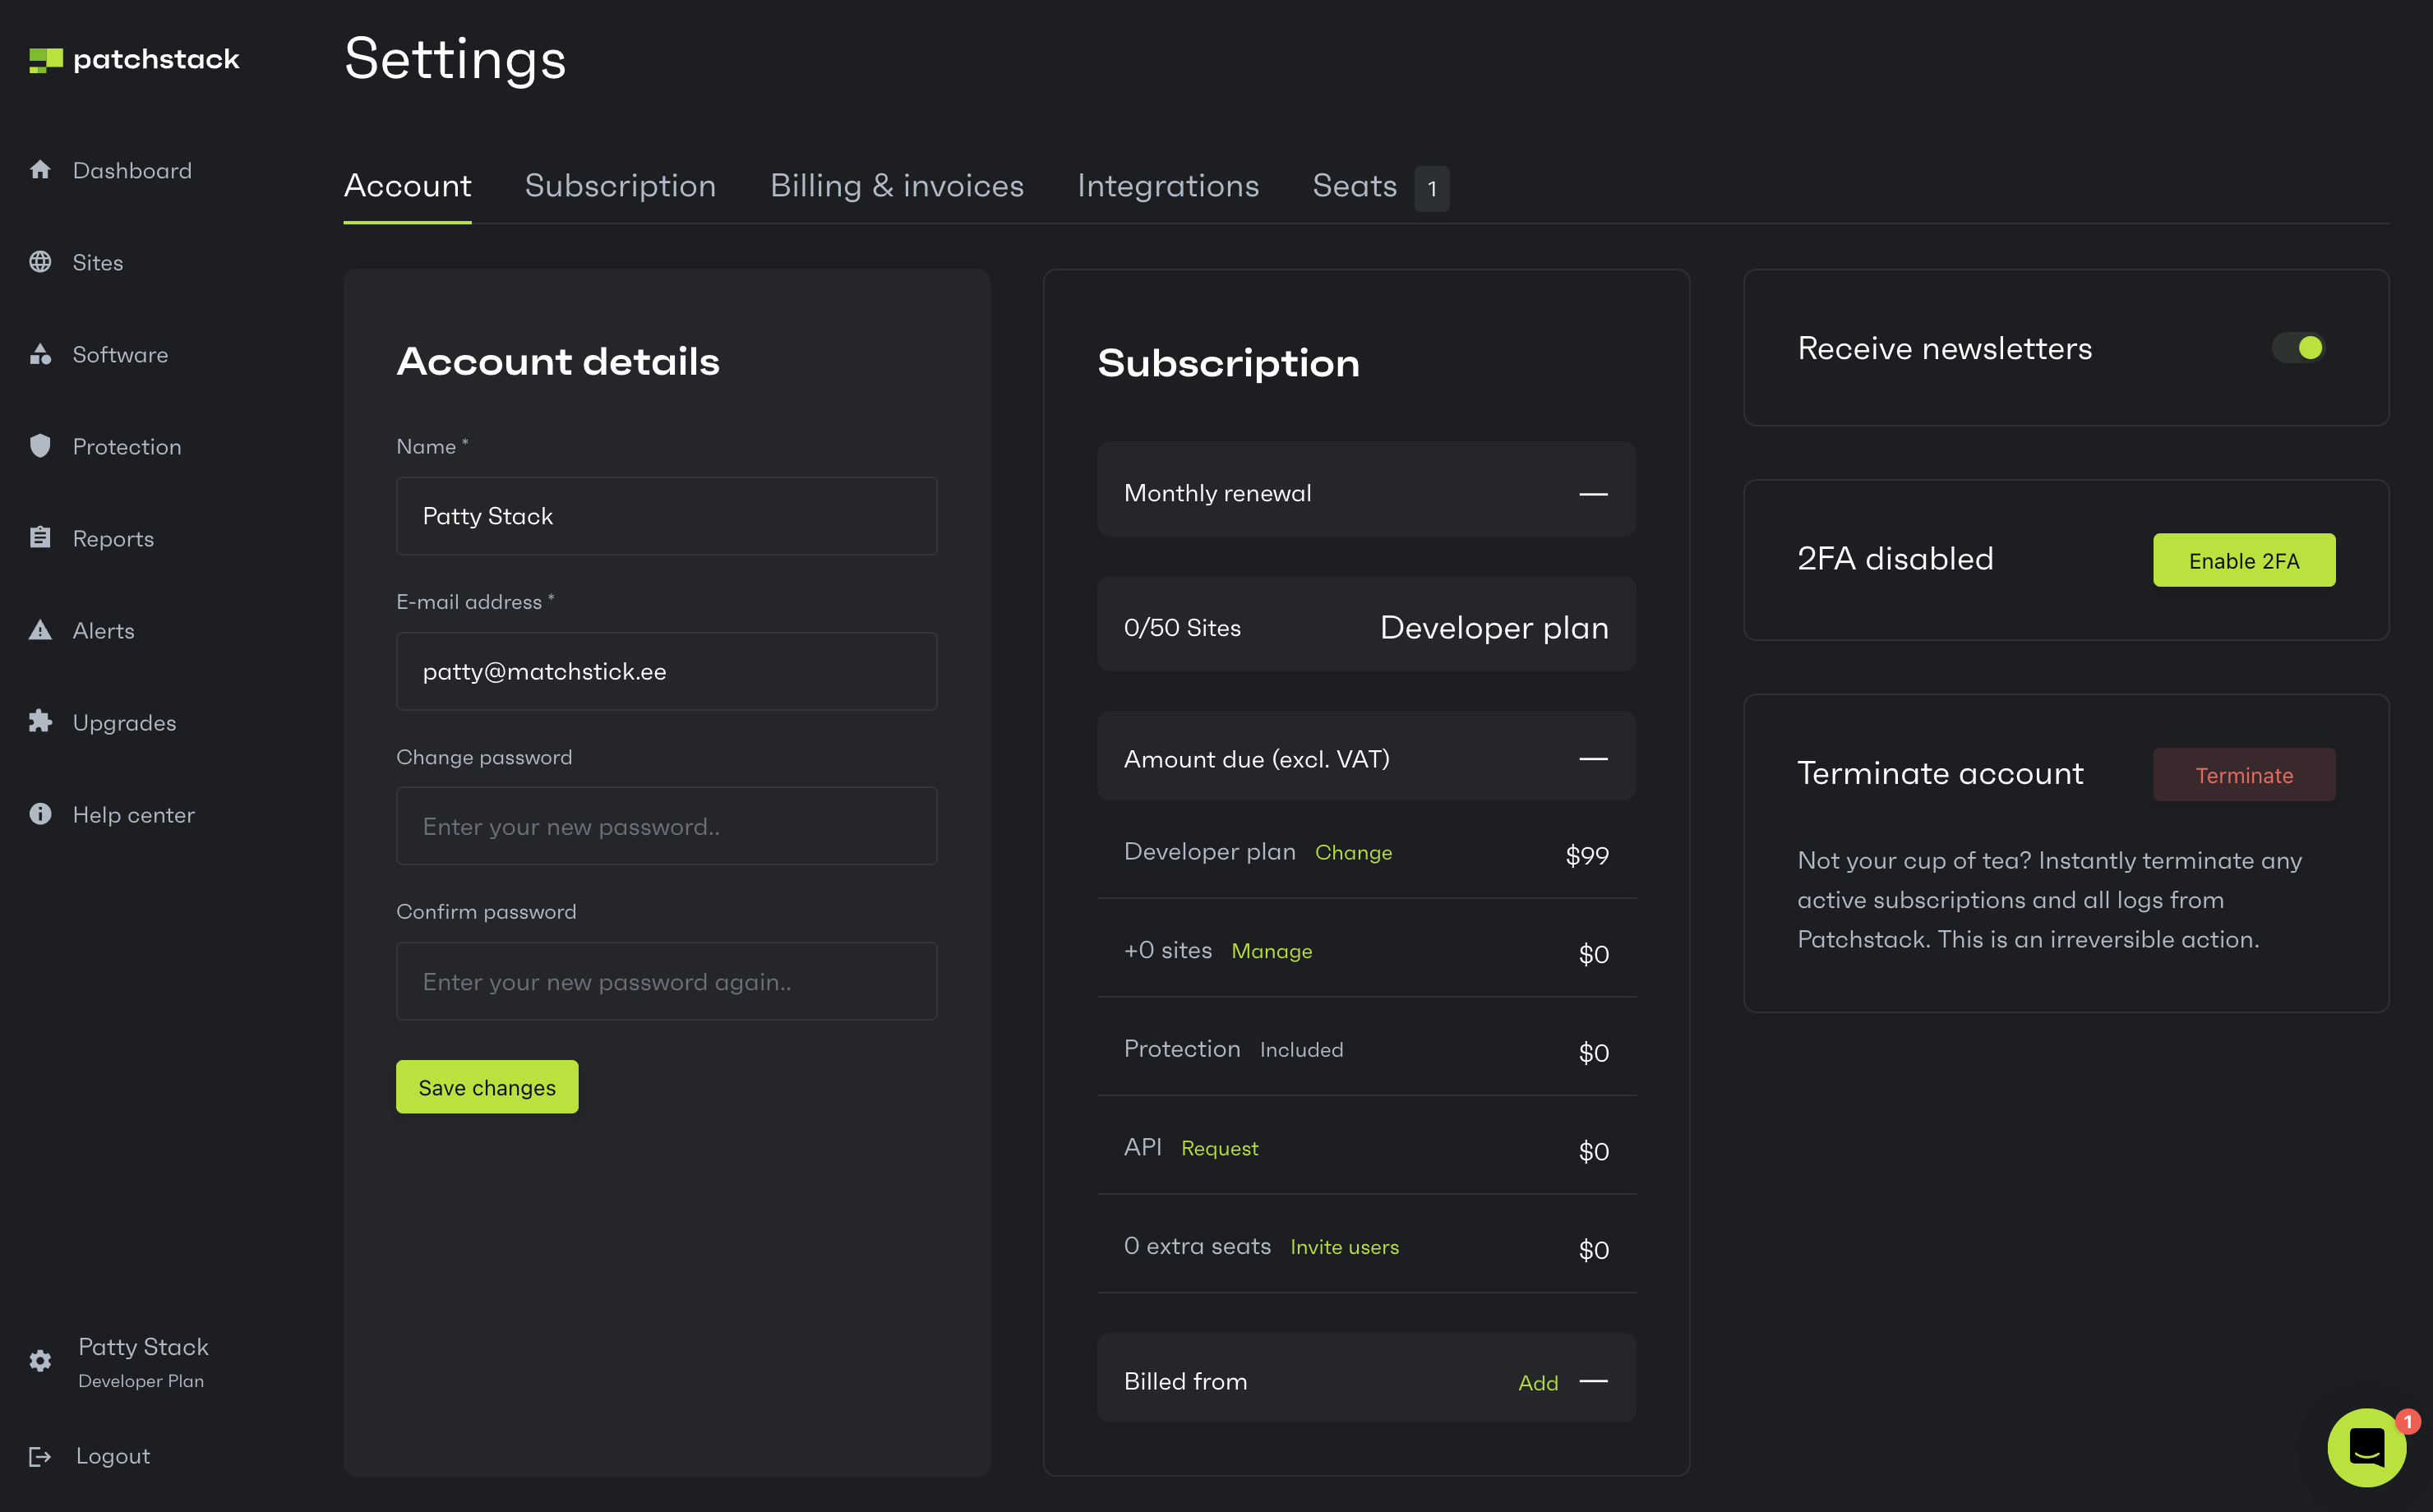
1. Click **Enable 2FA**.
2. You will be shown a popup with instructions to set up the 2FA.
3. For authentication, you can use authenticator apps like the Google Authenticator app.\
Get it from [App Store](https://apps.apple.com/us/app/google-authenticator/id388497605) or [Google Play](https://play.google.com/store/apps/details?id=com.google.android.apps.authenticator2\&hl=en\&gl=US).

4. You can scan the QR code or enter the given key manually into the mobile app.
5. Enter the key given by the mobile app to the “Enter 2FA Code” input and click **Enable 2FA**.
You have now successfully set up the two-factor authentication on your Patchstack account!
# Integrations
*The Slack integration is for the Developer and Business plan users only.*
To view integrations page, click on your name on Patchstack App (at the bottom left corner of the screen), then navigate to the **Integrations** page, or click here:
On the **Integrations** page you can integrate your Slack account with Patchstack.\
That way you can set up Patchstack alerts and send these to your own Slack channel.
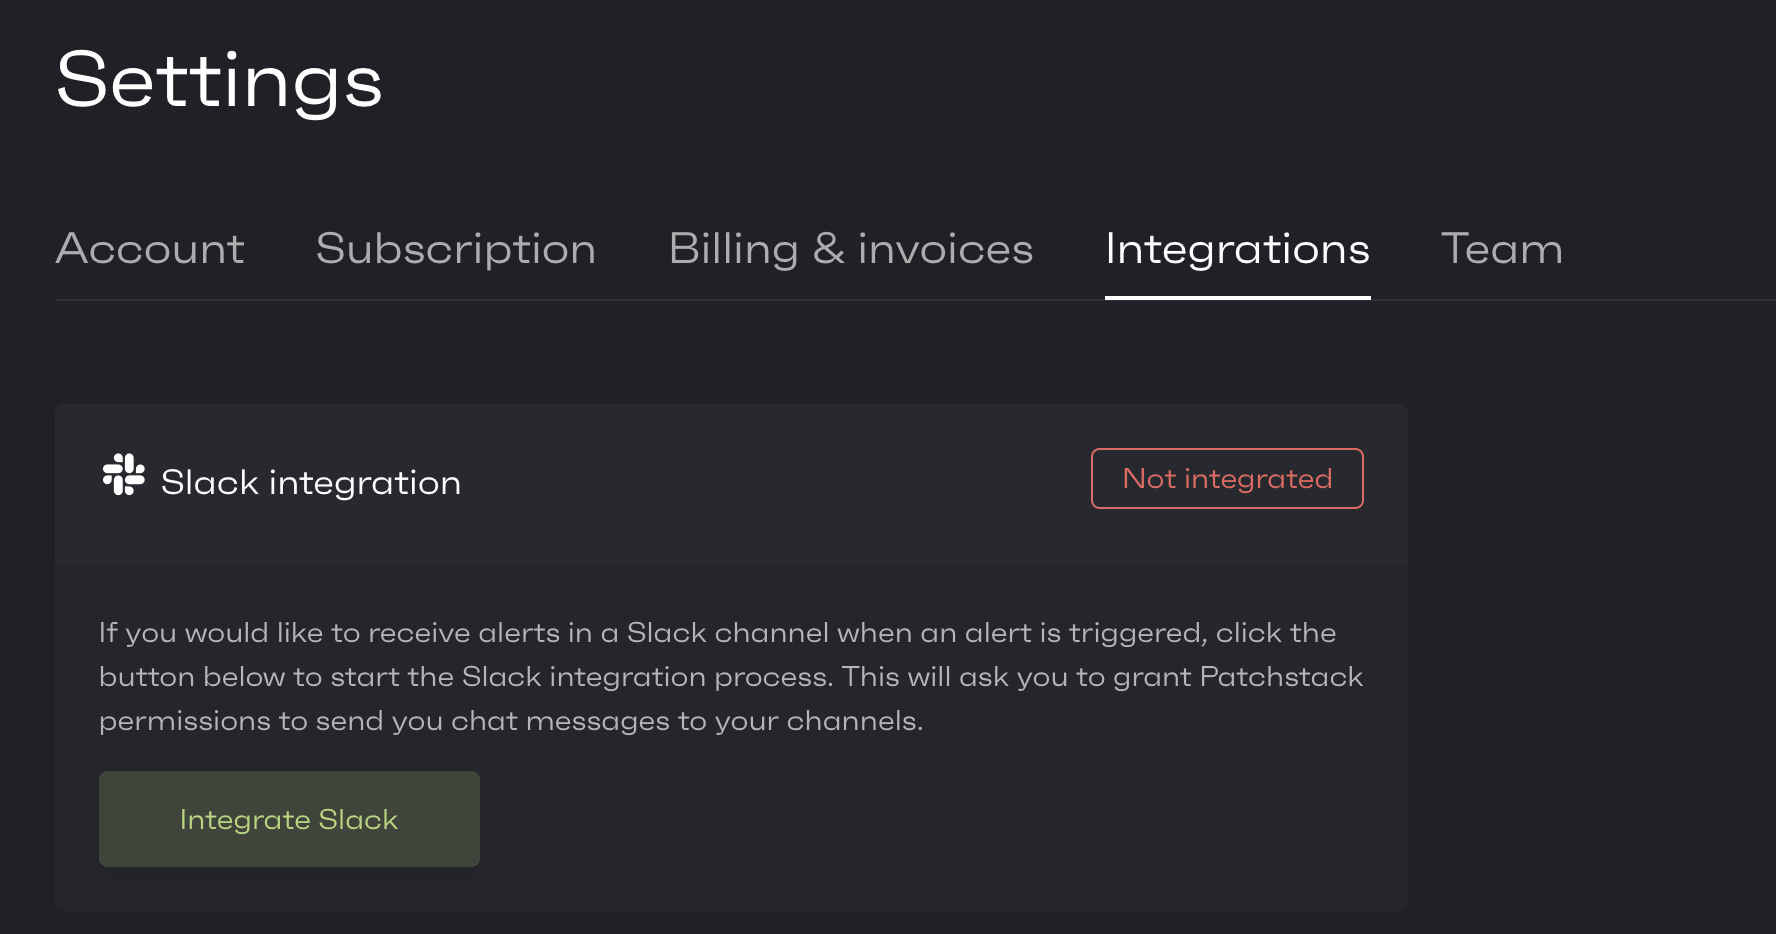
## Setting up the Slack integration
[Section titled “Setting up the Slack integration”](#setting-up-the-slack-integration)
To integrate Slack, click on **“Integrate Slack”**. You will be taken to Slack.

1. Check the settings and click **Allow**.
2. You will be taken back to the Patchstack App, with a success message.
3. After clicking **OK**, you’ll have to insert your channel name.
4. Insert your channel name ( e.g **#alerts** ).
5. Click on **Save & Send Test**.

You should now receive a message to your Slack channel.
To get real alerts to your Slack channel, you will need to create an alert trigger and set it to send alerts to Slack. Follow [this tutorial](/patchstack-app/alerts/creating-a-trigger/).
# Account settings
To view your account settings, click on your name on Patchstack App (at the bottom left corner of the screen), or click here:
On the **Account** page you can manage your profile data and access different settings related to your account.\
On the main screen, you can:
1. Change the name of your profile
2. Change the account email address
3. Change your password
4. Enable / disable the Patchstack newsletter
5. Set up 2 factor authentication for your user
6. Subscribe to upgrades for your account
7. Request to delete your account

# Subscription
To view your account subscription settings, click on your name on Patchstack App (at the bottom left corner of the screen), then navigate to the **Subscription** page, or click here:
On the **Subscription** page, you can switch between the pricing plans.\
You’ll find more information about the plans here: [](https://patchstack.com/pricing).
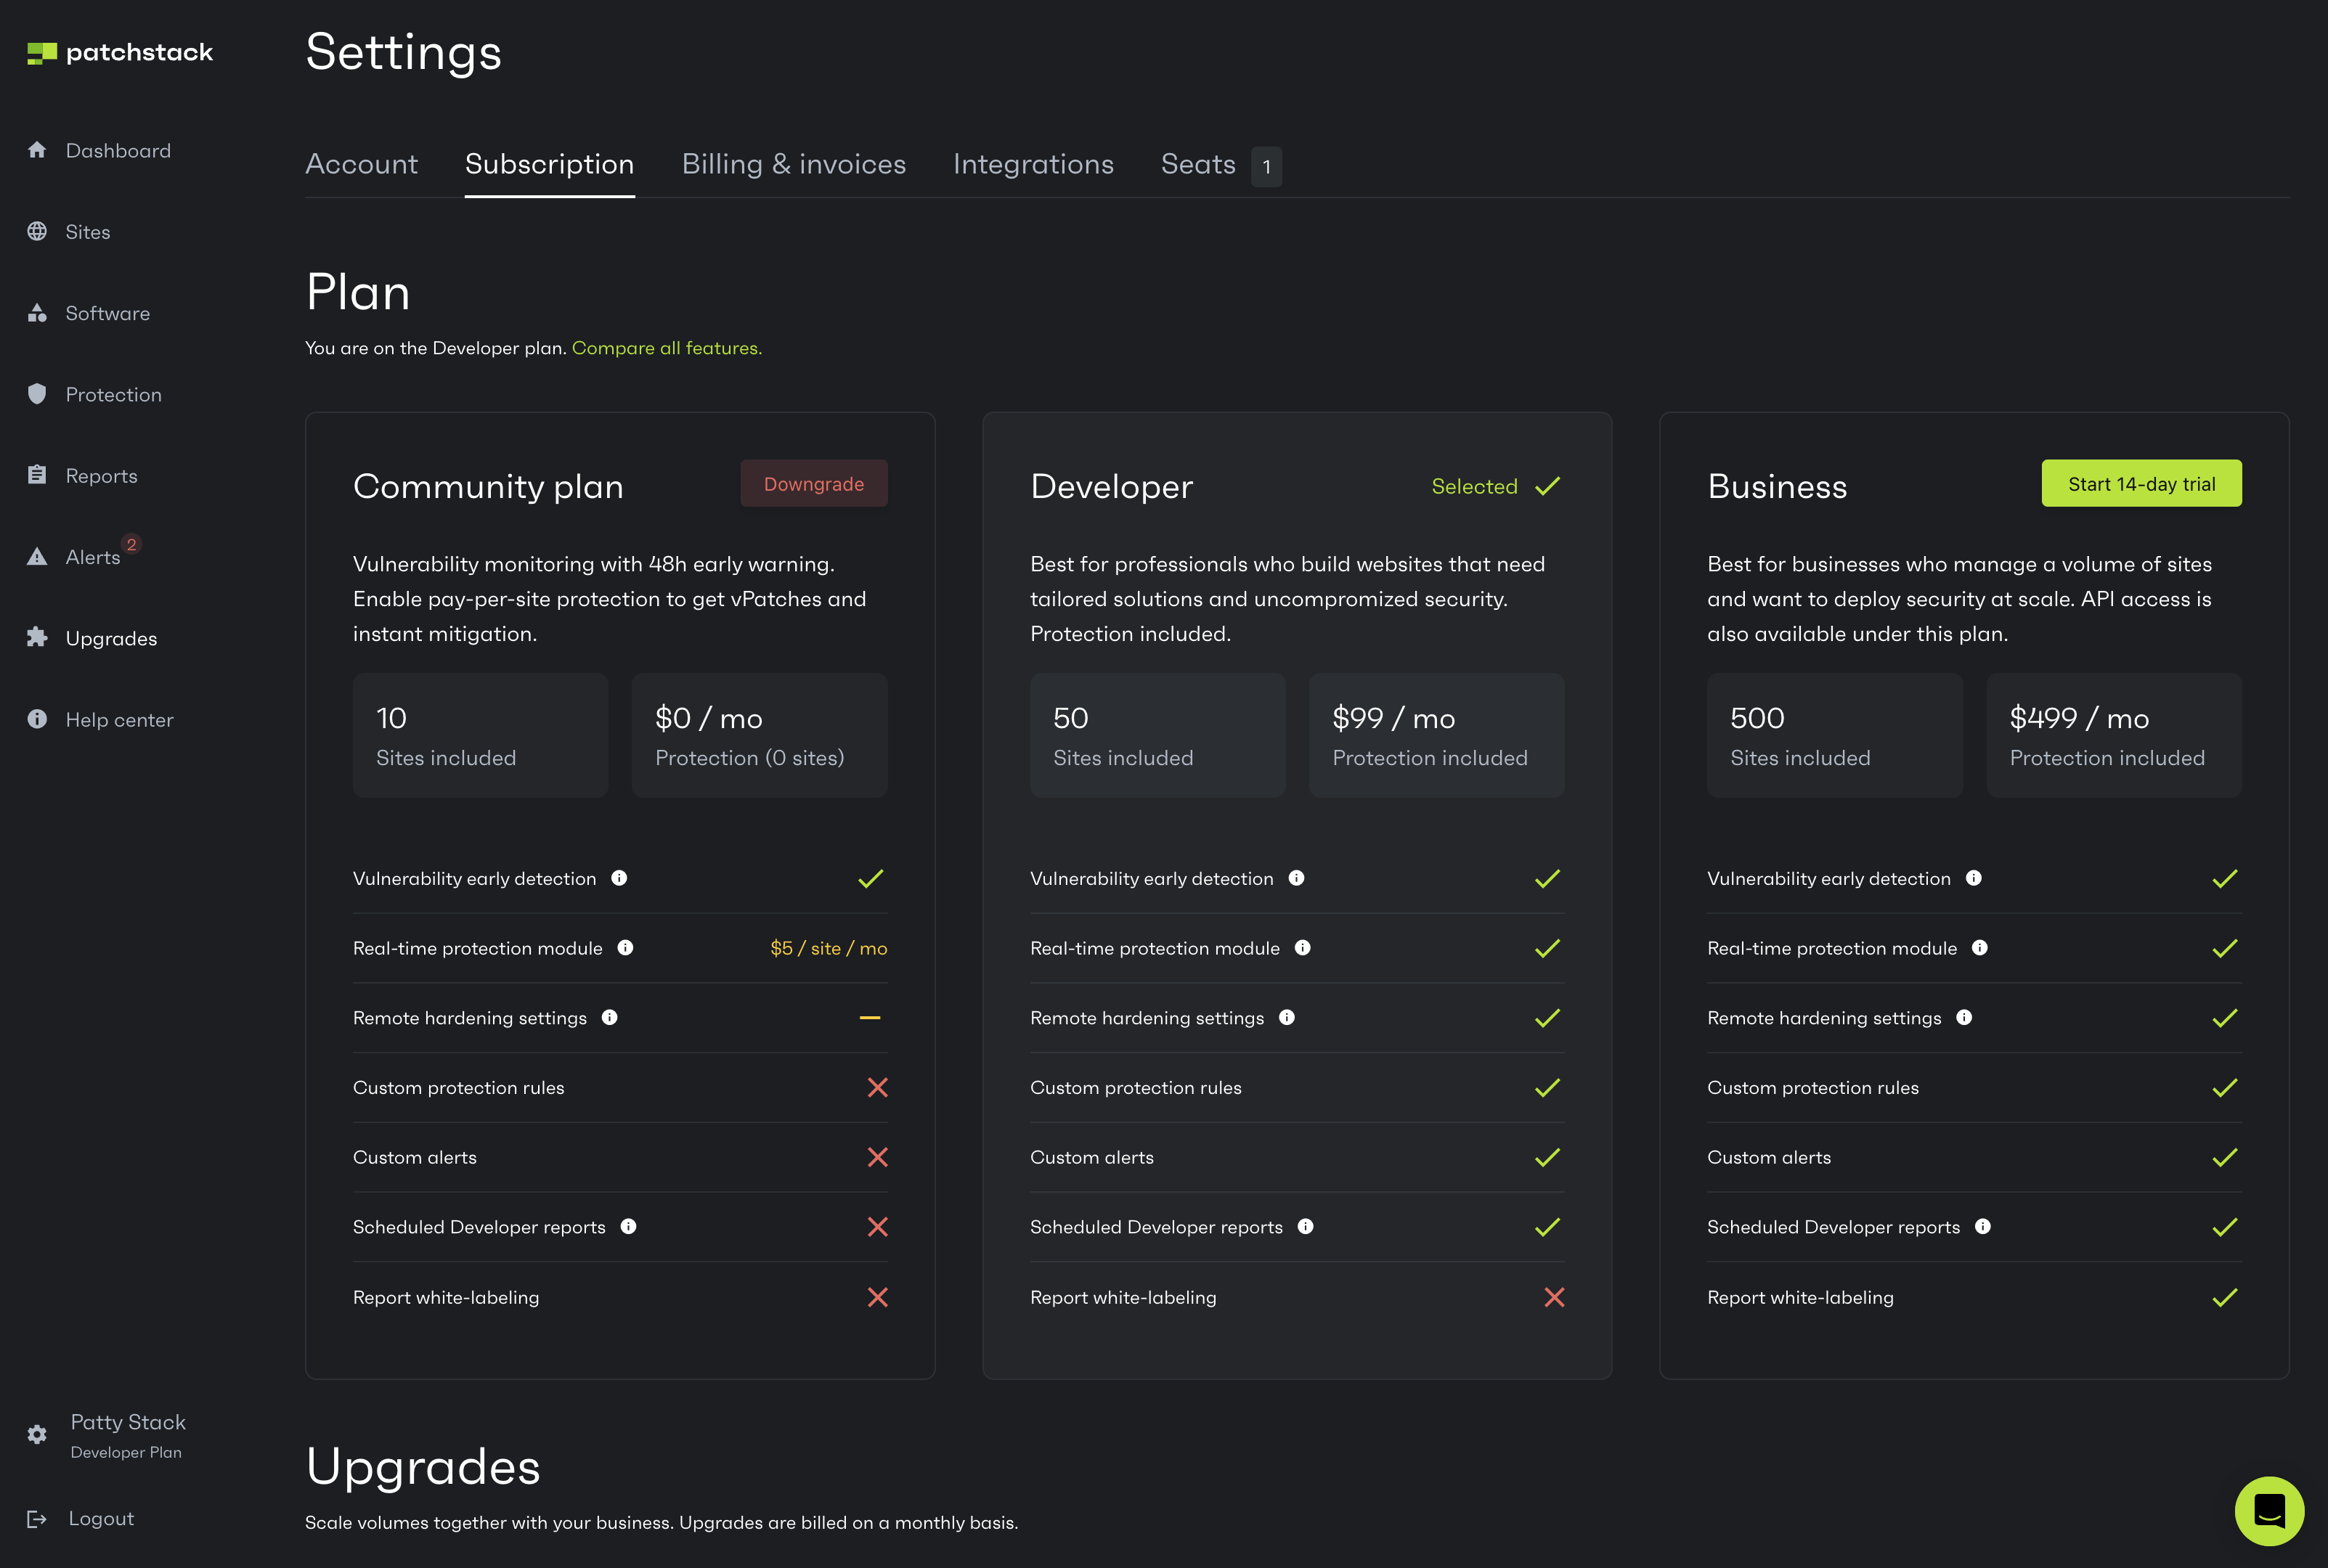
## Entering your billing information
[Section titled “Entering your billing information”](#entering-your-billing-information)
If you haven’t added the billing information, you will be asked to do it.\
To enter billing information, choose the plan, after which, you will be taken to the form where you can add your credit card information.
* You can add either Paypal or a credit card.
* Choose whether you want to have an annual or monthly pricing plan.
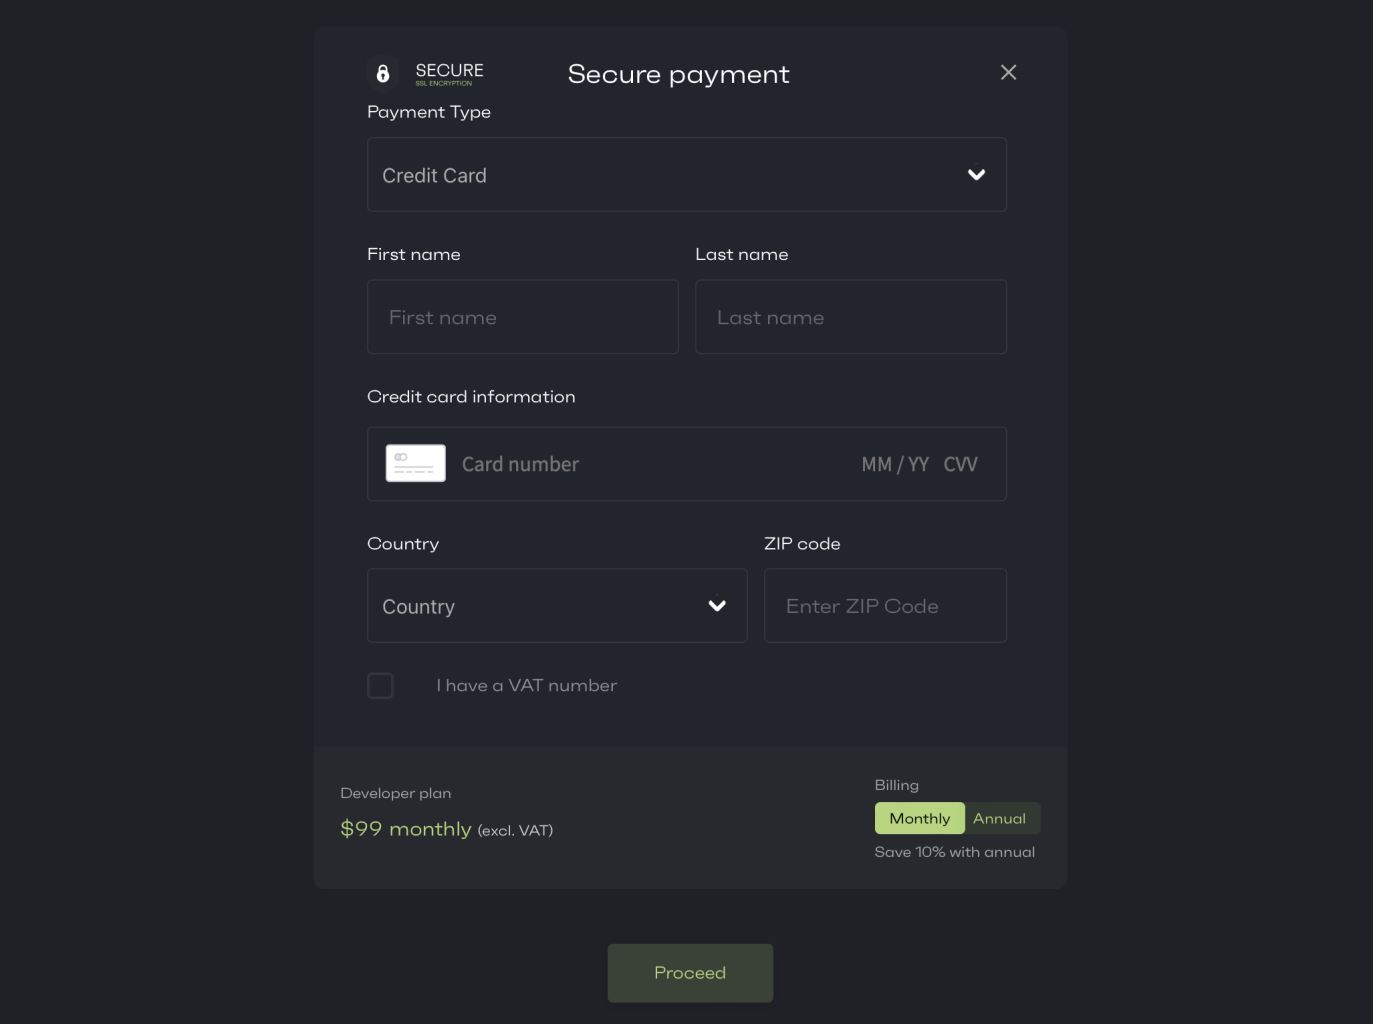
## Upgrading / downgrading your plan
[Section titled “Upgrading / downgrading your plan”](#upgrading--downgrading-your-plan)
If you have already subscribed to a Developer or a Business plan, you can manage your plans from the same page.\
Just change your pricing plan by selecting one first.
# Billing & invoices
To view your billing settings and past invoices, click on your name on Patchstack App (at the bottom left corner of the screen), then navigate to the **Billing & invoices** page, or click here:
On the **Billing & invoices** page you can see the information about your plan; when is the next billing date and download invoices.
By scrolling down, you see general data about your invoices and download these as PDF files.

## Updating the credit card information
[Section titled “Updating the credit card information”](#updating-the-credit-card-information)
To update your credit card information, or change your company address, click on the green **Update** button at the Credit card column.\
You will then see a popup for updating your credit card information as below.
To delete the credit card, click on the red **Delete** button at the top right corner.
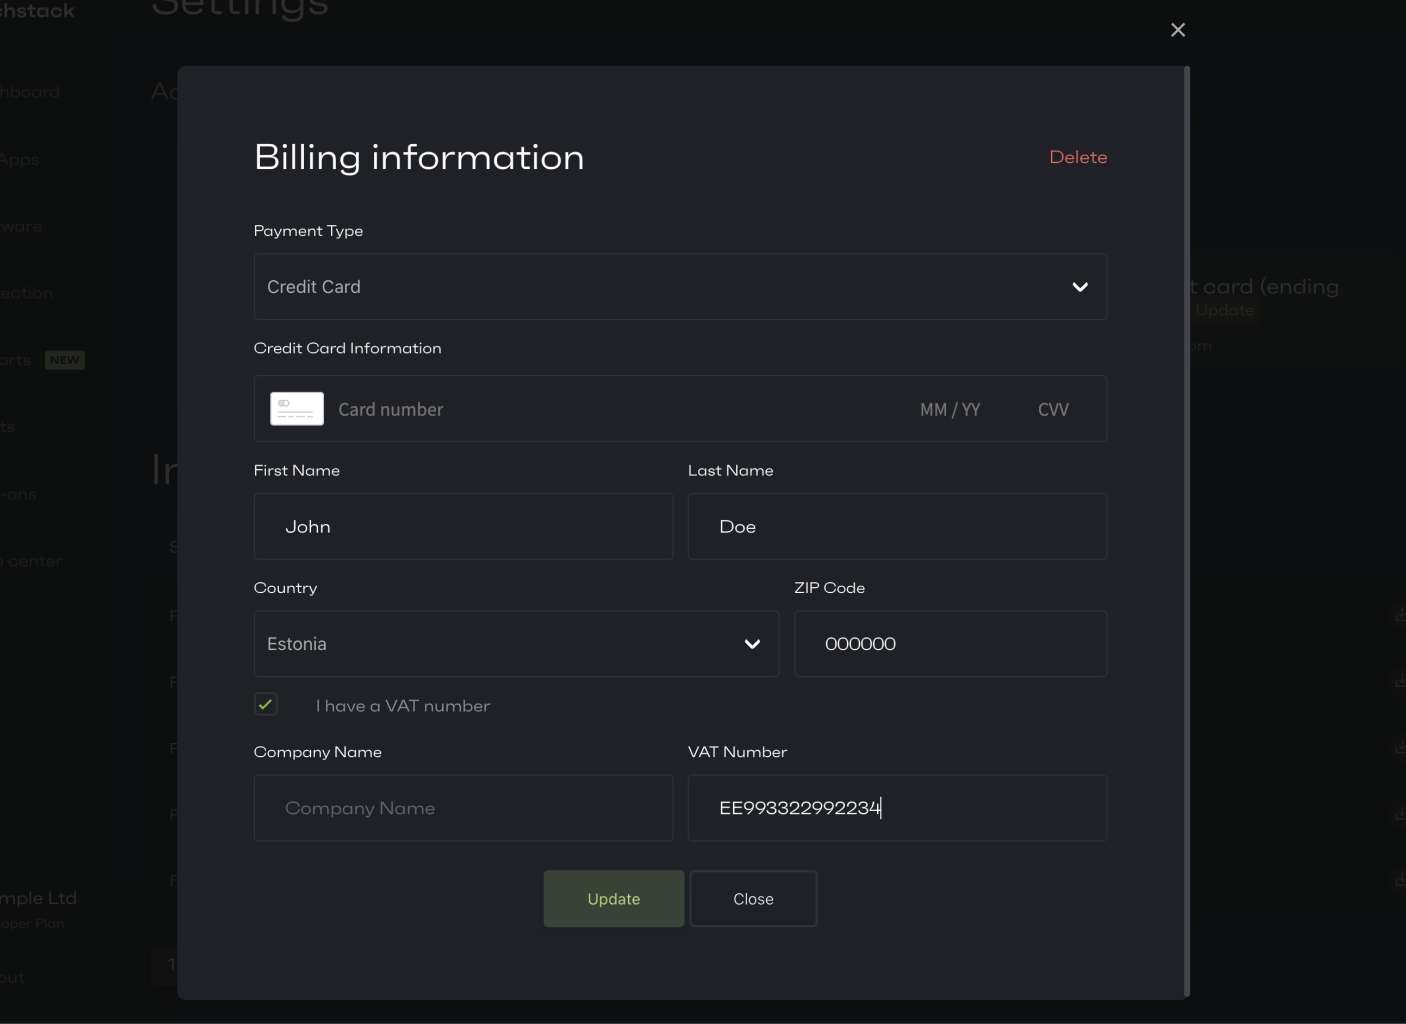
# Team
*Seats and team features are available on the Developer and Business plan users only.*
To manage your seats and team settings, click on your name on Patchstack App (at the bottom left corner of the screen), then navigate to the **Team** page, or click here:
On the **Team** page you can manage the seats. The seat management feature allows you to add sub-users to your account to which you can assign specific permissions and/or sites.\
When you add a new user, they will receive an email with a link to activate their account.
**Available roles**
1. Owner: Full control of all users and sites of all users, only 1 owner can exist.
2. Admin: Full control of all users and sites of all users, but cannot alter owners or other admins.
3. Manager: Full control of all sites of all users, cannot modify users.
4. Member: Read and write access to sites assigned to this user, cannot modify users or delete sites.
In order to attach a site to a user, go to **Site** > **Action button** > **Attach To User**.

### Adding a seat user
[Section titled “Adding a seat user”](#adding-a-seat-user)
To add a seat user, click on **Add seat user**.\
Add a name, email address and role of the seat user.
Note that you can **only add email addresses** that have **not yet registered** in Patchstack.
After adding the user, you can see the added user in the table below.\
An invitation will be sent to that email asking to register an account on Patchstack App.
### Attaching a seat user to the site
[Section titled “Attaching a seat user to the site”](#attaching-a-seat-user-to-the-site)
After the user has been added to Patchstack App, you can then choose to which sites would you want to attach this user. For that, scroll down to the **Sites** table. You can see all your sites in this view.\
Click on **Action** and **Attach to user** on the corresponding site.
You will be shown a popup, where you can choose, which seat attaches to the site.\
Pick the newly created user and click on **“Attach”**.

Now the new user can manage the site from their own Patchstack App account.
### Detaching a seat user from the site
[Section titled “Detaching a seat user from the site”](#detaching-a-seat-user-from-the-site)
To detach a user from managing the site, scroll down to the **Sites** table on the page. Pick a site and click **Action** and **Detach from user**. You will be shown a confirmation popup.
# Alerts
*Alerts feature is accessible for all Patchstack users.*\
*Community plan users have only one alert trigger, and that cannot be modified.*
To set up or modify your alerts, navigate to **Alerts** in Patchstack App, or click here: [](https://app.patchstack.com/alerts/)
On the **Alerts** page you’ll see an overview of the latest alerts and the alert triggers.\
Alerts are notifications, which can be delivered to your email or Slack channel.
*Note that some of the alerts may have a delay time of 15 to 30 minutes, as the data between your site and Patchstack App is synchronized 4 times an hour.*
To see the details about the latest alerts, click on the small arrow icon to the left of your domain name.
On the right side of the page, you can see the **Triggers** section.\
Triggers let you customize and receive relevant alerts, which can be sent to your email or Slack channel. Slack integration tutorial can be found [here!](/patchstack-app/account-settings/account-integrations/)
Triggers are used to send alerts about:
1. Software events - send alerts, when any of your site’s plugins or themes are found vulnerable or outdated
2. WordPress activity events - send alerts about basic WordPress activities - eg. post deleted, post trashed, plugin updated, plugin removed, etc.
3. Firewall logs events - send alerts when your site visitor matches certain URLs or IPs or traffic matches with your defined payloads
You can view the built-in trigger rules by clicking on the **Action** and **Edit** buttons of the trigger.
To set up custom notifications, you will have to create a trigger.\
You can create a trigger by clicking on **+ Create Trigger** on the top right corner and following [this article](/patchstack-app/alerts/creating-a-trigger/).
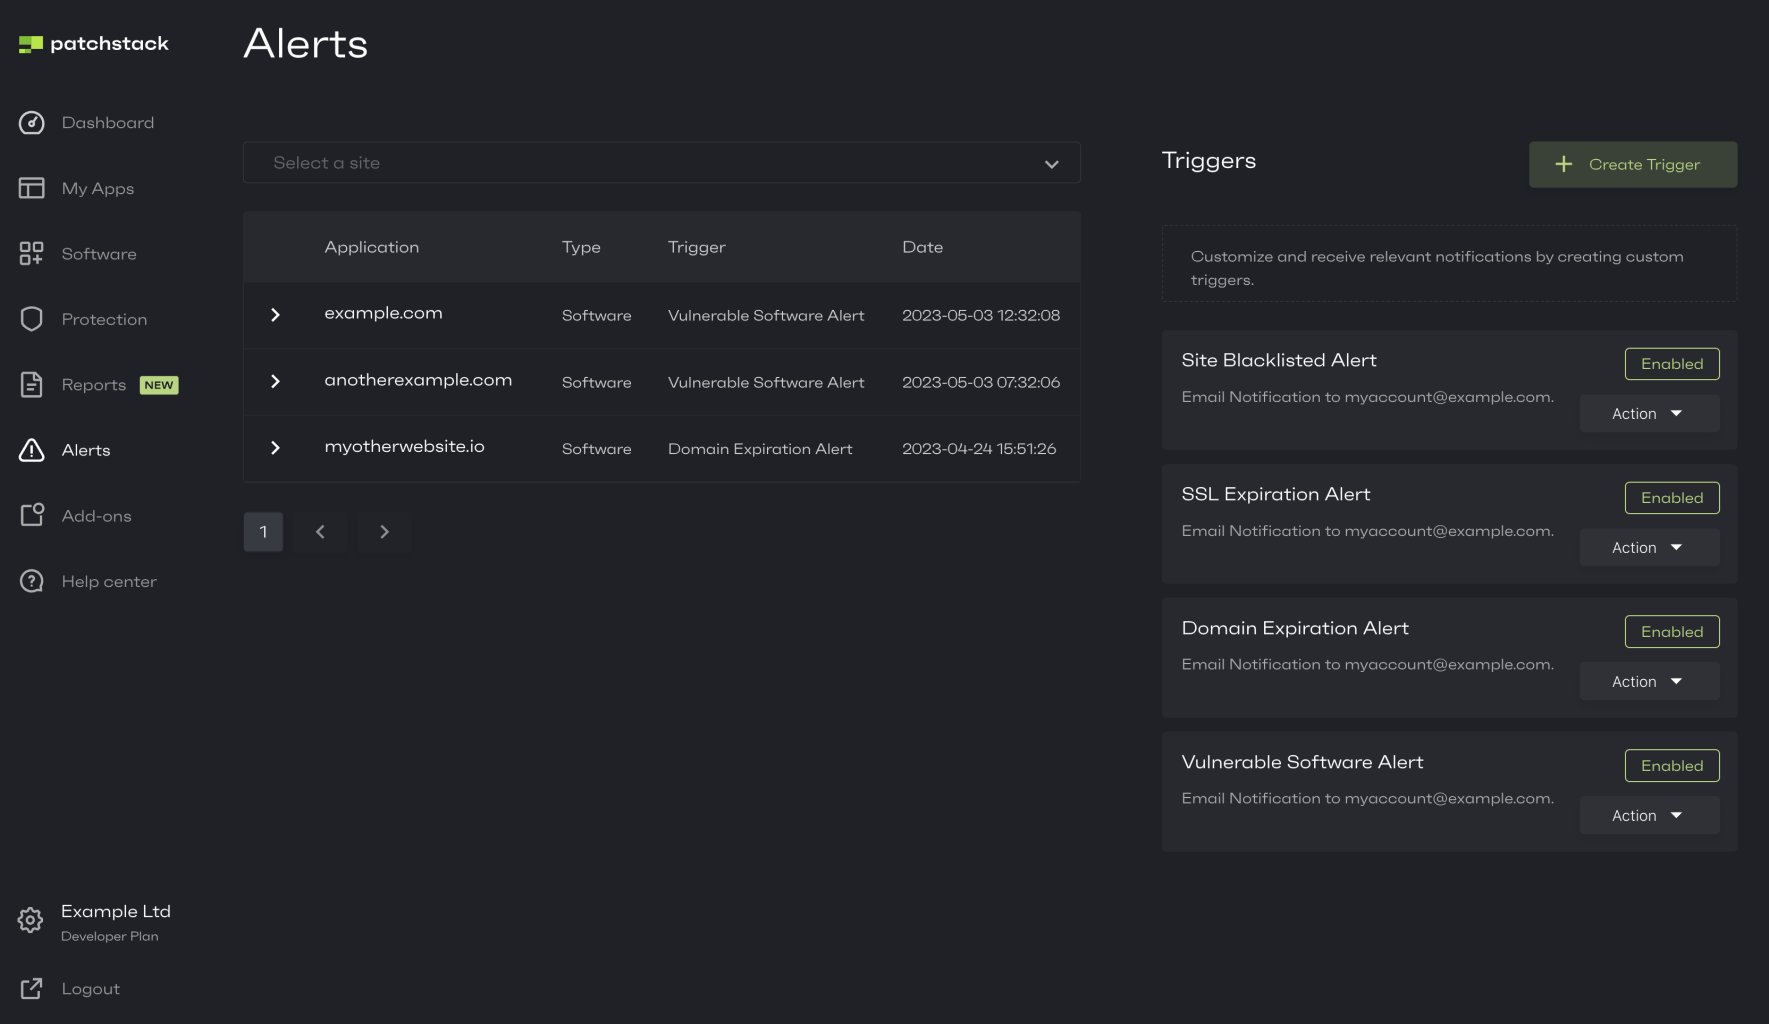
# Creating a trigger
*New triggers can be created on the Developer and Business plan only.*
You can create a trigger by clicking on **+ Create Trigger** on the **Alerts** page in Patchstack App or by navigating here: [](https://app.patchstack.com/alerts/create).

### How to set up an alert trigger
[Section titled “How to set up an alert trigger”](#how-to-set-up-an-alert-trigger)
1. Give your trigger a name by typing it into **Trigger Title** field.
2. Select the condition of when the alert is triggered from the dropdown
3. The dropdown includes the following conditions:
* **Component Event**
* Outdated - sends an alert, when a component on your site is outdated
* Vulnerable - sends an alert, when a component on your site is vulnerable
* **WordPress Activity Event**
* User Logged In - sends an alert, when someone logs in to WordPress
* User Registered - sends an alert, when a new account is created in WordPress
* Post Deleted - sends an alert, when a post is deleted from WordPress
* Post Trashed - sends an alert, when a post is sent to the trash in WordPress
* Attachment Uploaded - sends an alert, when an attachment is uploaded to WordPress
* Plugin Installed - sends an alert, when a new plugin gets installed on WordPress
* Plugin Deactivated - sends an alert, when a plugin is deactivated on WordPress
* Plugin Activated - sends an alert, when a plugin is activated on WordPress
* **Firewall Logs Event**
* Match IP - sends an alert, when your site gets visited from a certain URL
* Match URL - sends an alert, when a certain URL gets visited
* Match Payload - sends an alert, when a certain payload is submitted
4. Depending on a condition, you may be asked to set additional parameters to the conditions. For example by choosing "Match IP", you will have to choose, whether the status has to equal or be bigger than the code you type.
You will see the conclusion of your built rule before saving it (see the image below).
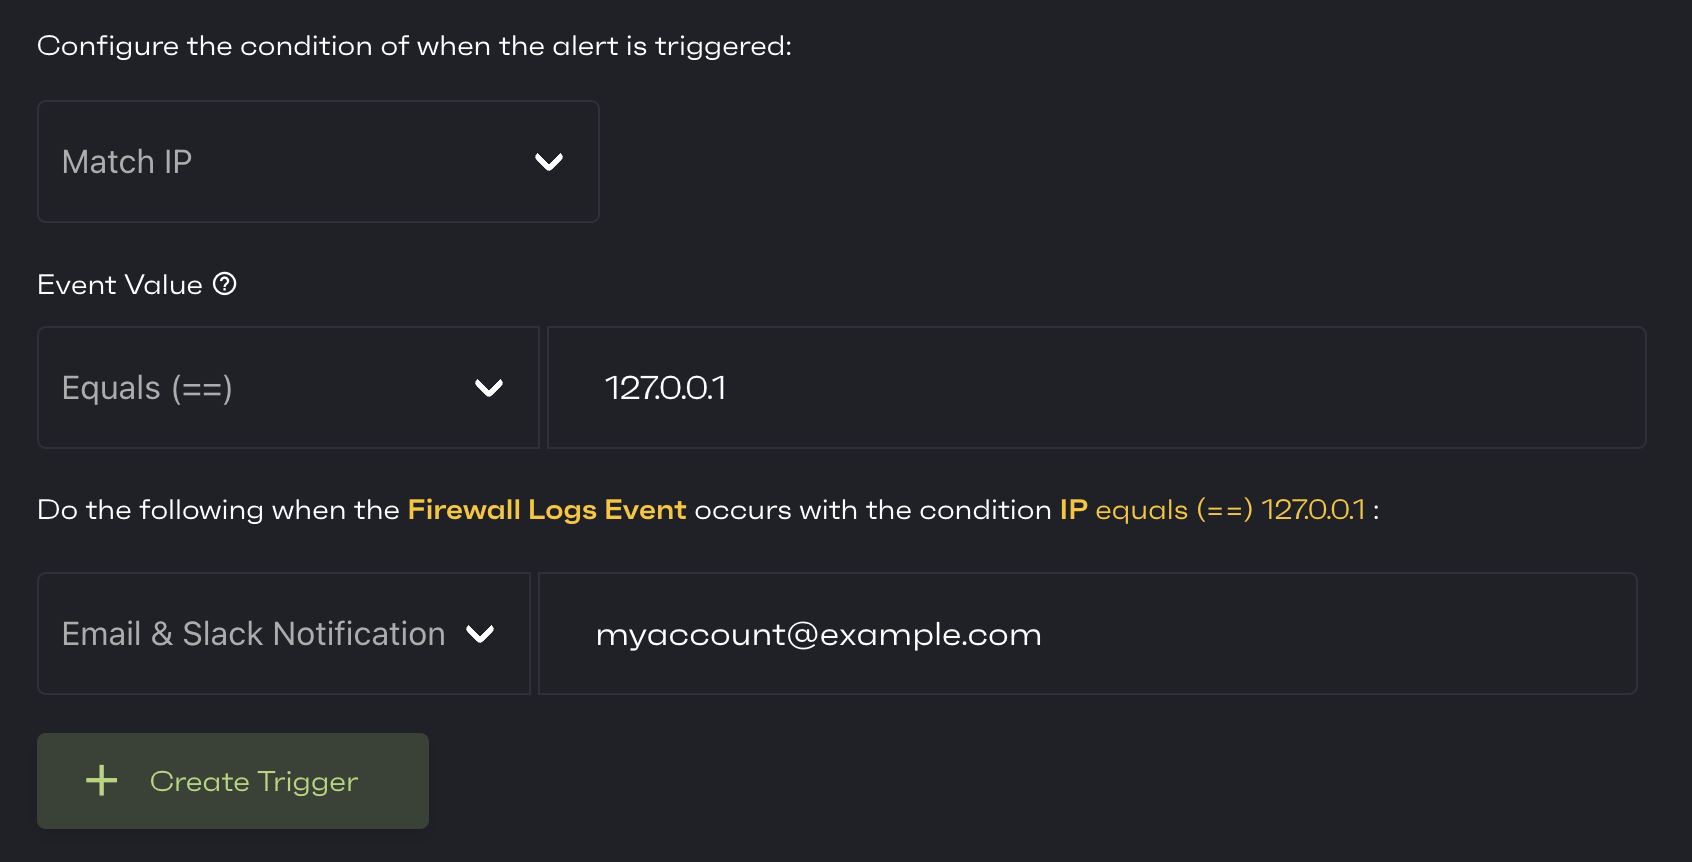
5. The next step is to choose whether you would like to get notified to your email, Slack channel, or both.
6. After having set your rules, click on **+ Create Trigger**.
7. You will be then directed back to the **Alerts** page where you can see your new trigger on the right side of the page.
# App errors
Sometimes, due to wrong configurations, you may get some alerts in Patchstack App. We have listed these error messages here so you would know what to do before contacting support.
### Failed to load the site settings, contact support.
[Section titled “Failed to load the site settings, contact support.”](#failed-to-load-the-site-settings-contact-support)
1. Check if the Patchstack plugin is activated on your WordPress site
2. Check if the **API key** is correct on your WordPress plugin. To see the API Key, click on the **Settings** from the submenu of your application in the Patchstack App. Access the Patchstack plugin from **Settings > Security** on your WordPress site.
3. Check if your site is publicly accessible and is not protected by any passwords. When you visit your site, can you see the content right away, or is there something blocking it?
4. Check that the domain name would be correct. Click on the **Settings** from the submenu of your application in the Patchstack App. Check that the URL uses the correct protocol (http\:// or https\://). Also, check if your site uses “www” or not. The URL **must be correct**.
5. If you are using Cloudflare, make sure you don’t have **Under Attack** mode enabled.
6. Make sure that your web-server has support enabled for the TLS 1.2 protocol. You can test your [TLS versions here](https://www.cdn77.com/tls-test).
7. Make sure that your site returns status code 200. You can [do this here](https://httpstatus.io/).
8. If none of the above seem to cause the problem, contact our support via chat.
### Failed to load the component data, contact support.
[Section titled “Failed to load the component data, contact support.”](#failed-to-load-the-component-data-contact-support)
1. Check if the Patchstack plugin is activated on your WordPress site
2. Check if the **API key** is correct on your WordPress plugin. To see the API Key, click on the **Settings** from the submenu of your application in the Patchstack App. Access the Patchstack plugin from **Settings > Security** on your WordPress site.
3. Check if your site is publicly accessible and is not protected by any passwords. When you visit your site, can you see the content right away, or is there something blocking it?
4. Check that the domain name would be correct. Click on the **Settings** from the submenu of your application in the Patchstack App. Check that the URL uses the correct protocol (http\:// or https\://). Also, check if your site uses “www” or not. The URL **must be correct**.
5. If you are using Cloudflare, make sure you don’t have **Under Attack** mode enabled.
6. Make sure that your web-server has support enabled for the TLS 1.2 protocol. You can test your [TLS versions here](https://www.cdn77.com/tls-test).
7. Make sure that your site returns status code 200. You can [do this here](https://httpstatus.io/).
8. If none of the above seem to cause the problem, contact our support via chat.
### Failed to load the users, contact support.
[Section titled “Failed to load the users, contact support.”](#failed-to-load-the-users-contact-support)
1. Check if the Patchstack plugin is activated on your WordPress site
2. Check if the **API key** is correct on your WordPress plugin. To see the API Key, click on the **Settings** from the submenu of your application in the Patchstack App. Access the Patchstack plugin from **Settings > Security** on your WordPress site.
3. Check if your site is publicly accessible and is not protected by any passwords. When you visit your site, can you see the content right away, or is there something blocking it?
4. Check that the domain name would be correct. Click on the **Settings** from the submenu of your application in the Patchstack App. Check that the URL uses the correct protocol (http\:// or https\://). Also, check if your site uses “www” or not. The URL **must be correct**.
5. If you are using Cloudflare, make sure you don’t have **Under Attack** mode enabled.
6. Make sure that your web-server has support enabled for the TLS 1.2 protocol. You can test your [TLS versions here](https://www.cdn77.com/tls-test).
7. Make sure that your site returns status code 200. You can [do this here](https://httpstatus.io/).
8. If none of the above seem to cause the problem, contact our support via chat.
### Failed to cancel the subscription, contact support.
[Section titled “Failed to cancel the subscription, contact support.”](#failed-to-cancel-the-subscription-contact-support)
Your account is probably expired due to payment failures, therefore there is nothing to cancel. You can contact support in the chatbox if you have any questions.
### For Cloudflare users
[Section titled “For Cloudflare users”](#for-cloudflare-users)
If you are using Cloudflare, your server supports only TLS 1.3 by default. To use Patchstack, additional support for TLS 1.2 is required. To add support for this TLS version in Cloudflare:
1. Login at Cloudflare, and click on your domain name
2. In the menu, go to SSL/TLS > Edge Certificates
3. Scroll down to the “Minimum TLS Version” section
4. Ensure that it is set to at least TLS 1.2 or lower
# Dashboard
To access the main dashboard in Patchstack App, click on **Dashboard** from the left-side navigation menu.
**Dashboard** shows you a general overview of all your WordPress sites:
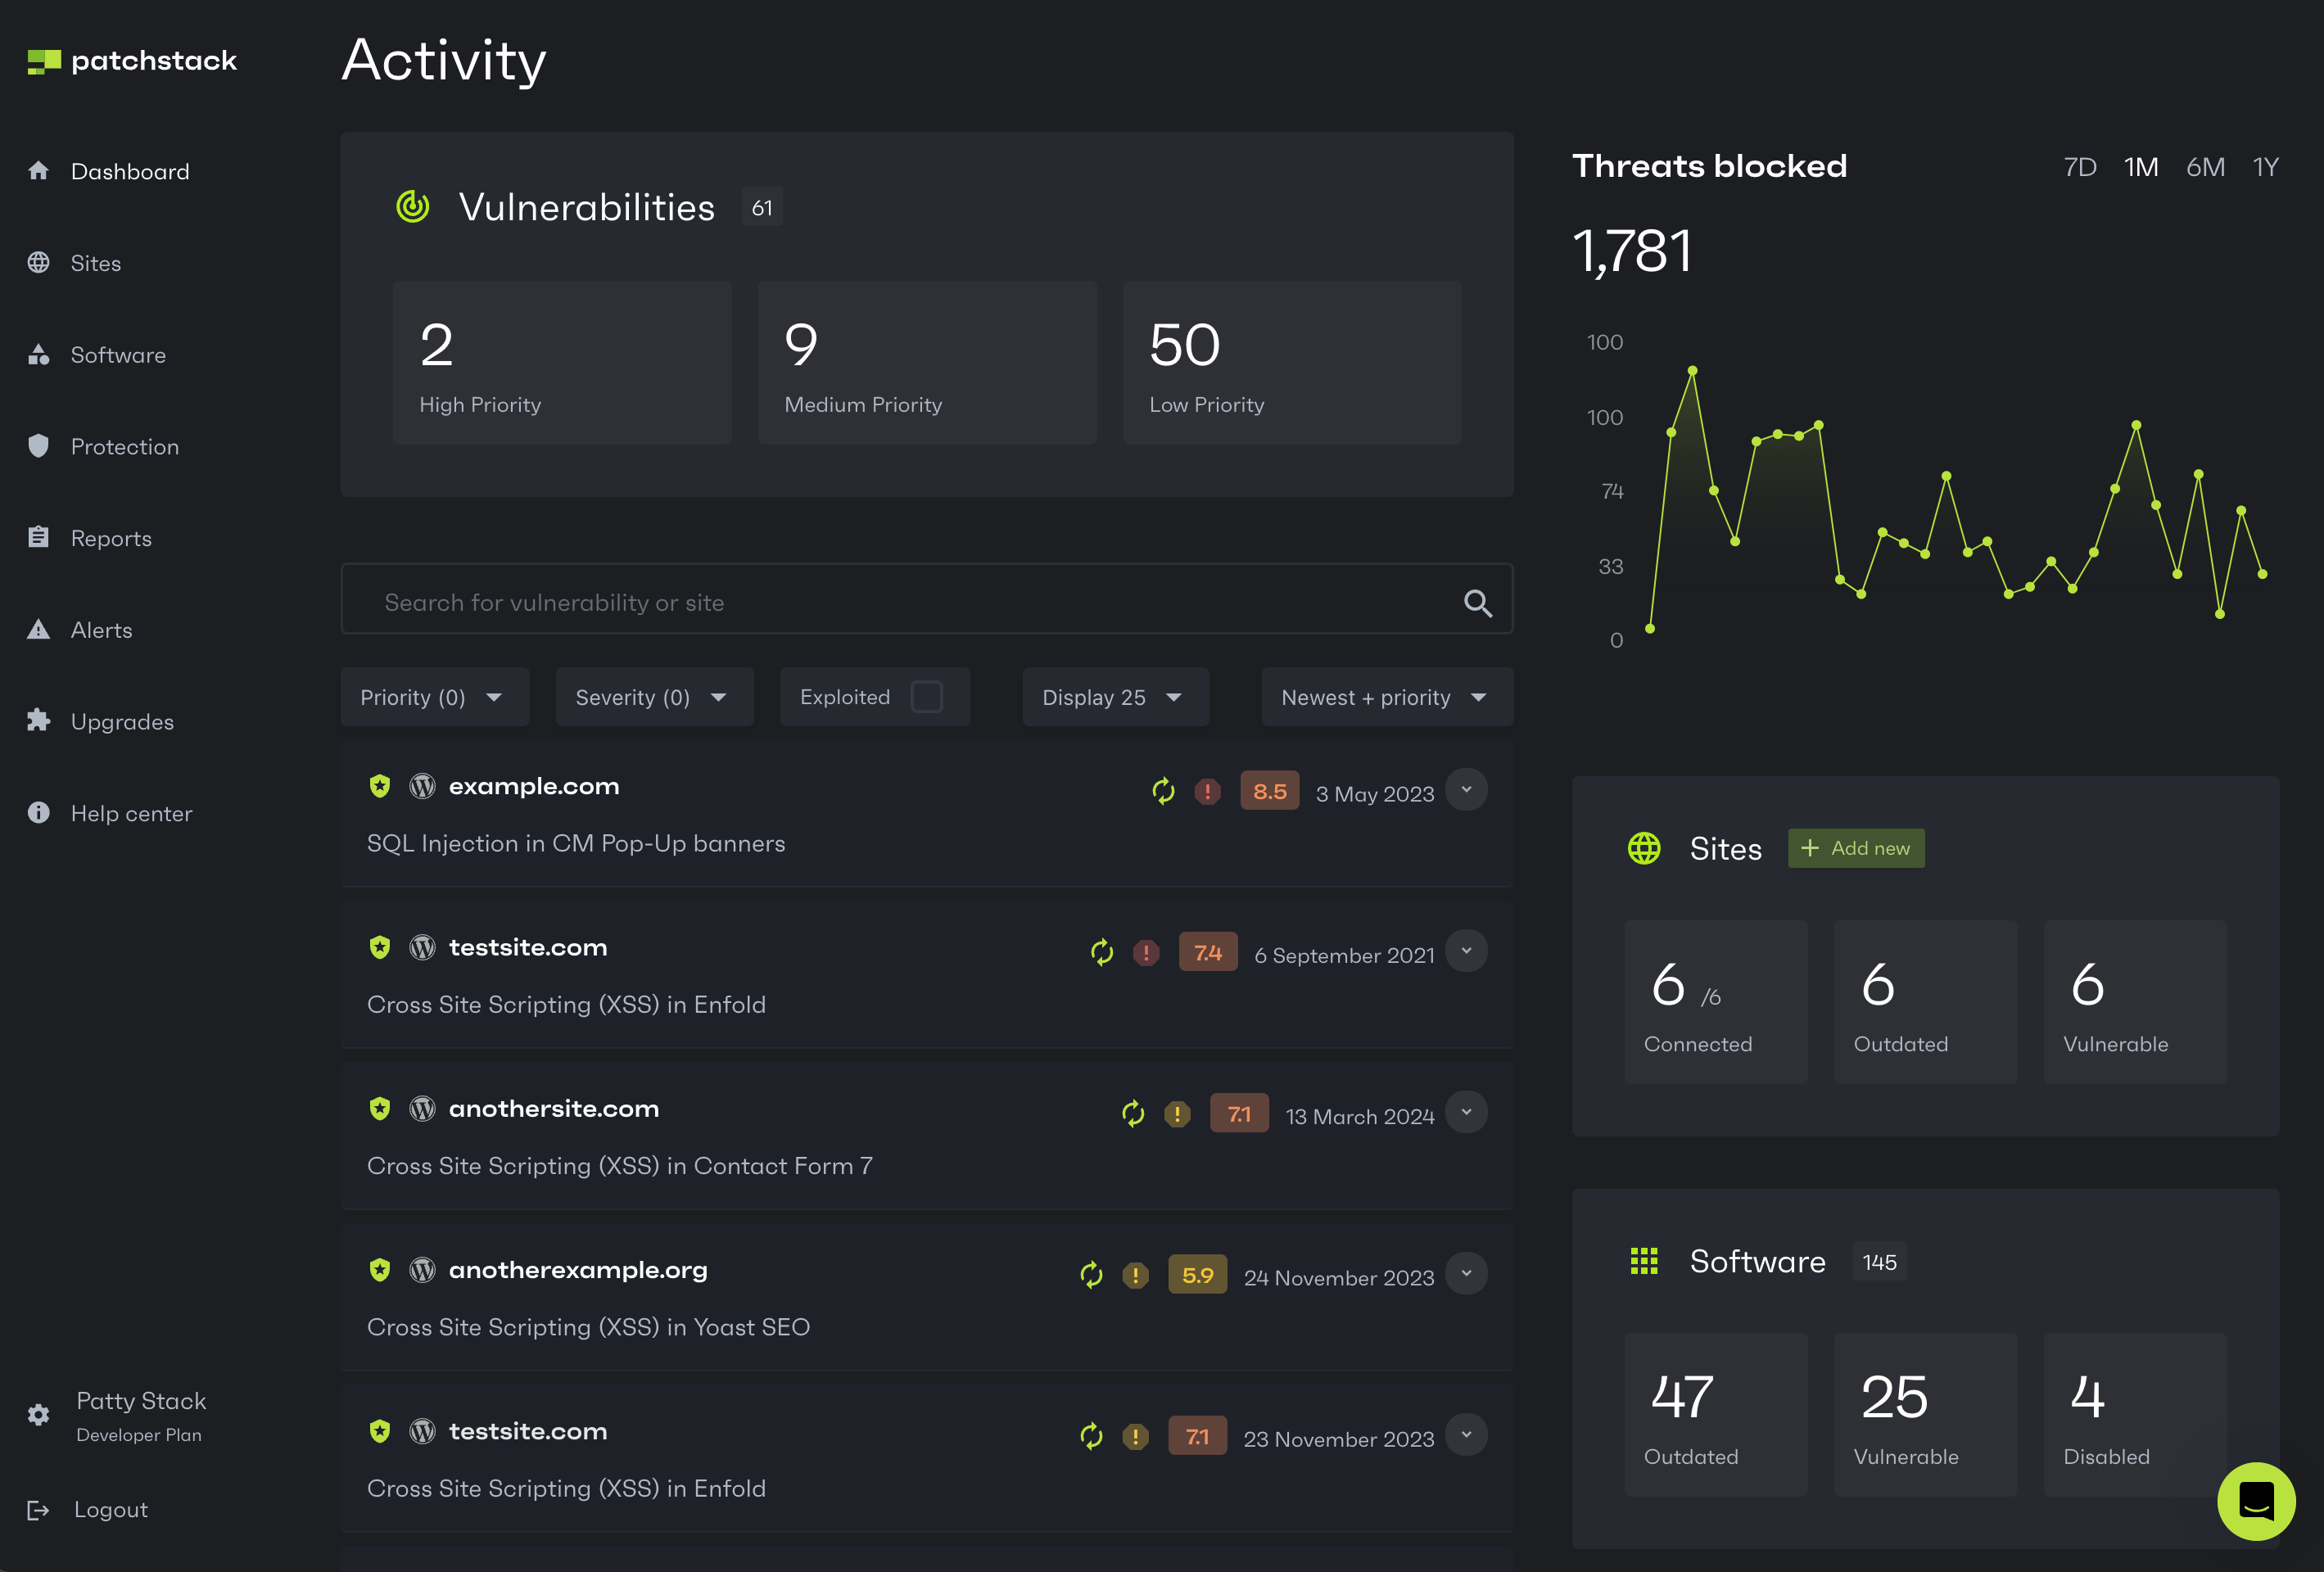
## Vulnerabilities section
[Section titled “Vulnerabilities section”](#vulnerabilities-section)
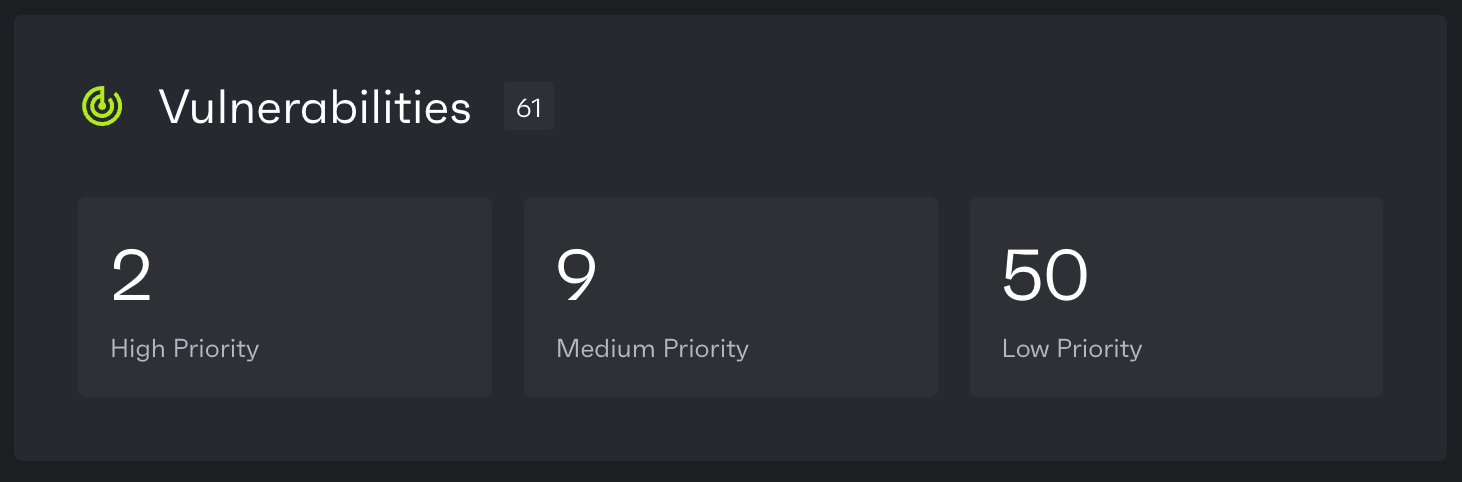
Vulnerabilities section shows you a general overview about all the vulnerabilities currently present on each of your WordPress sites. The vulnerabilities are divided into three different groups, which indicate the patching priority:
1. **High patch priority** software versions are expected to be mass-exploited or have already known to be exploited vulnerabilities. It’s important to patch those by updating the software to patched versions and/or enabling Patchstack firewall, which applies vPatches automatically.
2. **Medium patch priority** software versions are not expected to be mass-exploited, but could potentially be exploited in more targeted attacks. It’s important to patch those by updating the software to patched versions and/or enabling Patchstack firewall, which applies vPatches automatically.
3. **Low patch priority** software versions are not expected to be exploited, therefore low patch priority vulnerabilities won’t receive a vPatch from Patchstack.
## Vulnerability information and filtering
[Section titled “Vulnerability information and filtering”](#vulnerability-information-and-filtering)
You can use the search bar on the dashboard page, to find current vulnerabilities across any of your specific sites, or you can search your vulnerabilities by description.
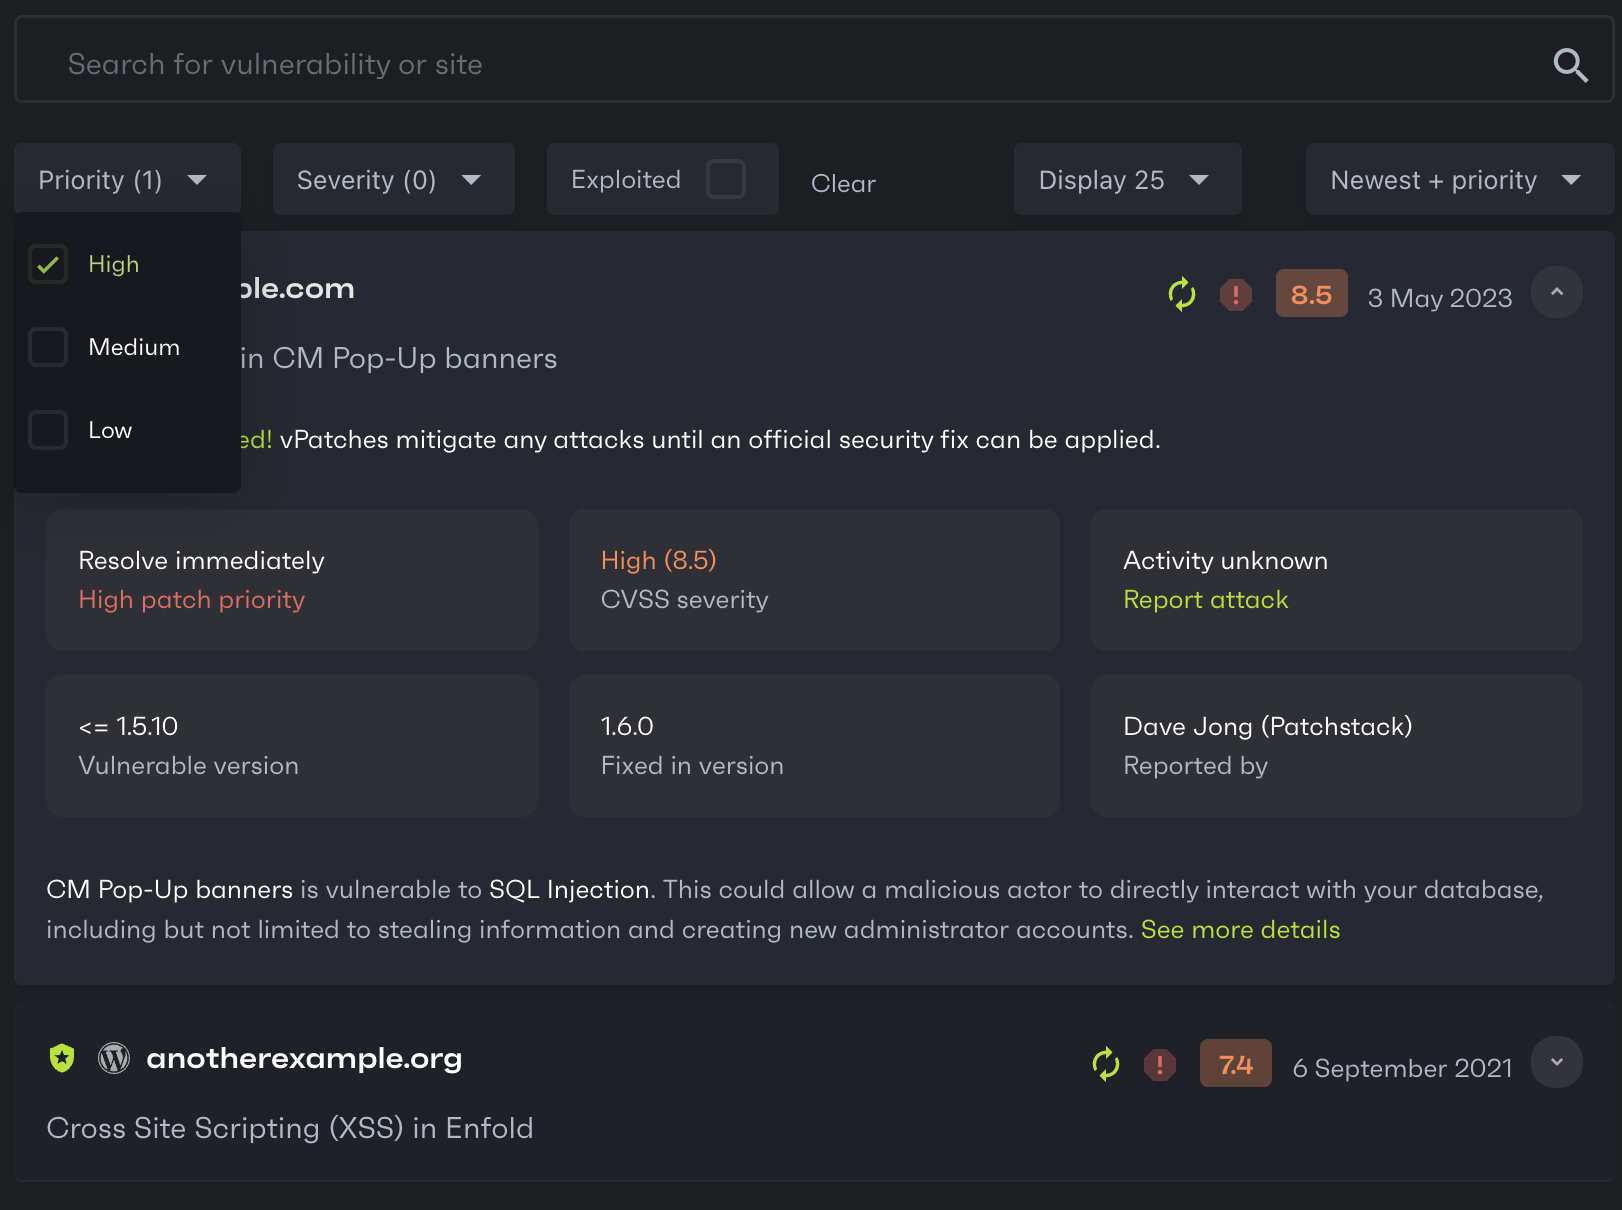
There are three main filters for vulnerability searching on the dashboard:
1. **Priority filter** - find vulnerabilities by patch priority. You can filter by high, medium and low patch priority vulnerabilities.
2. **Severity filter** - find vulnerabilities by [CVSS severity score](/faq-troubleshooting/other/what-is-the-cvss-score/). You can filter by critical, high, medium, low severity.
3. **Exploited** - filter out the vulnerabilities that are know to be exploited.
### List of vulnerability icons with descriptions
[Section titled “List of vulnerability icons with descriptions”](#list-of-vulnerability-icons-with-descriptions)
There are several icons shown on each vulnerability row. Below is a list of what each icon means.

**No update available**\
This software is found vulnerable, but it has no updates yet. It is recommended to turn on Patchstack firewall, or to disable and remove this plugin until update is available.
***

**Update available**\
This plugin has an update available. It is recommended to do this immediately as new software versions usually come with patched code (in case it is found vulnerable).
***

**High patch priority**\
Red exclamation mark indicates that this software version is expected to be mass-exploited or has already known to be exploited vulnerability. It is recommended to turn on Patchstack firewall as high patch priority vulnerabilities receive a vPatch from Patchstack. Update this software as soon as possible.
***

**Medium patch priority**\
Yellow exclamation mark indicates that this software version is not expected to become mass-exploited, but could potentially be exploited in more targeted attacks. It is recommended to turn on Patchstack firewall as medium patch priority vulnerabilities receive a vPatch from Patchstack. Update this software as soon as possible.
***

**Low patch priority**\
Gray exclamation mark indicates that this software version is not expected to become exploited. It is important to update this software when possible, although the security risk is very low. Low patch priority vulnerabilities won’t receive a vPatch from Patchstack.
***

**CVSS score**\
These numbers represent the CVSS score given to the vulnerability. The higher the CVSS score, the more severe is the vulnerability.\
Low (0.0 - 3.9); Medium (4.0 - 6.9); High (7.0 - 8.9); Critical (9.0+)
## Threats blocked section
[Section titled “Threats blocked section”](#threats-blocked-section)
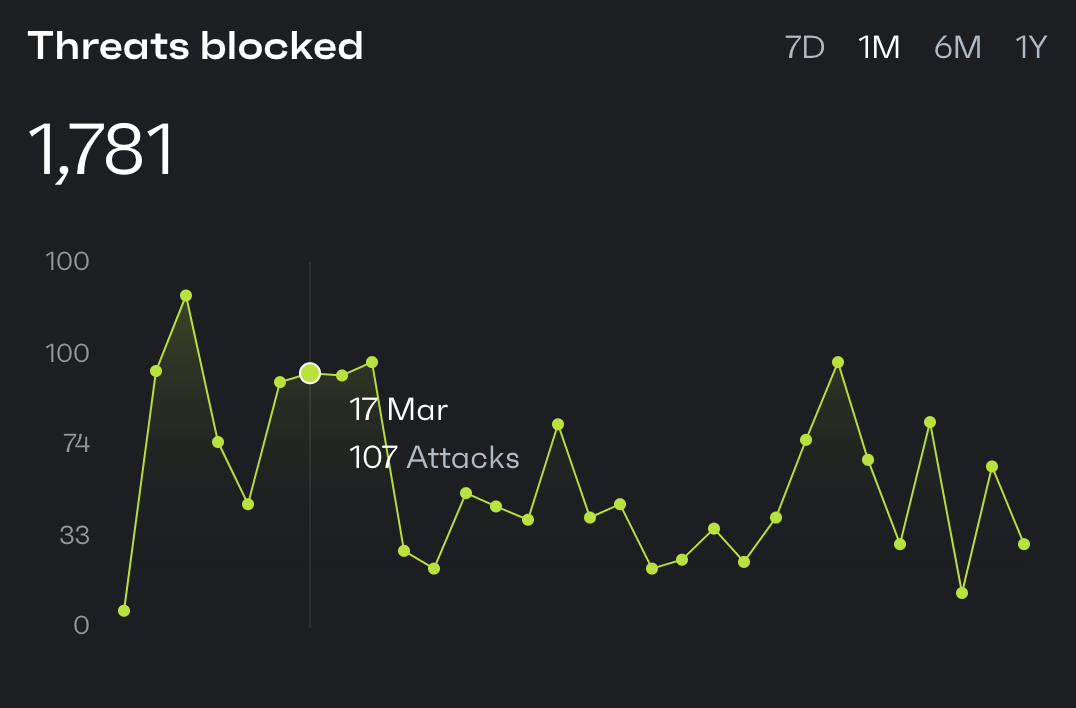
In the **Threats Blocked** section you can see a graph, which shows you how many attacks have been blocked by Patchstack across all your sites in total.\
On the top right corner, you can choose the time period (7 days, 1 month, 6 months or 1 year).\
On the left side, you see the number of attacks.
By moving the cursor on the graph, you can see the number of attacks by day.
## Sites
[Section titled “Sites”](#sites)
In the **Sites** section, you see a quick overview of how many sites you have added to the Patchstack App. It also shows how many of your sites have any outdated or vulnerable components.\
To add new websites to Patchstack App, click the **”+ Add new”** button. It will trigger a popup with steps to take to add more websites.
## Software
[Section titled “Software”](#software)
In the **Software** section, you can see how many software components (plugins, themes, WordPress core) your sites have in total.\
The next number shows how many of these are vulnerable.\
The third number shows how many of these components are disabled.
## Reports
[Section titled “Reports”](#reports)
In the **Reports** section, you can see how many reports have been scheduled and how many are available to download.
# Advanced rule
*Custom firewall rules (including advanced rules) are available for Patchstack Developer and Enterprise plan users.*
Navigate to the advanced firewall rules creation page by visiting **Protection** > **Custom rules** > **Advanced**, or click here:
The advanced rule creation page should be used by the more advanced users who want to create more specific rules. As at this time our firewall only supports PHP, we will speak of PHP and show examples in PHP below.

### Rule name
[Section titled “Rule name”](#rule-name)
The rule name is used for displaying purposes in the different logs throughout the App and PDF reports.
### Rule conditions
[Section titled “Rule conditions”](#rule-conditions)
The rule conditions contains the actual firewall rule. This uses a JSON format and allows you to define the different conditions to match against the request.
Each rule can contain an array of matching rules and can contain multiple conditions or chained AND conditions. The properties of each rule is as following:
#### parameter
[Section titled “parameter”](#parameter)
The request parameter to match against. Below are some examples for this property value.
* post.username
* Match against PHP $\_POST\[‘username’]
* get.id
* Match against PHP $\_GET\[‘id’]
* request.name
* Match against PHP $\_REQUEST\[‘name’]
* files.img
* Match against PHP $\_FILES\[‘img’]
* If used with the matching type file\_contains, will get the contents from the file
* cookie.name
* Match against PHP $\_COOKIE\[‘name’]
* server.HTTP\_USER\_AGENT
* Match against PHP $\_SERVER\[‘HTTP\_USER\_AGENT’]
* raw
* Match against a raw POST payload (typically sent as JSON)
* If it’s base64 encoded, it will be automatically base64 decoded
* If it’s JSON encoded, it will be automatically JSON decoded
* rules
* A special property that contains multiple rules to match against
Wildcard matching is possible as well if the field name is dynamic or you want to match against multiple fields. This can be done by inserting the asterisk character at the end of the parameter name.
* post.test.test1\*
* Match against $\_POST\[‘test’]\[‘test12’], $\_POST\[‘test’]\[‘test13’], etc
* Each field would have its value run against the rule
#### mutations
[Section titled “mutations”](#mutations)
Mutations can be applied to transform a certain request value to something else. For example, a base64 encoded value may have to be decoded first in order to figure out what it contains. The order you supply the mutations is important as that is the order it will be applied.
Below are the possible mutations.
* [json\_encode](https://www.php.net/json_encode)
* [json\_decode](https://www.php.net/json_decode)
* [base64\_decode](https://www.php.net/base64_decode)
* [intval](https://www.php.net/intval)
* [urldecode](https://www.php.net/urldecode)
* getArrayValues
* Custom function that casts all array values to a string in the format of key=value\&key=value
* Useful if you want to find a certain value in complex multi-dimensional arrays
#### match
[Section titled “match”](#match)
The matching type to perform. This property has 2 of its own properties: type and value.
The type property is the matching type to perform while value is the property to match against.\
Below are the possible matching types.
* [equals](https://www.php.net/manual/en/language.operators.comparison.php)
* Loose comparison using ==
* [equals\_strict](https://www.php.net/manual/en/language.operators.comparison.php)
* Strict comparison using ===
* [more\_than](https://www.php.net/manual/en/language.operators.comparison.php)
* Comparison using >
* [less\_than](https://www.php.net/manual/en/language.operators.comparison.php)
* Comparison using <
* [isset](https://www.php.net/isset)
* Only determine if the parameter is set
* ctype\_special
* Special custom function that removes commas, spaces, dashes and underscores and then determines if it’s a ctype\_alnum.
* [ctype\_digit](https://www.php.net/ctype_digit)
* If ctype\_digit function returns true/false
* [ctype\_alnum](https://www.php.net/ctype_alnum)
* If ctype\_alnum function returns true/false
* [is\_numeric](https://www.php.net/is_numeric)
* If is\_numeric function returns true/false
* [contains / stripos](https://www.php.net/stripos)
* if stripos function returns true
* [not\_contains](https://www.php.net/stripos)
* if stripos function returns false
* quotes
* Using stripos, determine if the value contains a single or double quote
* [regex](https://www.php.net/preg_match)
* If preg\_match returns 1
* [current\_user\_cannot](https://developer.wordpress.org/reference/functions/current_user_can/)
* If current\_user\_can WP function returns false
* [in\_array](https://www.php.net/in_array)
* If given value is in array list
* [not\_in\_array](https://www.php.net/in_array)
* If given value is not in array list. Uses !in\_array internally.
* [array\_in\_array](https://www.php.net/array_intersect)
* If array\_intersect returns non-empty result set
* If given array has any of its values in user input array
* array\_key\_value
* Extract another instance of “parameter” and match against its key
* Can be used for JSON encoded payloads that you decode using a mutation and then need to find a certain value in the array
* general\_xss
* Using the [wp\_kses\_post](https://developer.wordpress.org/reference/functions/wp_kses_post/) function, determine if the content changes (thus it could imply that a XSS payload was present.) This is just a general way of detecting XSS but will not catch all scenarios and ultimately relies on the WordPress function.
* inline\_xss
* Using a custom function, determine if the value contains either a single or double quote and then determine if it also contains an equal (=) sign or a bigger than (>) sign. This can detect certain inline HTML attribute injection payloads.
* hostname
* Retrieves the hostname of the parameter value and matches it with the hostname that is returned by the extension
* file\_contains
* If the parameter is a file, it will get the file contents and determine if the file contains a certain substring
### Rule examples
[Section titled “Rule examples”](#rule-examples)
**Check if a value ($\_GET\[’user’]) is not in an array**
```json
[
{
"parameter":"get.user",
"match":{
"type":"not_in_array",
"value":[
"admin"
]
}
}
]
```
**Check if the URL matches a regex**
```json
[
{
"parameter":"server.REQUEST_URI",
"match":{
"type":"regex",
"value":"\/(\\\/something\\\/)\/msi"
}
}
]
```
**Check if a value ($\_GET\[’id’]) is not a number or is less than 100**
```json
[
{
"parameter":"get.pid",
"match":{
"type":"ctype_digit",
"value":false
}
},
{
"parameter":"get.pid",
"match":{
"type":"less_than",
"value":100
}
}
]
```
**Check if a query parameter (test) is present in the URL**
```json
[
{
"parameter":"get.test",
"match":{
"type":"isset"
}
}
]
```
**Check if $\_POST\[’backdoor’] == mybackdoor and user-agent contains some\_backdoor\_agent**
```json
[
{
"parameter":"post.backdoor",
"match":{
"type":"equals",
"value":"mybackdoor"
},
"inclusive":true
},
{
"parameter":"server.HTTP_USER_AGENT",
"match":{
"type":"contains",
"value":"some_backdoor_agent"
},
"inclusive":true
}
]
```
**Check if $\_POST\[’payload’] contains a base64(json()) encoded payload with user\_role array key equaling to administrator**
```json
[
{
"parameter":"post.payload",
"mutations":[
"base64_decode",
"json_decode"
],
"match":{
"type":"array_key_value",
"key":"user_role",
"match":{
"type":"equals",
"value":"administrator"
}
}
}
]
```
**Check if $\_GET\[’action’] or $\_POST\[’action’] contains a value part of an array of values AND if the user is not an administrator**
```json
[
{
"parameter":"rules",
"rules":[
{
"parameter":"get.action",
"match":{
"type":"in_array",
"value":[
"restaurant_system_customize_button",
"restaurant_system_insert_dialog"
]
}
},
{
"parameter":"post.action",
"match":{
"type":"in_array",
"value":[
"restaurant_system_customize_button",
"restaurant_system_insert_dialog"
]
}
}
],
"inclusive":true
},
{
"parameter":false,
"match":{
"type":"current_user_cannot",
"value":"administrator"
},
"inclusive":true
}
]
```
**Check if the user’s IP address is in a list (e.g. whitelist)**
Note that the server.ip parameter is a special computed property and retrieves the IP address through the extension that is attached to the library. This IP grabbing function can be adjusted to your needs.
```json
[
{
"parameter":"server.ip",
"match":{
"type":"in_array",
"value":[
"127.0.0.1"
]
}
}
]
```
**Check if a certain value is present anywhere in the request ($\_GET, $\_POST, $\_SERVER\[’REQUEST\_URI’], raw POST data)**
```json
[
{
"parameter":"all",
"mutations":[
"getArrayValues"
],
"match":{
"type":"regex",
"value":"\/(\\\/something\\\/)\/msi"
}
}
]
```
**Check if an uploaded file ($\_FILES\[’img’]) contains \ **Custom rules** > **+ Create rule**, or click here:
We have crafted some ready-made custom firewall rule templates, which are easy to implement on your sites. The templates are made for the following rules:
* Whitelist IP addresses
* Whitelist if URL contains
* Block single IP address
* Block multiple IP addresses
* Block HTTP user agent if it contains a certain word
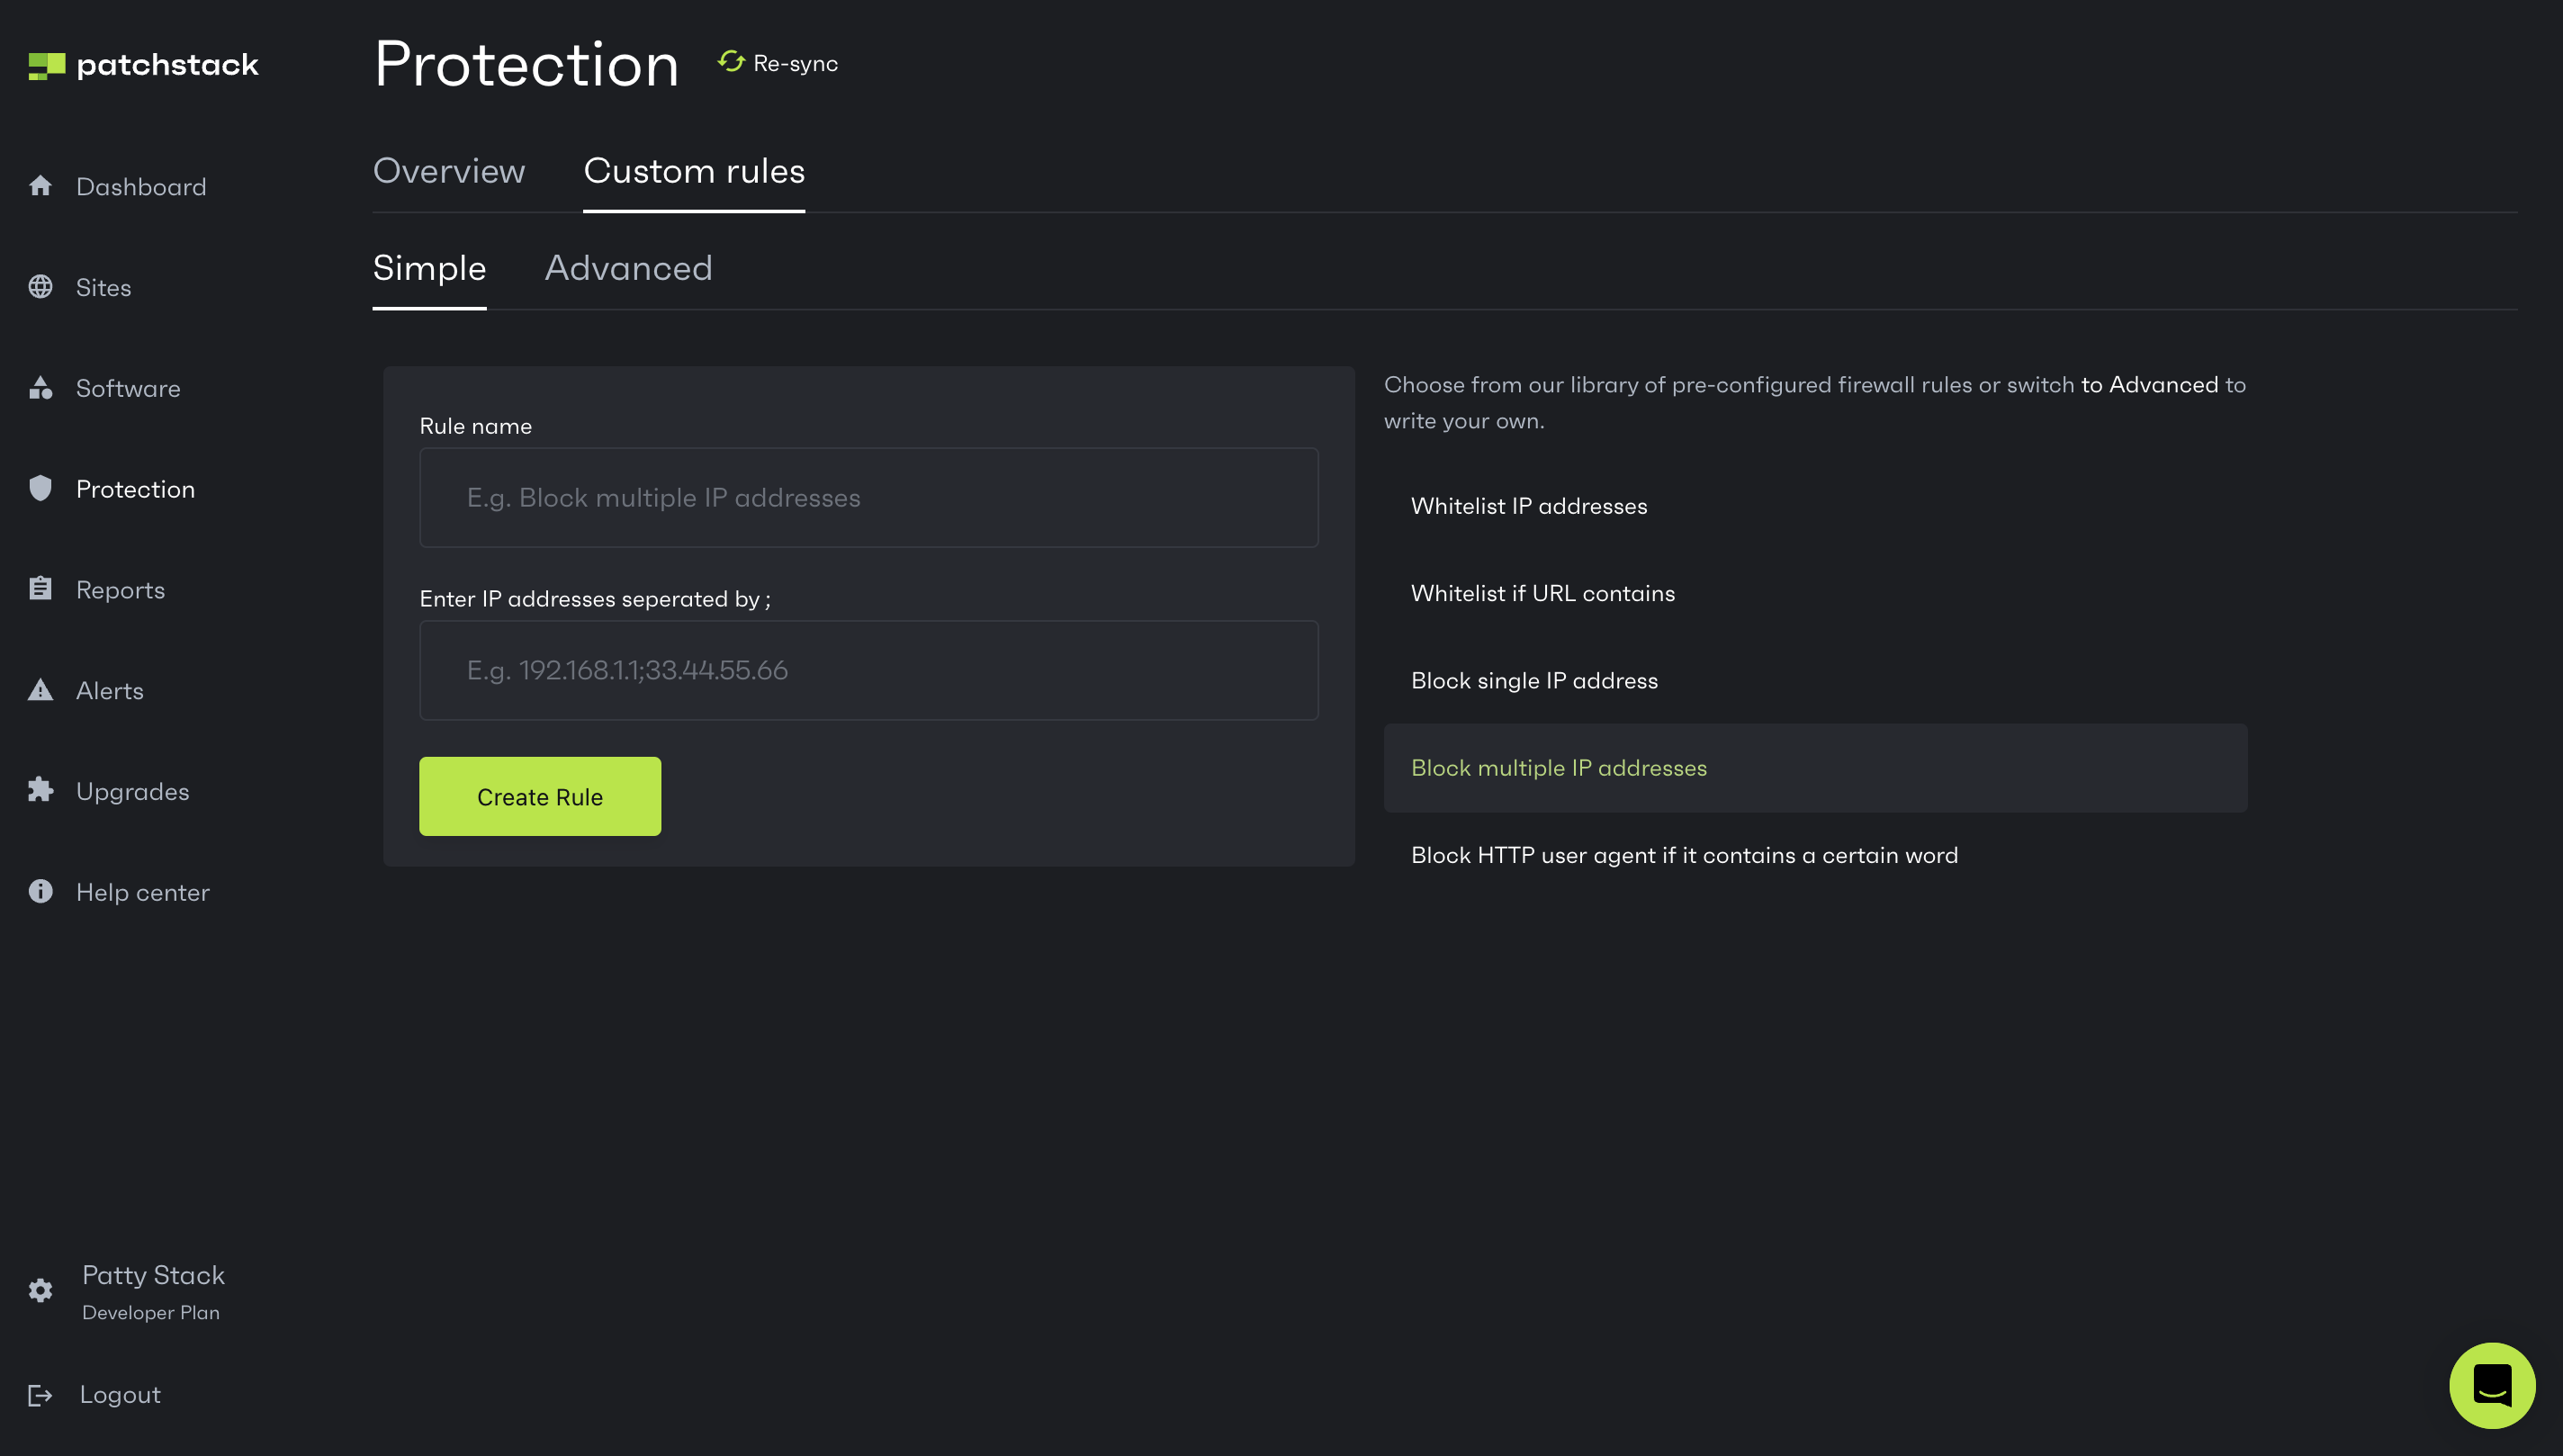
You can create basic custom firewall rules with simplicity and run them on your selected sites.
If you are looking to create some more advanced firewall rules, check out [this next article](/patchstack-app/protection/create-rule/advanced-rule).
# Custom rules
*Custom firewall rules are available for Patchstack Developer and Enterprise plan users.*
Navigate to the custom firewall rules page by visiting **Protection** > **Custom rules**, or click here:
On the custom rules page, you’ll see an overview of which rules you have created and to which sites are these attached to. You can use this page to attach / detach rules from your sites, or change the rules.
To begin creating a new custom firewall rule, click on **+ Create rule** button at the top of the page.
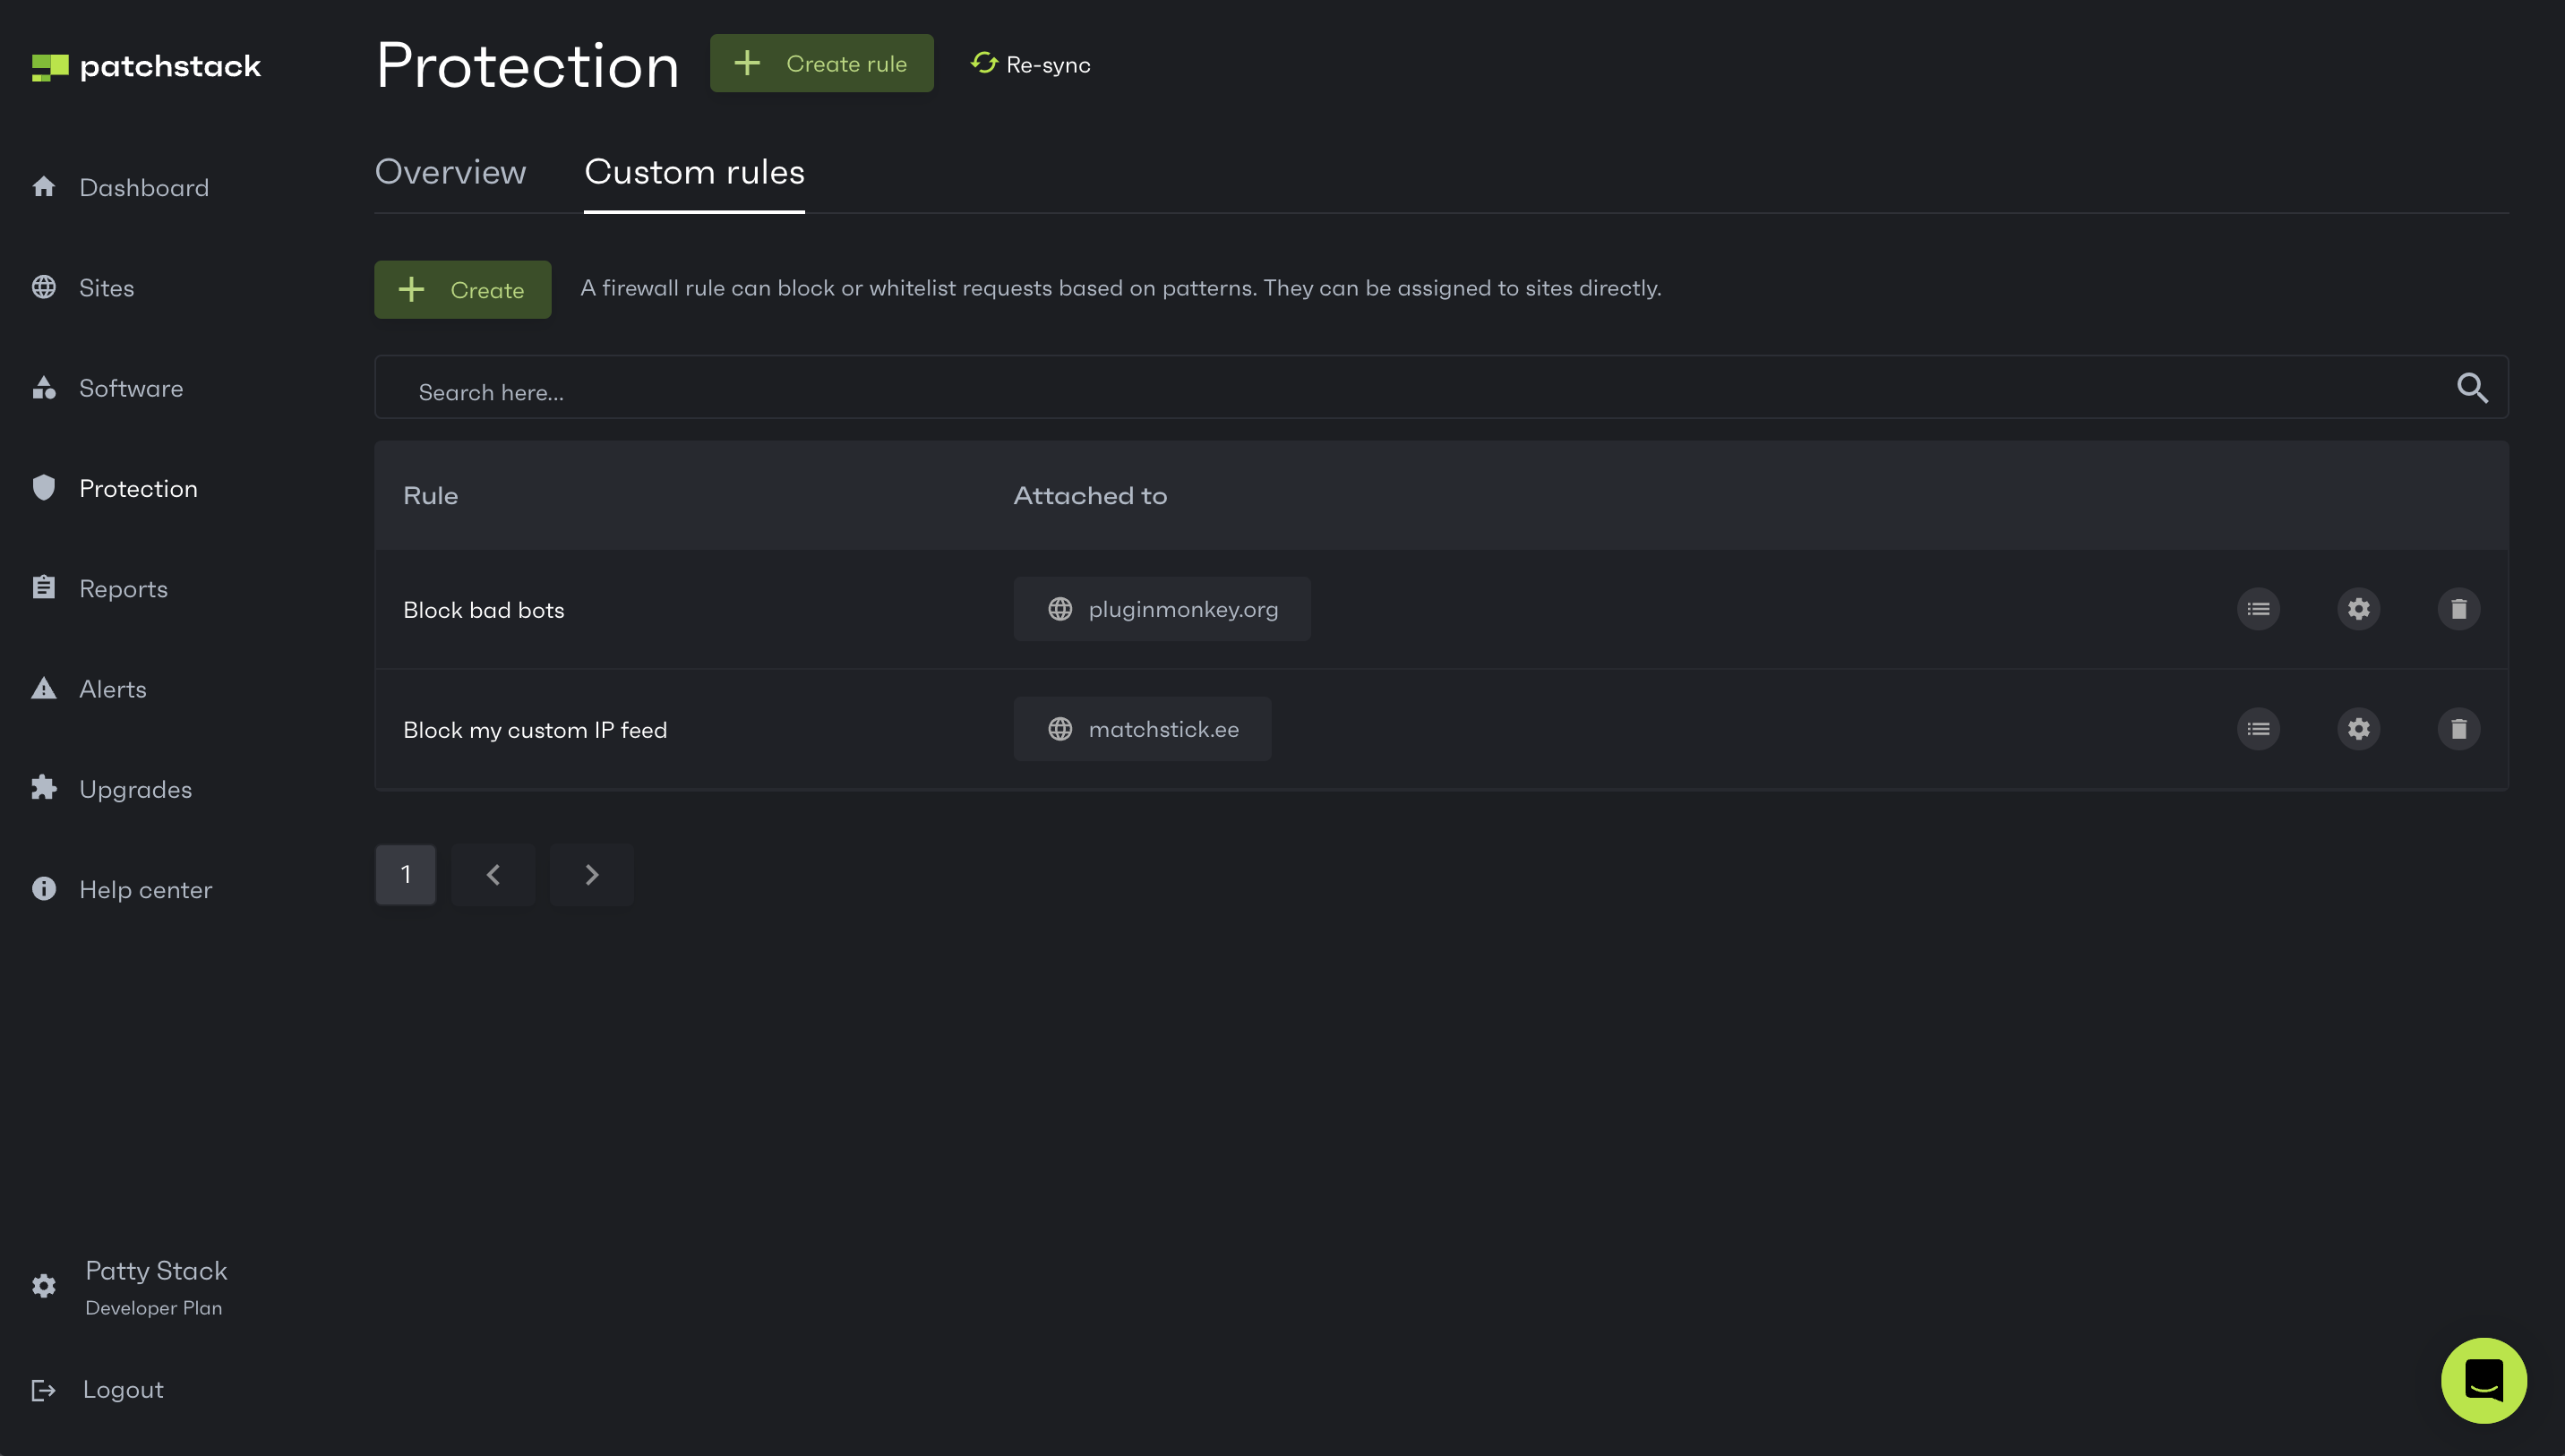
Note that after creating and attaching the custom firewall rule to your site, it may take some time before it takes effect. Alternatively, you can initiate a manual re-sync between Patchstack App and your site, by clicking on **Re-sync** button at the top of this page.
# Patchstack protection modules
## Introduction
[Section titled “Introduction”](#introduction)
Patchstack modules are modules managed by us and regularly updated to contain the latest vPatch definitions. Below contain the modules which you can enable on your sites with a description about its functionality.
### vPatches
[Section titled “vPatches”](#vpatches)
This module contains all the vPatches that protect you against plugin, theme and WordPress vulnerabilities for which we generated a vPatch. These vPatches match against specific conditions in the request to ensure a as low as possible false positive rate.
For example, a vPatch for a plugin vulnerability which allows someone to export all orders due to the plugin not implementing proper authorization checks may contain the following conditions:
* If the requesting URL contains /wp-admin/index.php?export\_orders=1
* AND
* If the current authenticated user is not a Shop Manager or Administrator
* THEN
* Block request
This allows us to block specific attacks without it affecting users who still may need to access the ability to export orders.
### Advanced Hardening
[Section titled “Advanced Hardening”](#advanced-hardening)
This module contains protection rules that protect you against commonly seen attacks that target WordPress sites. Some examples of the protection rules that are part of this module are listed below. All of them are not executed against users who are logged in as administrator.
These protection rules could cause false positives with remote WordPress management tools, in particular the protection rules that block settings from being changed by unauthenticated users.
* Block file uploads containing .php and .html extensions.
* These attacks attempt to upload .php backdoors to gain full access to your site.
* Block requests that contain wp-config.php anywhere in the URL or form payload.
* These attacks attempt to read or write to your wp-config.php file to steal your WordPress salts and database information.
* Block requests that contain default\_role and administrator.
* These attacks attempt to change the default registration role to administrator so new accounts are immediately granted the administrator privilege.
* Block requests that contain users\_can\_register.
* These attacks attempt to enable the registration feature by setting the users\_can\_register WordPress option to 1. Malicious people usually do this together with changing the default registration role.
* Block requests that contain \_capabilities and administrator.
* These attacks attempt a user to change their own privilege from a lower privilege, such as subscriber, to that of an administrator.
* Block requests that contain wp\_is\_mobile in the browser user agent (spoofed).
* At one point a large number of premium plugins/themes from a vendor contained a backdoor that got triggered with this string in the user agent. We block attacks if this is present.
### Community IP Blocklist
[Section titled “Community IP Blocklist”](#community-ip-blocklist)
Community IP blocklist blocks access to IP addresses which are known to exploit vulnerabilities. This module contributes threat data back to the Patchstack network.
### Generic OWASP
[Section titled “Generic OWASP”](#generic-owasp)
This module contains protection rules that protect you against requests that contain certain patterns that match the [OWASP top 10](https://owasp.org/www-project-top-ten/) ruleset.
This provides very aggressive protection and has a higher chance of false positives, so it is only recommended to enable this on sites with a low number of plugins and do not run some sort of e-commerce environment such as WooCommerce.
# Overview
*General protection is available for all Patchstack paid plan users.*
Navigate to the general protection overview page by visiting **Protection** from the navigation menu, or click here:
On this page, you can:
* Manage the protection modules across all your sites
* See the firewall blockings data across all your sites
* See the firewall log history across all your sites
### Protection modules
[Section titled “Protection modules”](#protection-modules)
A module is a collection of firewall rules managed by Patchstack. Assign modules to your app to protect them. You can manage the protection modules, by clicking on the green **Manage** button.\
[📖 Read more about the protection modules here.](/patchstack-app/protection/patchstack-modules/)
### Activity
[Section titled “Activity”](#activity)
From this section, you see, how many times did Patchstack firewall block the traffic for potential threats across all your sites.\
By default, it shows the results for the last 30 days. You can also choose to show it last 7 days, or 60 days, by clicking on the filter at the top right corner of this section.\
On the right side of the protection activity section, Patchstack App shows the top 5 IP’s blocked, and top 5 threats blocked in the given period of time.
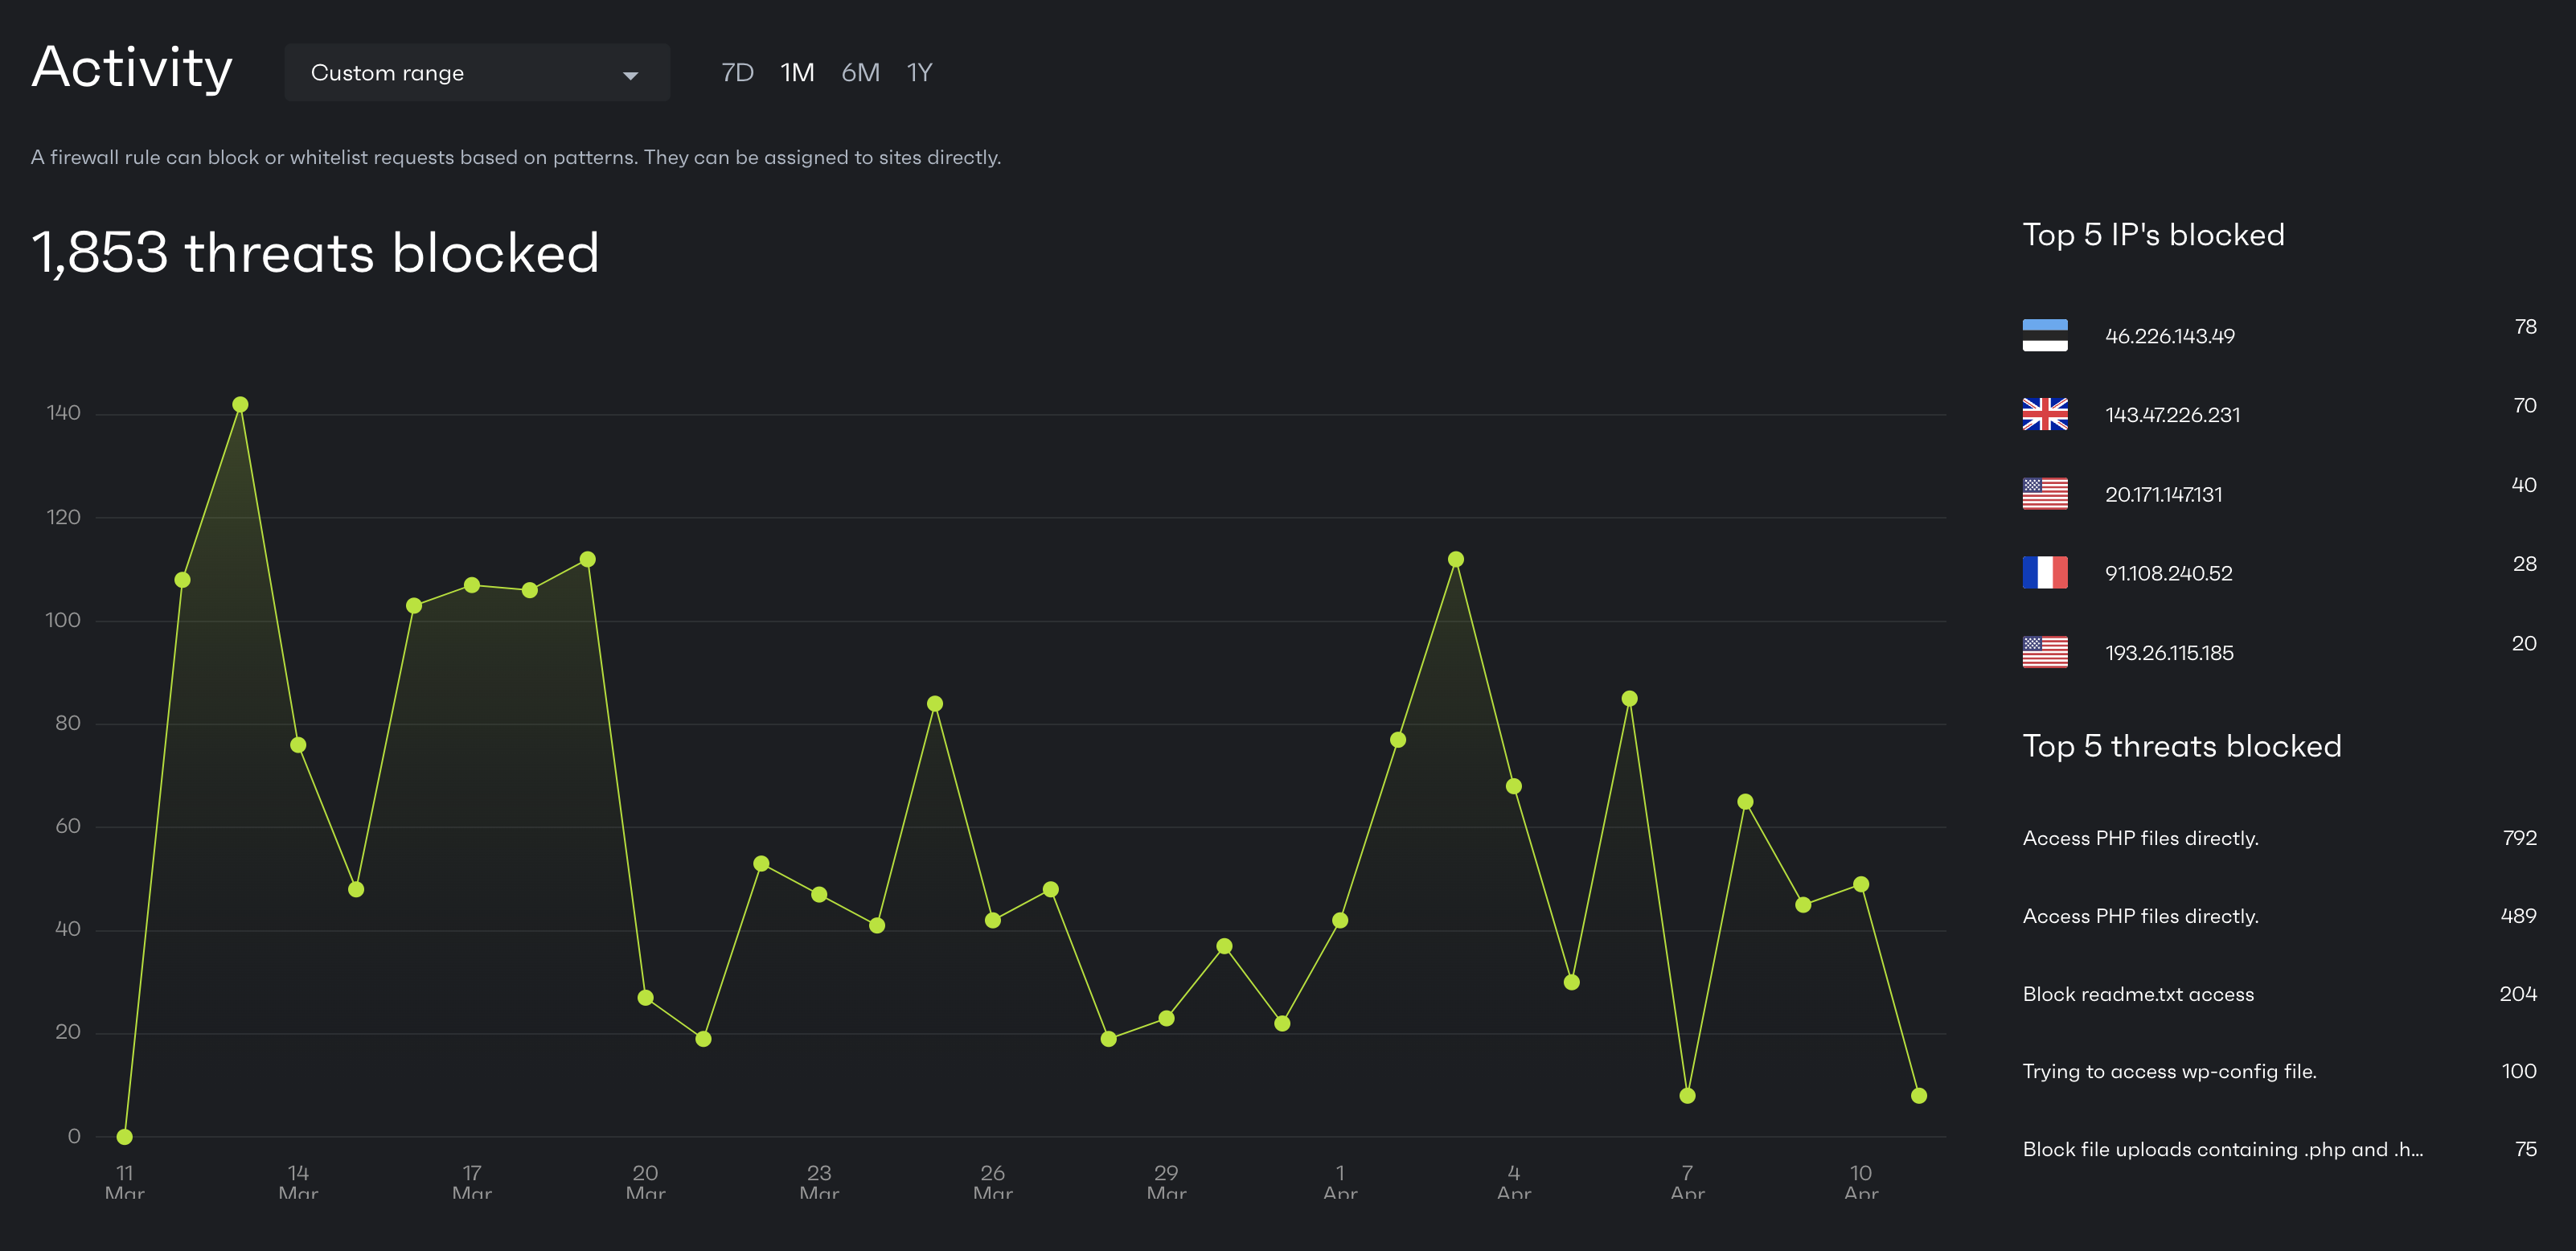
### Log history
[Section titled “Log history”](#log-history)
Each hacking attempt or attack is shown as a separate log entry. You can click on any log entry to view more details about the particular blocking. You can use the filters and search bar, to find entries of particular application, IP or URL from the protection log history.
To see the details of any attack, click on a table row. A popup with details opens next.

# Developer report
*The Developer report feature is available for the Developer and Business plan users.*
To generate a Developer report, navigate to **Reports** page in Patchstack App, or click here:
**Developer Report** is a periodic PDF security report. It means you will need to pick a time period (two dates), in which the data is shown on the report.
**The developer report shows:**
* Actions suggested to improve the security of your site
* Statistics and detailed information about:
* amount of vulnerabilities on the site at the moment;
* amount of new vulnerabilities that were identified;
* amount of vulnerabilities that have been solved during that period;
* Software overview - shows which plugins and themes are currently present on the website and what is the status of each component
* Shows the total number of attacks blocked during the period
* Shows the top 3 threat types and top 3 attacking origin countries
* Shows which attacks were blocked by vPatches, basic firewall rules, and custom firewall rules
[Download an example of the Developer report here!](https://s3.us-east-2.amazonaws.com/patchstack.com/patchstack_developer_report.pdf)
# Generating security reports
*Patchstack reports feature is accessible for all Patchstack users.*
To view and generate the Patchstack security reports, navigate to **Reports** link in Patchstack App navigation menu, or click here: ****
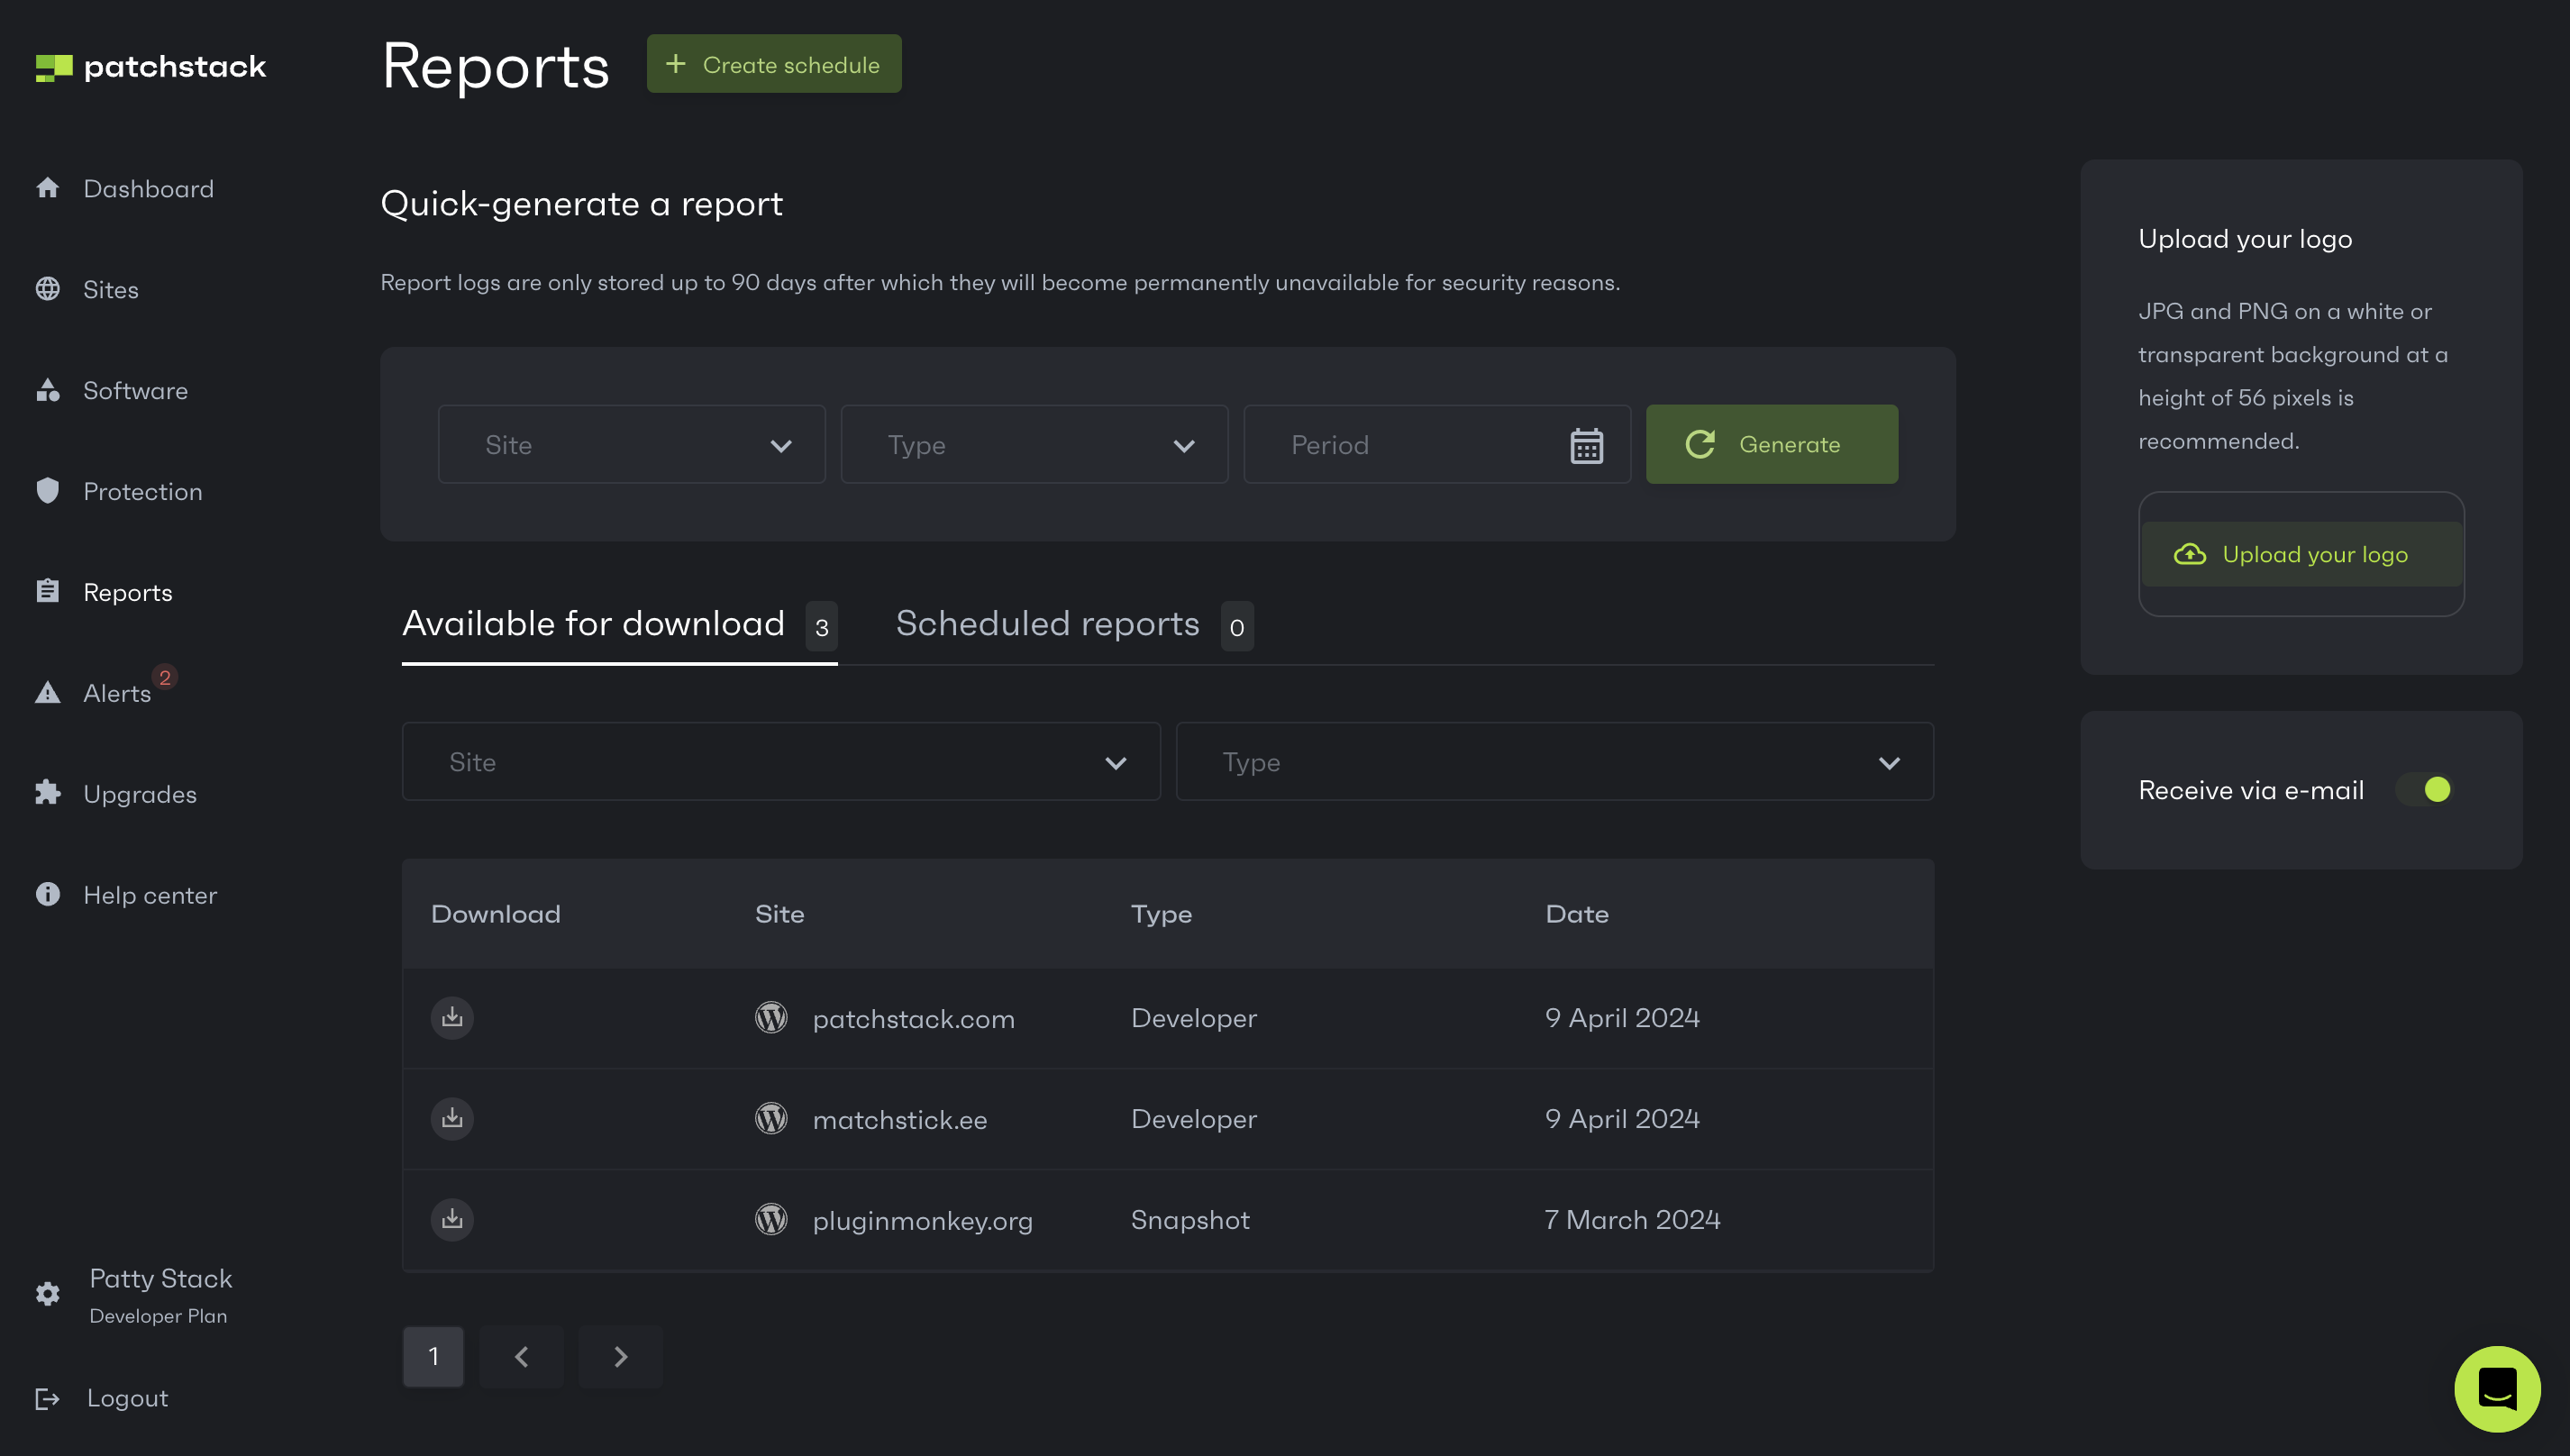
### Generating a Snapshot report
[Section titled “Generating a Snapshot report”](#generating-a-snapshot-report)
1. Go to the **Reports** page in the Patchstack App
2. Click on the **Site** dropdown and choose your site
3. Click the green **Generate** button
4. The report is generated and you can download it, by clicking the download icon in the table below
Read more about the **[Snapshot reports](/patchstack-app/reports/snapshot-report/)** here.
### Generating a Developer report
[Section titled “Generating a Developer report”](#generating-a-developer-report)
*This feature is only for the Developer and Enterprise plan users*
1. Go to the **Reports** page in the Patchstack App
2. Click on the **Site** dropdown and choose your site
3. From the second dropdown choose **Developer report**
4. From the third dropdown, select the timeframe for which you want your report
5. Click the green **Generate** button
6. The report will be generated in a few minutes. Once ready, you can download it by clicking the download icon in the table below.
Read more about the **[Developer reports](/patchstack-app/reports/developer-report/)** here.
# Reports overview
*Patchstack PDF security reports feature is available for all Patchstack users.*
To view the Patchstack security reports page, navigate to **Reports** link in Patchstack App menu, or click here:

From the **Reports** page, you can generate PDF security reports for your sites.\
With Patchstack, you can automatically schedule your reports generation so you don’t have to manually generate them.
Patchstack has 2 different types of reports available:
* **[Snapshot report](/patchstack-app/reports/snapshot-report/)**\
This is a security report about the current situation on the website. Snapshot report is a free feature for all Patchstack users.
* **[Developer report](/patchstack-app/reports/developer-report/)**\
This is a periodic security report about the situation on the website, with security suggestions and improvements. Developer report generation is available for the Developer and Enterprise plan users only. Developer reports can be scheduled to be auto-generated monthly, or weekly.
On the **Reports** page you can view and download all the previously generated PDF reports.\
To download a report, click on the download icon that is located at the left side of the table.
To view and manage your scheduled reports, click on **Scheduled reports** tab. Note that report scheduling is for the Developer and Enterprise plan users.
# Reports whitelabeling
*Security reports whitelabeling feature is for the Business plan users only.*
To view the report whitelabeling settings, navigate to the **Reports** link in Patchstack App menu, or click here:
If you are on a **Business plan**, the reports whitelabeling feature lets you add your custom logo on the Patchstack security reports.\
To upload a logo, head to the **Reports** page on the Patchstack App.
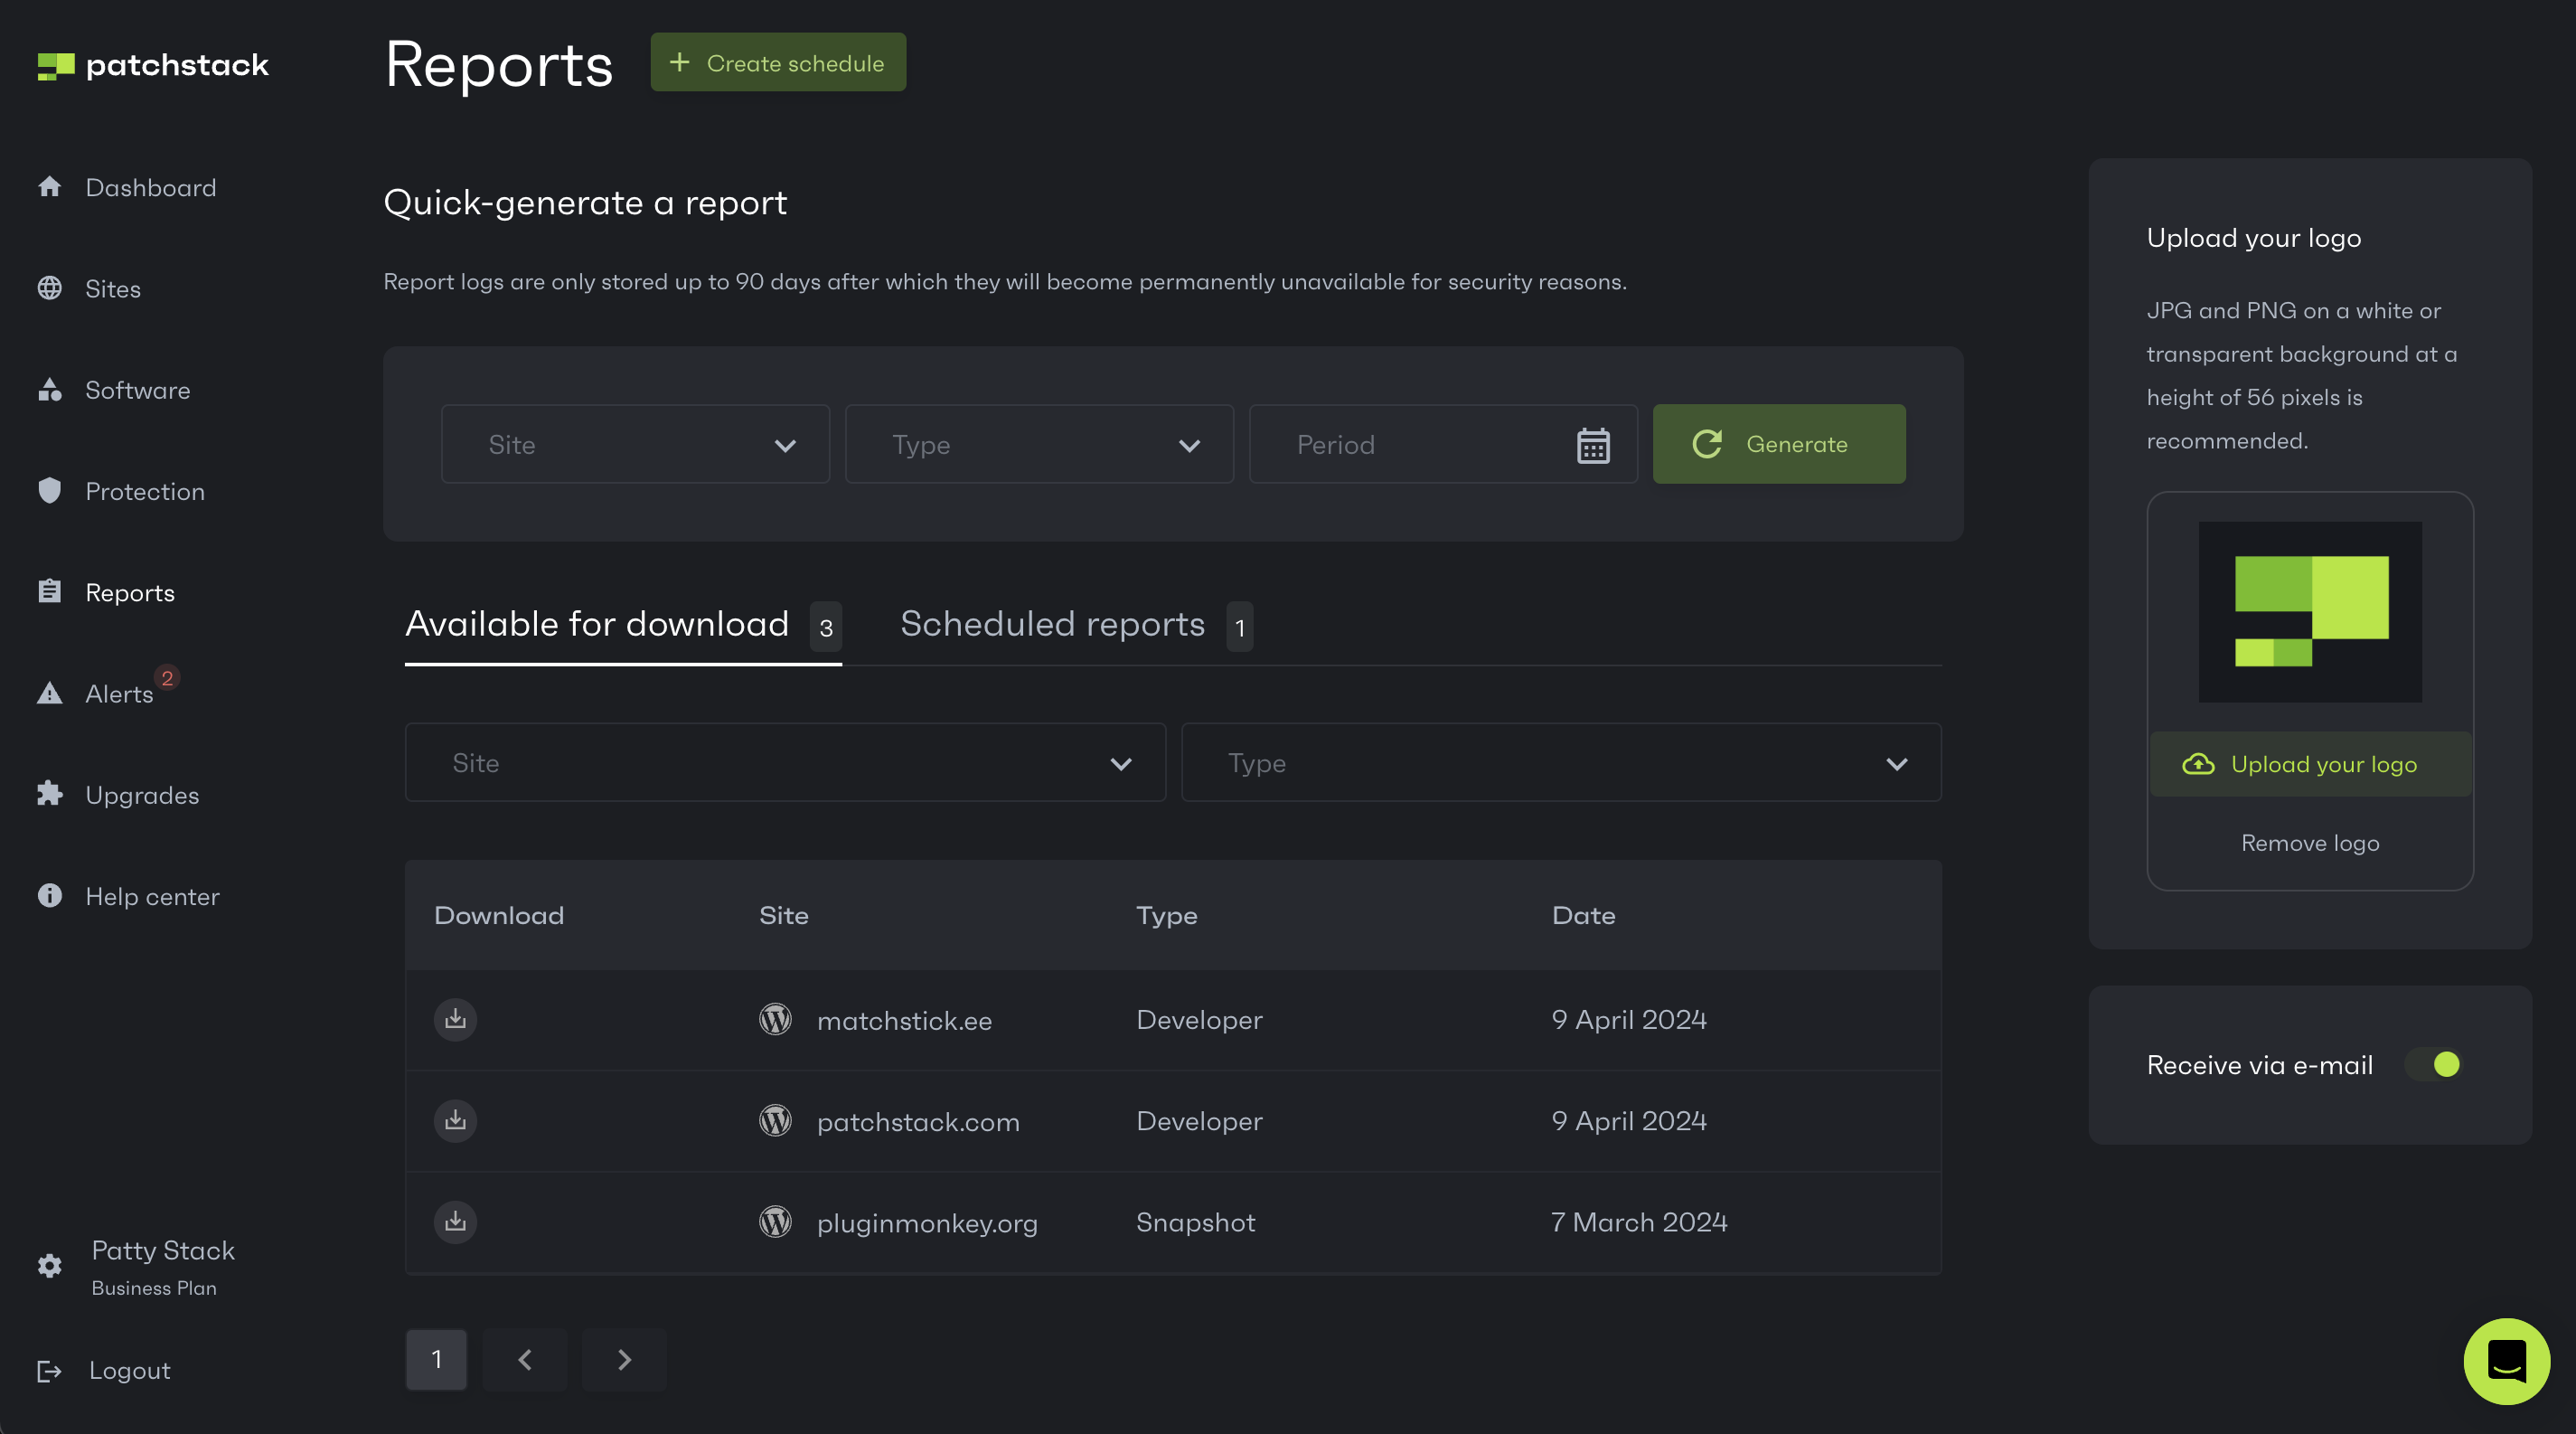
Click on the **Upload your logo** button at the top right of the screen.\
Choose the file and upload it.
# Scheduling security reports
*Reports scheduling is a feature for the Developer and Enterprise plan users.*
To view the scheduled security reports or schedule new reports, navigate to\
**Reports** > **Scheduled reports** in Patchstack App, or click here:
If you have clients to whom you want to send PDF security reports regularly, scheduling the reports can be highly beneficial for you. The reports will be generated automatically and can be accessed from the Patchstack App at any time.\
Reports will be available for downloading on the Reports page.
## Creating a report schedule
[Section titled “Creating a report schedule”](#creating-a-report-schedule)
1. Go to the **Reports** page in Patchstack App
2. Click on the **+ Create Schedule** button at the top of the screen
3. You will see a popup as such: 
4. Pick your site URL from the left dropdown menu. You can then choose to schedule the reports two ways:
* Monthly, on the 1st
* Weekly, on Mondays
5. If you are on an **Enterprise plan**, you can also customize some report settings and upload your customer’s logo, which will be shown on the reports.
6. Having finished with customizing, click **Create**.
Note that reports are generated at specific times:
* Weekly reports are generated every Monday, 02:00 UTC time
* Monthly reports are generated every month on 1st, 03:00 UTC time
## Editing a report schedule
[Section titled “Editing a report schedule”](#editing-a-report-schedule)
To edit a schedule, head to the **Scheduled reports** tab on the **Reports** page.
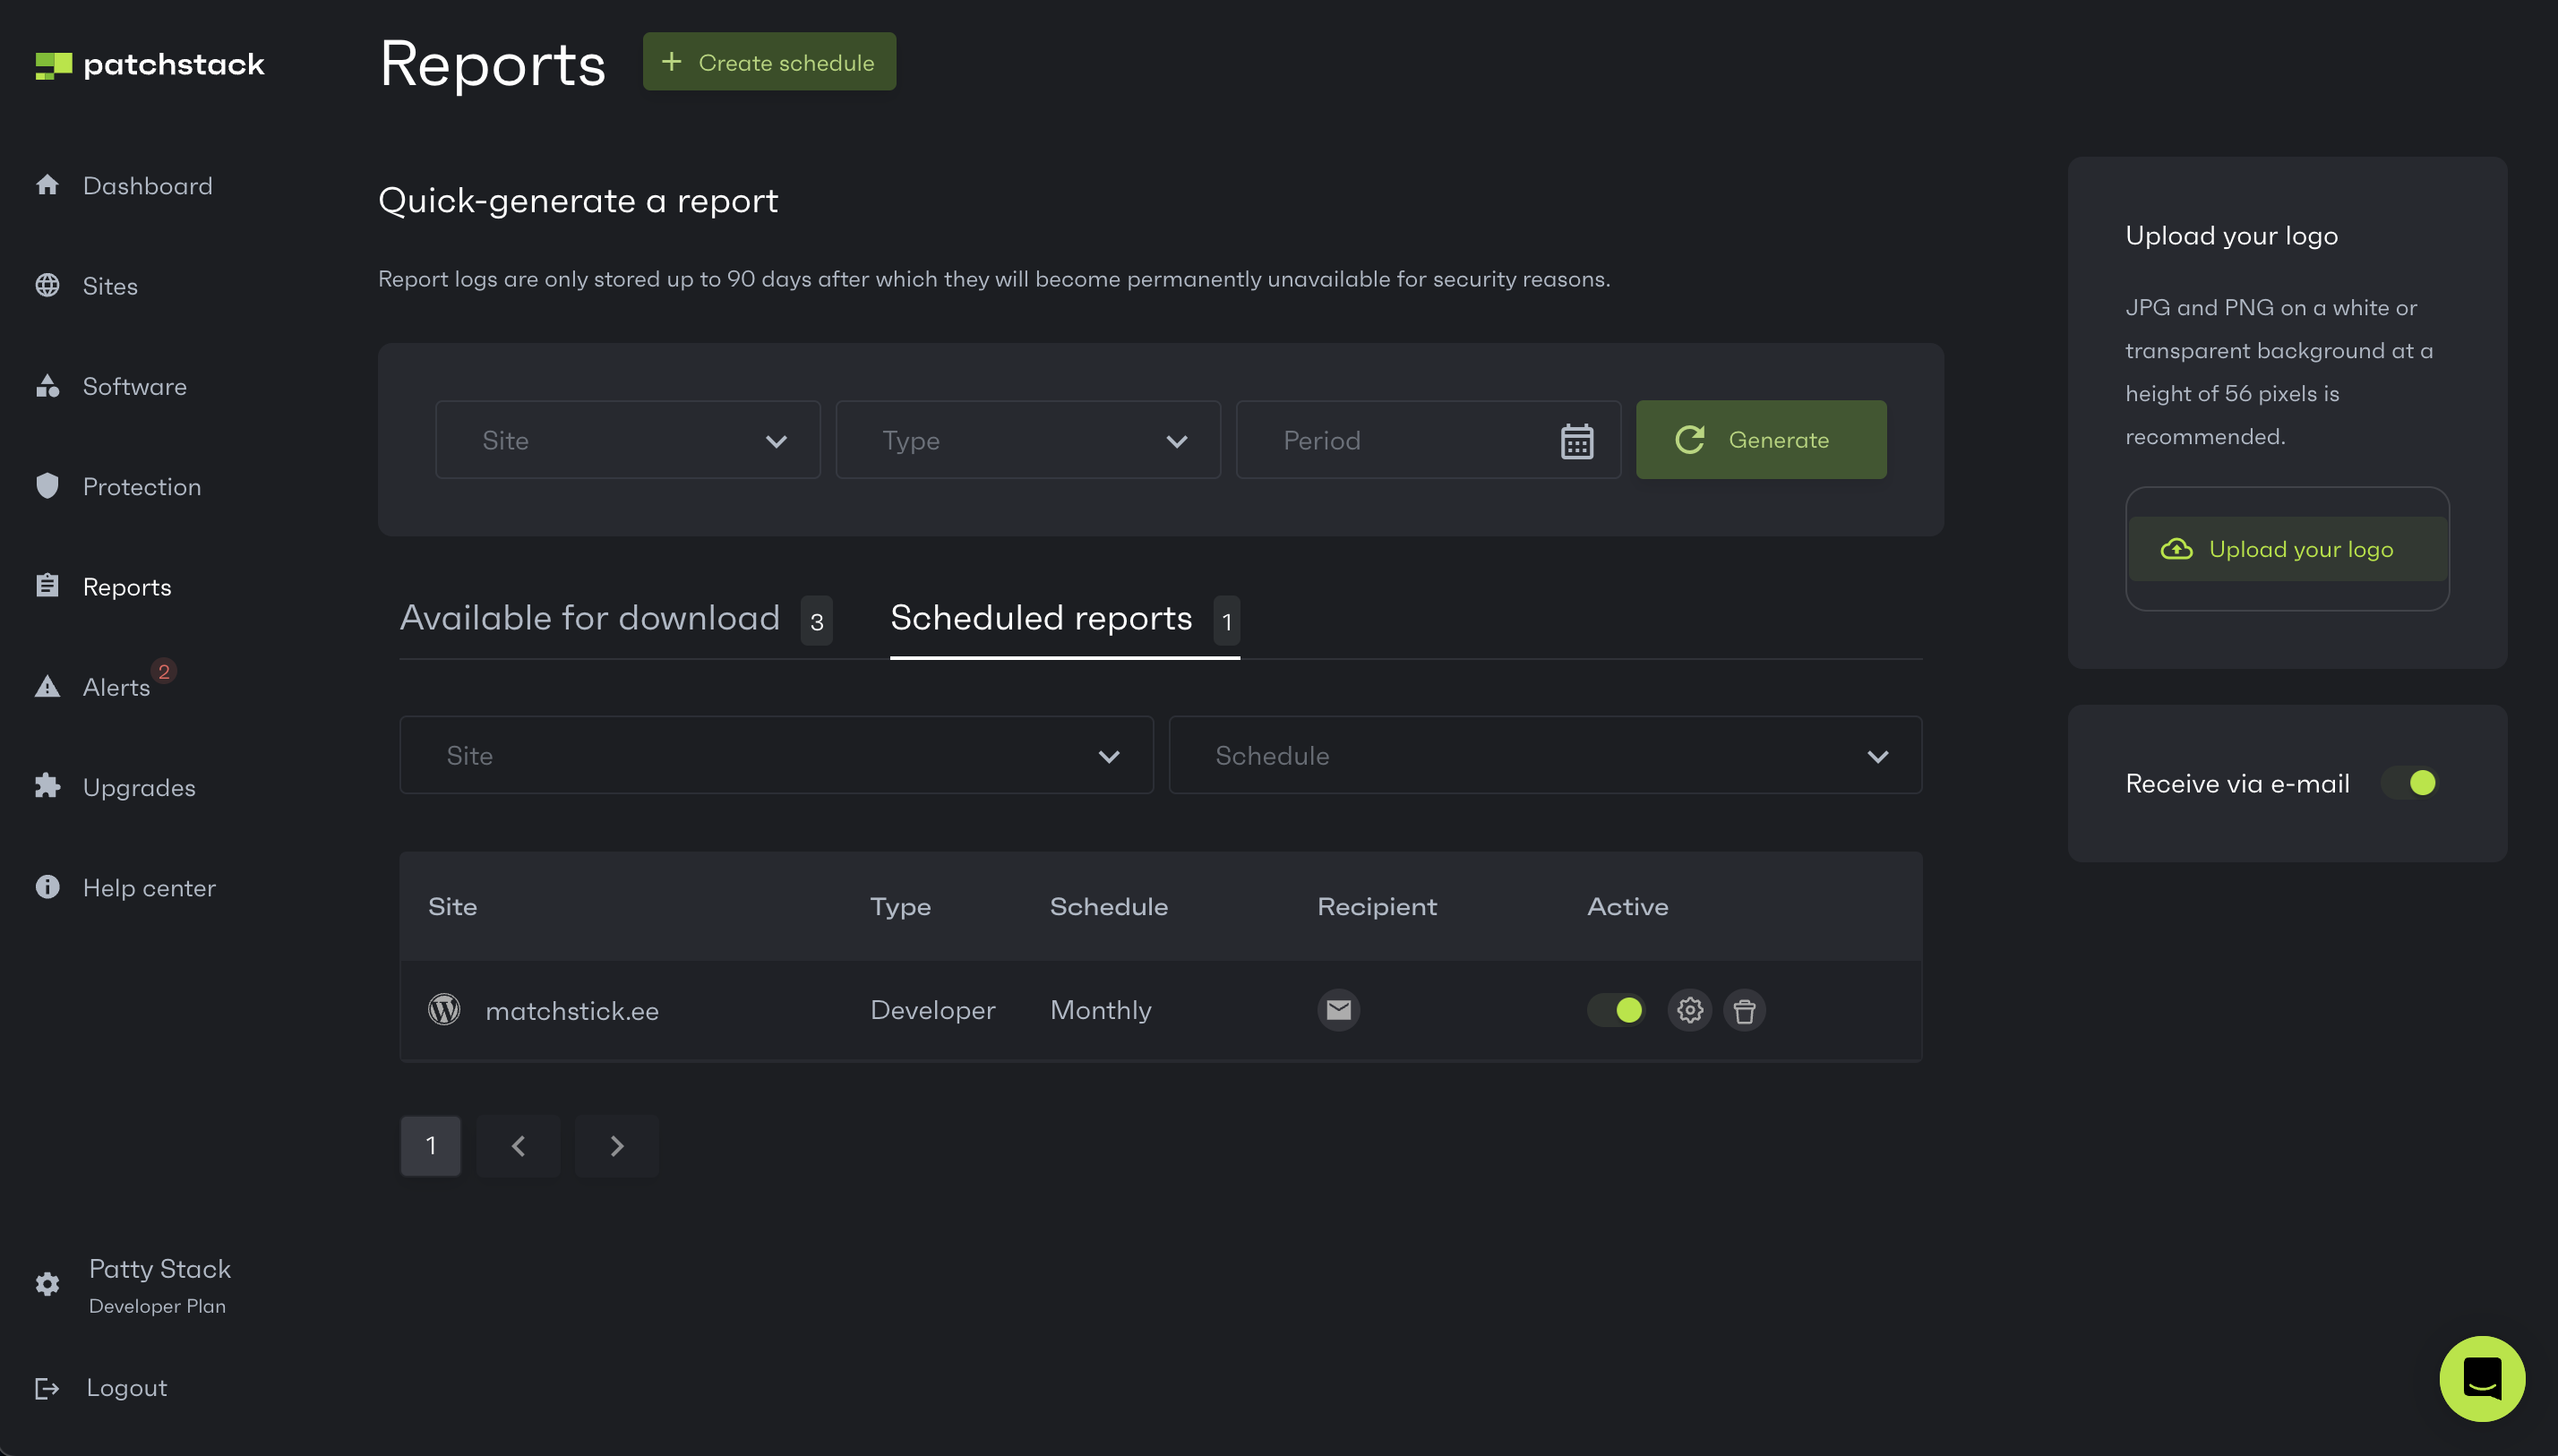
You can then see all the sites that have any reports scheduled.\
Click on the gear icon on the row of the domain.
You will see a popup as such (note that the screenshot contains some settings for an Enterprise plan user):
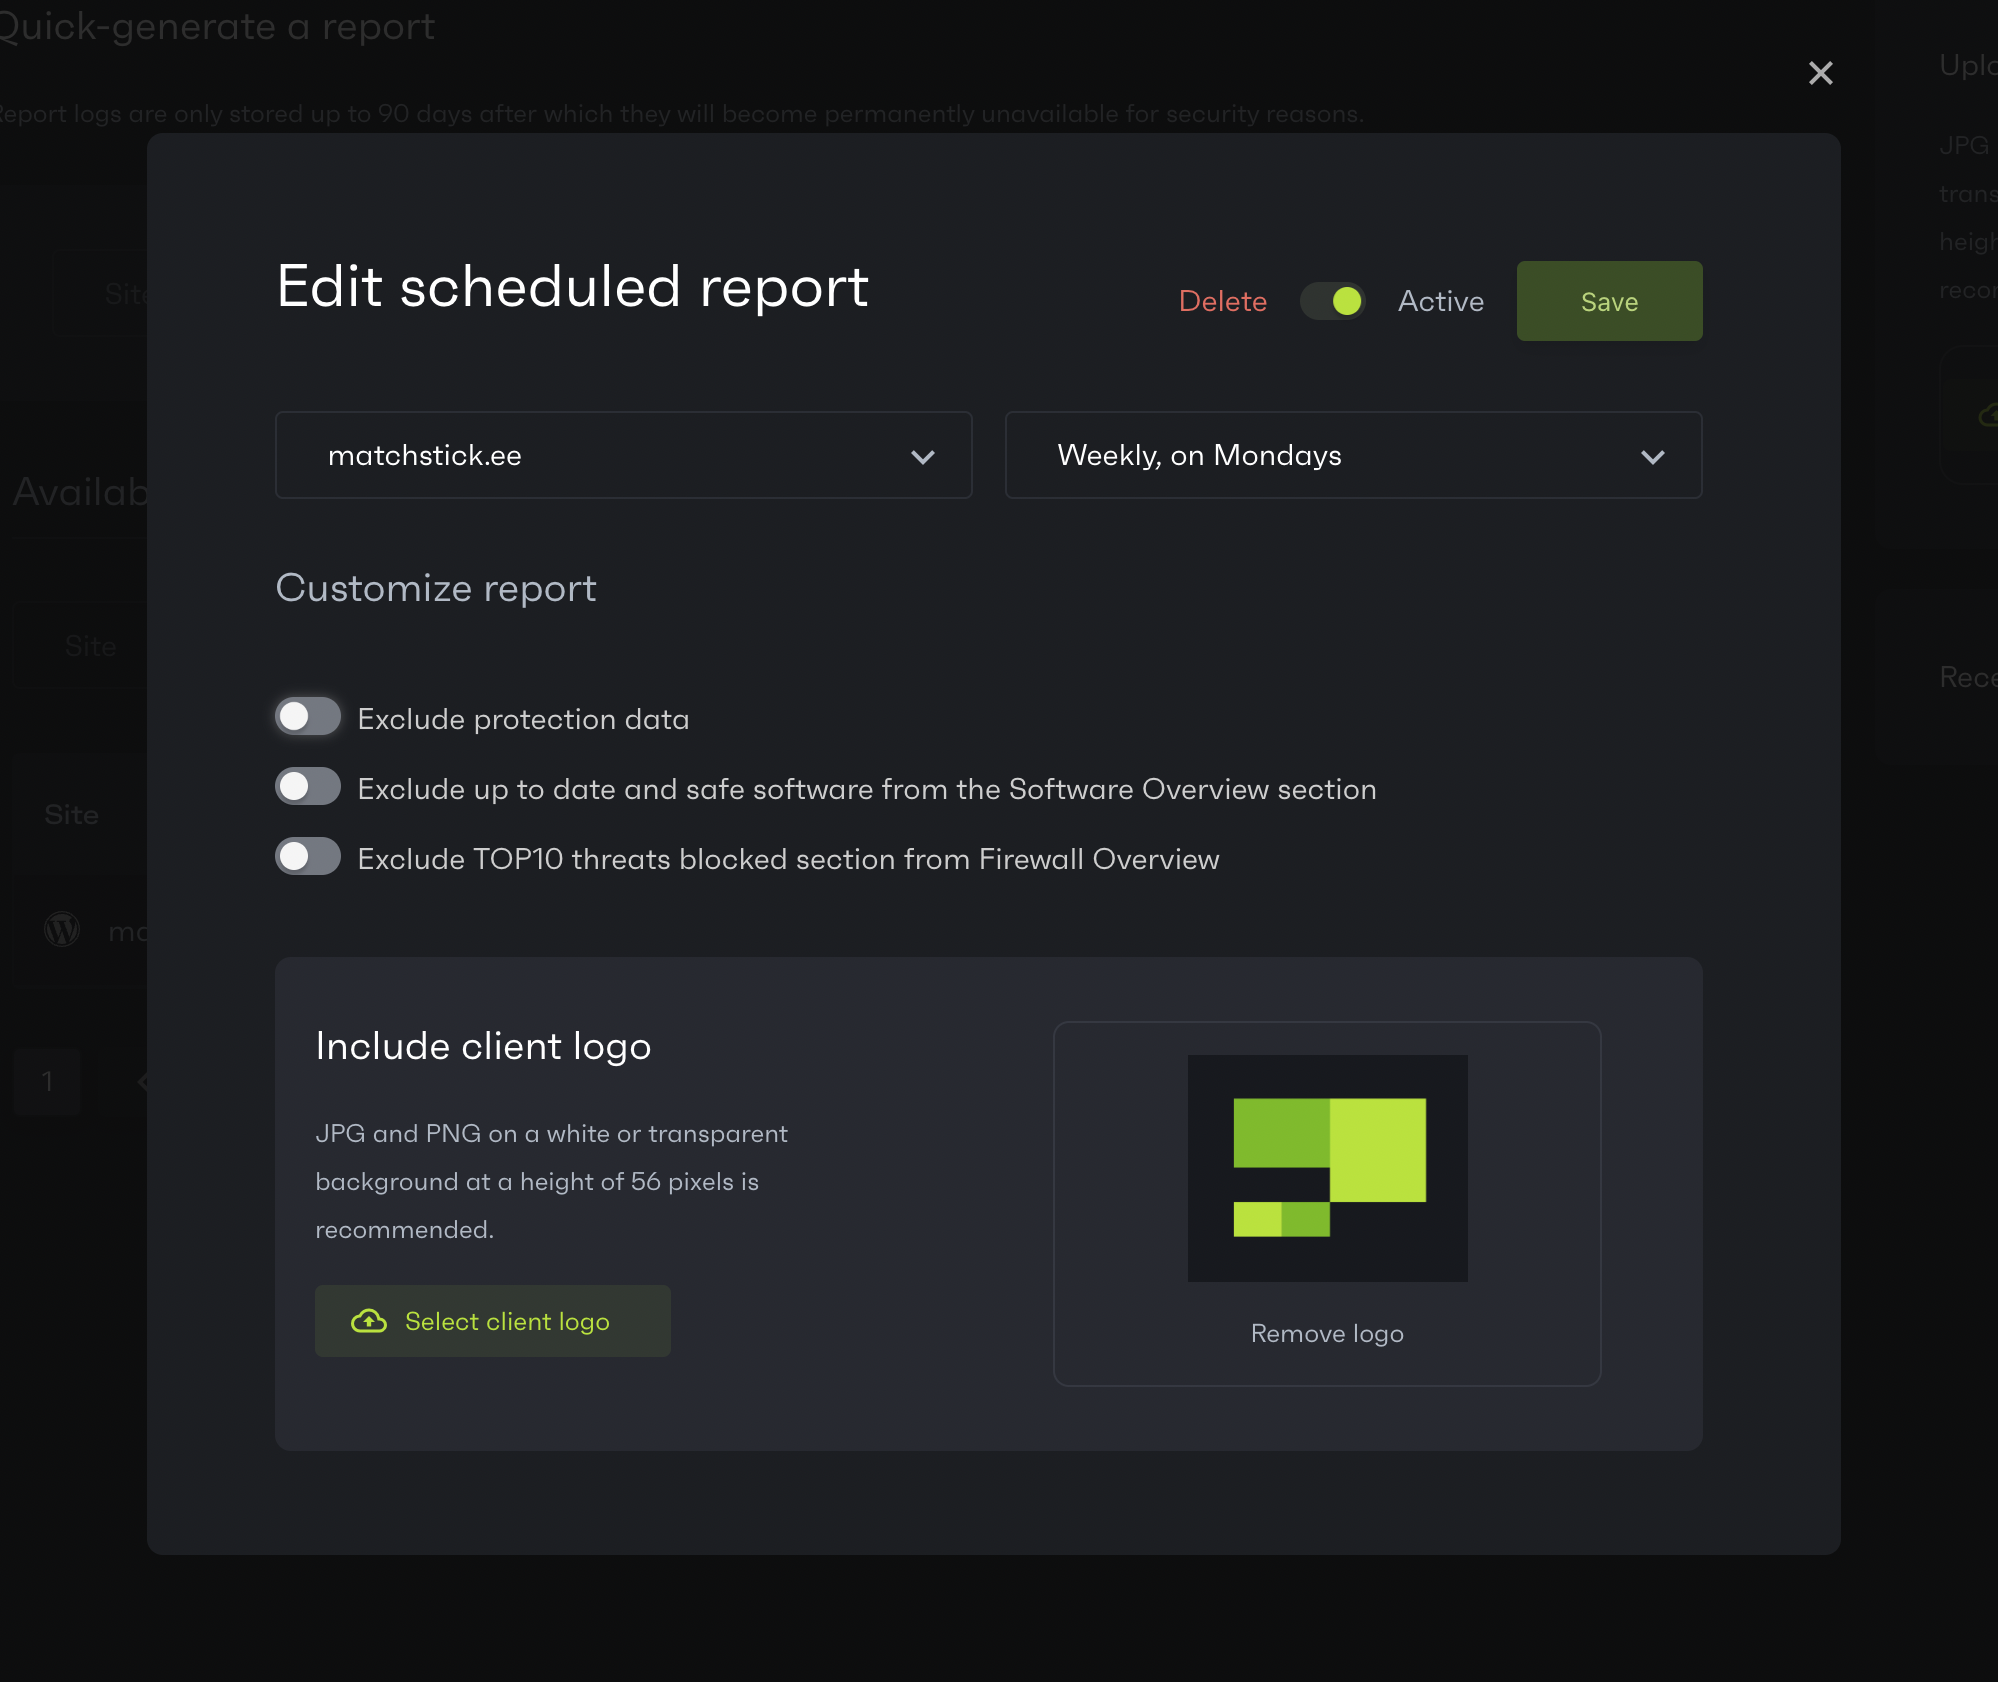
If you are an **Enterprise plan user**, you can toggle the switches in order to customize the data shown on the PDF reports. Also, it is possible to upload the customer logo, so it will be shown on the reports.
After making the changes, click on **Save** button at the top right corner.
# Snapshot report
*Snapshot reports feature is available for all Patchstack users.*
To generate a Snapshot report, navigate to **Reports** page in Patchstack App, or click here:
Snapshot report is a PDF security report, which shows the current situational report of the website. Snapshot report shows:
* Actions that are suggested for you to take with the site (which plugin or theme to update or delete)
* Which vulnerabilities does the site currently have
* Overview of the third-party components installed on the site
[Click here to download an example of a Snapshot report!](https://s3.us-east-2.amazonaws.com/patchstack.com/patchstack_snapshot_report.pdf)
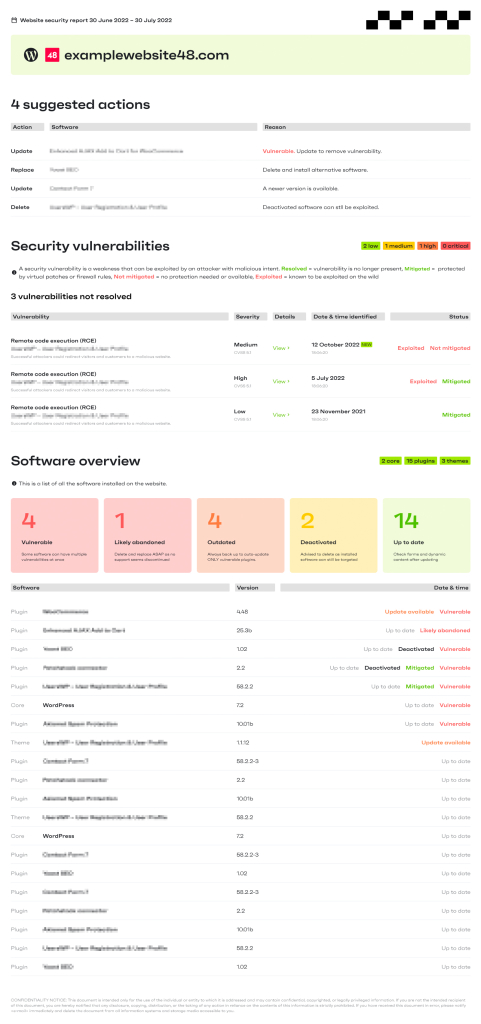
# Activity
*Activity log is accessible for all Patchstack users.*\
**This feature available for WordPress sites only.**
To view your site’s activity log, navigate to **Sites** > **yourdomain.com** > **Activity** in Patchstack App.

Patchstack activity log displays a large number of events that occur on your WordPress site. The logs are stored for 12 months after which they are archived.
On the **Activity** page, you can:
1. Enable / disable the activity log\
*Disabling the activity log is useful, when your site has a lot of activity. For example, the activity log database may become too large on dropshipping ecommerce sites, where huge amounts of products are being constantly imported. On such sites, we recommend disabling the activity logs.*
2. Enable / disable logging the failed logins\
*This will store the failed login entries WordPress activity logs database*
3. Enable / disable uploading the failed login logs to Patchstack\
*This will sync the failed login entries from WordPress activity logs database to Patchstack App logs*
4. See, what sort of activities have been done on the site.
5. Search for activities by username or IP addresses
# General
*General hardening settings are available for all Patchstack paid plan users.*\
***Protection is available for WordPress sites only.***
The general hardening settings are extra firewall rules to protect your website. These rules can be tweaked according to your needs.
To manage your site’s hardening settings, navigate to **Sites** > **yourdomain.com** > **Hardening** in Patchstack App.

On this page you can manage the following hardening settings:
1. **Disable the theme editor** - this feature could protect you from potential automated attacks that involve the theme editor
2. **Remove readme.html from the WordPress root folder** - this will attempt to stop basic readme.html scans by bots or visitors
3. **Block readme.txt access**
4. **Disable user enumeration** - this feature blocks hackers from getting your WordPress usernames
5. **Hide WordPress version** - this feature removes the WordPress version in the \ tag in the HTML output
6. **Block WordPress application password feature** - this feature disables the application passwords feature introduced in WordPress 5.6
7. **Restrict XML-RPC Access** - this feature restricts access to xmlrpc.php by only allowing authenticated users to access it
8. **Restrict WP REST API Access** - this feature restricts access to the WP Rest API by only allowing authenticated users to access it
# Htaccess
*.htaccess settings are available for all Patchstack paid plan users.*\
***Protection is available for WordPress sites only.***
Hardening rules are extra firewall settings, that can be tweaked according to your needs. To manage your site’s .htaccess settings, navigate to **Sites** > **yourdomain.com** > **Hardening** > **.htaccess** in Patchstack App.
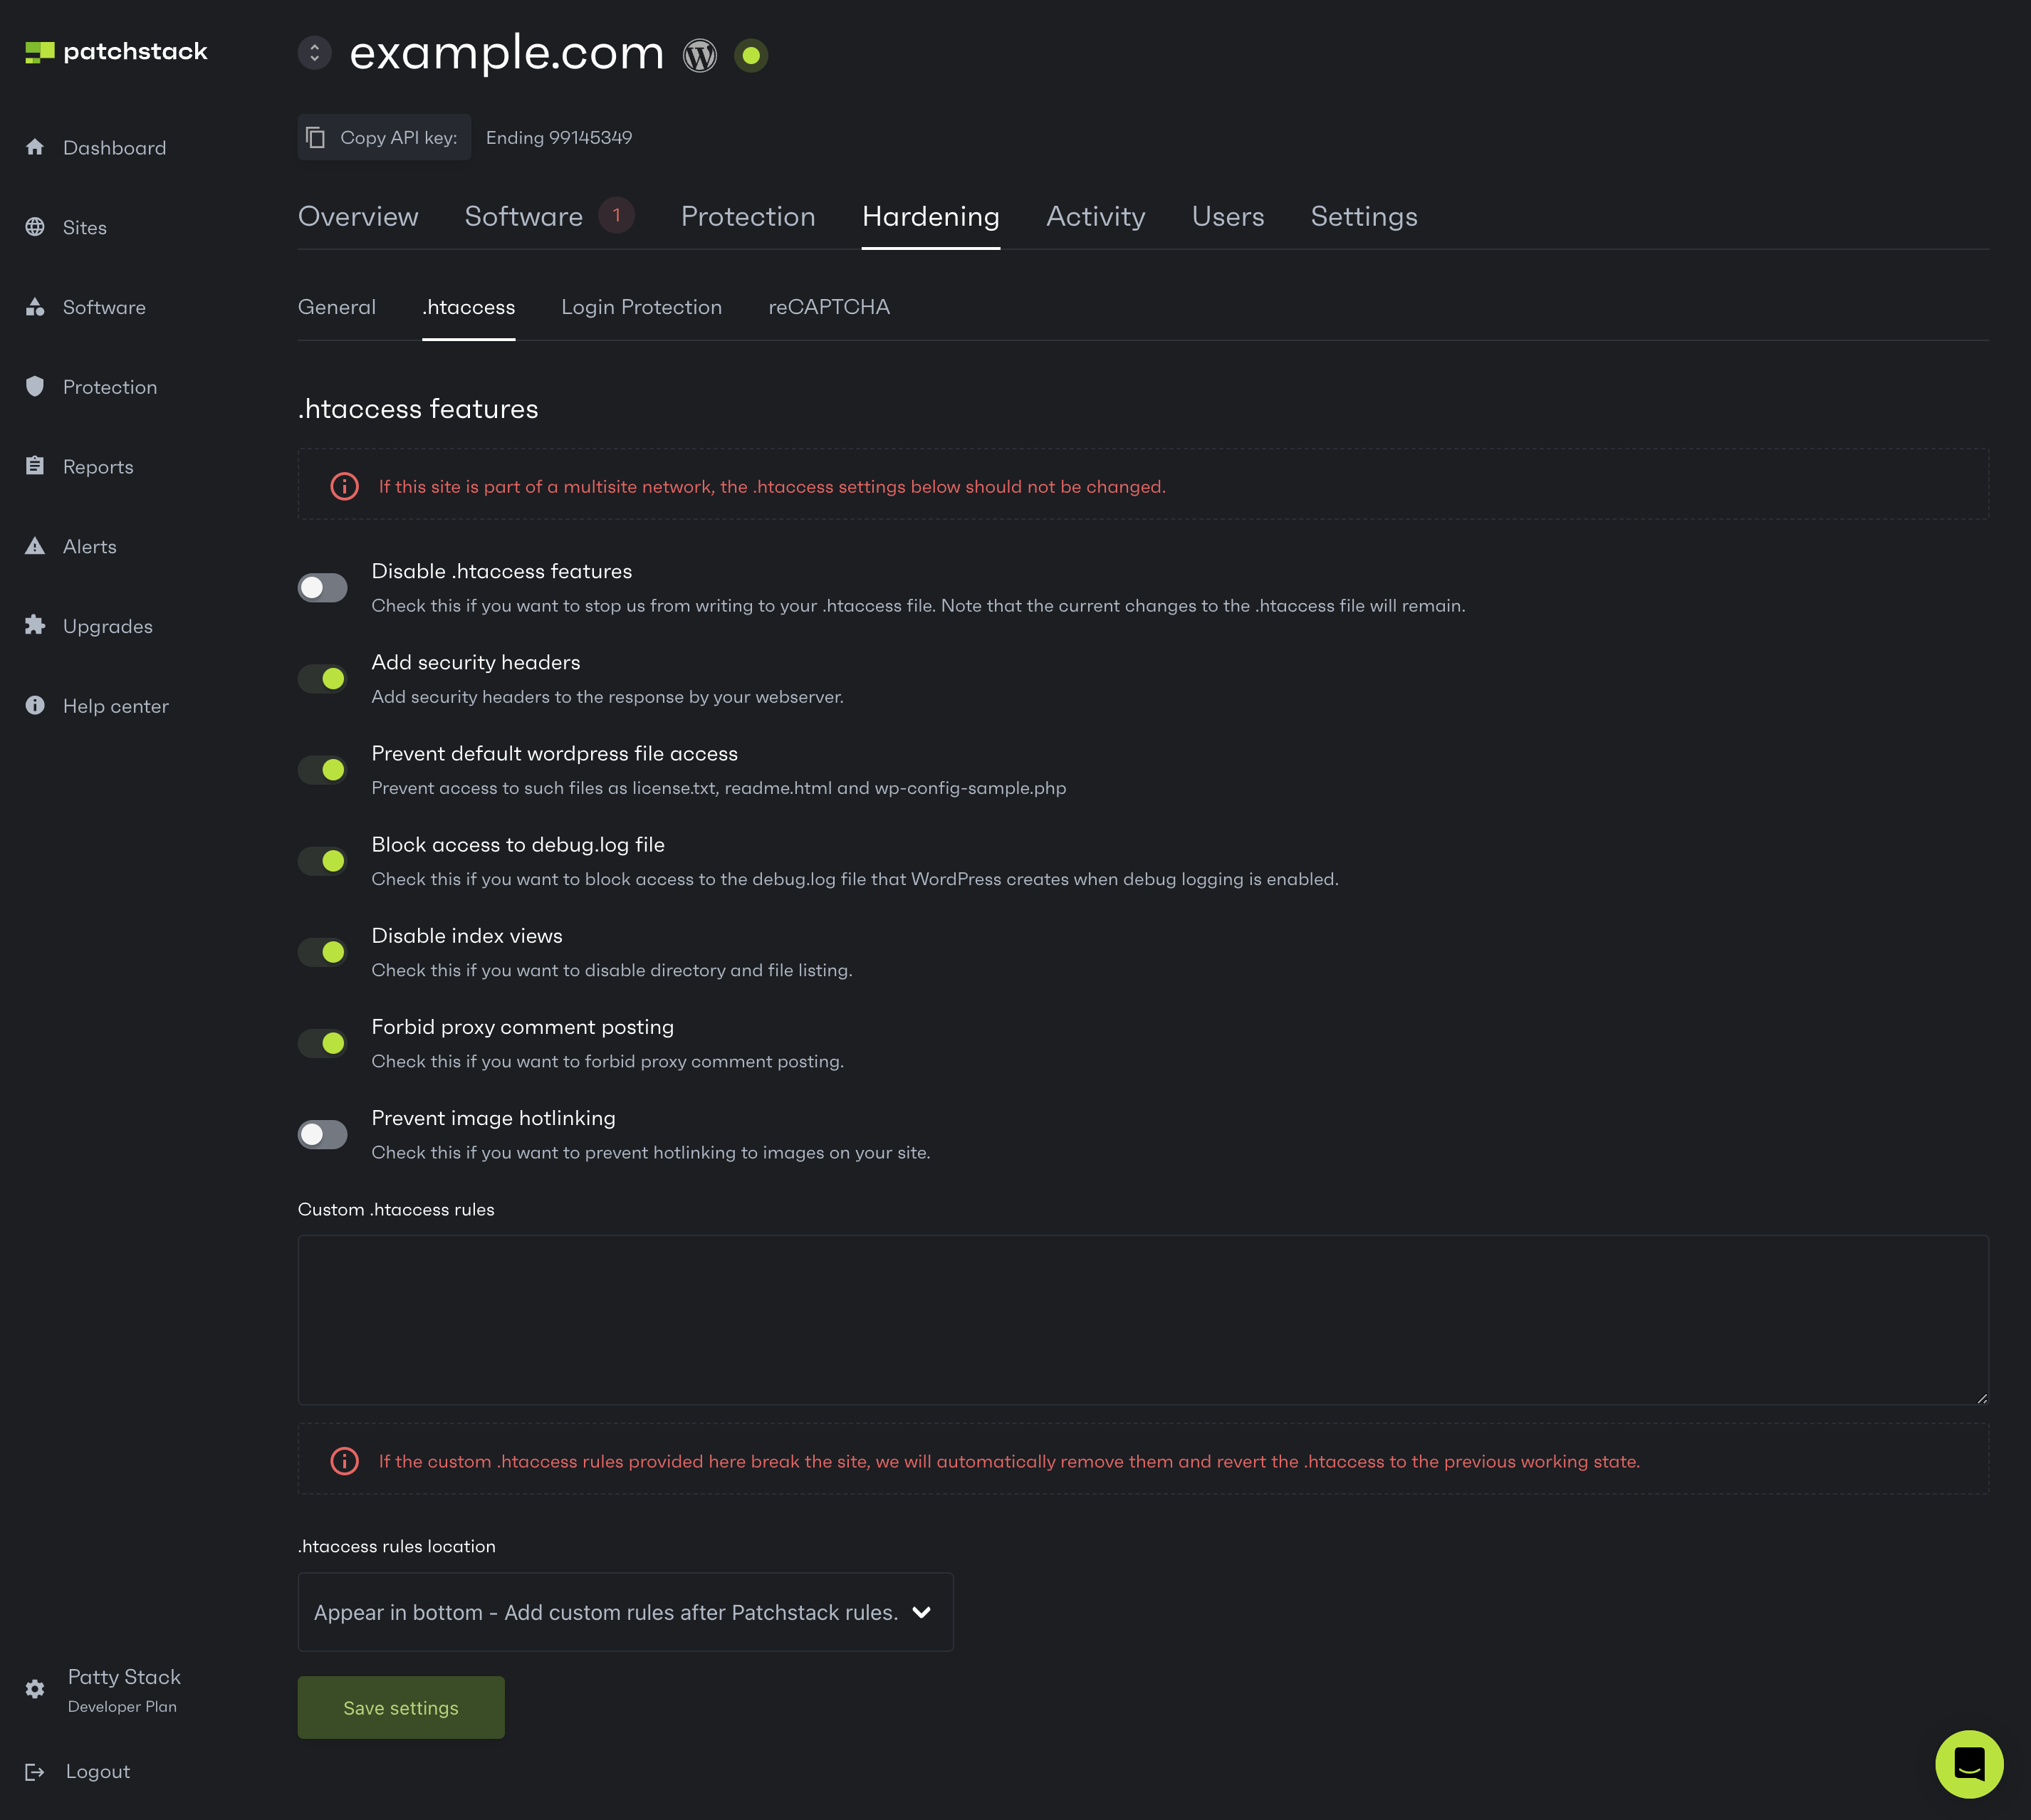
## .htaccess features
[Section titled “.htaccess features”](#htaccess-features)
On the **.htaccess features** block you can modify some of your site settings and modify the .htaccess file.
Settings you can manage on this page:
* Add security headers - toggle this, and Patchstack adds basic security headers to your .htaccess file
* Prevent default WordPress file access - this feature blocks access to such files as license.txt, readme.html and wp-config-sample.php files
* Block access to debug.log file - check this if you want to block access to debug.log file that WordPress creates when debug logging is enabled
* Disable index views - disables directory indexing and file listings
* Forbid proxy comment posting
* Prevent image hotlinking
## Writing custom .htaccess rules
[Section titled “Writing custom .htaccess rules”](#writing-custom-htaccess-rules)
In case you wish to write custom .htaccess rules to the file, you can insert your rules to **Custom .htaccess rules** textfield.\
Additionally, you can select if your written rules appear before or after the Patchstack rules in the .htaccess file.
Please note that in case your custom .htaccess rules would break your website, Patchstack will automatically remove them and revert the .htaccess to the previous working state.
Having done all your changes, click on **Save settings** at the bottom of this section.
# Login protection
*Login protection is available for all Patchstack paid plan users.*\
***Protection is available for WordPress sites only.***
To manage your WordPress site’s login protection, and set up 2FA (two factor authentication) for it, navigate to **Sites** > **yourdomain.com** > **Hardening** > **Login protection** in Patchstack App.
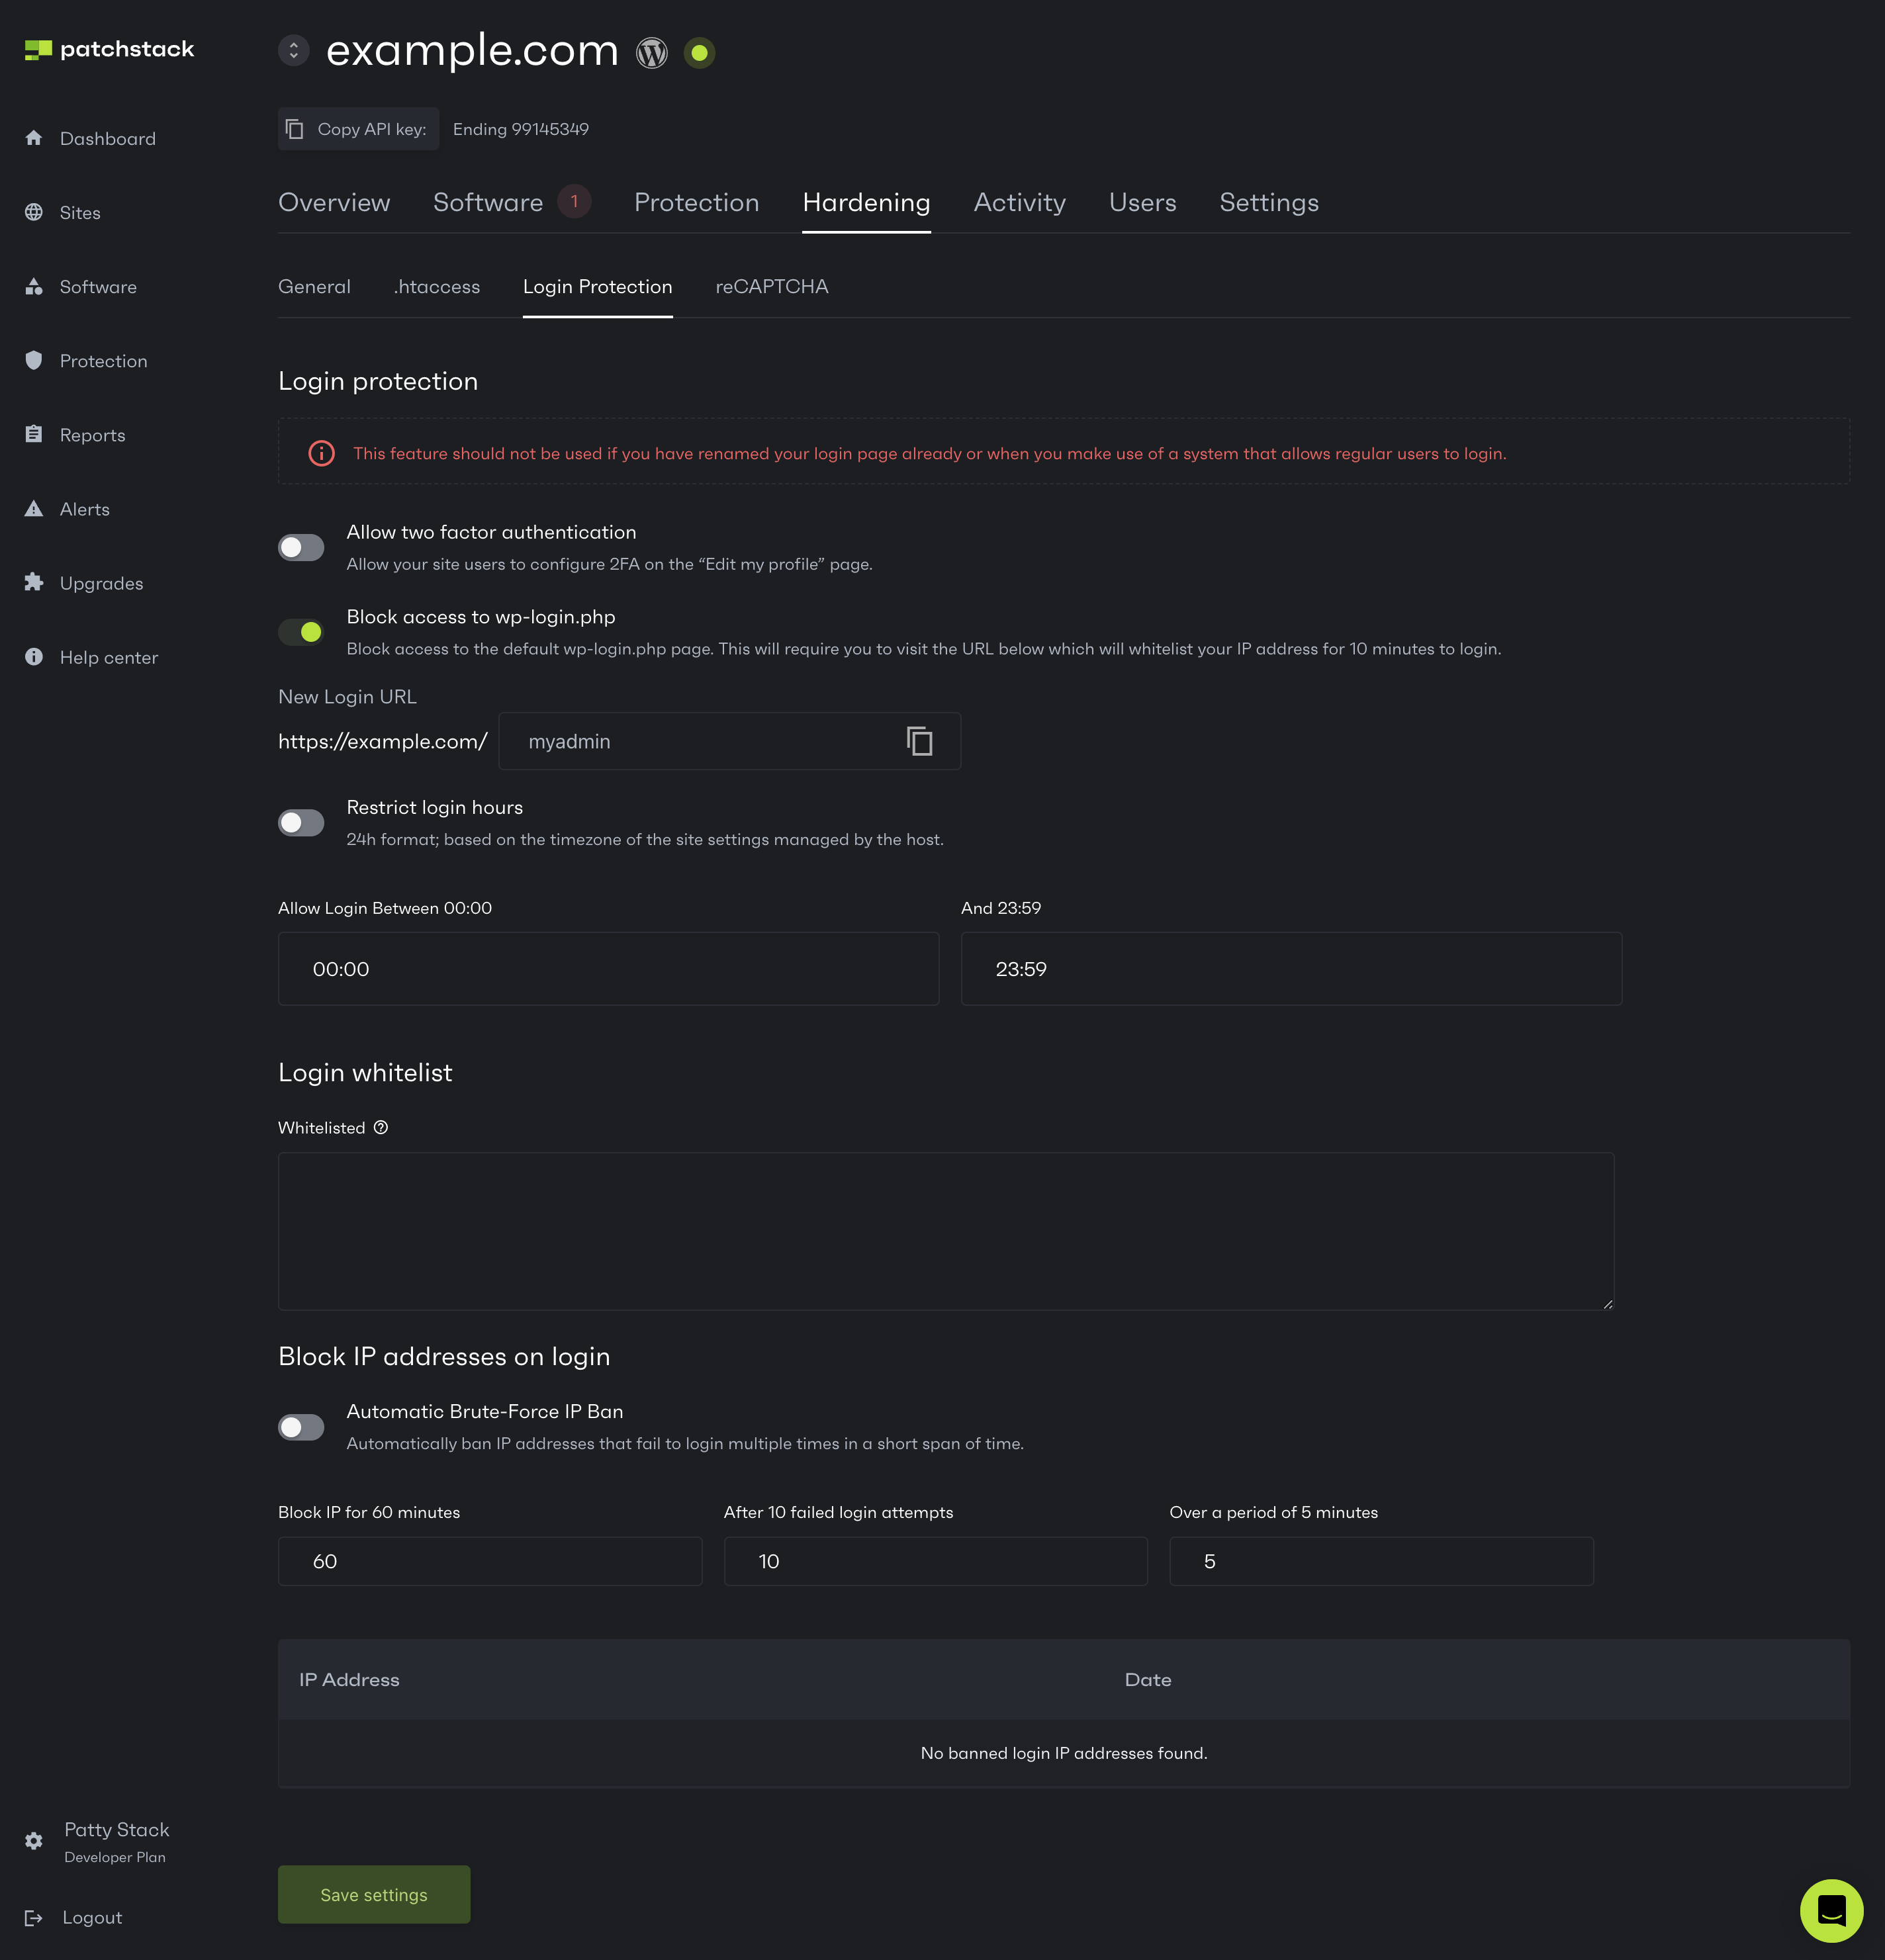
On the **Login protection** subpage you can:
* Block access to default /wp-admin page and set up a custom login URL
* Ban IPs that fail on multiple login attempts
* Set a specific time, where in between users can log in to WordPress
* Enable WordPress users to set up the 2FA from WordPress profile page
* Add IP addresses to WordPress login whitelist
* Block certain IP addresses from being able to log into WordPress
## How our custom login URL feature works
[Section titled “How our custom login URL feature works”](#how-our-custom-login-url-feature-works)
If you define a new URL for login, it works like a security token for your wp-admin. Entering your custom URL once, will whitelist your IP to access regular wp-admin URL again.
### Example usage:
[Section titled “Example usage:”](#example-usage)
Let’s say you enter **“myadmin”** to the **New URL** field.\
To log in to your WordPress admin panel, you need to:
1. First visit your secret URL (for example **yourdomain.com/myadmin**)
2. Your IP gets whitelisted
3. You can now log in from the regular **yourdomain.com/wp-admin** again
4. Other visitors are blocked from wp-admin page, unless they know your security token (in this case /myadmin)
# Captcha
*Captcha feature is available for all Patchstack paid plan users.*\
***Protection is available for WordPress sites only.***
Captcha is a powerful tool for protecting your website against spambots.\
With Patchstack, you can integrate captcha solutions easily into your WordPress sites.
To manage your site’s captcha settings, navigate to **Sites** > **yourdomain.com** > **Hardening** > **Captcha** in Patchstack App.
Patchstack offers two captcha solutions:
* Google reCAPTCHA
* Cloudflare Turnstile
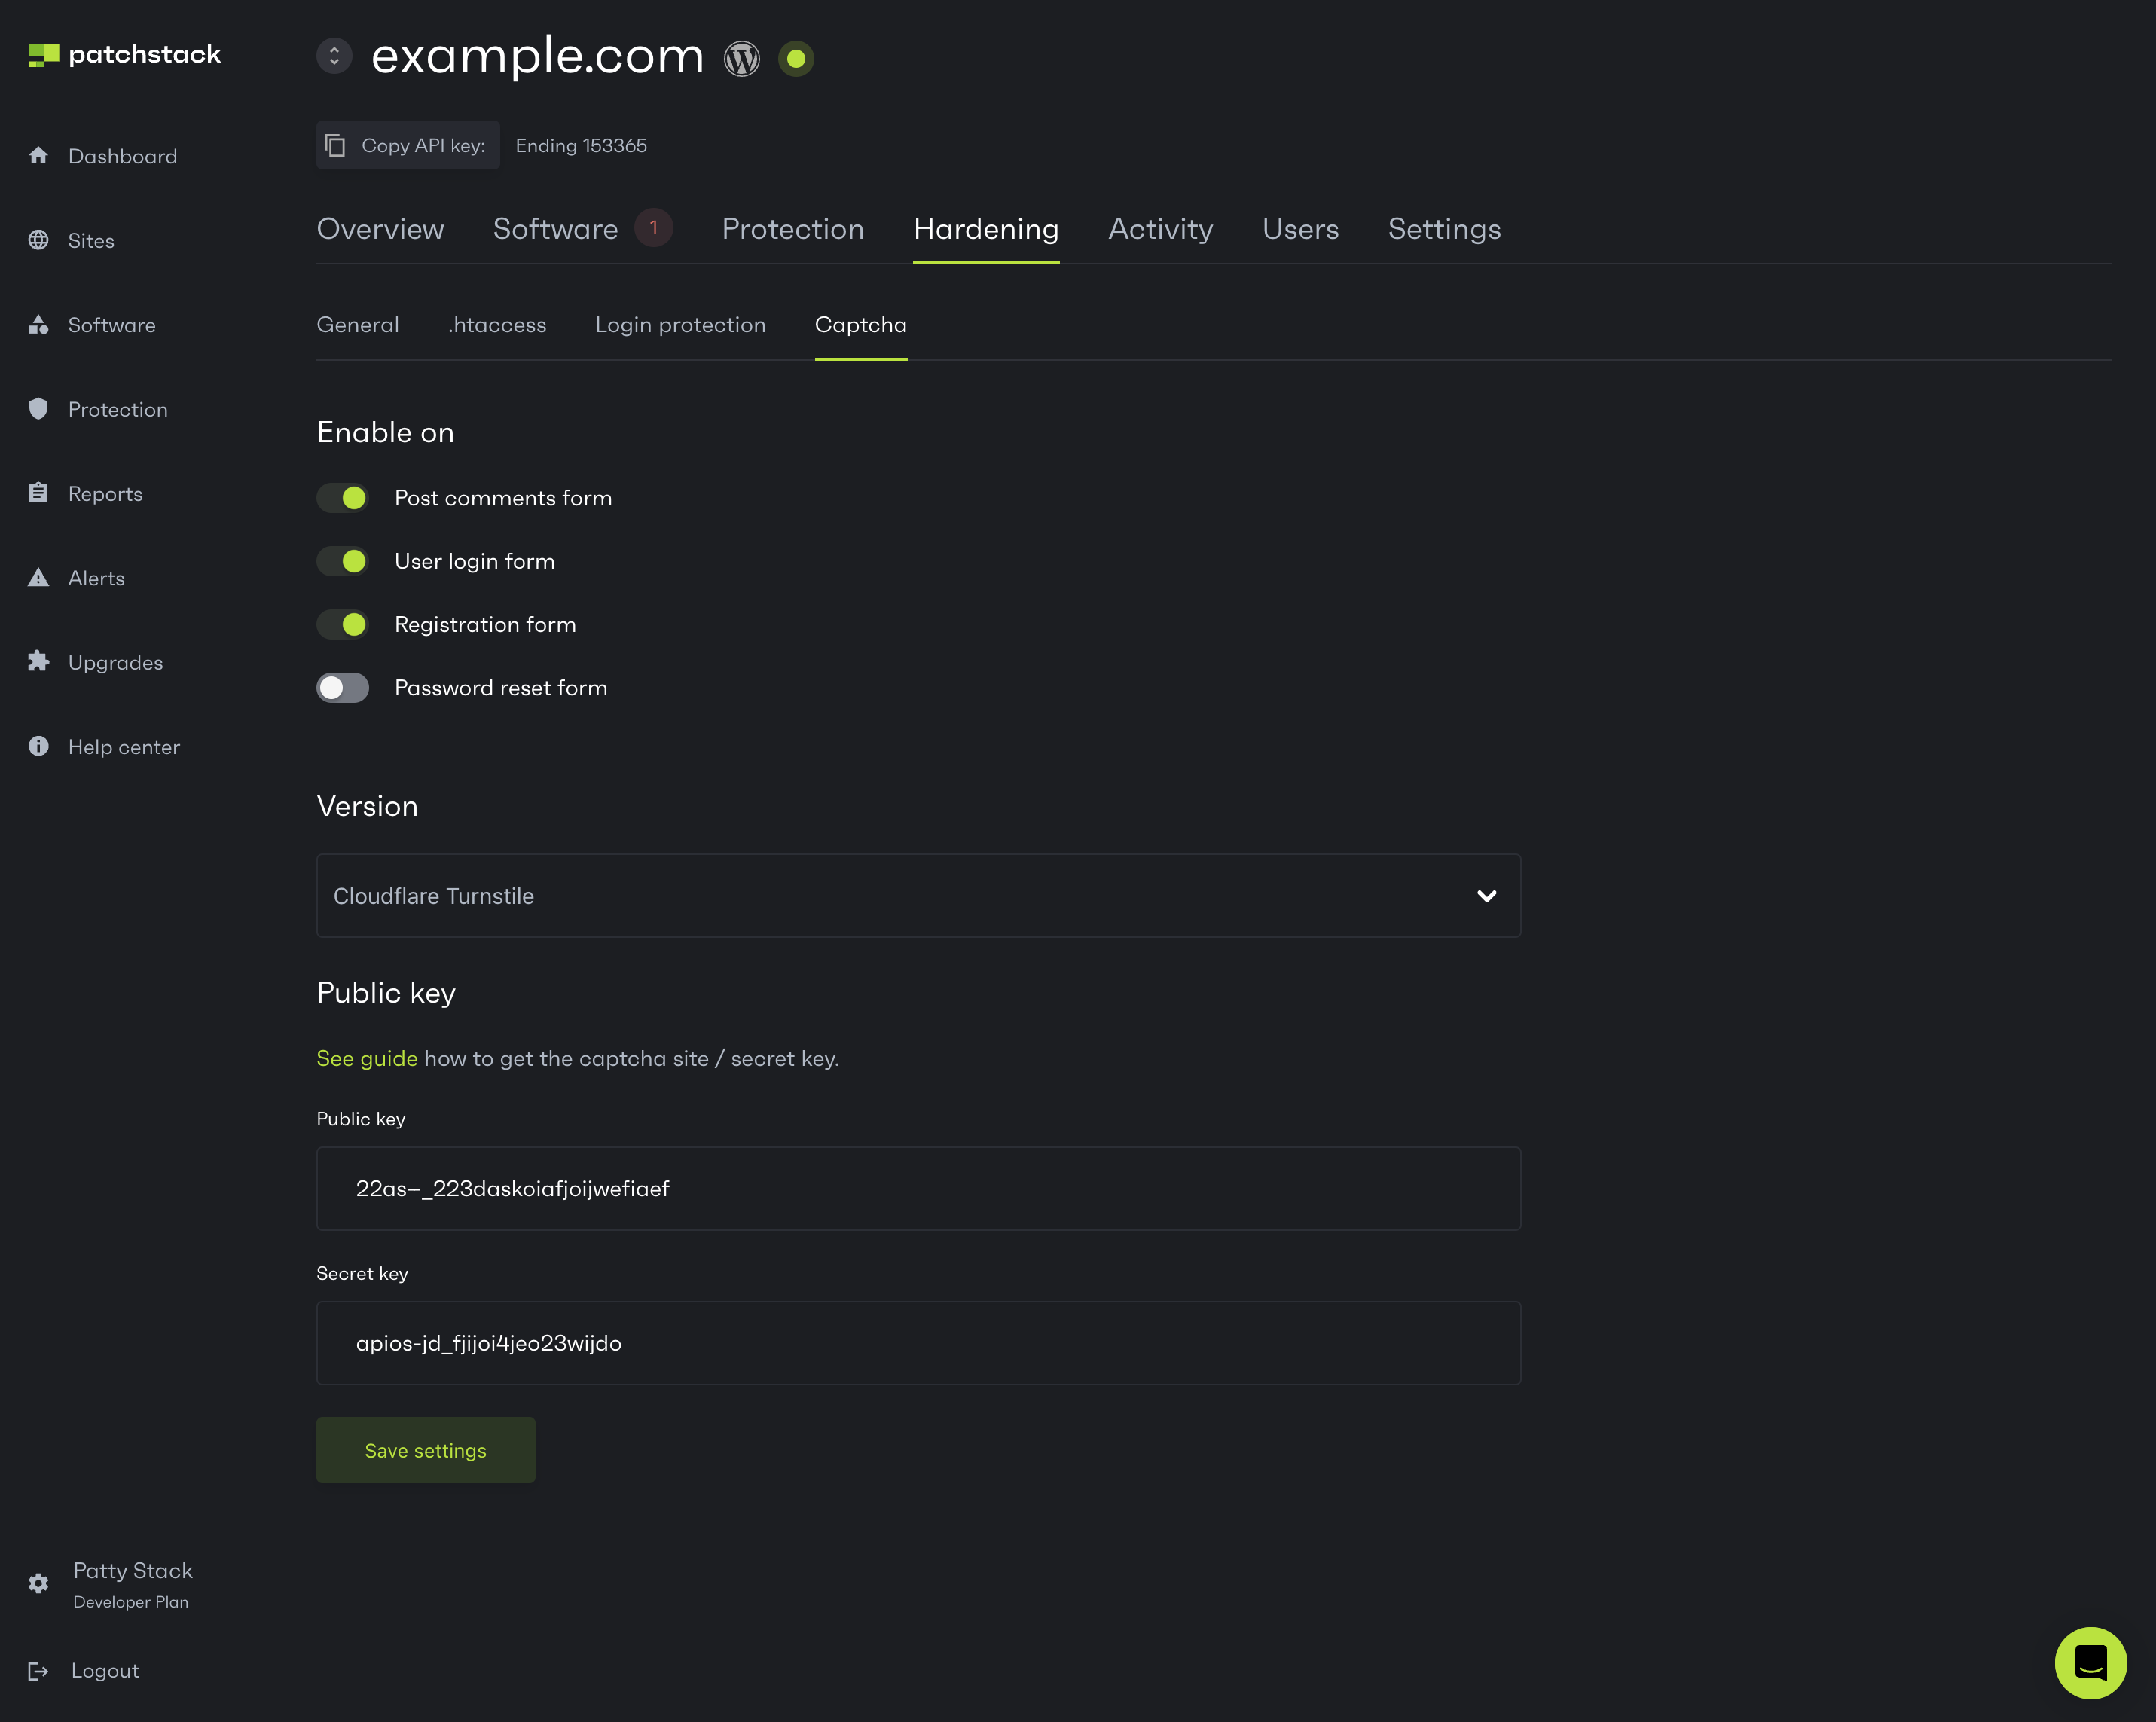
Note that our captcha can only be used on the WordPress built-in forms - these are:
* Commenting forms
* Login form
* Registration form
* Password reset form
**NB!** Patchstack does not offer captcha integrations for other third-party plugins or themes (eg. WooCommerce, Contact Form 7).
To activate captcha on your site, you will have to generate a public key and secret key first. The tutorials for creating captcha keys and integrating them with Patchstack can be found below.
## Setting up Google reCAPTCHA
[Section titled “Setting up Google reCAPTCHA”](#setting-up-google-recaptcha)
You can choose whether to use reCAPTCHA v2 or reCAPTCHA v3.\
Find information about different reCAPTCHA versions [here!](https://developers.google.com/recaptcha/docs/versions)
[Here is a tutorial how to generate those](/faq-troubleshooting/integrations/how-to-get-the-site-key-and-secret-key-for-the-recaptcha-feature/).
To set up Google reCAPTCHA:
1. Login into your Google account at Google.com
2. Go here:
3. In the label, enter your site name
4. Check reCAPTCHA v2 OR reCAPTCHA v3 depending on which reCAPTCHA version you want to use. The reCAPTCHA v3 feature is only available in our plugin version 1.3 and up
5. In the domains field, enter your domain(s)
6. Check the checkbox to agree to the terms
7. Click on Register
8. You will now see the Site key and Secret key which you will need to copy over to our plugin, then save the settings on the settings page
Once the keys have been generated, insert them to the Patchstack App and click **Save settings**.
## Setting up Cloudflare Turnstile
[Section titled “Setting up Cloudflare Turnstile”](#setting-up-cloudflare-turnstile)
To set up Cloudflare Turnstile:
1. Choose **Cloudflare Turnstile** from the versions list of captchas in Patchstack App.
2. Log in to Cloudflare:
3. In the navigation menu on the left, click “Turnstile”
4. Click on “Add Site”
5. Add your site name, and the domain name which you want to run the Turnstile on
6. Click **Create**
7. The site key and secret key will be shown on the screen
8. Copy these keys over to the fields on the Patchstack App > yoursite.com > Hardening > Captcha page
9. Click **Save settings**
After all the changes, click on **Save settings**.
# Additional settings
*Additional protection settings are available for all Patchstack paid plan users.*\
***Protection settings and modules are available for WordPress sites only.***
The **Additional settings** subpage is found at **Sites** > **yoursite.com** > **Protection** > **Additional settings** in Patchstack App.
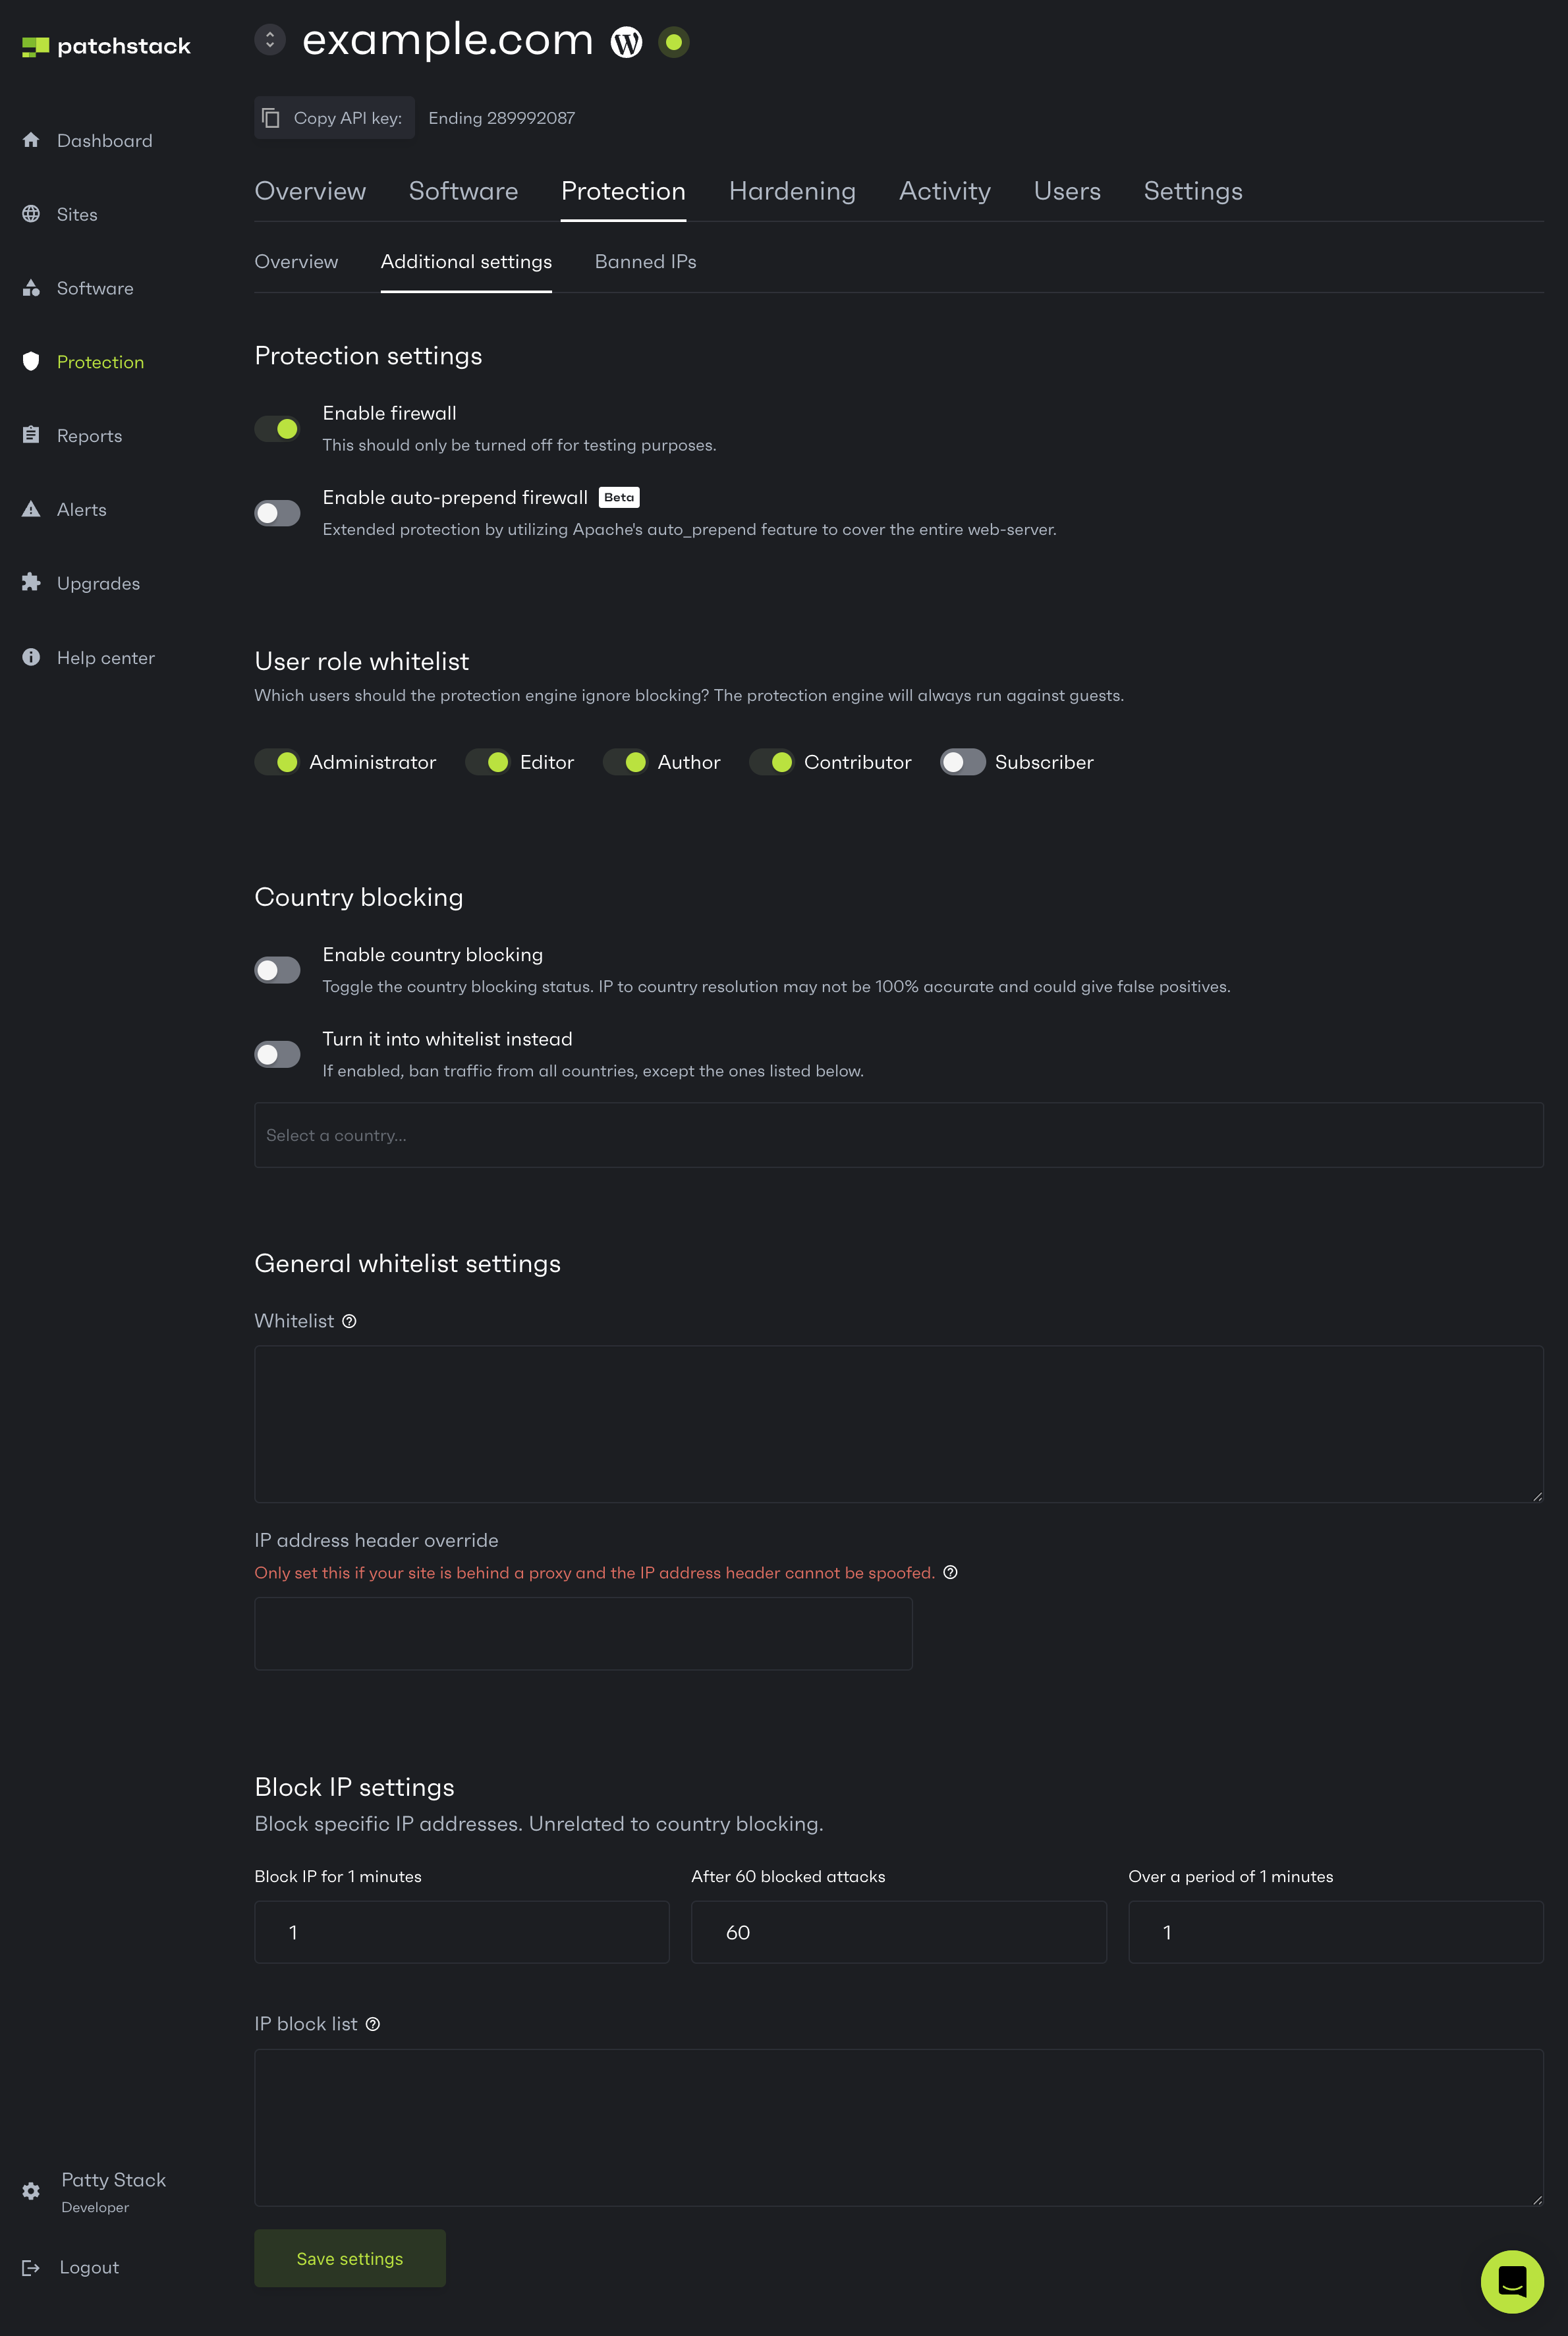
## Additional settings features
[Section titled “Additional settings features”](#additional-settings-features)
### Protection settings
[Section titled “Protection settings”](#protection-settings)
**Enable firewall** - this toggle enables or disables Patchstack’s firewall. When turned off, your site won’t be protected by virtual patches or firewall rules. However, other security measures (such as IP bans, country blocking, and .htaccess rules) will remain active. We recommend disabling the firewall only for testing purposes.
**Enable auto-prepend firewall** - this feature is new and currently designated a beta feature. It allows Patchstack to inject the [auto\_prepend\_file](https://www.php.net/manual/en/ini.core.php#ini.auto-prepend-file) variable into the .htaccess file which will let the Patchstack firewall run in all PHP scripts across the entire web-server. This makes it possible to block vulnerabilities in PHP files which are loaded outside WordPress core itself. This feature only works on Apache servers.
### User role whitelist
[Section titled “User role whitelist”](#user-role-whitelist)
You can whitelist user types from the Patchstack firewall engine. This means that the Patchstack firewall would not run against these user types at all. To whitelist any user type, do the following:
1. Navigate to your sites’ **Protection** > **Additional settings** page in Patchstack App
2. Look for the **User role whitelist** section
3. Toggle the roles, that you wish to whitelist
4. Click **Save settings** once the changes have been done.
### Country blocking
[Section titled “Country blocking”](#country-blocking)
In case you want to block traffic to your site from certain countries, you can do so in the **Country blocking** section.  To block any country from viewing your site, do the following:
1. Navigate to your sites’ **Protection** > **Additional settings** page in Patchstack App
2. Look for the **Country blocking** section
3. Toggle the **Enable country blocking** switch
4. Start typing the name of the country into the country list field
5. Click on the country name
6. Scroll down and click on **Save settings**
### Inversed country blocking
[Section titled “Inversed country blocking”](#inversed-country-blocking)
Patchstack has also added the option which inverses the country blocking. When “Turn it into whitelist” is checked, the countries which are typed into the country list input, will be the only countries from which the traffic to your site is allowed.
**Example case:**\
If you want to allow traffic ONLY from (for example) Germany:
1. Type “Germany” into **country input field**
2. Check **Turn it into whitelist instead**
3. Check **Enable country blocking**
4. Click on **Save settings**
PS! In some rare occurrences, the country blocking feature can cause false positive blockings. We rather recommend using country blocking on a server level.
### General whitelist settings
[Section titled “General whitelist settings”](#general-whitelist-settings)
Under the **General whitelist settings** section, you can manage whitelist settings and add IP address header override rule.
> #### 📘 Whitelist
>
> [Section titled “📘 Whitelist”](#-whitelist)
>
> Each rule must be on a new line.
>
> The following keywords are accepted\
> IP:IPADDRESS\
> PAYLOAD:someval\
> URL:/someurl
>
> Definitions\
> IP = firewall will not run against the IP\
> PAYLOAD = if the entire payload contains the keyword, the firewall will not proceed\
> URL = if the URL contains given URL, firewall will not proceed
>
> Example\
> IP:192.168.1.1\
> PAYLOAD:contact\_form\
> URL:water\
> URL:/some-form
>
> In this scenario, the firewall will not run if the IP address is 192.168.1.1 or if the payload contains contact\_form or if the URL contains water or if the URL contains /some-form.
> #### 📘 IP Address Header Override
>
> [Section titled “📘 IP Address Header Override”](#-ip-address-header-override)
>
> If you would like to override the IP address header that we use to grab the IP address of the visitor, enter the value to IP Address Header Override input.
>
> This must be a valid value in the $\_SERVER array, for example HTTP\_X\_FORWARDED\_FOR. If the $\_SERVER value you enter does not exist, it will fallback to the Patchstack IP grab function so ask your hosting company if you are unsure.
>
> Leave this empty to use the Patchstack IP address grabbing function.
### Block IP settings
[Section titled “Block IP settings”](#block-ip-settings)
In this section, you can Block IPs that are a potential threat to your sites.
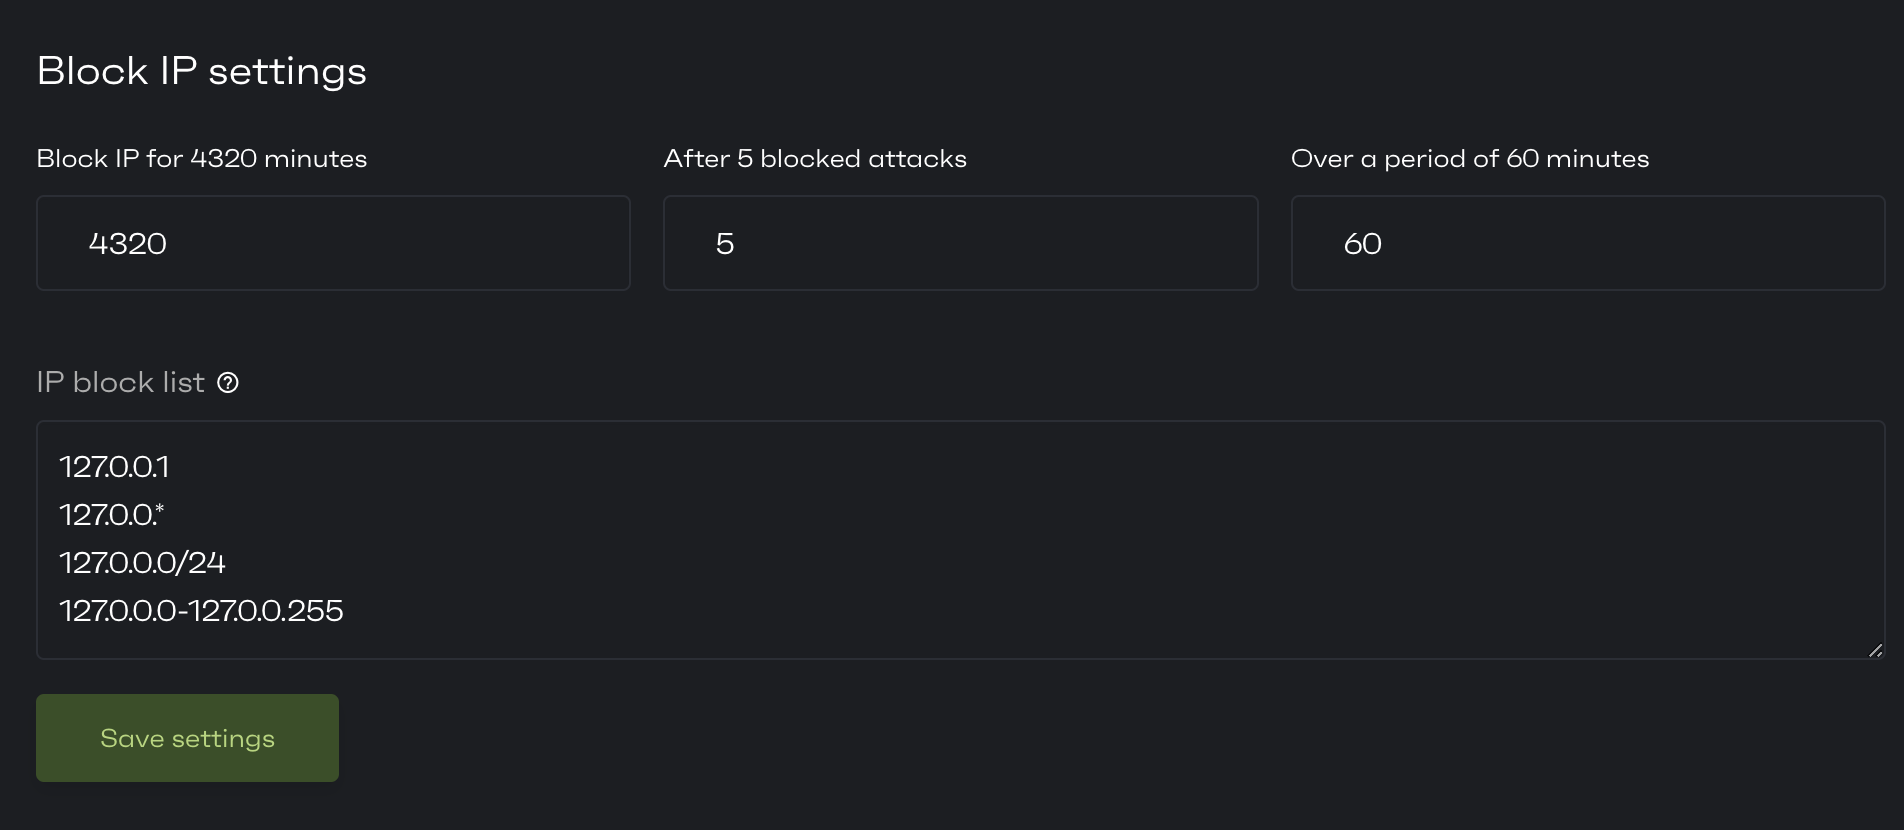
> #### 🚧 Example case:
>
> [Section titled “🚧 Example case:”](#-example-case)
>
> Patchstack has blocked 5 attacks on your site from one specific IP address in a period of 60 minutes.\
> You would now want this IP to be blocked.
>
> Type in the following data:
>
> Block IP for **4320** Minutes\
> After **5** Blocked Attacks\
> Over A Period of **60** Minutes
>
> Click **Save Settings**
>
> Now - any IP address which meets all those conditions will be blocked for three days.
> #### 📘 IP Block List
>
> [Section titled “📘 IP Block List”](#-ip-block-list)
>
> Lets you completely block IP addresses by entering each IP address to a new line.
>
> Following formats are accepted:\
> 127.0.0.1\
> 127.0.0.\*\
> 127.0.0.0/24\
> 127.0.0.0-127.0.0.255
# Banned IPs
*Banned IPs page is accessible for all Patchstack paid plan users.*\
***Protection settings and modules are available for WordPress sites only.***
The **Banned IPs** subpage is found at **Sites** > **yoursite.com** > **Protection** > **Banned IPs** in Patchstack App.
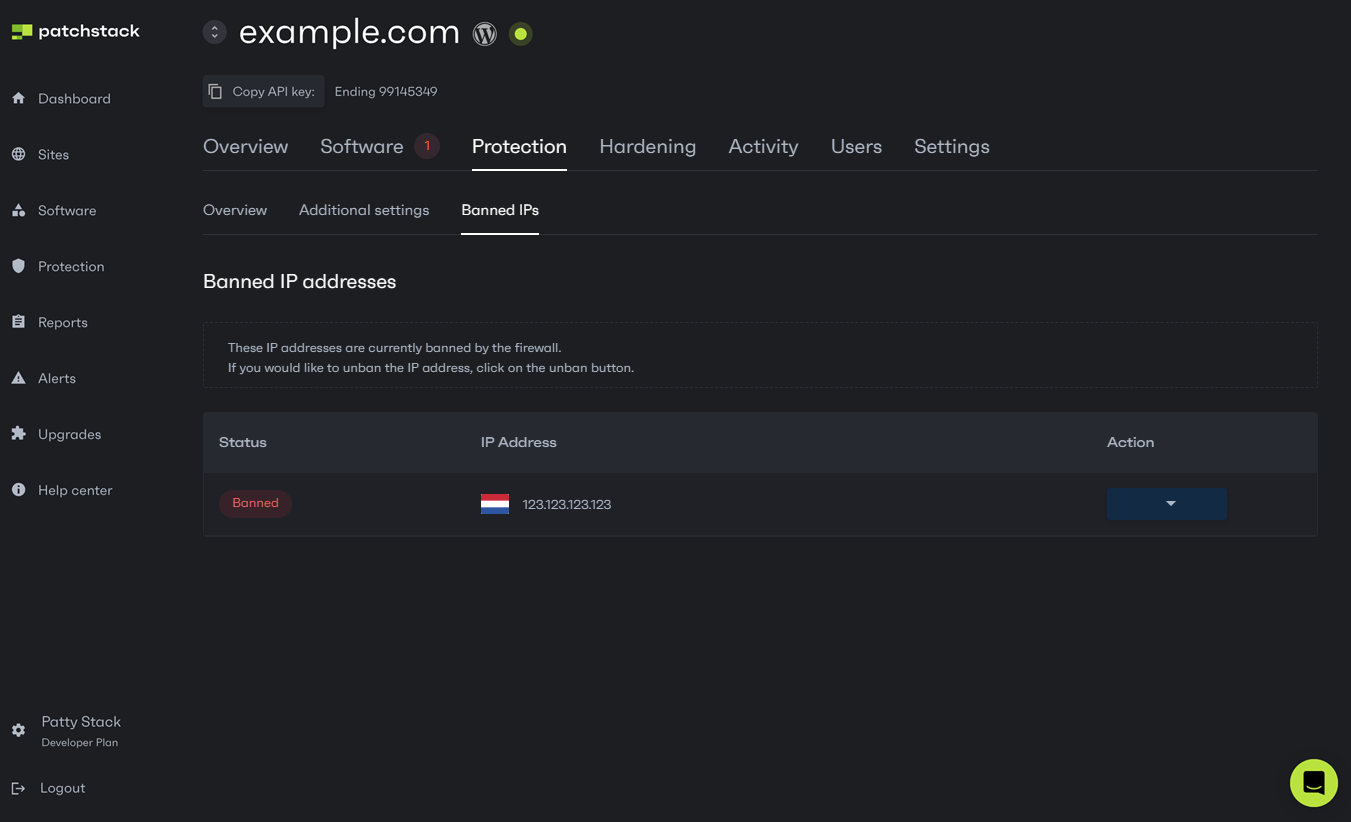
Navigate to Banned IPs page and look for **Banned IP addresses** section to view all the IP addresses that are currently banned from visiting the site. In case it’s a false positive blocking, you can unblock this IP by selecting **Action** > **Unban**.
The IPs listed on this page are blocked temporarily, based on the rules you have set on the **Protection** > **Additional settings** page of your site. [See here.](/patchstack-app/site-dashboard/protection/app-protection-additional-settings/#block-ip-settings)
# Overview
*Site protection overview and security solutions are available for all Patchstack paid plan users.*\
***Protection settings and modules are available for WordPress sites only.***
The **Protection overview** subpage is found at **Sites** > **yoursite.com** > **Protection** in Patchstack App.
On the **Protection overview** subpage you can:
* Toggle the protection modules on/off for your site
* See where your site got attacks from
* See how have the hackers tried to attack your site

## Protection modules
[Section titled “Protection modules”](#protection-modules)
Patchstack firewall consists of four types of protection modules, which can be toggled on and off for any protected site. These protection modules also show the number of your sites are attached to each module. Below are the decriptions for all four protection modules:
### vPatching module
[Section titled “vPatching module”](#vpatching-module)
Receive Patchstack’s **vPatches** ([virtual patches](https://patchstack.com/articles/virtual-patching/)) to protect you sites against attacks targeted for known dangerous vulnerabilities in your sites. **vPatches** are highly specific and strict firewall rules that prevent vulnerabilities from being exploited without changing any of your code.\
[📖 Read more](/patchstack-app/protection/patchstack-modules/#vpatches)
### Advanced hardening
[Section titled “Advanced hardening”](#advanced-hardening)
The **Advanced hardening** module applies additional security mechanics to the WordPress application to block common malicious requests against WordPress sites.\
[📖 Read more](/patchstack-app/protection/patchstack-modules/#advanced-hardening)
### Community IP blocklist
[Section titled “Community IP blocklist”](#community-ip-blocklist)
Community IP blocklist blocks access to IP addresses which are known to exploit vulnerabilities. This module contributes threat data back to the Patchstack network.
### Generic OWASP
[Section titled “Generic OWASP”](#generic-owasp)
Generic firewall rules against OWASP top 10 vulnerability types including XSS, SQLi, RCE and for other known exploitation methods. Note, due to its generic nature this module may cause false-positives on more complex sites that use a lot of plugins.\
[📖 Read more](/patchstack-app/protection/patchstack-modules/#generic-owasp)
## Activity section
[Section titled “Activity section”](#activity-section)
From the **Activity** section of the **Protection overview** page, you see how many times did Patchstack firewall block the traffic for potential threats.\
You can set a filter to show the data from up to 1 year ago. On the right side of this protection activity section, Patchstack App shows the top 5 IP’s blocked, and top 5 threats blocked in the given period of time.
## Log history section
[Section titled “Log history section”](#log-history-section)
Each hacking attempt or attack is shown as a separate protection log entry. You can click on any log entry to view more details about the particular blocking.
To see the details of any attack, click on a table row. A popup opens next.
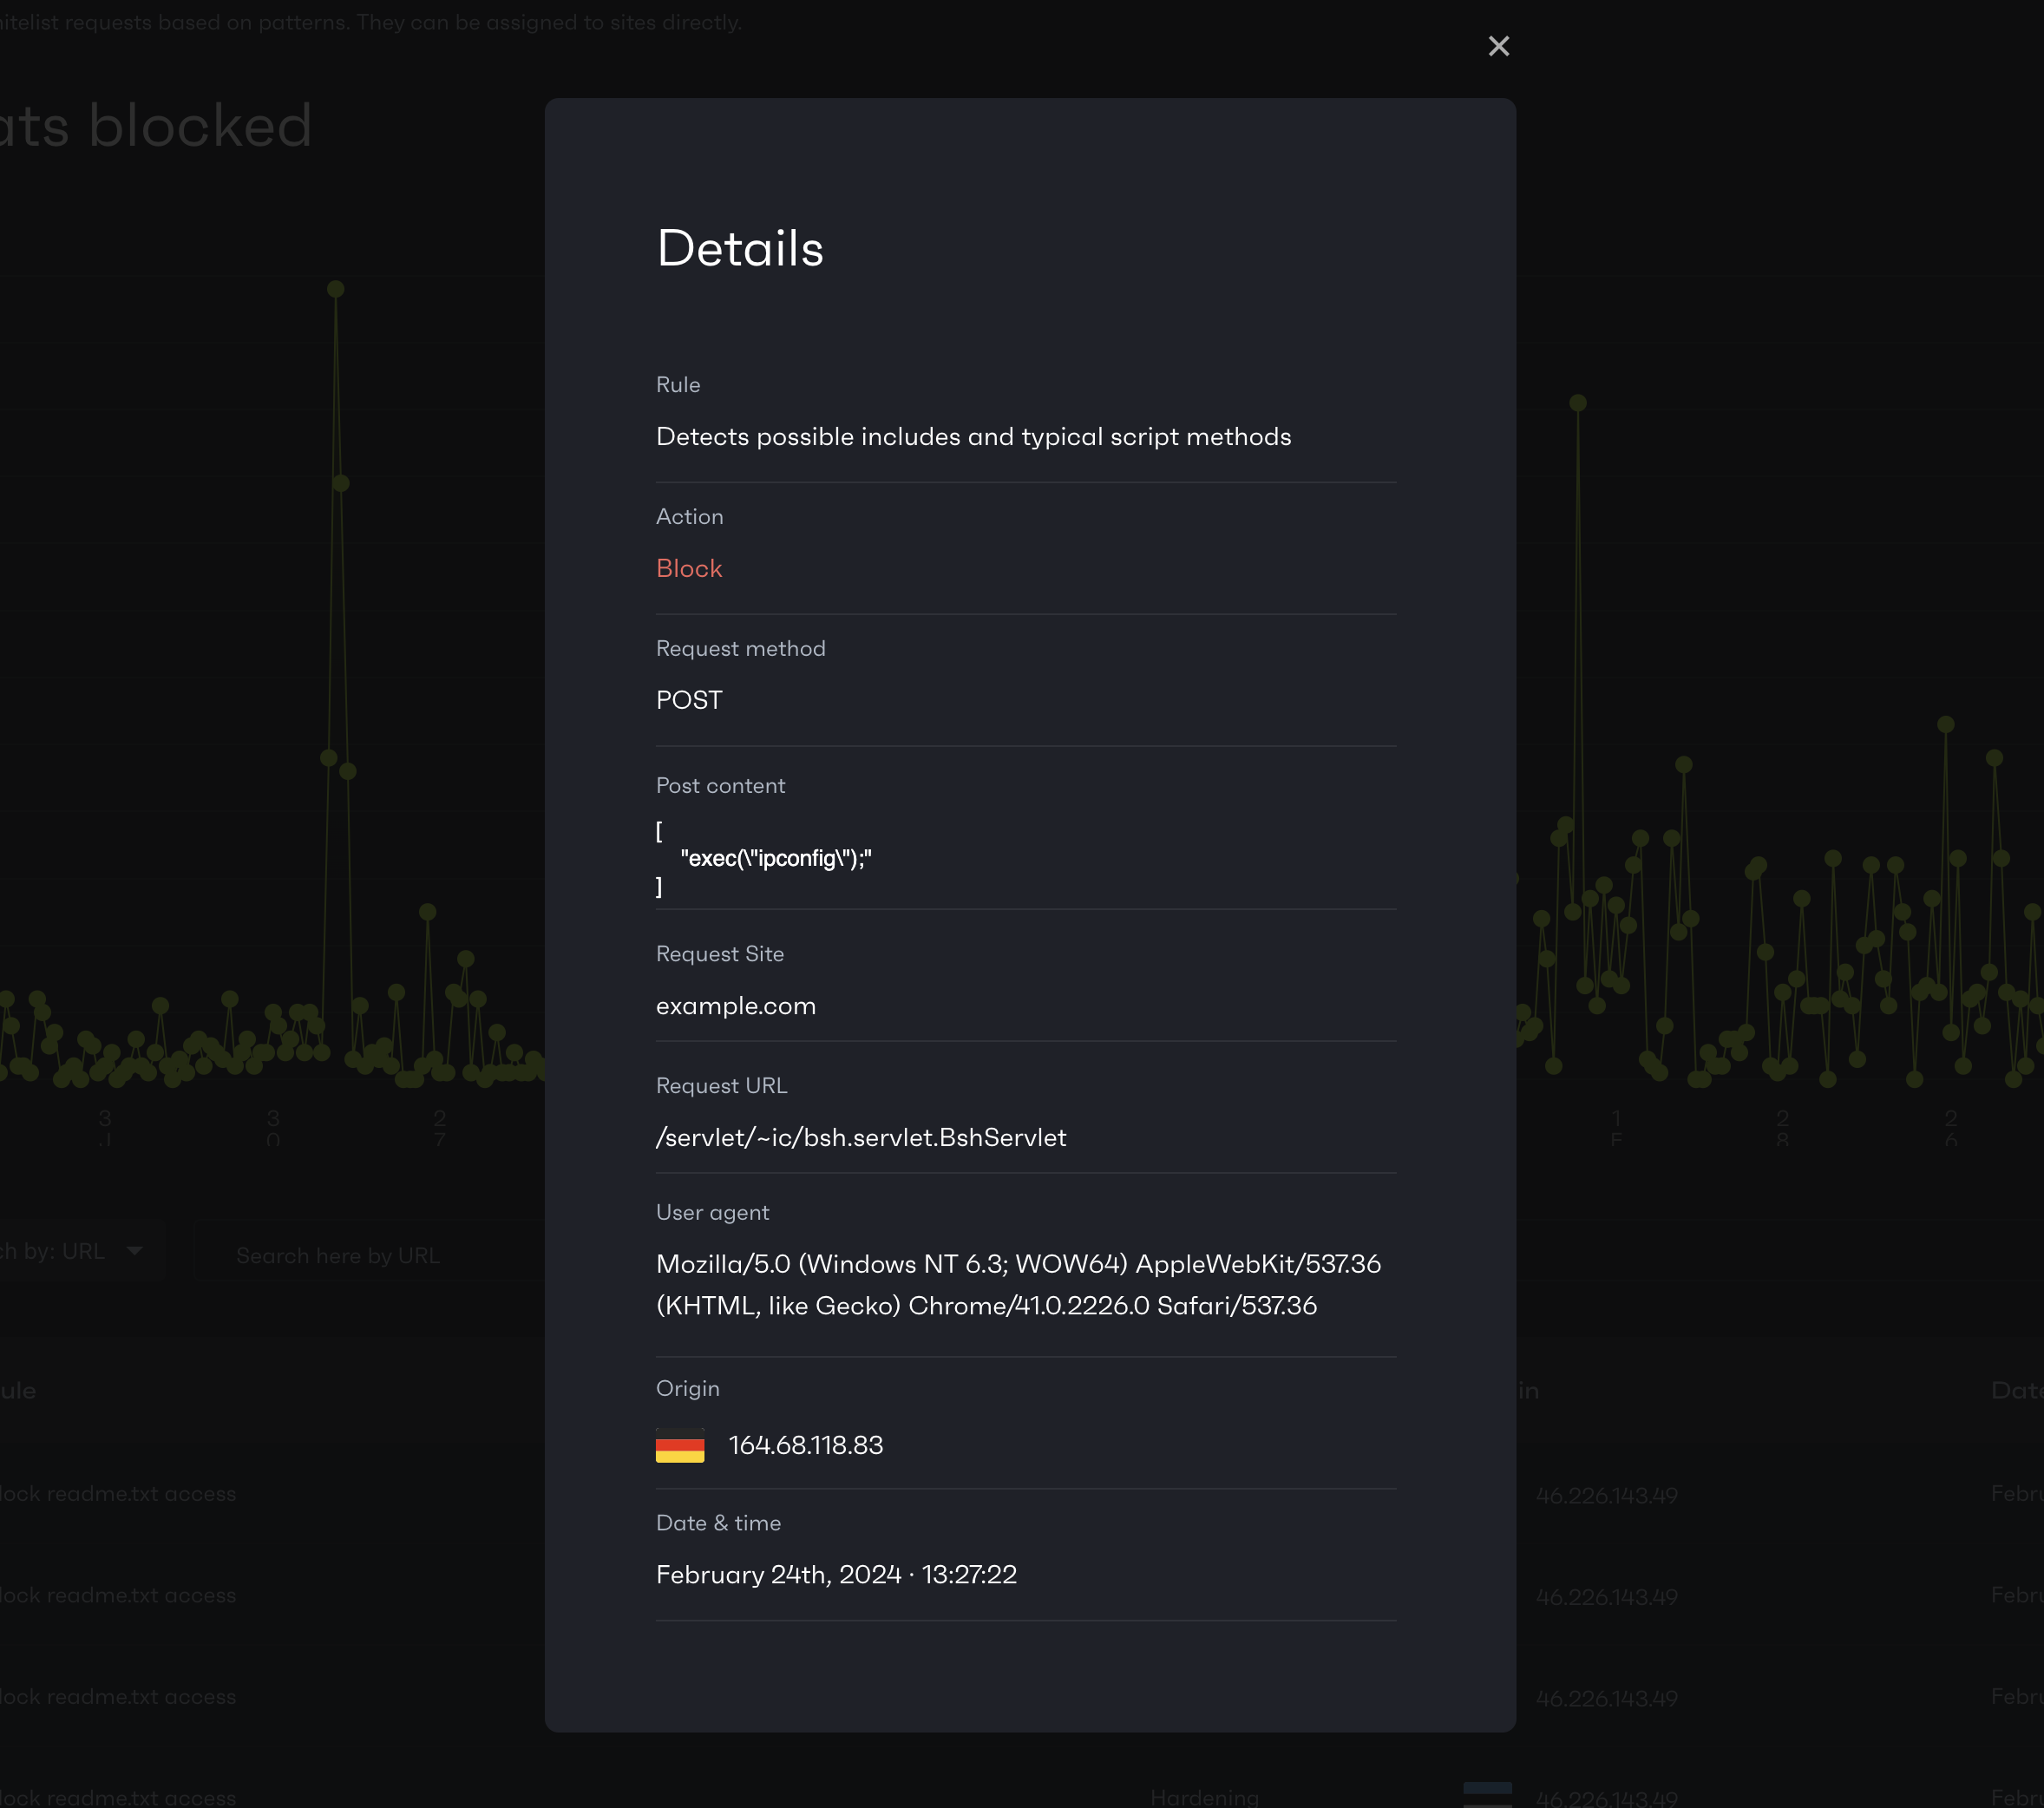
# Settings
To download the plugin file for your site, obtain the API key or change your domain URL, navigate to **Sites** > **yourdomain.com** > **Settings** in Patchstack App.

From this page, you can:
* Find your site API key that needs to be inserted into the plugin
* Change your domain, in case it has changed or entered incorrectly
* Download the Patchstack plugin .zip file here by clicking **Download latest version** . Note that this plugin file will come with pre-inserted API key, so you can use the same .zip file for only this particular WordPress application
## How to upload the Patchstack plugin to WordPress
[Section titled “How to upload the Patchstack plugin to WordPress”](#how-to-upload-the-patchstack-plugin-to-wordpress)
To upload the plugin to your WordPress site:
1. Go to your WordPress administration page
2. Navigate to **Plugins** > **Add New**
3. Click on **Upload Plugin**
4. Upload the .zip file from there
5. Click **Activate** after uploading the plugin
If you need any assistance, don’t hesitate to reach out to our live support chat!
# Overview
To see data about a specific site, navigate to **Sites** > **yourdomain.com** in Patchstack App.
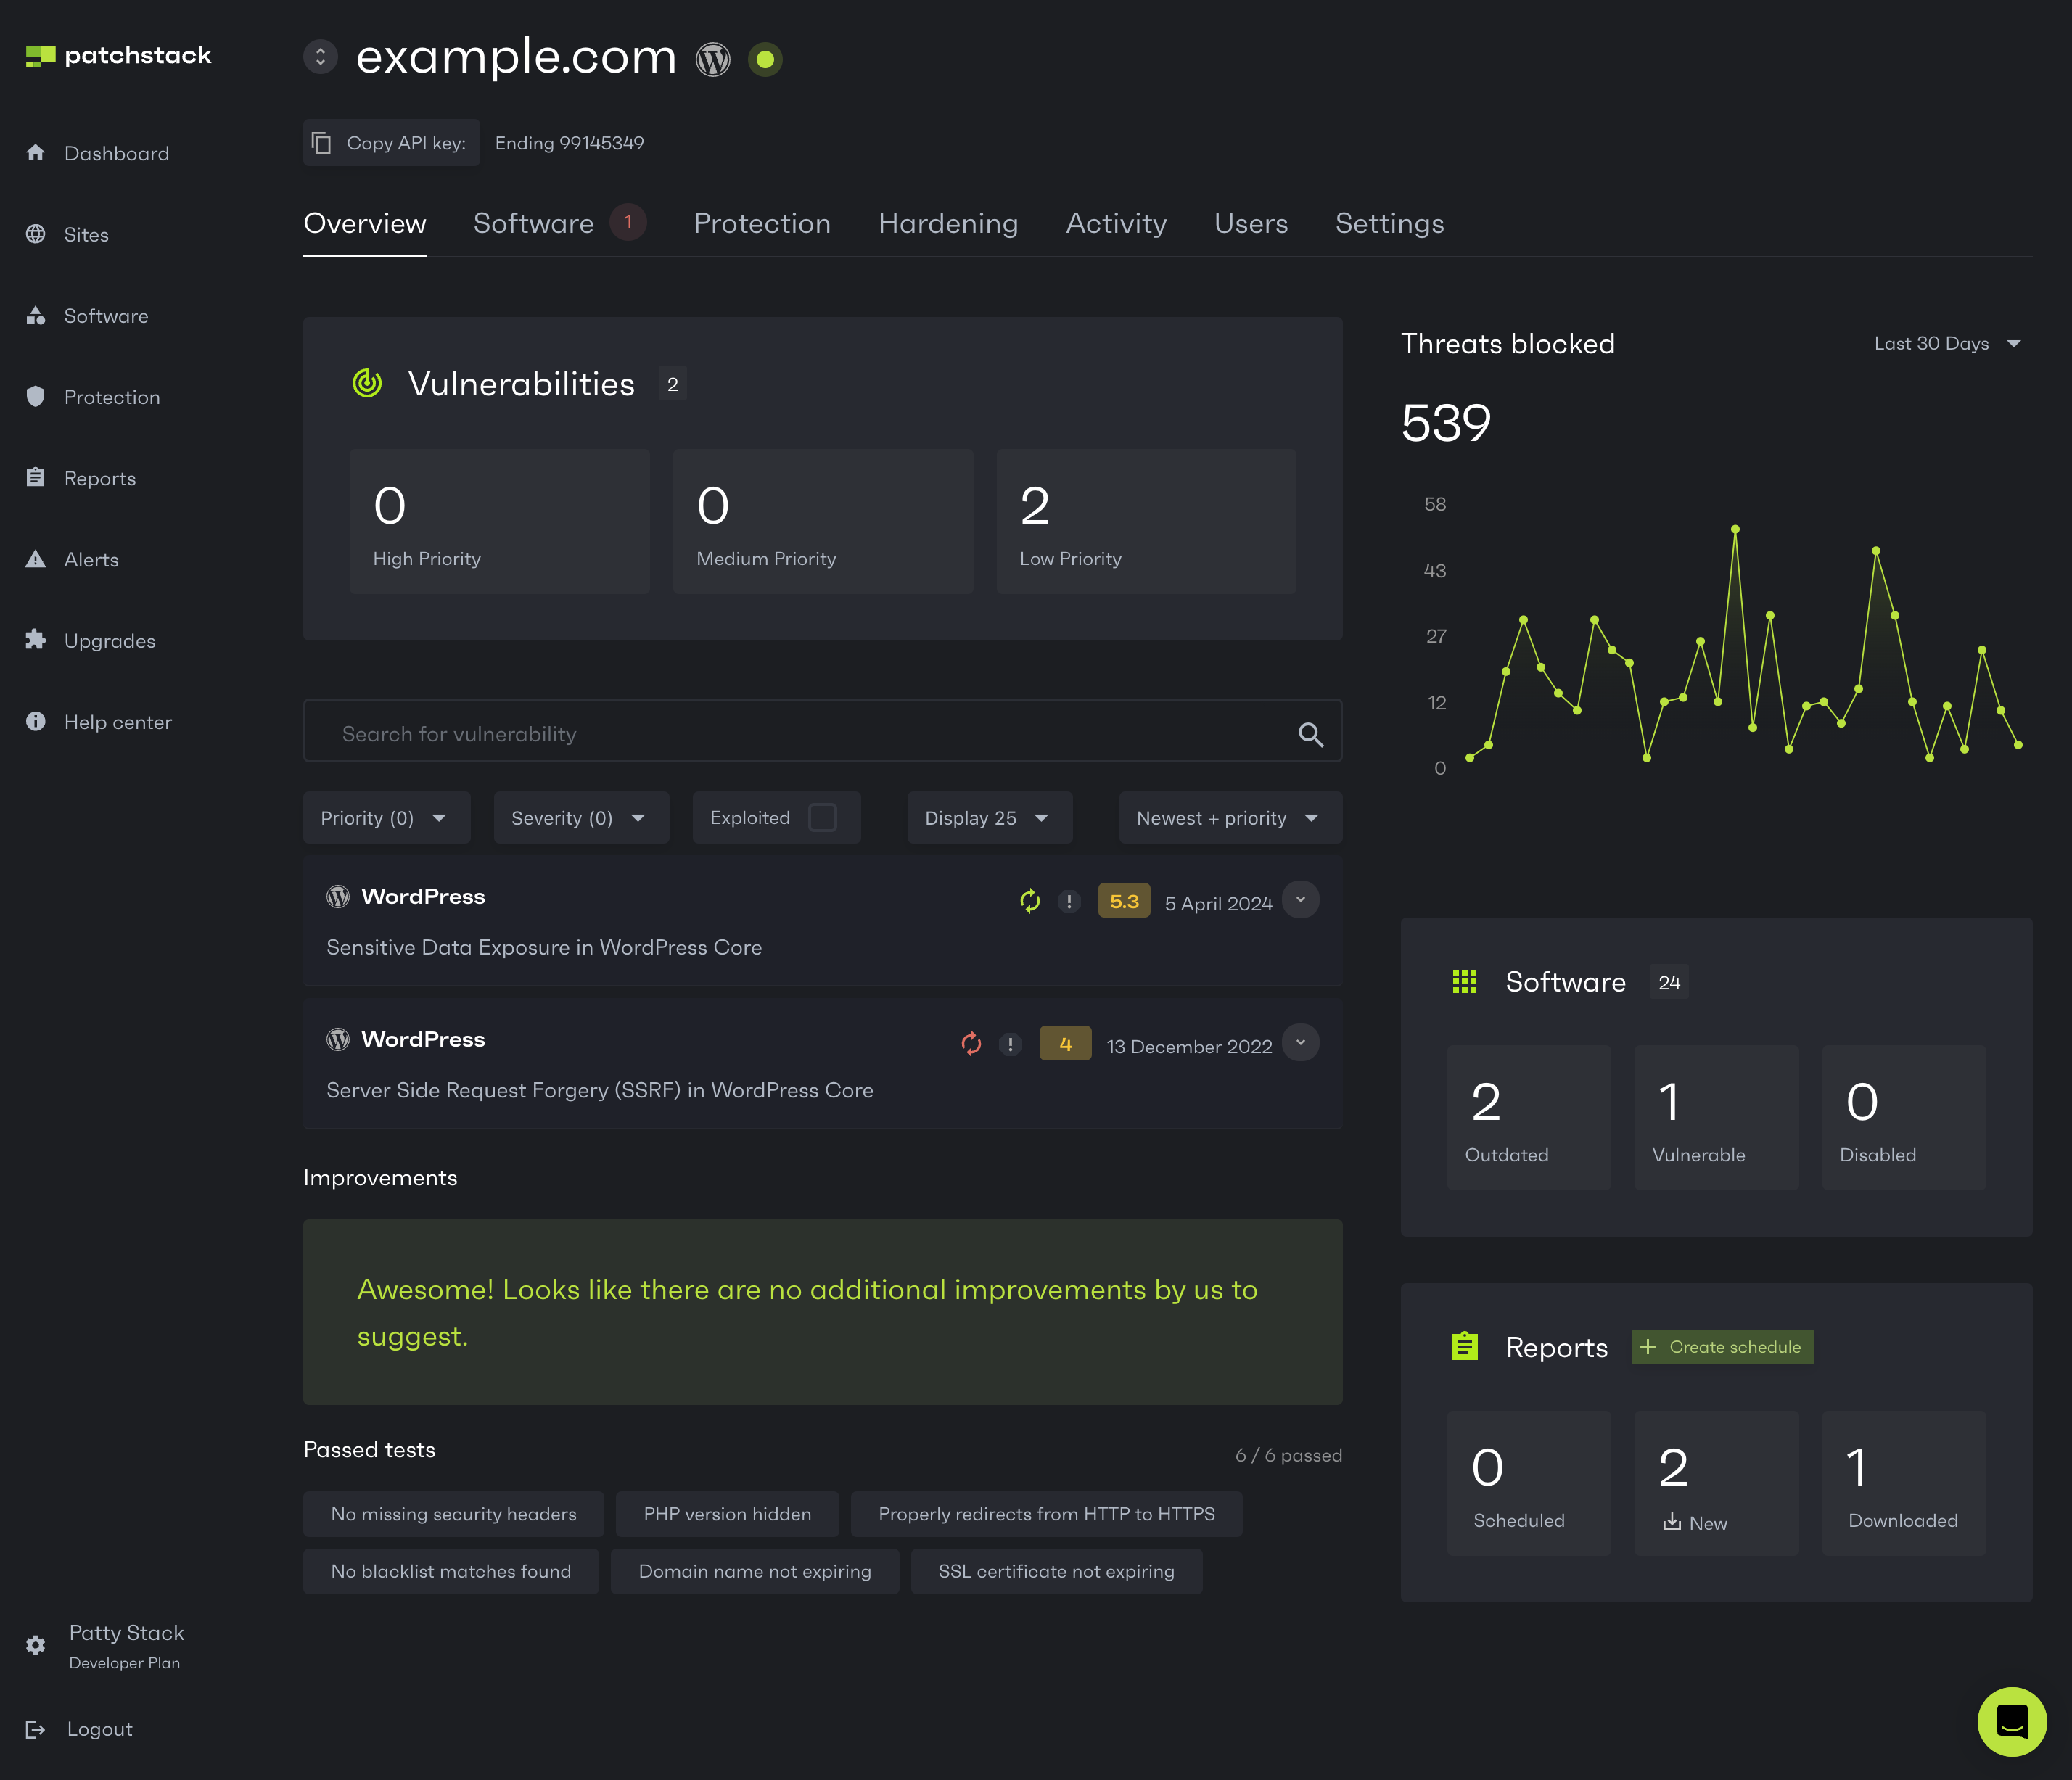
**Site dashboard** shows you the following, general overview of your site:
* An overview and search of the current vulnerabilities - read more about the [vulnerability details and searching here](/patchstack-app/dashboard/#vulnerability-information-and-filtering)
* How many attacks on your site have been blocked within a certain time period
* How many software components have been installed on your site; how many of these components are vulnerable; how many are outdated
# Software
*Site software page shows an overview of all the software components your site has been built with.*
To see an overview of all your site’s software, navigate to **Sites** > **yourdomain.com** > **Software** in Patchstack App.

Software management is only for WordPress
On the this software subpage, you can also manage the software components of your WordPress site.
The following actions are available only for WordPress CMS:
* Enable auto-updates for:
* Only vulnerable software
* All core, themes, and plugins
* Have an overview of software your site is using and see all your software versions
* See if any of the software is found vulnerable or outdated
* Update, activate, deactivate, or delete the existing plugins/themes
* Update all your software with one click
* Force resynchronization between Patchstack App and your site if something looks out of sync
### To perform any actions with specific plugins or themes on your site, follow the steps below:
[Section titled “To perform any actions with specific plugins or themes on your site, follow the steps below:”](#to-perform-any-actions-with-specific-plugins-or-themes-on-your-site-follow-the-steps-below)
1. Check the checkboxes of your plugins or themes (at the left side of the table row)
2. Click on the **Actions** button next to the search bar
3. You can then pick one of the following actions:
* Update
* Activate
* Deactivate
* Delete
Software that is grayed out, is currently either deactivated on the website. If the checkbox is missing for that row, it means this software cannot be updated via third party apps like Patchstack. This goes for some of the premium licensed software, which use non-standard updating mechanisms.
### Update all your software with one click
[Section titled “Update all your software with one click”](#update-all-your-software-with-one-click)
You can update components altogether by clicking the **Update All** button.\
Just keep in mind to **back up your files and database** before doing that.
# Users
*Site users page is accessible for the paid plan users.*\
**This feature is available for WordPress sites only.\_**
To view your WordPress site users, navigate to **Sites** > **yourdomain.com** > **Users** in Patchstack App.
On this **Users** subpage you can see all the regular users that have been registered on your WordPress site. Patchstack shows you only the users with following roles:
* Administrator
* Editor
* Author
* Contributor
*Privacy notice: Patchstack does not store your WordPress users’ data. This data is retrieved directly from your site’s database each time this table is loaded in the Patchstack App.*
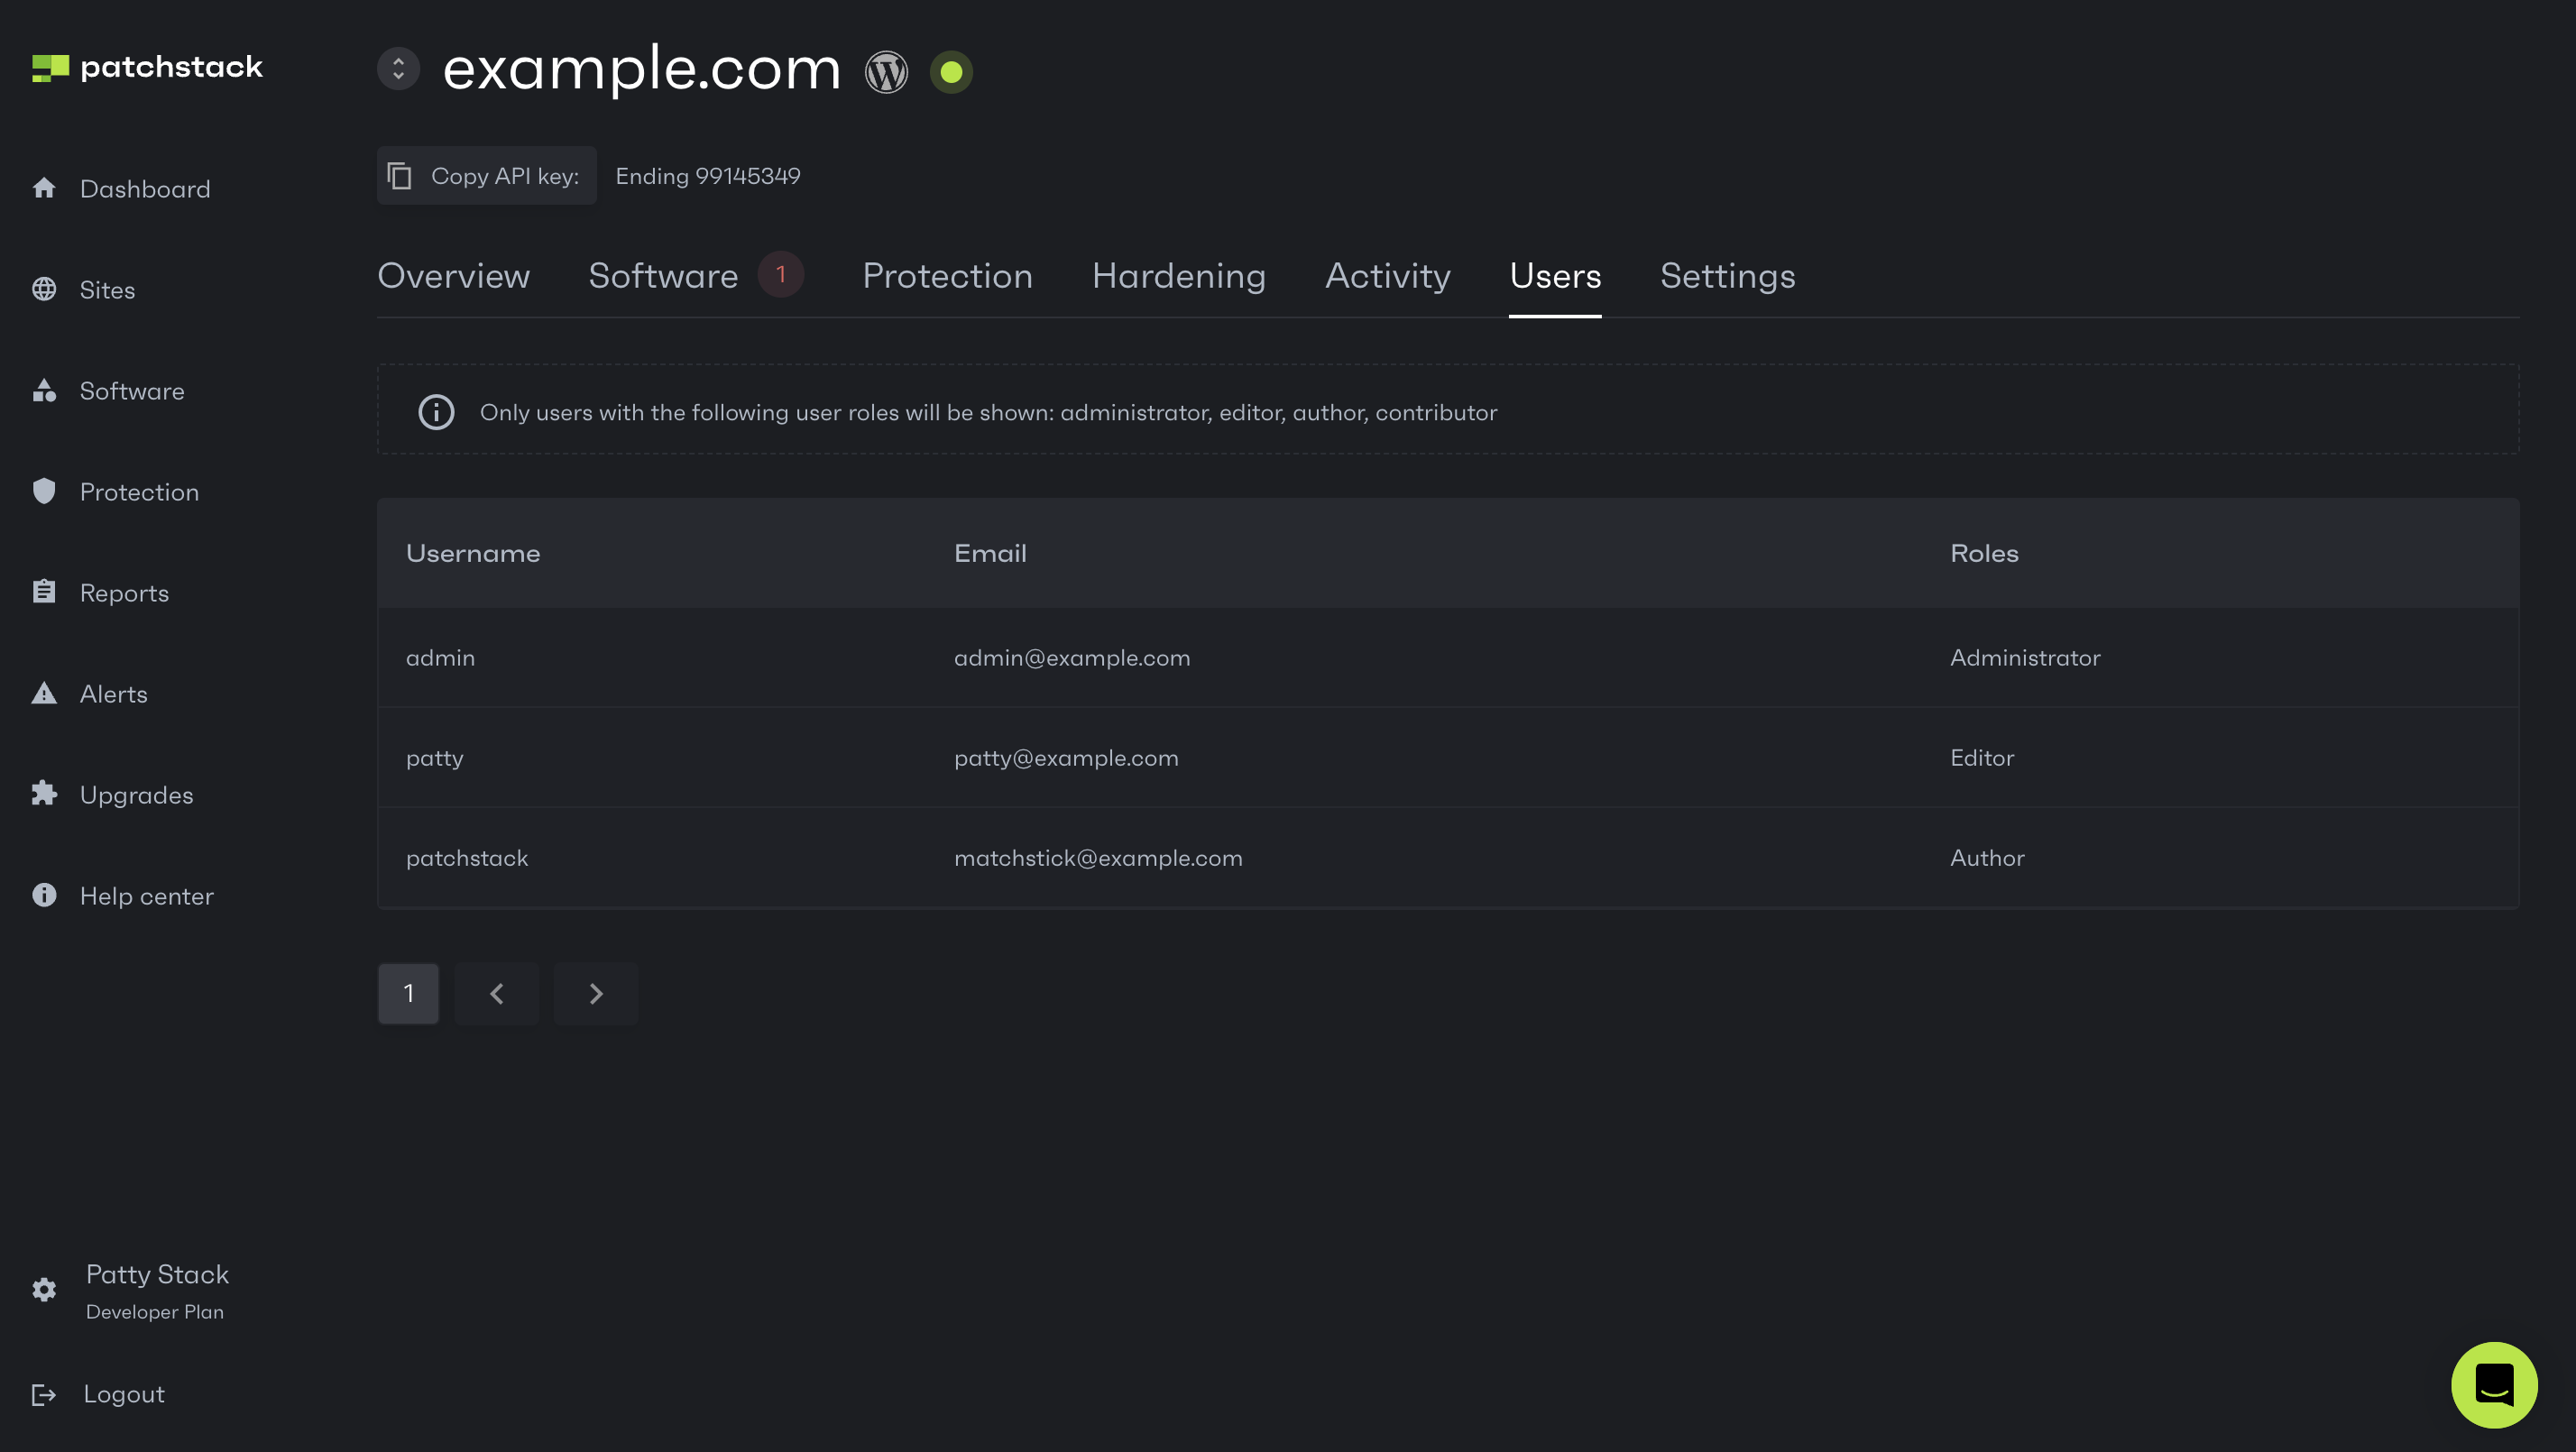
# Adding a site
Adding a site to Patchstack is relatively easy. Here is a simple guide on how to add and connect a site to Patchstack App:
1. Navigate to the [**Sites**](https://app.patchstack.com/sites) view in Patchstack App
2. Click on **+ Add new** button. 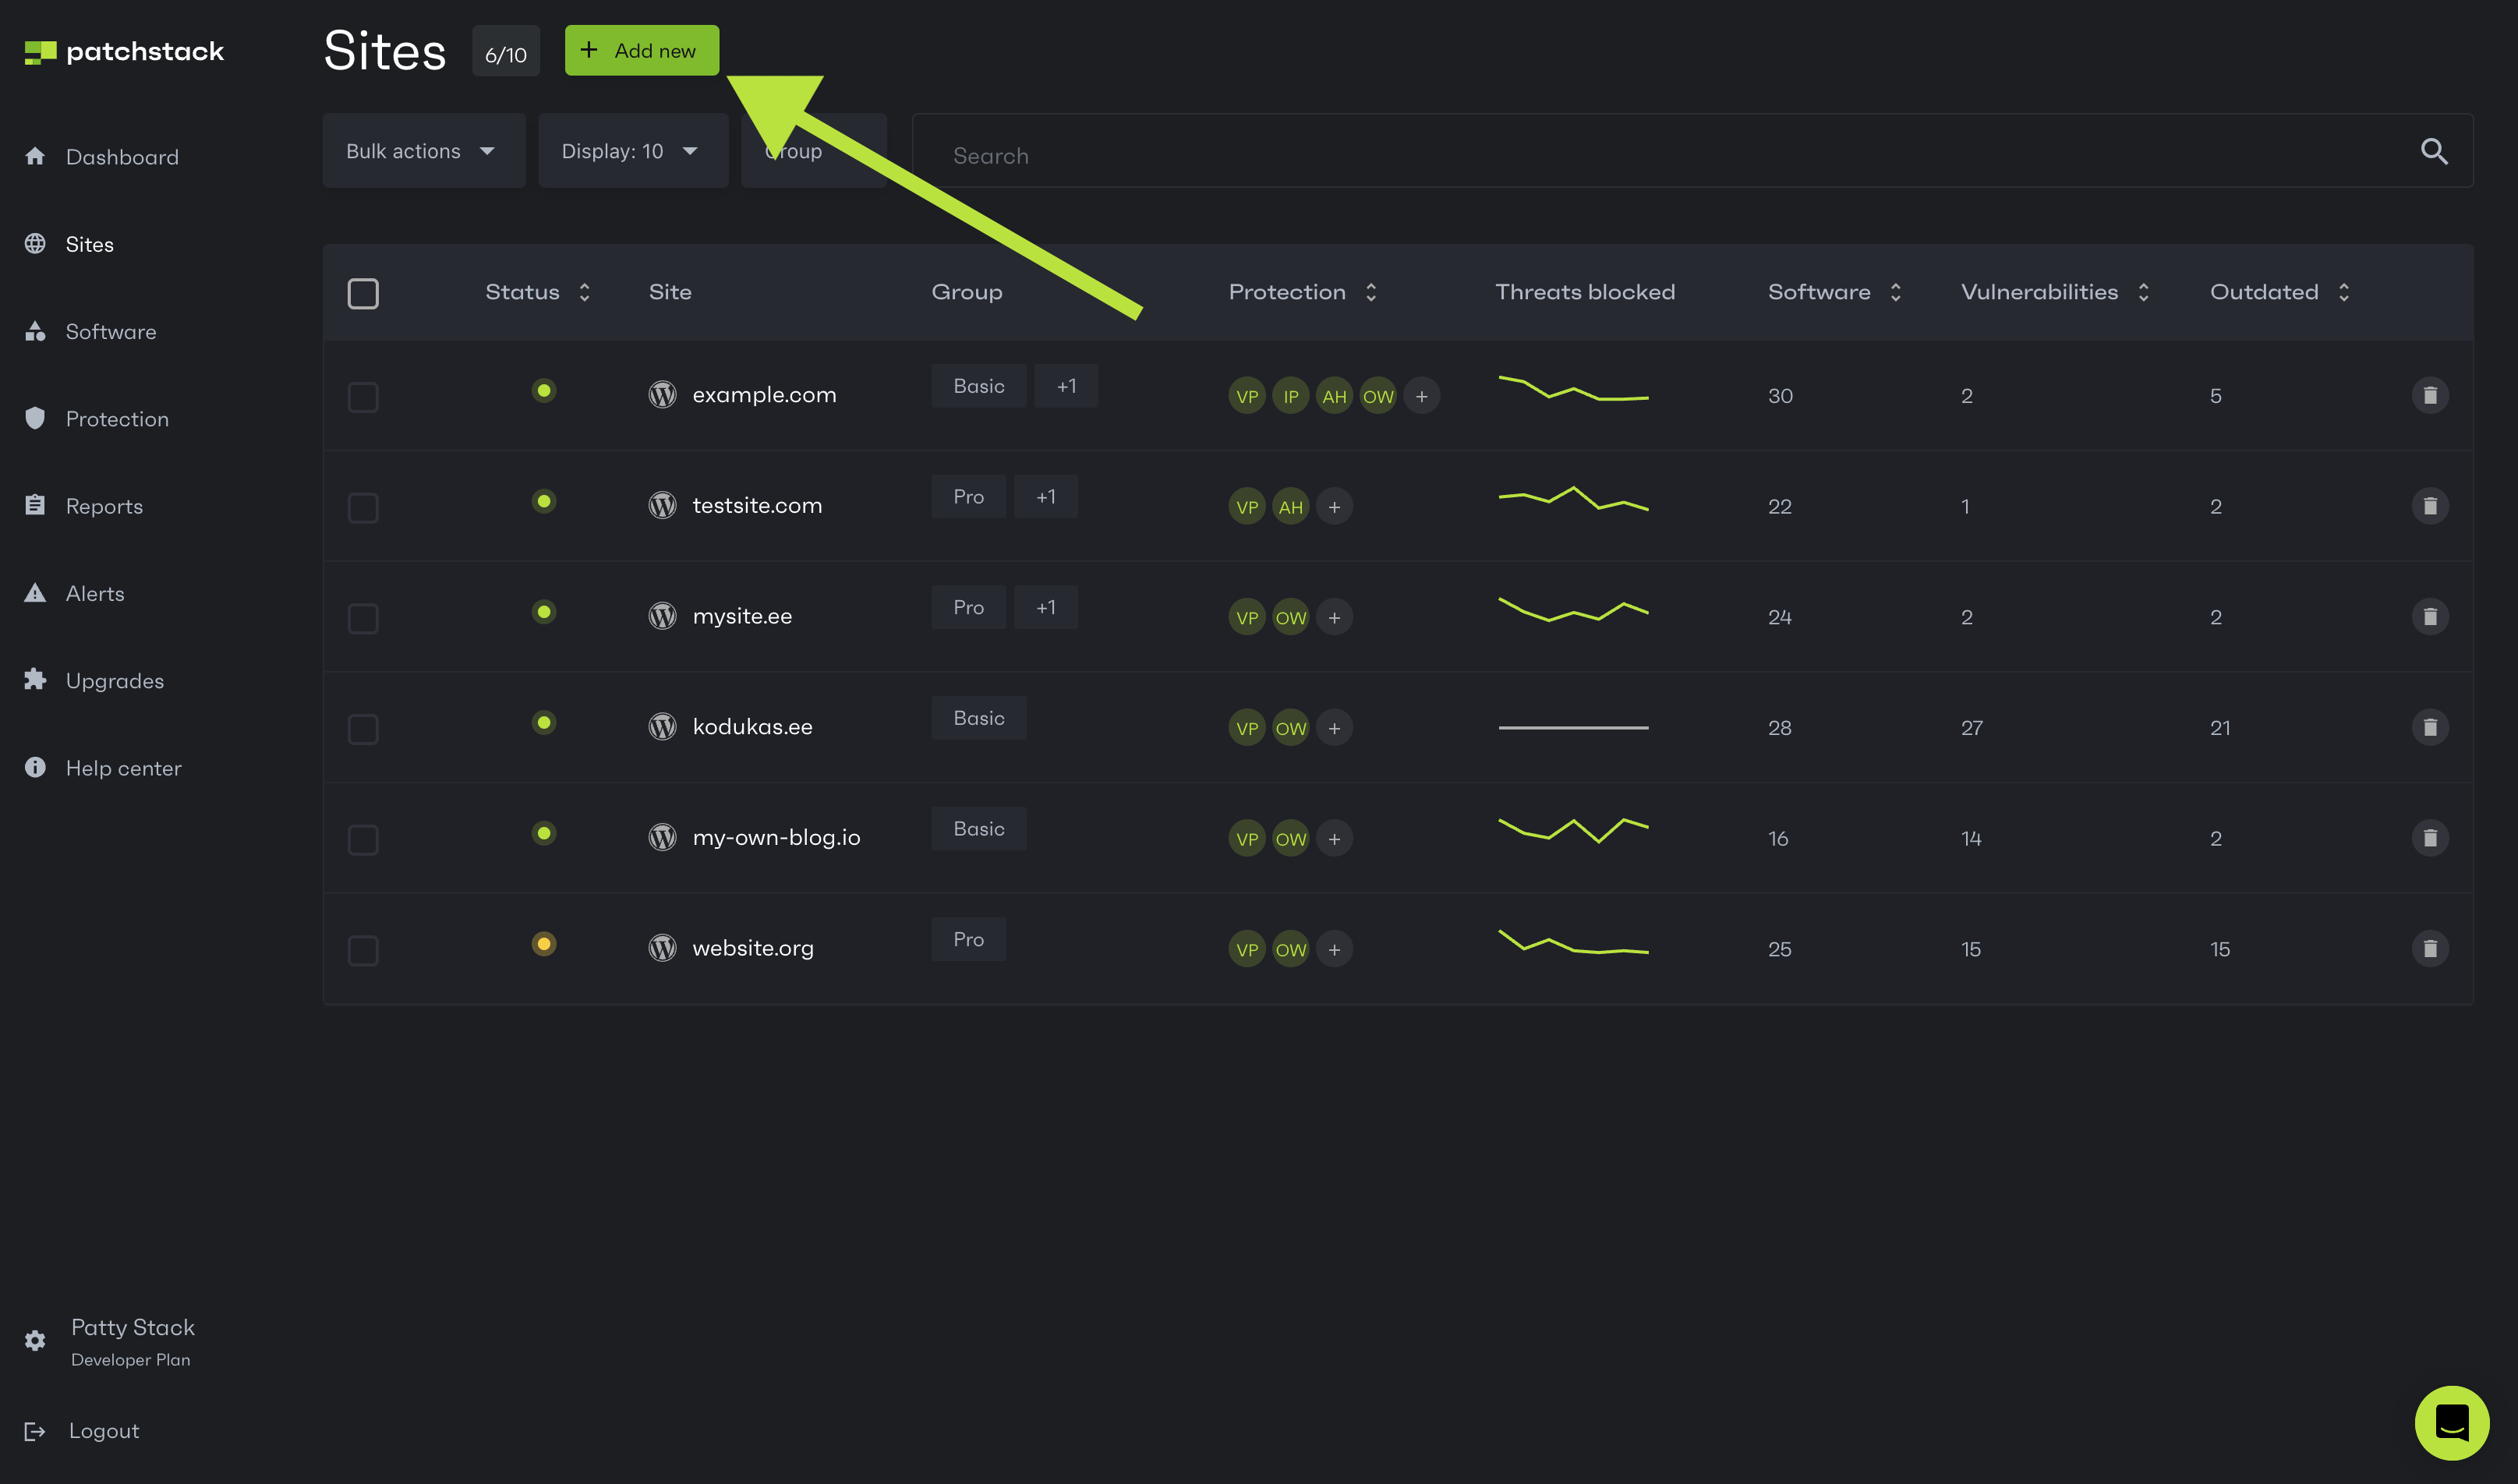
3. Type your domain name into the popup and choose your CMS: 
4. Click on **Continue to plugin/connector sync**.
5. In case you chose WordPress, continue with the steps below. If you chose other CMS, check [**Joomla instructions**](/patchstack-plugin/patchstack-connector/how-to-install-on-joomla/) or [**Drupal instructions**](/patchstack-plugin/patchstack-connector/how-to-install-on-drupal/)
6. You will be taken to the next step, where you can follow the next instructions. 
7. Click **Download latest plugin**
8. Upload the plugin .zip file to your WordPress site by visiting /wp-admin > Plugins > Add New > Upload Plugin
9. Activate the plugin
If you need further help, don’t hesitate to reach out to us via live chat at the bottom right corner!
# Sites
On the [**Sites**](https://app.patchstack.com/sites) page you see a general overview of all the sites you have added to the Patchstack App.\
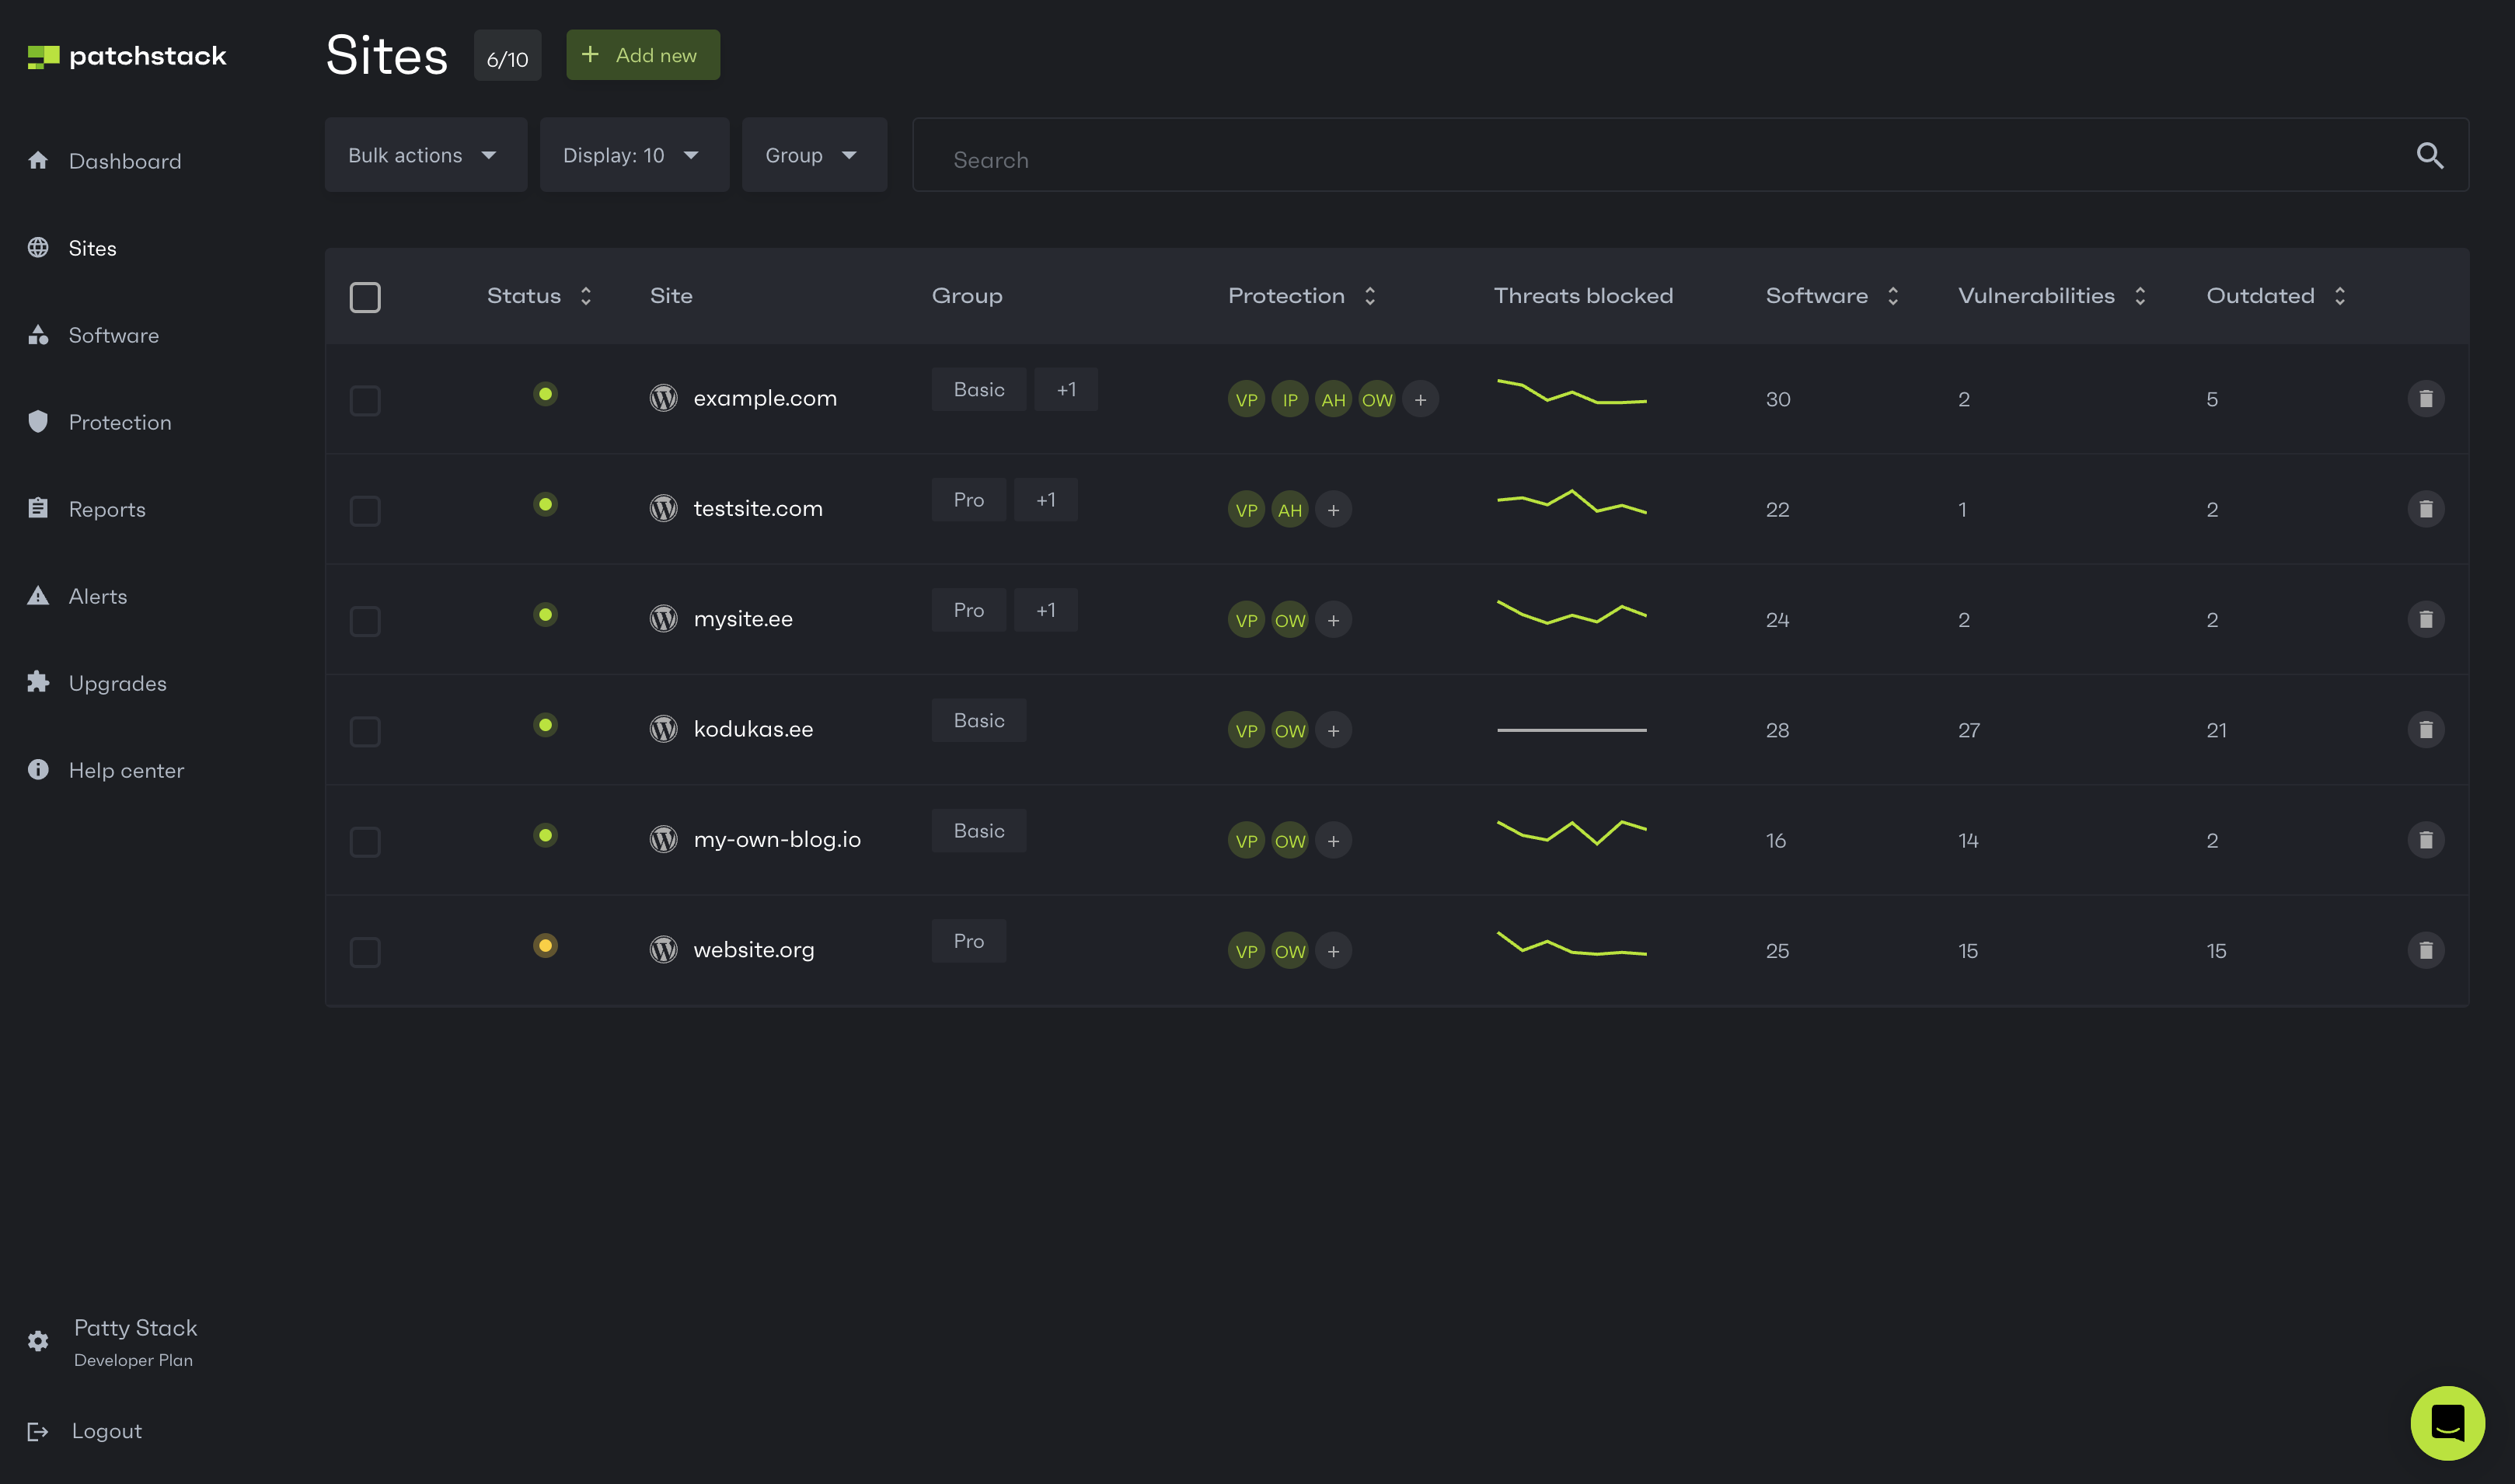
## Overview of all your sites
[Section titled “Overview of all your sites”](#overview-of-all-your-sites)
You can see the quick overview of each of your sites from the [**Sites**](https://app.patchstack.com/software/overview) view in Patchstack App.\
Let’s go through some more important table columns to explain the data shown.
1. **Status** column shows whether the site is properly connected. Hover over the circle with your cursor, to view the status of your site connection. Below is the list of possible color indicators:
* Green circle: Patchstack plugin is properly connected
* Yellow circle: Firewall is currently out of sync, delayed or turned off
* Red circle: Patchstack plugin is not connected with your site
2. **Group** column shows what groups that site has been attached to. Attaching your sites to custom groups makes it easier to manage them. For example you could group them by care plan names that you offer.
3. **Protection** column shows you, which protection modules are activated on the site. If you are on a free plan, you can see a toggle which lets you activate the protection on that site. If you have protection enabled, you’ll see such modules:
* VP - [vPatching module](/patchstack-app/protection/patchstack-modules/#vpatches)
* AH - [Advanced hardening module](/patchstack-app/protection/patchstack-modules/#advanced-hardening)
* IP - [Community IP blocklist module](/patchstack-app/protection/patchstack-modules/#community-ip-blocklist)
* OW - [Generic OWASP module](/patchstack-app/protection/patchstack-modules/#generic-owasp)
4. **Threats blocked** - this graph is a visual representation of the firewall activity in the last 7 days
5. **Software** column shows how many third party software is installed on this particular site (like plugins, themes or WordPress core)
* **Vulnerabilities** - how many vulnerabilities are currently present on your website
* **Outdated** - how many of the third party software are outdated and need updating
## Manage groups
[Section titled “Manage groups”](#manage-groups)
You can define groups, to which your sites can be attached to. Check [this article](/patchstack-app/sites/site-groups/) for details.
## Search and display
[Section titled “Search and display”](#search-and-display)
You can use the search-bar, to look up for the sites you have added. After typing, hit the Enter key. Left from the search-bar, you can choose how many sites to display per page.
## Adding a new site
[Section titled “Adding a new site”](#adding-a-new-site)
To add a new site, click on **+ Add new** and follow the instructions. You can also see a tutorial of adding a new site [in this article](/patchstack-app/sites/adding-a-site/).
## Removing a site
[Section titled “Removing a site”](#removing-a-site)
To delete a site, click on the trashcan icon.\
To delete multiple sites simultaneously, check the according checkboxes, then click **Bulk actions** > **Delete**.\
Check [this article](/patchstack-app/sites/removing-a-site/) for more details.
# Removing a site
Sites can be removed from the [**Sites**](https://app.patchstack.com/sites) page in Patchstack App.\
## Removing a single site
[Section titled “Removing a single site”](#removing-a-single-site)
To remove one site from Patchstack App, follow these steps:
1. Click on the trashcan icon on the domain you wish to remove
2. You will be asked to confirm the deletion
3. Click **Delete site** 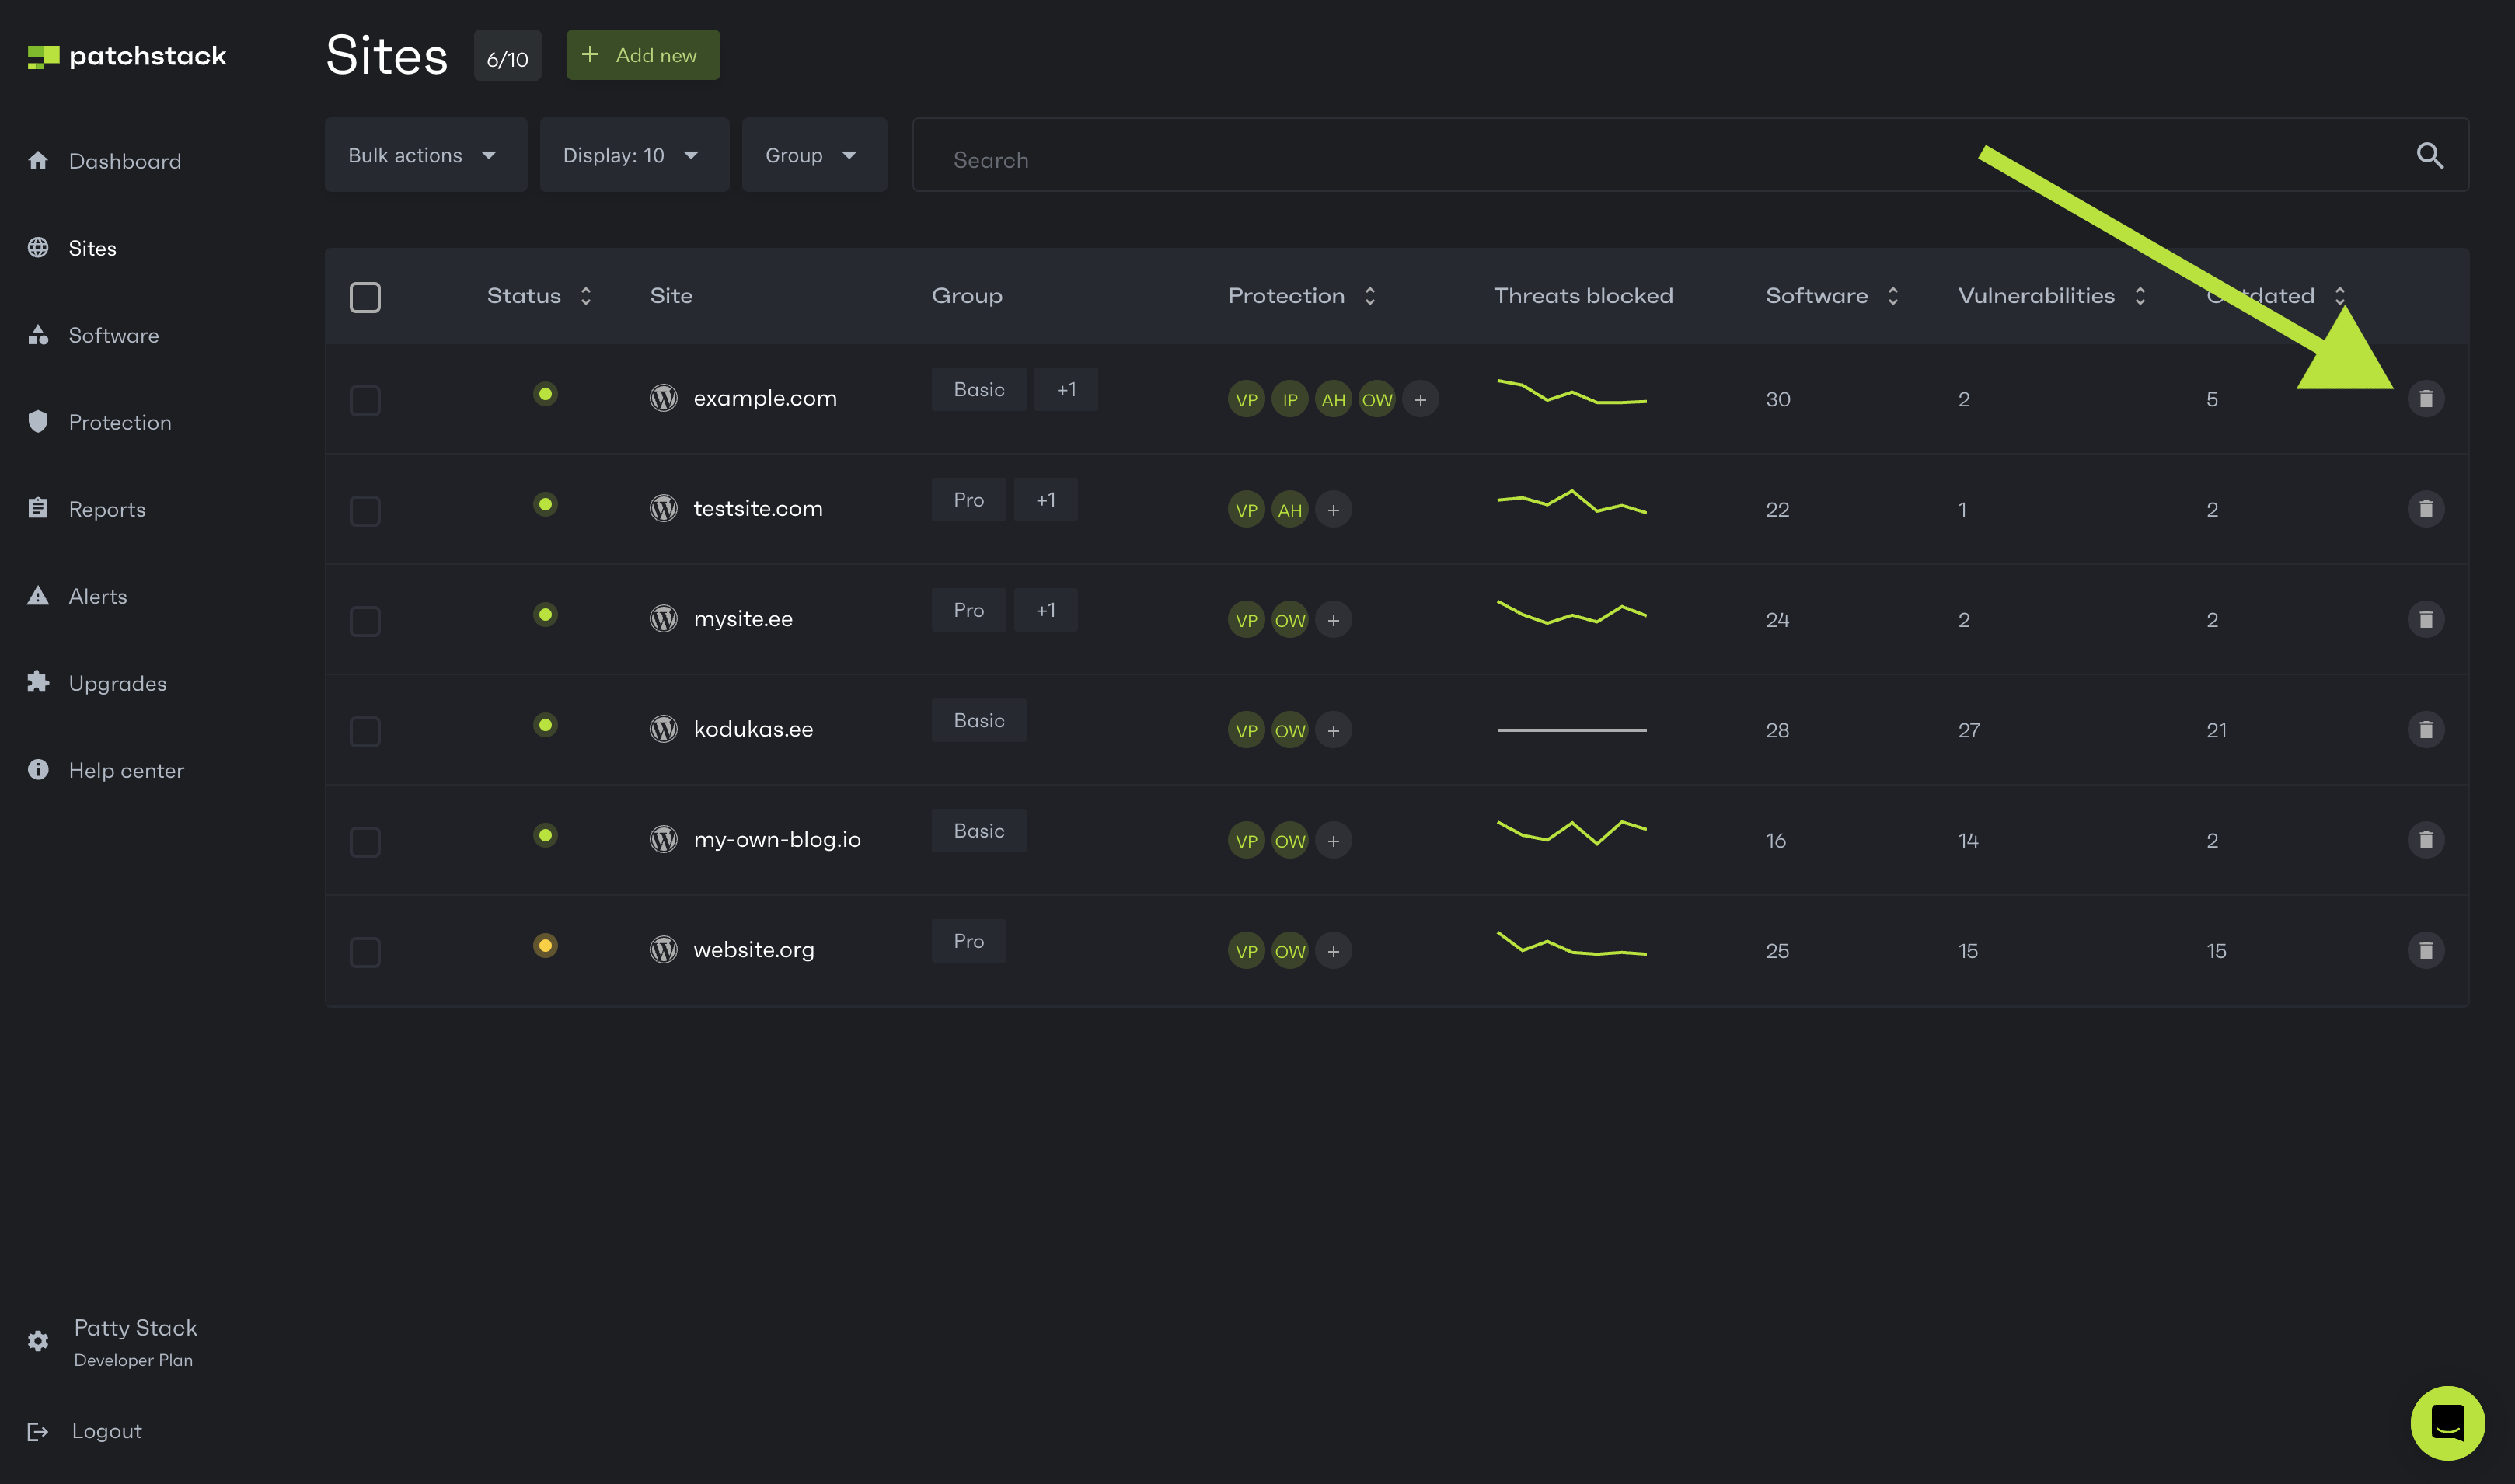
## Removing sites in bulk
[Section titled “Removing sites in bulk”](#removing-sites-in-bulk)
To bulk delete your sites from Patchstack App:
1. Check the checkboxes of your domains
2. Click on **Bulk actions** > **Delete** 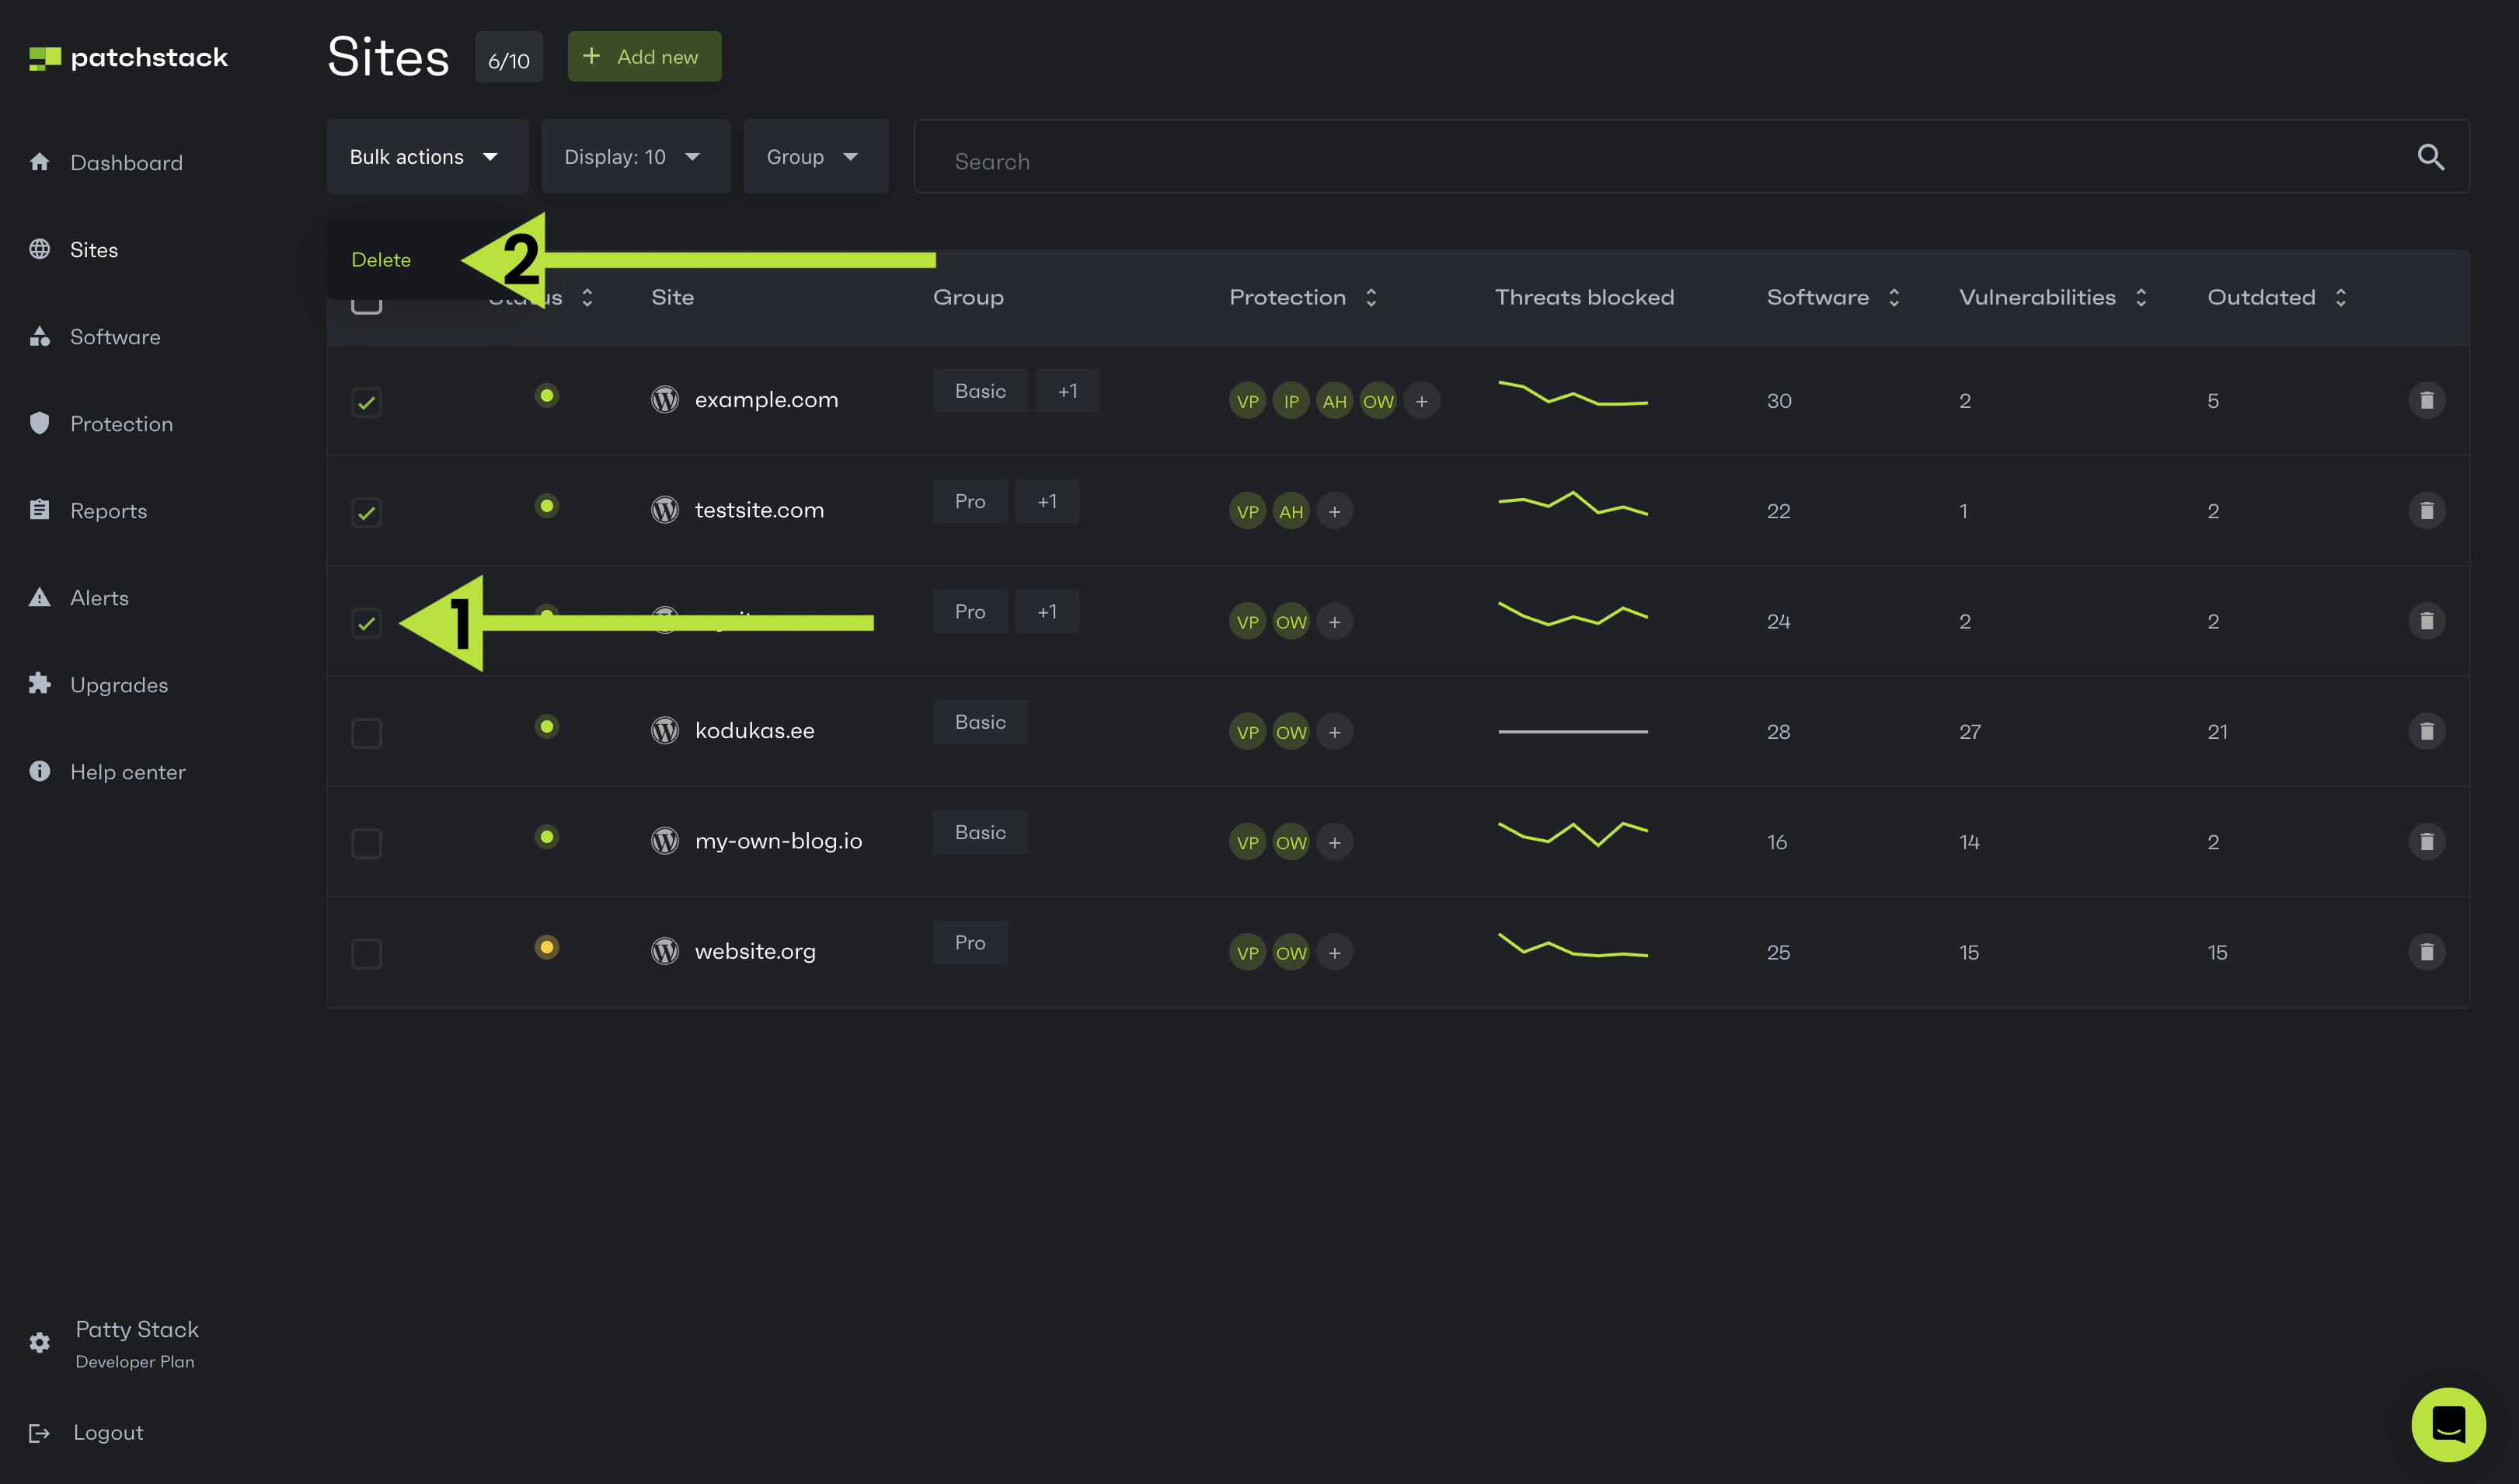
3. You will be asked to confirm the deletion
4. You can also choose to automatically uninstall the Patchstack plugin from these sites
5. Click **Remove sites** 
# Groups
*Groups feature is available for all Patchstack paid plan users.*
Grouping makes it easier to distinguish the sites from each other. You can attach your sites to multiple groups.
For example, if you sell care plans, you can group your sites by care plan names. 
## Creating a group
[Section titled “Creating a group”](#creating-a-group)
To create a group, click on a plus sign at the groups column in the [**Sites**](https://app.patchstack.com/sites) view of Patchstack App. You can give this group a name and attach it to your site.
## Attaching a group
[Section titled “Attaching a group”](#attaching-a-group)
You can attach an existing group to any site, by clicking the **plus sign**, and start typing the already existing group name. Then, click on the group name to attach it to that site.
## Removing a group
[Section titled “Removing a group”](#removing-a-group)
Once a group has been assigned to a site, it cannot be edited. However, you can remove the existing group and create a new one. To do this, hover over the group name until an “X” appears, then click on it to remove the group.

## Searching domains by group
[Section titled “Searching domains by group”](#searching-domains-by-group)
You can filter your sites by group names by typing the group name into the search bar at the top.\
You can filter your sites by groups by selecting the group name from the filter next to the search bar.
# Automatic updates
*Automatic updates feature is available for all Patchstack users.*\
***This feature is available for WordPress sites only.***
Navigate to the automatic updates page by visiting **Software** > **Automatic updates**, or click here:
On the **Automatic updates** subpage, you can see which of your sites have auto-updates enabled. You can turn automatic updates for each of your sites on / off.\
Patchstack also has an option to only auto-update such software that has any vulnerabilities detected.
For each site, you have the following options:
1. Auto-update only vulnerable components (recommended) - this option includes core versions, plugins and themes
2. Auto-update WordPress core (whenever update is available)
3. Auto-update plugins (whenever update is available)
4. Auto-update themes (whenever update is available)
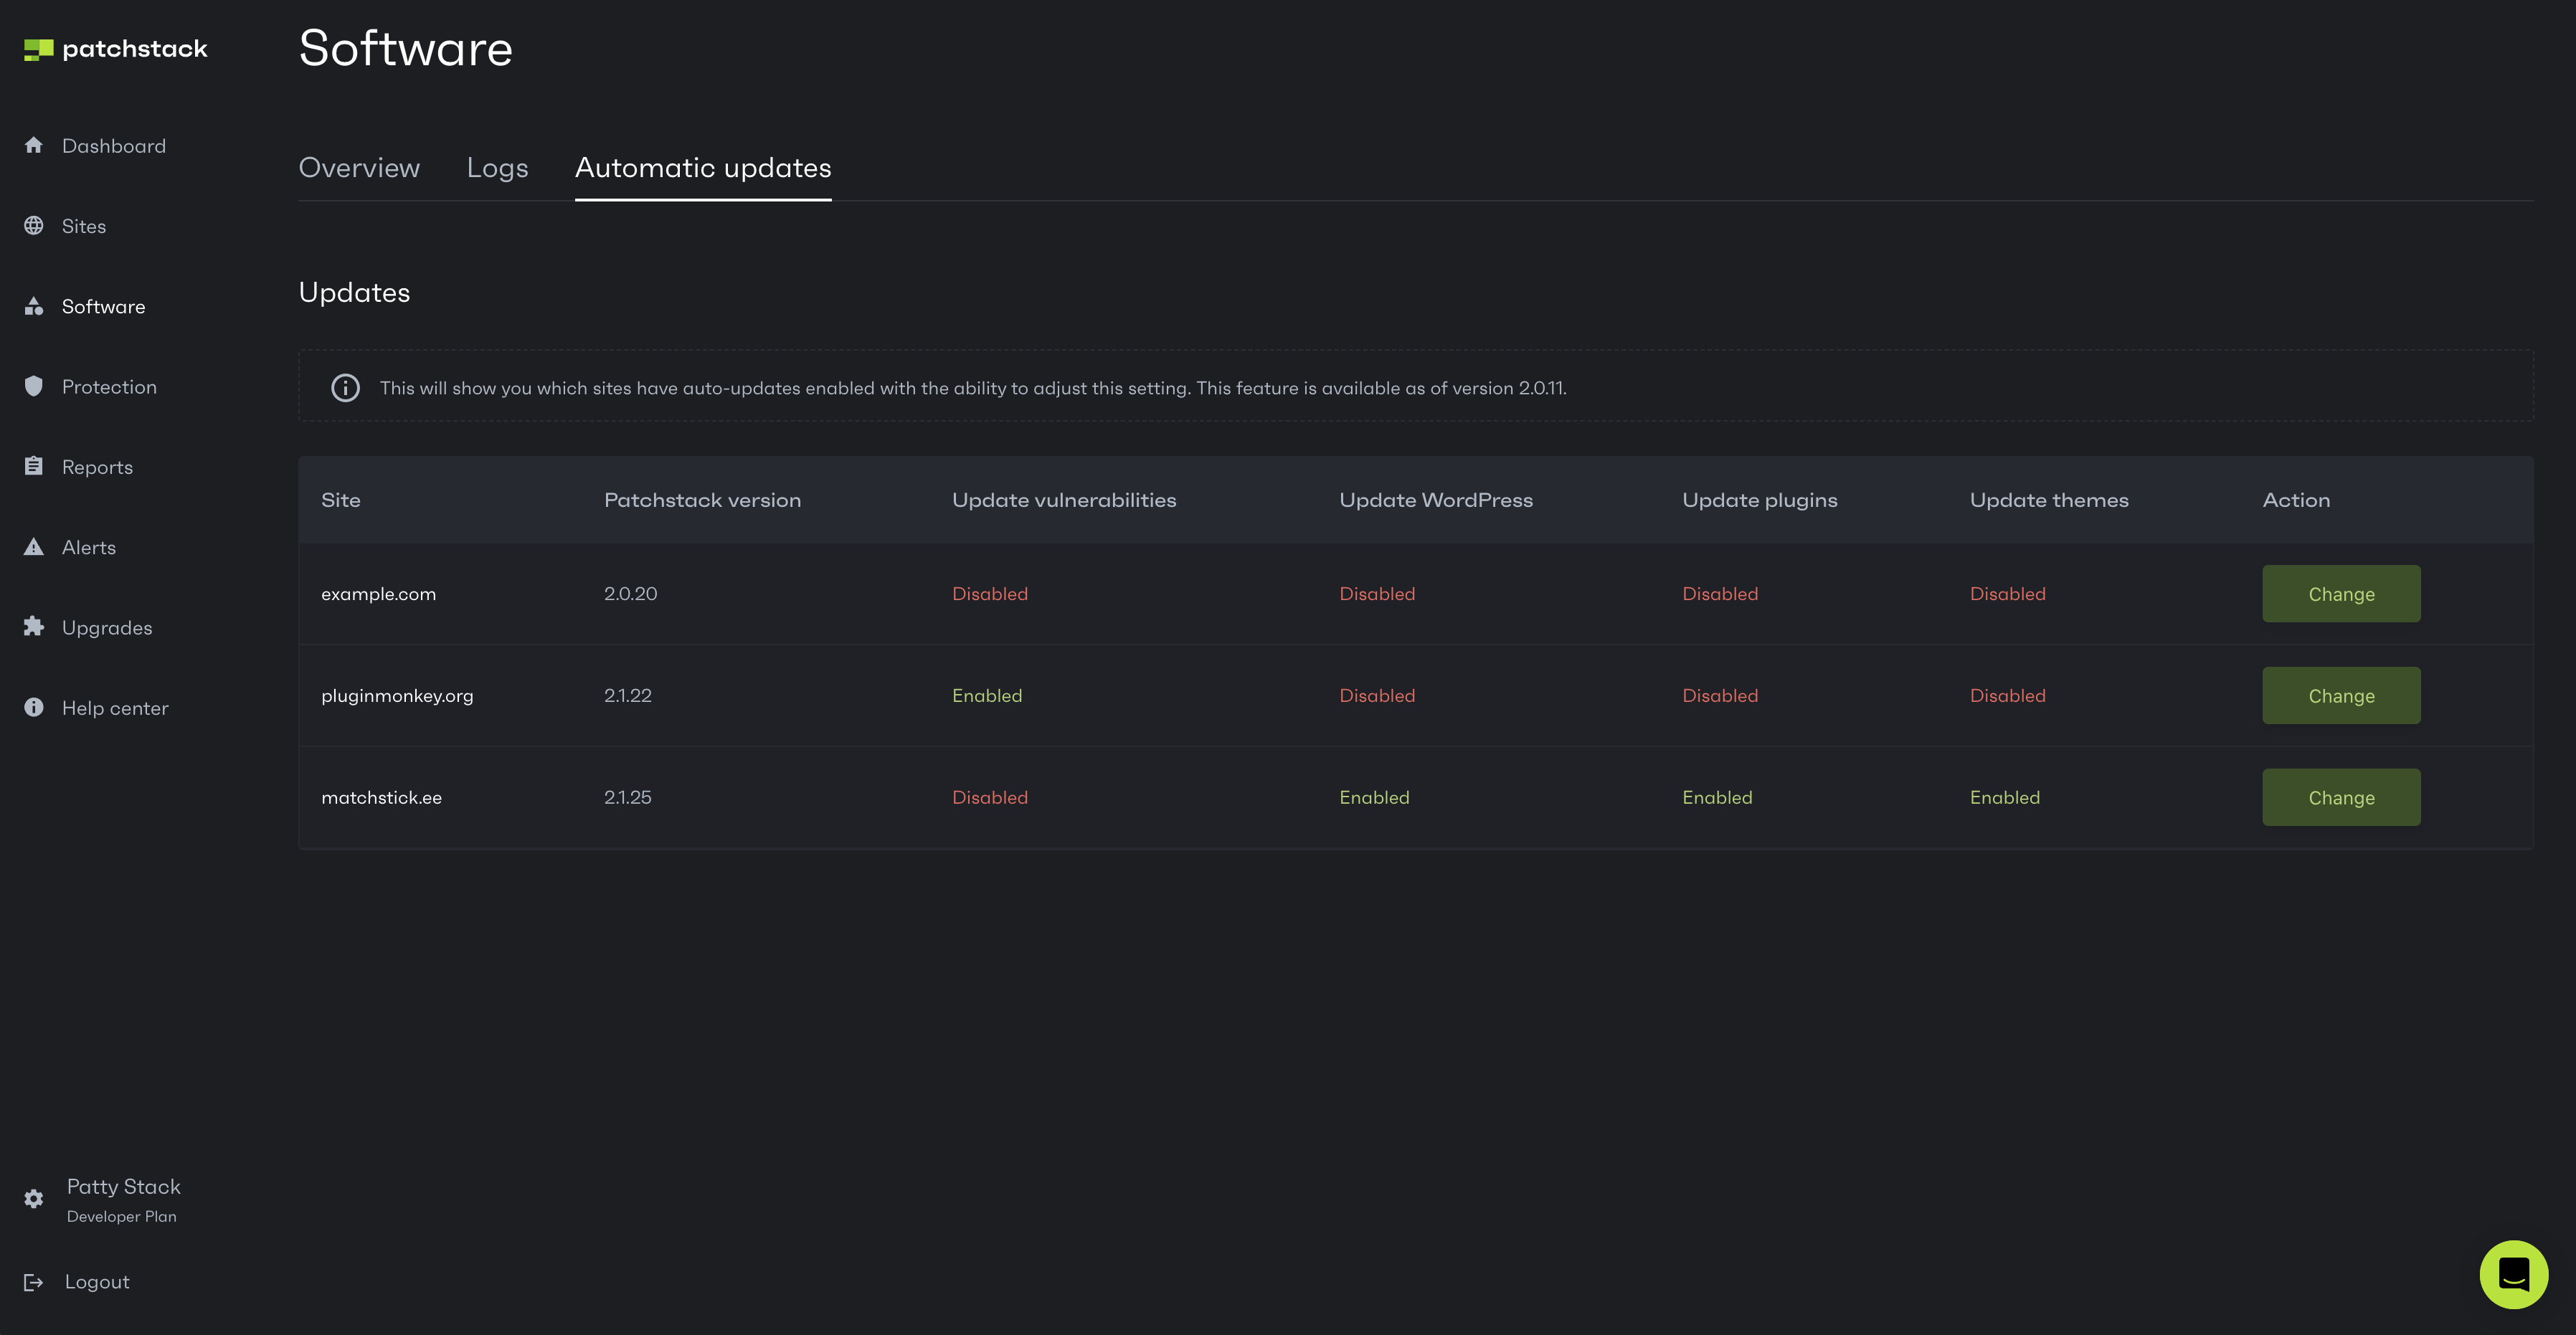
## Turning on the auto-updates
[Section titled “Turning on the auto-updates”](#turning-on-the-auto-updates)
To turn on the **auto-updates** feature, click the **Change** button of the corresponding site in the table.\
You will be shown a popup, which lets you toggle auto-updates for:
* Only vulnerable software versions
* For all WordPress core versions (whenever update is available)
* For all plugin versions (whenever update is available)
* For all theme versions (whenever update is available)
To activate any of the options, toggle the buttons. (see the image below).
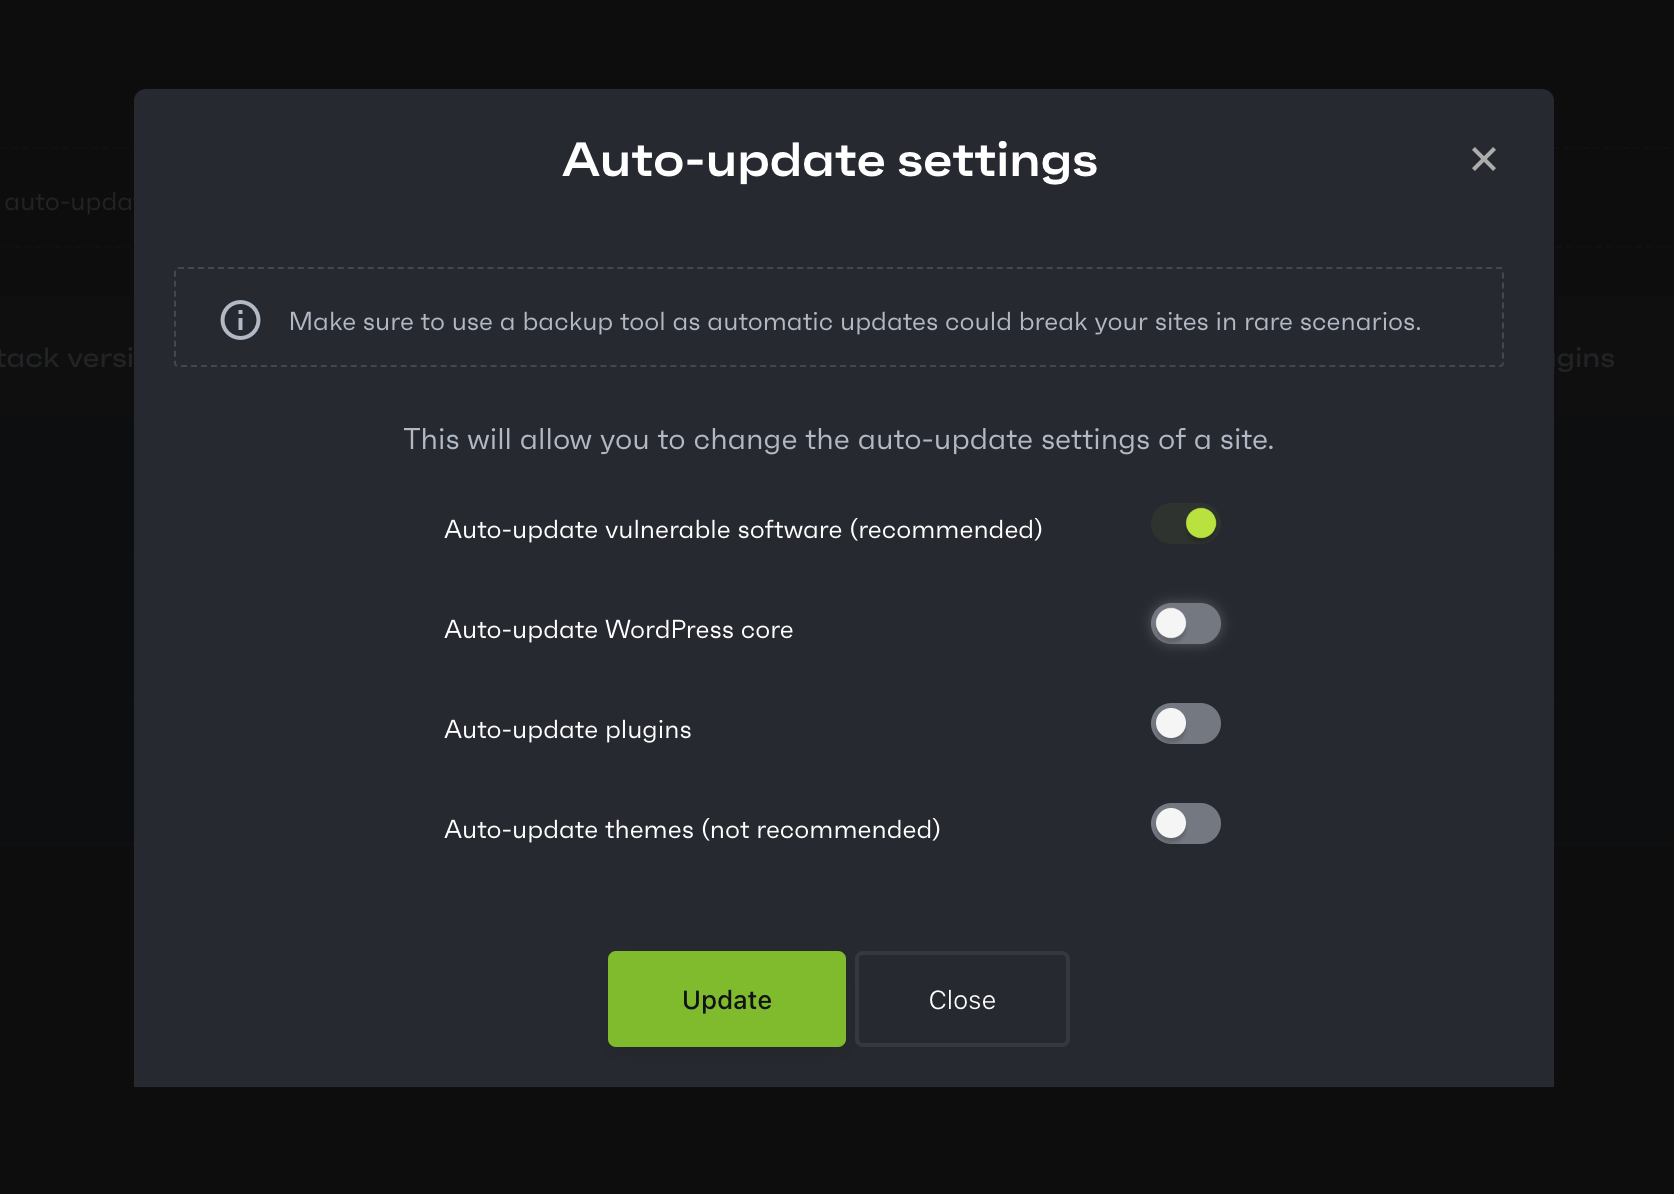
> ❗️ Note that auto-updating won’t work for some of the premium plugins or themes as these may not use standard updating mechanisms (for example some software requires a separate licnese checking call)
> ‼️ Note that updating software could potentially break your site, but for security reasons, it is recommended to still auto-update at least your vulnerable software components.
After toggling the buttons, click **Update**.
# Logs
*Software logs are acessible for all Patchstack users.*\
***Software logs are available for WordPress sites only.***
Navigate to the software logs page by visiting **Software** > **Logs**, or [click here](https://app.patchstack.com/software/logs).
On the **Logs** subpage you can see the history of what actions have you taken with different software (themes, plugins and WordPress core) through the Patchstack App.
As seen on the screenshot below, it shows that the user has updated three plugins on three different websites.
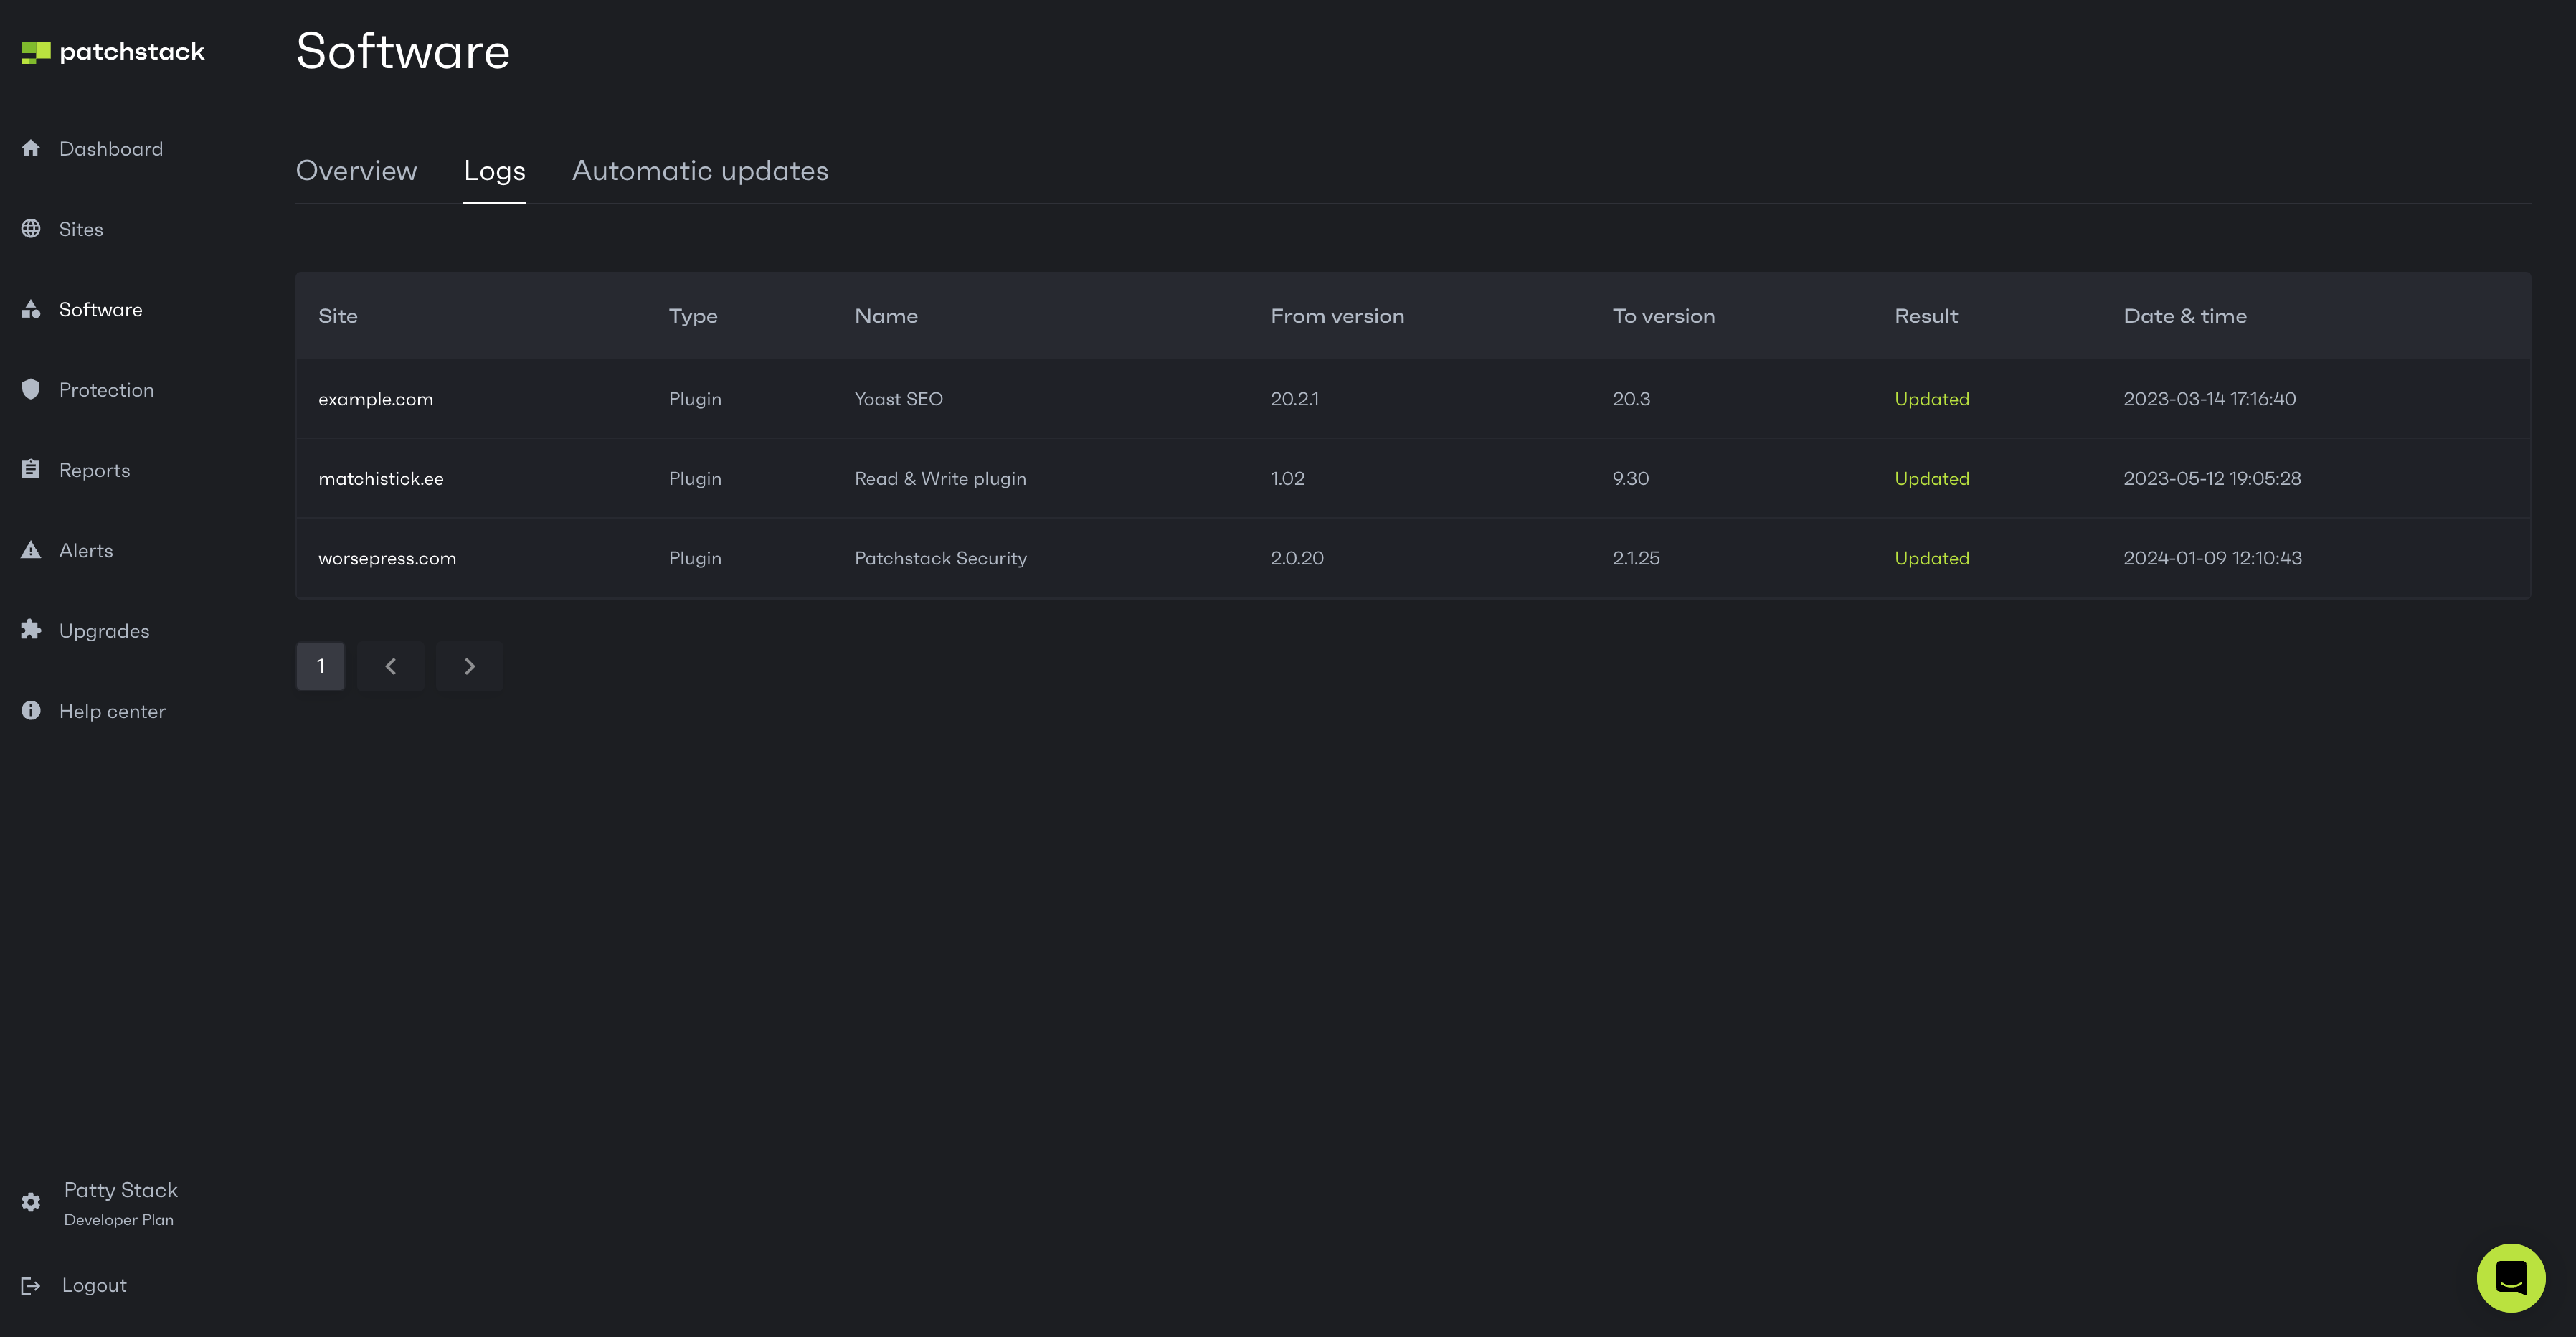
Note
PS! Software logs are only showing actions taken manually from Patchstack App. This page does not show data about auto-updated software, or updates ran from WordPress itself. To view the data about auto-updated software or updates ran from WordPress itself, you can visit your site [Activity log](/patchstack-app/site-dashboard/activity/) instead.
# Overview
*Software overview is accessible for all Patchstack users.*
Navigate to the software overview page by clicking **Software** from the navigation menu, or click here:
On the **Software** overview page, you can see the general overview, that shows all the components (plugins, themes, CMS core version, PHP and MySQL versions) that each of your sites use.\
The table on this page shows, which of the components are vulnerable and which ones have updates available. Plugins and themes that are grayed out, are currently deactivated on the website, or cannot be updated via third party apps like Patchstack (like premium licensed software, which use non-standard updating mechanisms).
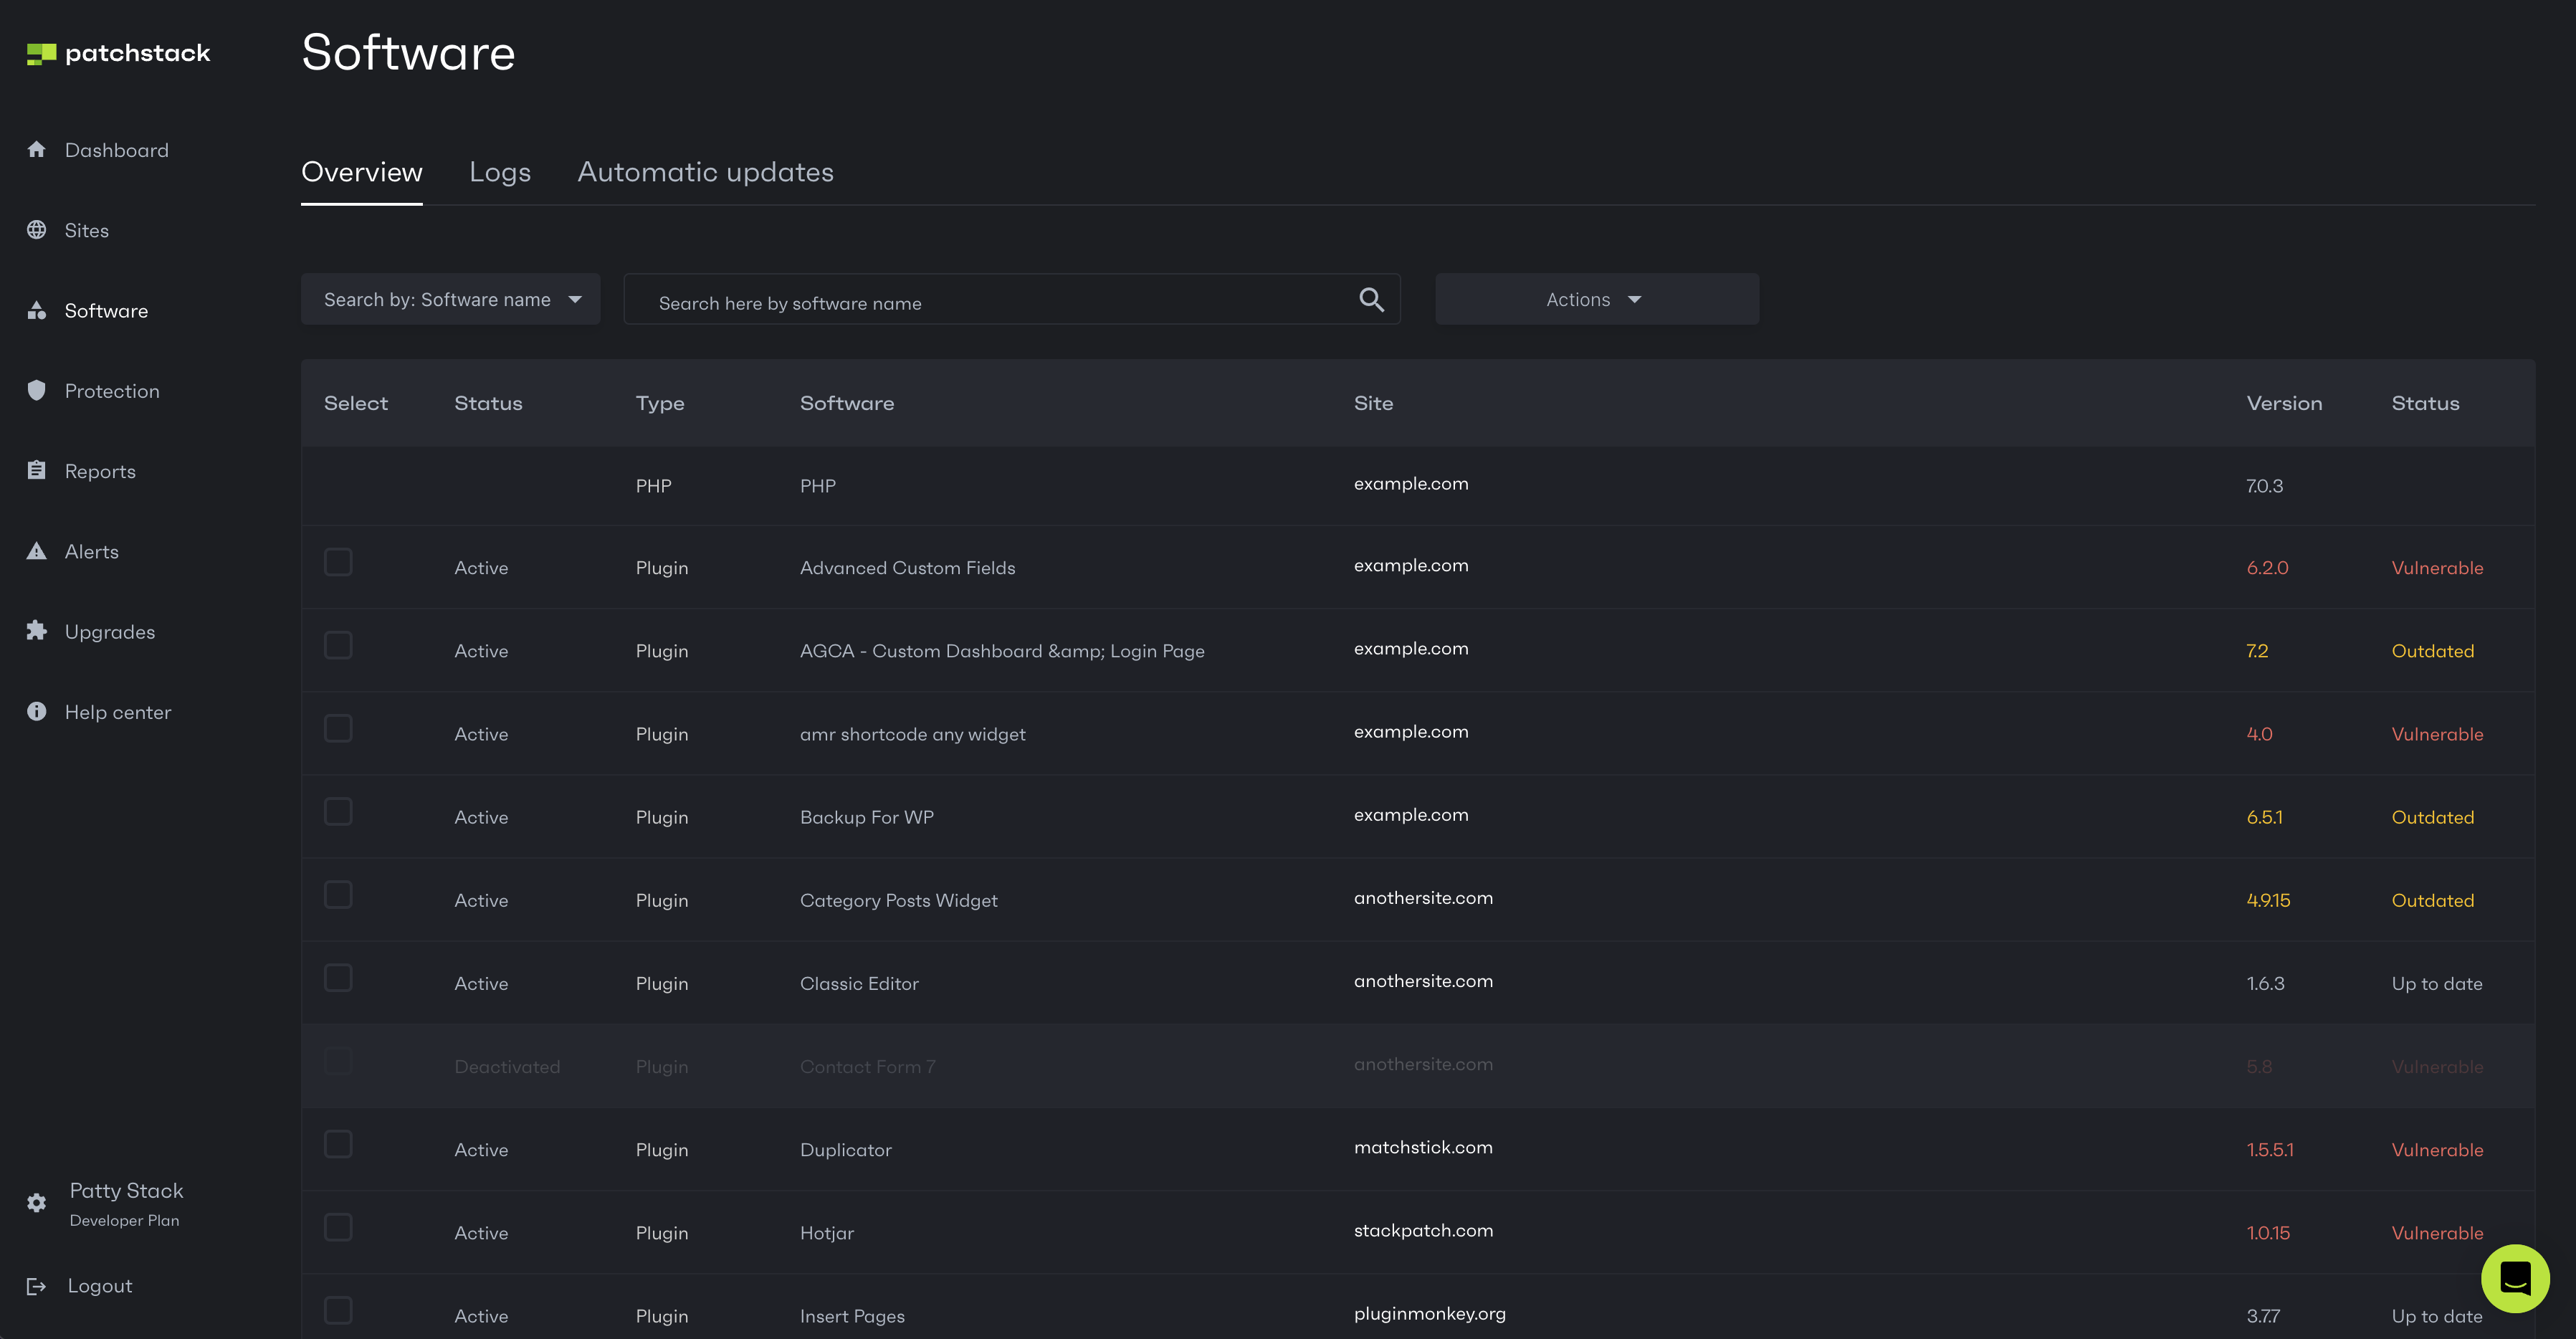
## Updating the software
[Section titled “Updating the software”](#updating-the-software)
You can update your software on that page. Keep in mind to backup your files and databases before doing that.\
If you wish to update components individually, you can select those one by one by clicking on the checkbox on the left column. After that, click on **Action** > **Update**.\
Your software versions should start updating on your WordPress sites immediately.
# Seats
*Seats upgrade is available for the Developer and Enterprise plan users.*
To view available plan upgrades, navigate to **Upgrades** in Patchstack App, or click here: [](https://app.patchstack.com/billing/subscription)
**Seats** upgrade allows you to grant access to your Patchstack account for other email addresses. You can choose which permissions to give to each email account.
Enable this upgrade by clicking on the **Manage** button at the top right corner of this module on the [Upgrades page](https://app.patchstack.com/billing/subscription).
* Developer plan comes with 3 free seats included by default.
* Enterprise plan comes with 5 free seats included by default.
The cost for an extra seat is $24 / month.
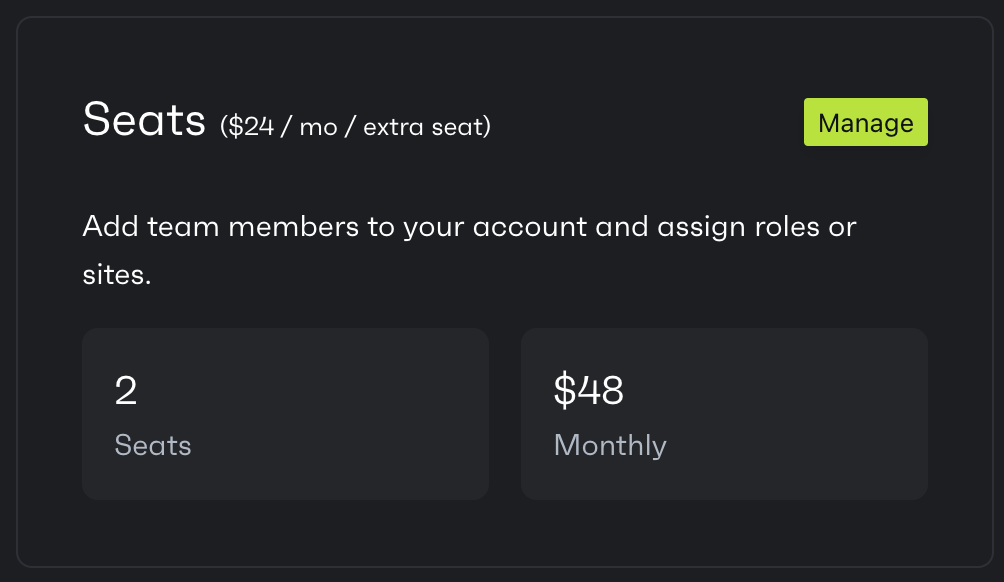
### Managing the seat accounts
[Section titled “Managing the seat accounts”](#managing-the-seat-accounts)
You can manage the seat accounts by navigating to your account settings (click on your name at the bottom left corner) and click on [**Seats**](https://app.patchstack.com/team/) from the top menu.
The help article about how to manage the seat accounts can be [found here.](/patchstack-app/account-settings/team/)
# Upgrades
*Upgrades are available for the Patchstack Developer plan users.*
To view available plan upgrades, navigate to **Upgrades** in Patchstack App, or click here: [](https://app.patchstack.com/billing/subscription)
Patchstack’s plan upgrades include:
1. [Volume upgrade](/patchstack-app/upgrades/volume-upgrade/) - extend the amount of sites you can add to your Patchstack account
2. [Seats](/patchstack-app/upgrades/seats/) - grant access to your Patchstack App sites for another user
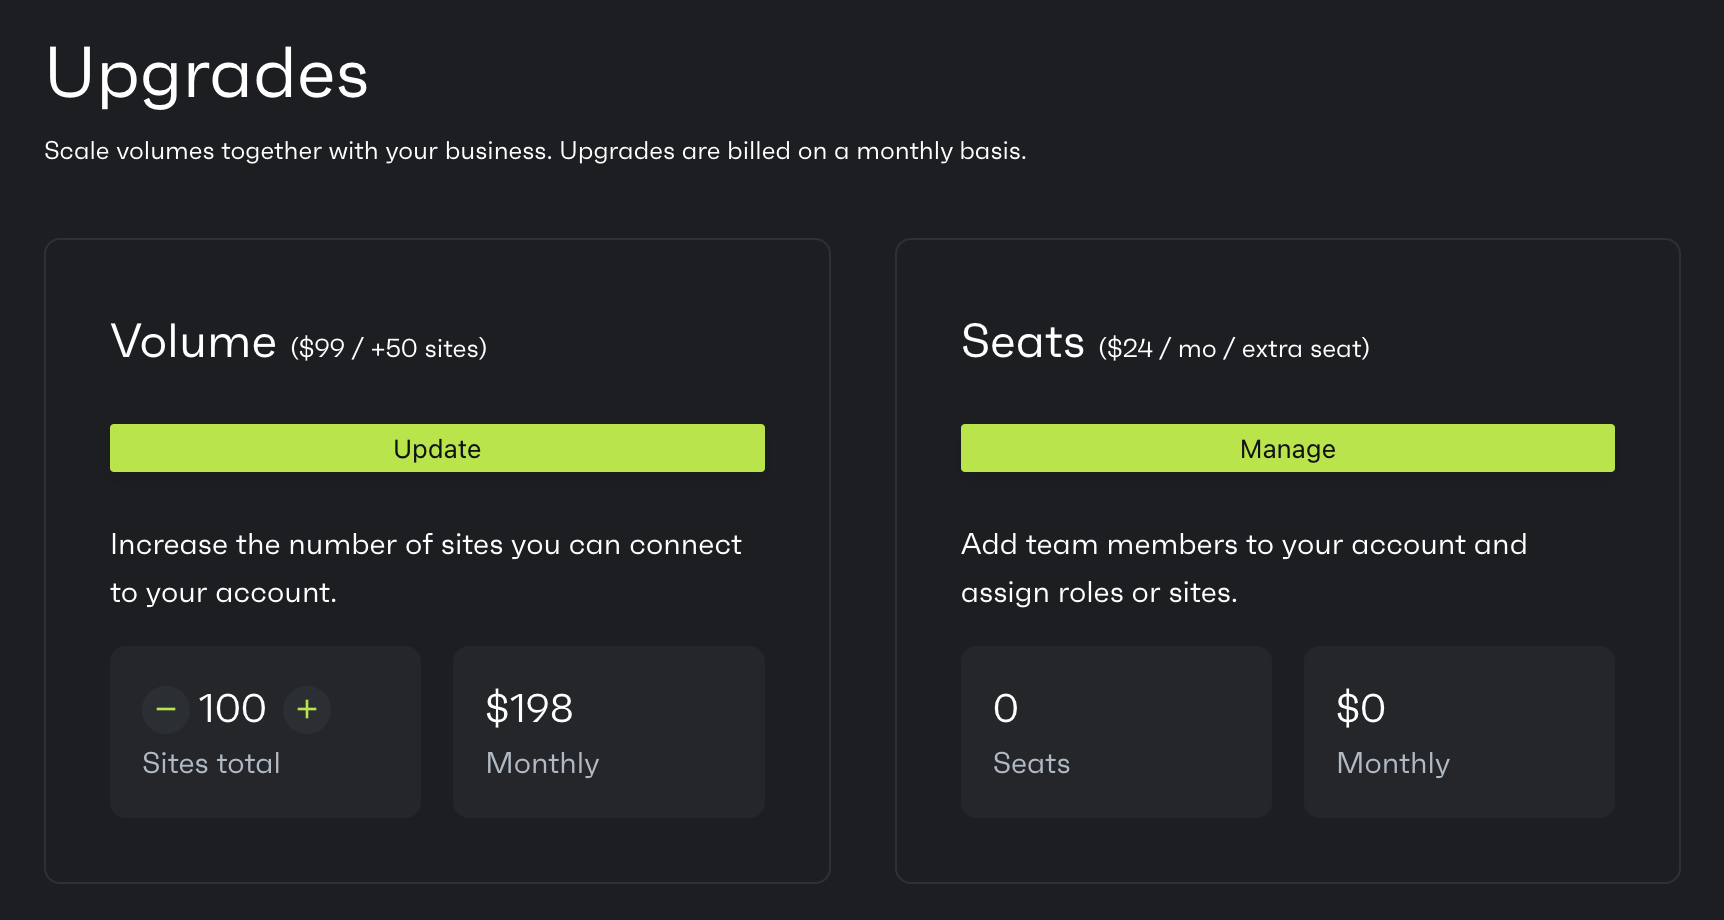
# Volume upgrade
*Volume upgrade is available for the Developer plan users.*
To view available plan upgrades, navigate to **Upgrades** in Patchstack App, or click here: [](https://app.patchstack.com/billing/subscription)
Volume upgrade is an addon for the Developer plan users for increasing the number of site slots for your Patchstack account.
* On the Developer plan, you will get 50 extra site slots for $99 / month.
Go to the [Upgrades page](https://app.patchstack.com/billing/subscription) in Patchstack App to activate **Volume upgrade**.
The module shows, how many additional sites you can add in total and how much you currently pay for it per month.
To increase your site slots, click on the green plus icon in the module. The price is shown instantaneously.
Click **Update** to proceed with activating/modifying this add-on.
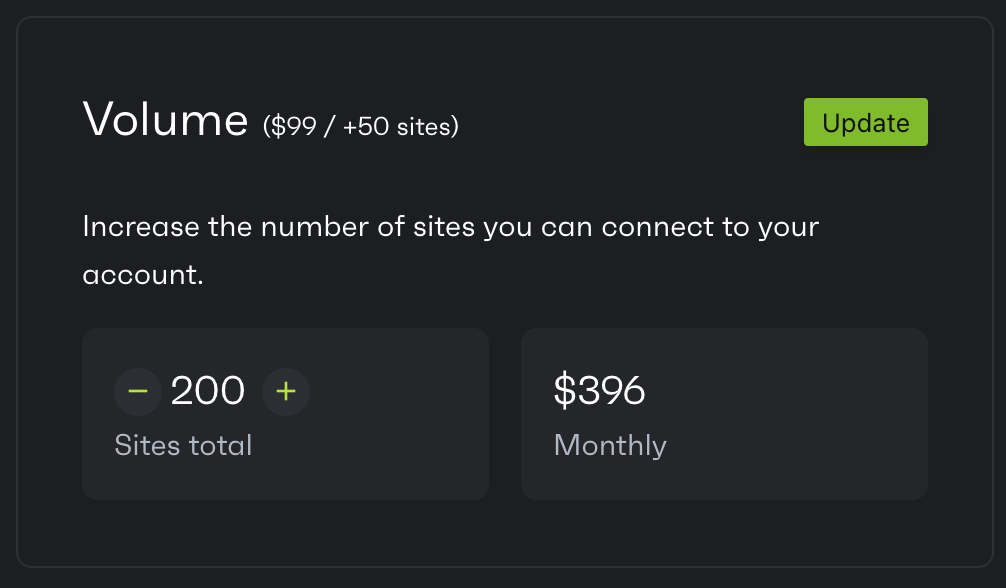
# Changelog
**March 27th 2025**
* Version 2.3.2
* Fixed: captcha error with WooCommerce forms
**March 24th 2025**
* Version 2.3.1
* Added: constant PS\_DISABLE\_MU to disable mu-plugin creation
* Fixed: potential fatal PHP error due to recursion
**March 13th 2025**
* Version 2.3.0
* Added: opt-in auto\_prepend firewall (Apache 2.4 support only)
* Added: captcha support for WooCommerce form
* Added: 2FA support for WooCommerce form
* Added: constant PS\_DISABLE\_HTACCESS to disable .htaccess writing globally
* Added: show error when connection lost due to salts changes
* Added: cronjob to determine if environment changed for proxy IP detection
* Added: ability to reset 2FA of one/all users through App
* Added: ability to remotely reset cache of caching plugins
* Fixed: PHP error on legacy rules processing
* Fixed: potential issue with logs upload hanging
* Changed: small performance improvement when on wp-admin pages
* Changed: trim API key when being entered into API key field
* Changed: default values of firewall block throttle increased to reduce error code 22 instances
* Changed: App -> plugin communication
* Removed: readme.html deletion
* Removed: registration email blacklist feature
* Removed: old reference to api.webarxsecurity.com
* Removed: old unused internal options
**July 9th 2024**
* Version 2.2.13
* Added: some statistics on the plugin dashboard.
* Added: Cloudflare Turnstile captcha support.
* Changed: due to WP core changes, set some options to autoload true.
* Changed: minimum PHP version to 5.6.0.
* Changed: some cron jobs from several times a day to once a day.
* Changed: updated the GEOIP database.
* Fixed: potential caching issue with specific caching plugins.
* Fixed: changed some settings retrieval to get\_option instead of get\_site\_option.
* Fixed: .htaccess error showing on non-Apache environments.
* Fixed: multisite settings inconsistencies.
* Fixed: refresh loop on API key page.
* Removed: unused CSS, JavaScript, images.
* Removed: plugin settings management from WordPress wp-admin. You must now do this through the Patchstack App.
**April 11th 2024**
* Version 2.2.12
* Added: error info if WP CLI activation fails.
* Updated: a few documentation hyperlinks.
* Updated: WordPress tested up to value.
* Fixed: AJAX plugin activation error.
* Fixed: potential fatal error during plugin activation.
* Fixed: missing ) in text.
* Fixed: reset API keys under certain conditions.
**March 8th 2024**
* Version 2.2.11
* Fixed: potential issue where uploading logs to our API would not work properly.
**March 6th 2024**
* Version 2.2.10
* Added: notice that plugin setting management will be removed in plugin on May 1st 2024.
* Removed: cookie notice feature.
* Removed: logs viewing through the plugin, must view through the App now.
* Changed: initial landing page for API key activation.
* Changed: post and comment activity logging activities is now opt-in.
* Fixed: unnecessary software fetching call if plugin is not connected.
* Fixed: logs will forcefully upload in batches of 100 now.
**February 28th 2024**
* Version 2.2.9
* Fixed: software upload gets called too often if un-activated state.
* Fixed: force software upload if WP CLI.
* Fixed: PHP warning on 8.1+.
**January 30th 2024**
* Version 2.2.8
* Added: command to unban all banned IP addresses from the firewall.
* Changed: WP CLI command to accept both key-id formats.
* Fixed: WP CLI command should load all options after activation.
* Updated: GeoIP database.
**January 17th 2024**
* Version 2.2.7
* Changed: textual changes.
**January 11th 2024**
* Version 2.2.6
* Fixed: issue where an activation loop would occur when a certain variable is set internally.
* Fixed: issue where some data remains after license is expired.
* Fixed: do not run firewall during cronjob call.
* Fixed: add no caching headers to login page rename, and change priority of execution.
* Fixed: bug with the firewall engine that could throw a PHP error.
* Changed: moved mu-plugin from patchstack.php to \_patchstack.php for higher priority.
* Changed: made all hardening features available to paid community users.
**November 27th 2023**
* Version 2.2.5
* Fixed: issue on license page where manage options would show to community users.
* Fixed: issue where data is not logged properly under certain circumstances.
* Fixed: issue where custom whitelist rules (legacy) were not working properly.
**November 20th 2023**
* Version 2.2.4
* Fixed: issue with the firewall engine processor that could result in a false positive.
**November 13th 2023**
* Version 2.2.3
* Changed: make sure the table creation migrations define a primary key.
* Fixed: fatal error if a custom (legacy) rule with IP address matching was defined.
**November 10th 2023**
* Version 2.2.2
* Fixed: fatal error if a custom (legacy) whitelist was defined.
**November 9th 2023**
* Version 2.2.1
* Fixed: fatal error on multisite Patchstack settings page.
* Fixed: styling issue on multisite Patchstack settings page.
**November 8th 2023**
* Version 2.2.0
* Added: a brand new firewall engine
* Changed: many performance optimizations
* Fixed: minor bugs regarding the UI
**June 29th 2023**
* Version 2.1.25
* Added: patchstack activate command to activate through WP CLI.
* Fixed: Selectize library not loading.
* Fixed: Fatal error due to wp-config.php salts not present on some environments.
* Fixed: Execution order of country blocking feature.
* Fixed: PHP version truncated in software sync.
**May 2nd 2023**
* Version 2.1.24
* Added: license check delayed message.
* Added: implementation of new plan.
* Added: ability to re-run migrations on multisite environments.
* Added: support for new license key format.
* Changed: UI of license activation/change page.
* Changed: error code of login throttle limitation.
* Changed: updated GEO2IP database.
* Changed: "tested up to" value.
**November 3rd 2022**
* Version 2.1.23
* Added: no caching constant to avoid many caching plugins from caching our forbidden pages.
* Added: encryption/decryption to the core.
* Changed: bumped WordPress tested up-to value.
* Fixed: not being able to change license key to a different value.
**October 4th 2022**
* Version 2.1.22
* Fixed: several multi-site related errors.
* Fixed: incorrect block of wp-json endpoint.
* Fixed: incorrect 2FA secret key generation.
* Removed: broken code from activation process.
**August 9th 2022**
* Version 2.1.21
* Fixed: Bug where some settings could not be saved or retrieved.
**August 5th 2022**
* Version 2.1.20
* Fixed: Bug where the components did not properly synchronize under certain circumstances.
* Changed: Documentation URL structure.
**February 22nd 2022**
* Version 2.1.18
* Fixed: Changed how the no caching headers are sent in the response headers to avoid certain caching configurations from caching the blocked request page.
**February 3rd 2022**
* Version 2.1.17
* Fixed: An undefined index PHP error that could show up on specific hosting environments.
**January 27th 2022**
* Version 2.1.16
* Changed: The WordPress tested up to value.
**January 19th 2022**
* Version 2.1.15
* Added: The ability to turn on/off the theme editor, changed the description.
* Fixed: An inconsistency with the custom whitelist option.
**December 29th 2021**
* Version 2.1.14
* Fixed: An issue with the hide login functionality where only one IP address could be whitelisted at a time.
**December 21th 2021**
* Version 2.1.13
* Added: The login rename feature has been added back and adjusted so it works differently under the hood.
* Added: Option for us to get some debug information from the site, when needed and requested.
* Fixed: PHP error when the plugin would be activated through the CLI.
* Fixed: Logs synchronization issue on some environments.
* Fixed: A prefix has been added to all AJAX actions in order to avoid potential collision with other plugins with the same AJAX action name.
* Fixed: Custom .htaccess rules should not be sanitized to avoid breaking the .htaccess file.
* Fixed: The minimized JavaScript and CSS files of the plugin will now get served instead of the beautified/larger files.
* Fixed: Upon fresh install of the Patchstack plugin, the last synchronization identifier should be reset.
**November 9th 2021**
* Version 2.1.12
* Fixed: Logs synchronization issue on some environments.
**November 5th 2021**
* Version 2.1.11
* Fixed: Remotely saving options that hold arrays.
**November 4th 2021**
* Version 2.1.8 through 2.1.10
* Added: Ability to change the API keys.
* Fixed: Cronjobs would not be set properly if someone upgraded from our previous plugin.
* Fixed: Certain settings would not be retrieved remotely properly.
* Fixed: Several PHP errors on certain environments.
**November 3rd 2021**
* Version 2.1.2 through 2.1.7
* Fixed: PHP 8 related errors.
* Changed: The token verifier of the listener.
* Changed: Migration from old Patchstack plugin to new plugin.
* Changed: Some hyperlinks and text.
* Removed: Login page rename feature.
**November 1st 2021**
* Version 2.1.0 and 2.1.1
* Added: New interface for free users.
* Fixed: Software synchronization issue.
* Fixed: Issue regarding App communication.
* Fixed: Path issue of the image of the cookie notice.
**June 21st 2021**
* Version 2.0.20
* Added: Ability to remotely unblock blocked login IP addresses.
* Added: Ability to remotely view the blocked login IP addresses.
* Fixed: Bug in regards to auto-blocking login and firewall requests when the defined threshold condition was met.
* Changed: Updated the .pot translation file.
**May 18th 2021**
* Version 2.0.19
* Added: Ability to remotely force an upload of all firewall and activity logs.
* Added: Ability to create firewall rules which can ignore the whitelist.
* Changed: Some references from WebARX to Patchstack.
* Changed: Removed unused logged data from blocked requests. This means less data will be logged in the WordPress database and that uploads to our API will be faster.
**March 16th 2021**
* Version 2.0.18
* Fixed: A bug in regards to the login page rename feature.
**March 12th 2021**
* Version 2.0.17
* Fixed: Fatal error on PHP 8 installations.
* Updated: The WordPress "tested up to" value to 5.7.
**March 10th 2021**
* Version 2.0.16
* Fixed: User role whitelist issue on multisite environments.
* Fixed: Remote setting saving issue.
* Changed: Interface has been changed to match the new Patchstack colors.
**August 7th 2020**
* Version 2.0.14
* Fixed: Undefined variable error that might show up in certain scenarios.
**July 6th 2020**
* Version 2.0.13
* Changed: Made a small performance improvement to code that runs on all requests.
* Fixed: Issue related to custom LOG and REDIRECT firewall rules.
* Fixed: Issue where IP whitelisting/unblocking did not work on the login settings page.
* Removed: Backup feature.
* The GeoIP database has also been updated.
**May 1st 2020**
* Version 2.0.12
* Added: Ping that will send a ping to our API every so often to determine the state of the plugin and firewall.
* Added: Message indicating that the backup feature will be remove on June 1st, 2020.
* Fixed: Some errors that would occur on older PHP versions.
* Fixed: The cache-control header has been added to the firewall error page to make sure that caching plugins and servers do not cache the error page. (Cache-Control: no-store)
* Fixed: Issue where disabling the firewall would not actually turn off the firewall.
* The GeoIP database has also been updated.
**March 11th 2020**
* Version 2.0.11
* Added: Auto-update feature to automatically update WordPress core, plugins, themes or vulnerable software. The auto-update is executed next time WordPress searches for updates behind the scenes.
* Fixed: Error in PHP 7.4
* Fixed: Software data is synchronized more often with our API.
* Fixed: 1 year cookie expiration was actually only a 1 month expiration.
* Fixed: Many improvements to the upgrade handlers.
**January 8th 2020**
* Version 2.0.10
* Fixed: Prioritize the Cloudflare IP header and use it when it's available.
* Fixed: Software information will be synchronized more often.
* Fixed: The IP addresses on the custom IP block list will now be trimmed to get rid of any unexpected charaters.
* Changed: Slightly optimized the performance of the firewall.
**December 2nd 2019**
* Version 2.0.9
* Fixed: The option to disable plugin/theme edit will no longer write to (or create) the wp-config.php file which could potentially cause fatal errors.
* Fixed: Country blocking feature will no longer block Patchstack if USA is blocked as country.
**November 19th 2019**
* Version 2.0.8
* Fixed: Fatal error in plugin update checker library.
* Version 2.0.7
* Added: Country blocking functionality. You can find this on the firewall settings page. It also has an option to inverse block, which means the selected countries will only be able to visit your site.
* Fixed: Minor optimization to the firewall engine.
* Fixed: Rare condition in whitelist rules handling that would throw an error.
* Fixed: Error with PHP 7.3 in the plugin update checker library.
* Fixed: Changed the update checker library to run on any type of admin page so it will more often look for updates.
* Fixed: Issue where turning "Disallow Theme Edit" off would not properly turn it off in the wp-config.php file.
**October 17th 2019**
* Version 2.0.6
* Fixed: Improved performance and reduced memory usage of the firewall.
* Fixed: Added more exception handling to the backup code to prevent fatal errors from happening.
**October 10th 2019**
* Version 2.0.5
* Fixed: SQL error under a specific condition in the function that uploads activity logs.
**October 8th 2019**
* Version 2.0.4
* Fixed: Fatal error in backup function that (attempts to) delete old backup files.
**October 7th 2019**
* Version 2.0.3
* Fixed: Fatal SQL error in the activity logs synchronization function to the portal.
**October 3rd 2019**
* Version 2.0.2
* Fixed: Fatal error when you have custom firewall rules configured.
* Version 2.0.1
* Fixed: Fatal error when reCAPTCHA or 2FA is enabled.
* Version 2.0.0
* Added: Ability to turn off the readme.html deletion feature.
* Added: Opt-in to log failed logins. The default will be turned off because usually it's of no value to you and us and it consumes 80-90% of the logs.
* Added: Ability to view a list of banned IP addresses by the firewall and unban them remotely. (this feature will be added to the portal)
* Added: Hardening feature to turn off the WP REST API (wp-json). This is disabled by default due to some people making use of it.
* Added: The ability to specify patterns that will be checked against registration email addresses. If a match is found, the registration will be declined.
* Added: Option to hide the Patchstack widget on the dashboard.
* Fixed: Firewall block reason not showing properly in the firewall logs table.
* Fixed: Issue where the login page rename feature didn't work in certain scenarios.
* Fixed: Reduced the number of SQL queries executed when certain actions are executed in the plugin.
* Fixed: Clicking the logon hours checkbox would check/uncheck a different checkbox.
* Fixed: When you deactivate the plugin, it will no longer remove any settings or data. It will now only remove all settings and data when you uninstall the plugin.
* Fixed: Fatal PHP error in software synchronization function when a theme is reporting invalid data.
* Fixed: Several issues related to the .htaccess file writing: removed RewriteBase from our rules and added support for multisite.
* Changed: Removed the need for writing to certain files in the data folder which also reduces the number of IO operations.
* Changed: Refactored the entire plugin to better support multisite environments, optimize performance, fix several bugs and remove/fix redundant code.
* Changed: Links to third-party sites in paragraphs of the Patchstack plugin will now open in a new tab.
* Changed: Slightly optimized certain aspects of the backup functionality.
* Removed: Several useless options that did not make a significant security impact on the site.
* Removed: .htaccess backup/restore functionality.
**August 28th 2019 & August 29th 2019**
* Version 1.4.7
* Fixed: Issue on lower PHP versions where the firewall script would cause a memory exhaustion error.
* Version 1.4.5 & 1.4.6
* Fixed: Make sure that the Patchstack JavaScript files for the backend are only loaded on the Patchstack pages.
* Version 1.4.4
* Added: Option on firewall page to override which IP header to use from the $\_SERVER array when we grab the IP address of the visitor.
* Fixed: Firewall authentication check has been improved to reduce the number of false positives of when you are logged in but still blocked by the firewall.
* Fixed: Text for 2FA not displaying on the user profile page.
* Fixed: PHP error "Can't use function return value in write context" on lower PHP versions that we officially don't support.
* Fixed: .htaccess file handler will no longer mess up any comments made by yourself or other plugins. Additionally it will now only alter the file if there's actually a change.
* Fixed: Multisite sites overview table header being displayed under the table.
* Fixed: The whitelist textarea option will no longer be deleted if you deactivate the plugin.
* Fixed: Issue when activating sites on multisite environment.
* Changed: Backup feature is now available on multisite. We still recommend to use a dedicated backup service by your host since they do not impact your sites performance and are much faster.
* Changed: The scheduled task function to assign a unique time of the day to your site of when to run the Patchstack scheduled tasks. This will reduce load on both your site and our servers.
* Changed: Blocked comment spam attempts are no longer stored on the portal, but will still show on the logs page of your site.
* Removed: The need of mu-plugins folder and the firewall.php file inside this folder.
**August 8th 2019**
* Version 1.4.3
* Fixed: IP proxy issue on certain hosts.
**August 5th 2019**
* Version 1.4.2
* Added: Multisite network functionality.
* Added: Strict-Transport-Security security security header.
* Fixed: Issue related to the hardening tab on the portal.
* Fixed: Several issues related to backups.
* Fixed: Several PHP errors.
* Removed: License expiring message.
**May 27th 2019**
* Version 1.4.1
* Added: Button to disable the backup feature.
* Added: Textbox to specify maximum number of backup copies to keep in Google Drive.
* Added: Better errors when a file cannot be written to.
* Fixed: reCAPTCHA undefined variable error under certain conditions.
* Fixed: Several backup related issues.
* Fixed: Software synchronization between the WordPress site and our API has been optimized.
* Fixed: The way the security headers are set in order to avoid certain PHP header errors.
**April 29th 2019**
* Version 1.4.0
* Added: Backup feature to backup your files and database to Google Drive. You can find this feature under the "Backup" tab on the Patchstack plugin settings on your site.
**April 10th 2019**
* Version 1.3.9
* Added: XML-RPC block option has been added and is enabled by default. If you would like to turn it back on, you can find the option on the "Hardening" tab.
* Fixed: Bluehost IP address issue where the proxy IP address would get logged instead of the actual visitors IP address. This caused conflicts with the firewall banning feature.
**April 5th 2019**
* Version 1.3.8
* Fixed: Several PHP errors that would show up under certain conditions.
**March 12th 2019**
* Version 1.3.7
* Added: Functionality for old whitelisting structure has been re-added.
* Fixed: Invisible reCAPTCHA error on login.
* Fixed: Several errors related to the firewall regarding parsing the firewall rules.
* Fixed: Issue where the session would be killed if you moderated or posted comments.
* Removed: Referral input fields since it's no longer used.
**February 19th 2019**
* Version 1.3.6
* Added: Ability to match firewall rules against IP addresses.
* Version 1.3.5
* Added: Implementation of new enhanced firewall logic (which can be managed in the portal)
* Changed: Patchstack is no longer shown as a menu option but now shown under the "Settings" menu as "Security".
* Fixed: Bug that killed your session if you managed comments through wp-admin.
* Fixed: Cookie notice would show briefly on the site with certain caching plugins.
* Fixed: build\_log\_db PHP error.
* Fixed: Undefined variable error.
* Fixed: Security headers issue with the X-XSS-Protection header.
**January 16th 2019**
* Version 1.3.4
* Added: Functionality so the plugin settings can be remotely adjusted through the portal.
* Fixed: Version 1.3.3 skipped due to minor bug that had to be fixed.
**October 18th 2018**
* Version 1.3.2
* Changed: Frequency of some scheduled tasks to reduce server load on both your site and our API.
* Changed: Refactoring of some code.
* Fixed: Force synchronization with the portal when the plugin is activated under certain conditions.
**September 26th 2018**
* Version 1.3.1
* Fixed: DISALLOW\_FILE\_EDIT PHP notice error.
* Fixed: Blocked requests will now properly return a 403 forbidden error.
* Fixed: Unauthenticated users doing actions on posts will not be logged.
* Fixed: Cookie notice will no longer be affected by caching plugins.
* Fixed: Show error on wp-login.php if login rename feature is enabled.
* Fixed: If IP address header contains multiple IP addresses, use the first IP in the list.
* Fixed: Fatal PHP error: nesting level too deep.
* Fixed: Removed policy word from the cookie notice.
* Fixed: Load reCAPTCHA script only if it is actually enabled.
* Fixed: Fatal error when the plugin is activated on the multisite environment.
**August 29th 2018**
* Version 1.3.0
* Added: Activity logs.
* Added: Ability to specify logon hours. For example 09:00-19:00 or 18:00-06:00 (uses server time).
* Added: User-based 2FA (works with Authy and Google Authenticator)
* Added: Option to make use of invisible reCAPTCHA.
* Added: Ability to see which IP addresses are currently blocked from logging in.
* Added: Ability to unblock blocked IP addresses from logging in and whitelist ability.
* Added: Finetune when to block an IP addresses when firewall blocks a request.
* Added: Finetune when to block an IP address when a login request failed.
* Added: Comment form reCAPTCHA option.
* Added: Ability to select which user roles are excluded from the firewall.
* Changed: Re-designed the plugin to match the portal design
* Changed: Ability to block IP addresses by range, CIDR notation, wildcard and single IP.
* Changed: Refactored a bunch of code.
* Removed: Old user login logs.
* Removed: Old code that was no longer used.
* Fixed: Several issues regarding plugin/license activation.
* Fixed: Login brute force blocking not working properly.
* Fixed: Permission error message.
* Fixed: Patchstack styling overrides styling of other plugins.
* Fixed: When you request a rescan of the site, it will block Patchstack and log it.
**August 3rd 2018**
* Version 1.2.1
* Added: The ability to control when to block an IP address depending on the number of failed login attempts and time span.
* Fixed: Security headers checkbox not working properly.
* Fixed: Prefixed cookie notice CSS class/id attributes so it doesn't collide with the theme or other plugins.
**August 2nd 2018**
* Version: 1.2
* Added: Added section separators to the settings page.
* Added: Ability to tell Patchstack where to inject custom .htaccess code.
* Added: Ability to tell Patchstack to never modify the .htaccess file again.
* Fixed: Rewrote .htaccess related code to fix issues in certain environments.
* Fixed: Removed and adjusted some CSS so it doesn't override CSS of other plugins.
* Fixed: WP\_Error on some environments when trying to login.
* Fixed: Small adjustment made to reCAPTCHA processor to fix the issue on some environments.
* Fixed: Patchstack icon on vertical menu's.
* Fixed: Rename login page not working on certain environments.
**July 28th 2018**
* Added: The Patchstack logo and text in the cookie notice can now contain your referral link.
* Fixed: The firewall/user logs pagination styling has been improved.
* Fixed: Firewall will not execute if the whitelist is non-existent to prevent false positives.
* Fixed: In rare scenarios the plugin activation process would cause an infinite redirect loop, this has been fixed.
# How to uninstall
You can deactivate and uninstall the Patchstack plugin just like any other WordPress plugin.\
We recommend uninstalling it from the WordPress admin panel to have the plugin and its data correctly removed from the server (files and database entries).
After successful deletion, the \*\_options table will be the only table that keeps the plugin settings data. So the next time you install Patchstack on the same site, your plugin data will be there again (including the API key).
To deactivate, go to your **Plugins** page, find **Patchstack Security**, click on **Deactivate** and then **Delete**
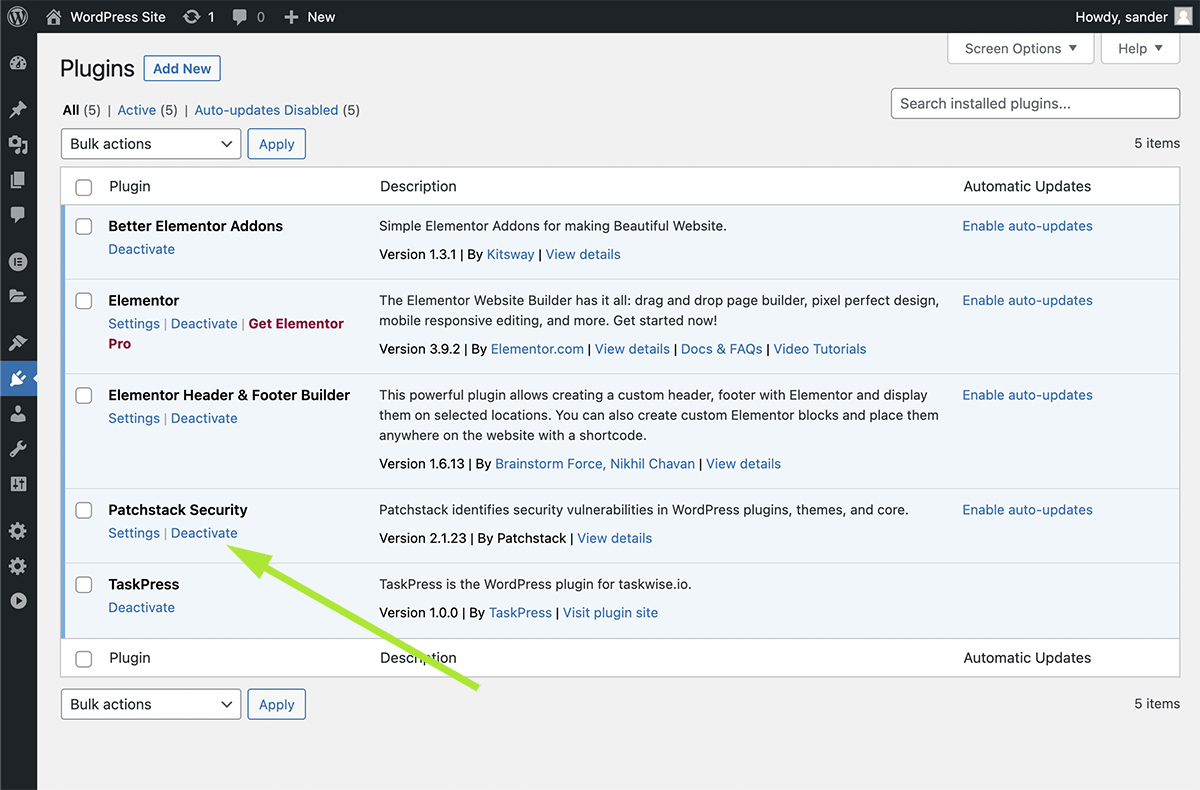
# How to update
You can update the Patchstack plugin in two ways:
* From the WordPress admin area
* From the Patchstack App
**NB!** If you have <= 2.0.20 version of Patchstack installed, [follow this tutorial](/faq-troubleshooting/plugin/updating-patchstack-from-2020/)
## Updating from the WordPress admin area
[Section titled “Updating from the WordPress admin area”](#updating-from-the-wordpress-admin-area)
1. Navigate to your website’s WordPress admin area and click on **Plugins** from the admin menu
2. Scroll down and search for **Patchstack Security**
3. Click on **Update**
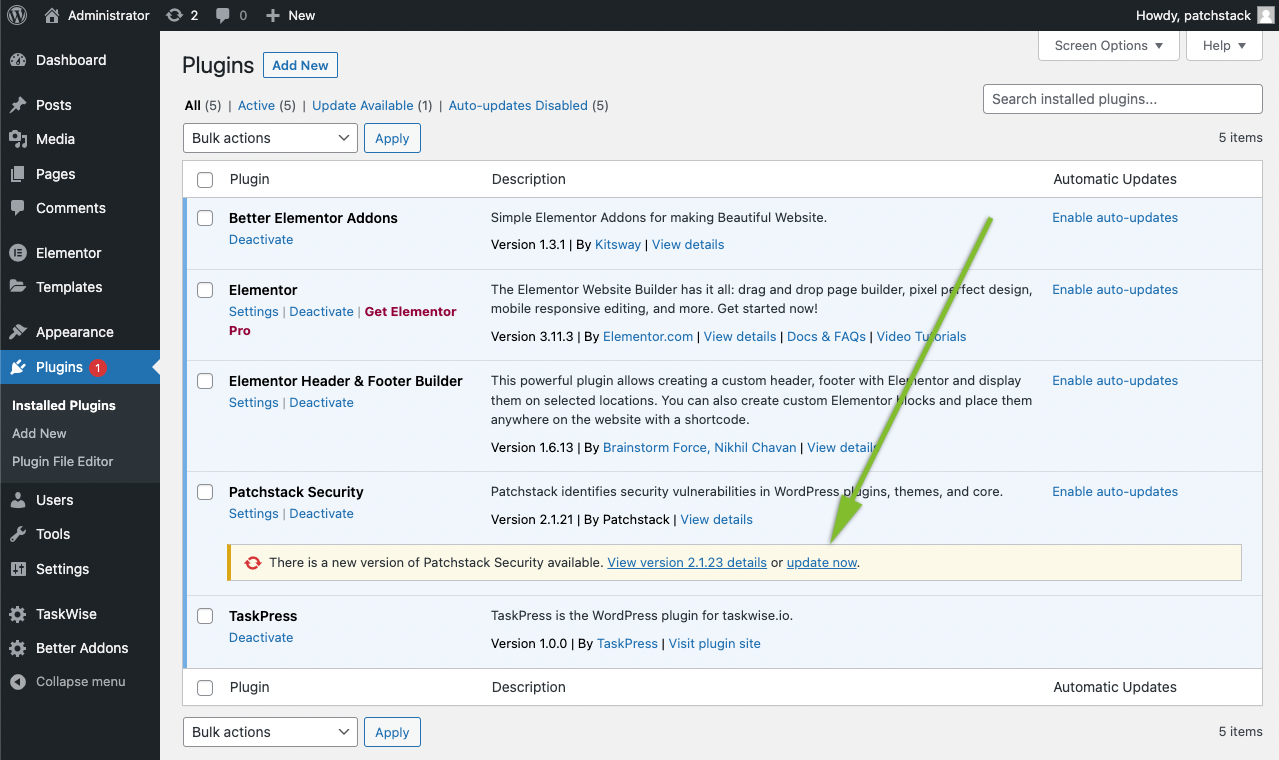
## Updating from the Patchstack App
[Section titled “Updating from the Patchstack App”](#updating-from-the-patchstack-app)
1. Log in to [the Patchstack App](https://app.patchstack.com)
2. Navigate to **Sites** from the left menu
3. Find your site and click on it
4. From the submenu, click **Software**
5. Find the **Patchstack Security** plugin and tick the checkbox from the left column of the table row
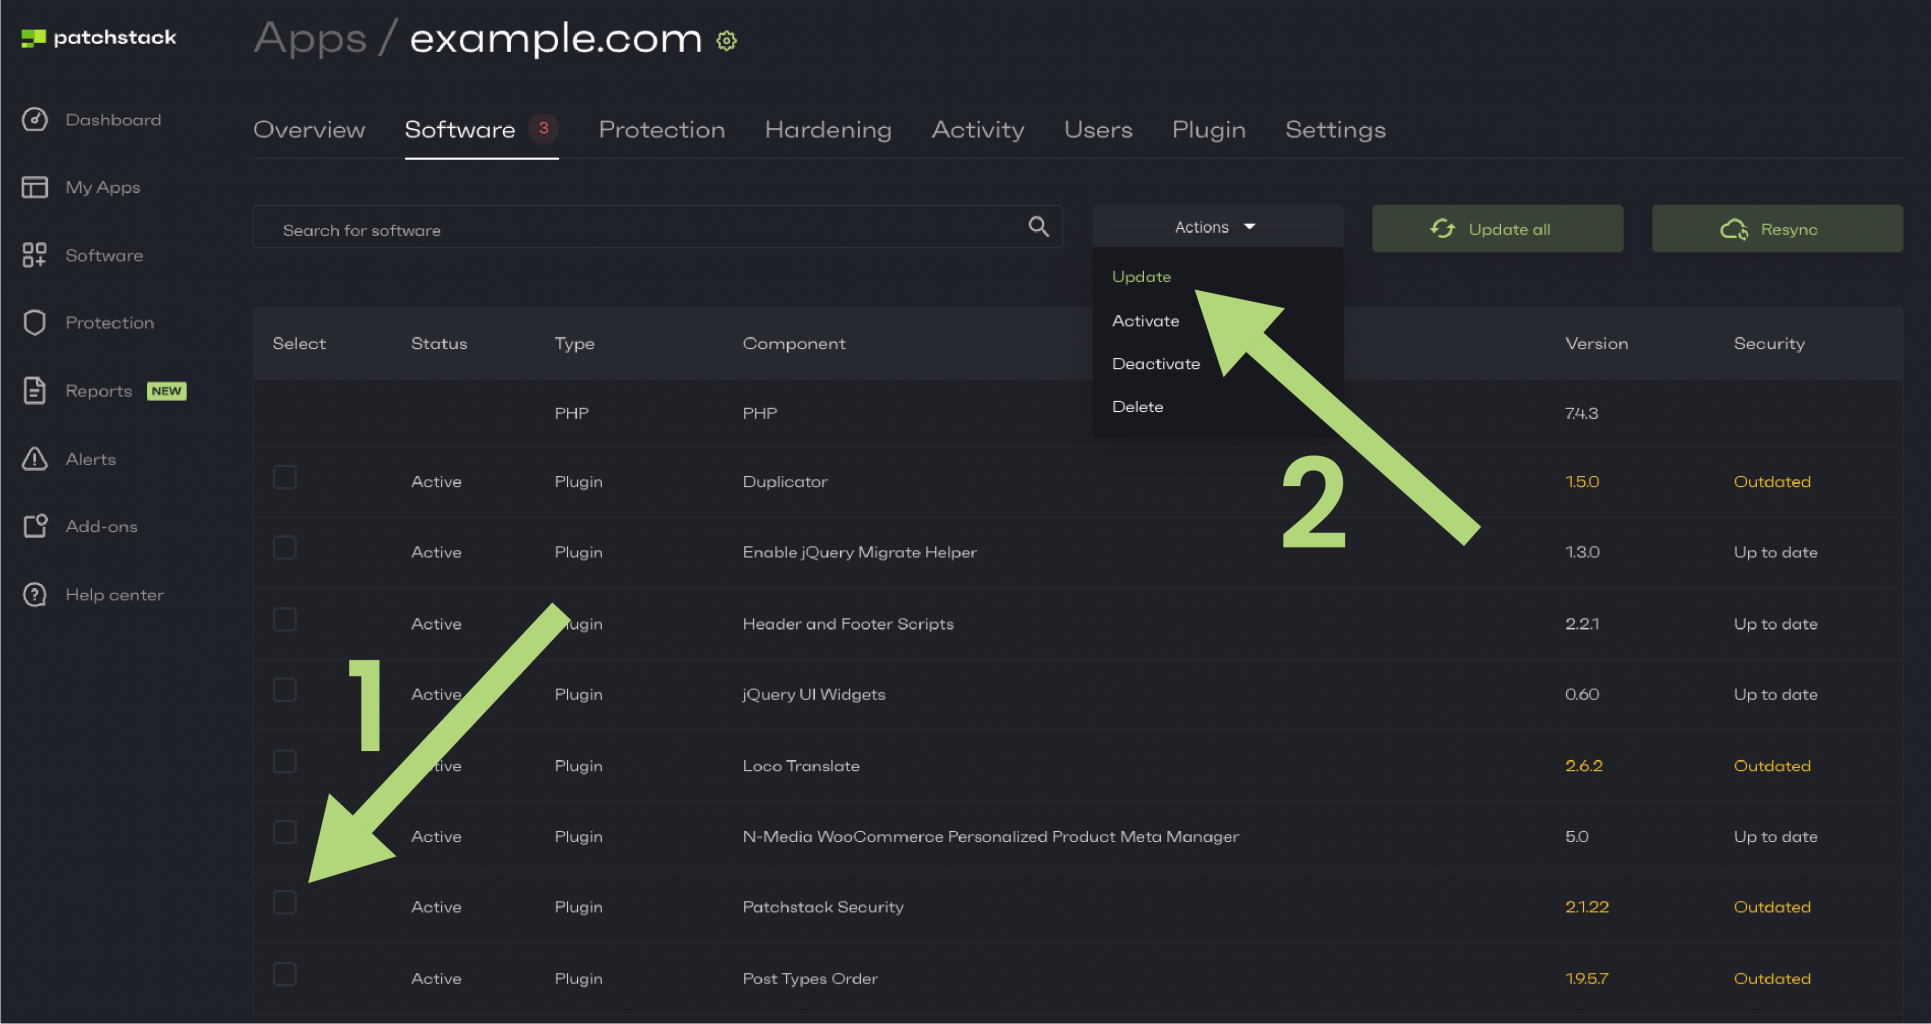
# Multisite installation
You can set up Patchstack on each of your network sites as easily as you would set it up on regular WordPress sites. Keep in mind that each site must be added to the Patchstack App individually and will take up a slot on your account. Every subsite of your multisite network will have an individual API key which has to be inserted correctly.
Here are the steps to take to install Patchstack on your multisite network.
## Step #1 — Adding the site to Patchstack App
[Section titled “Step #1 — Adding the site to Patchstack App”](#step-1--adding-the-site-to-patchstack-app)
To install Patchstack on the multisite network, the easiest way is to do it via the Patchstack App.
1. Navigate to [Sites](https://app.patchstack.com/sites) on the Patchstack App and click on **+ Add new** (at the top bar).
2. Type in your domain and click **Continue to plugin sync**
3. You are then shown a popup like this: 
4. Click on **Or sync manually** link and copy the API key
## Step #2 — Install the plugin
[Section titled “Step #2 — Install the plugin”](#step-2--install-the-plugin)
1. Go to your WordPress Network Admin and navigate to **Plugins** > **Add New Plugin**
2. Search for “Patchstack”
3. Install the “Patchstack – WordPress & Plugins Security” plugin
4. Once the plugin is installed, click **Activate**
5. You will then see screen as such: 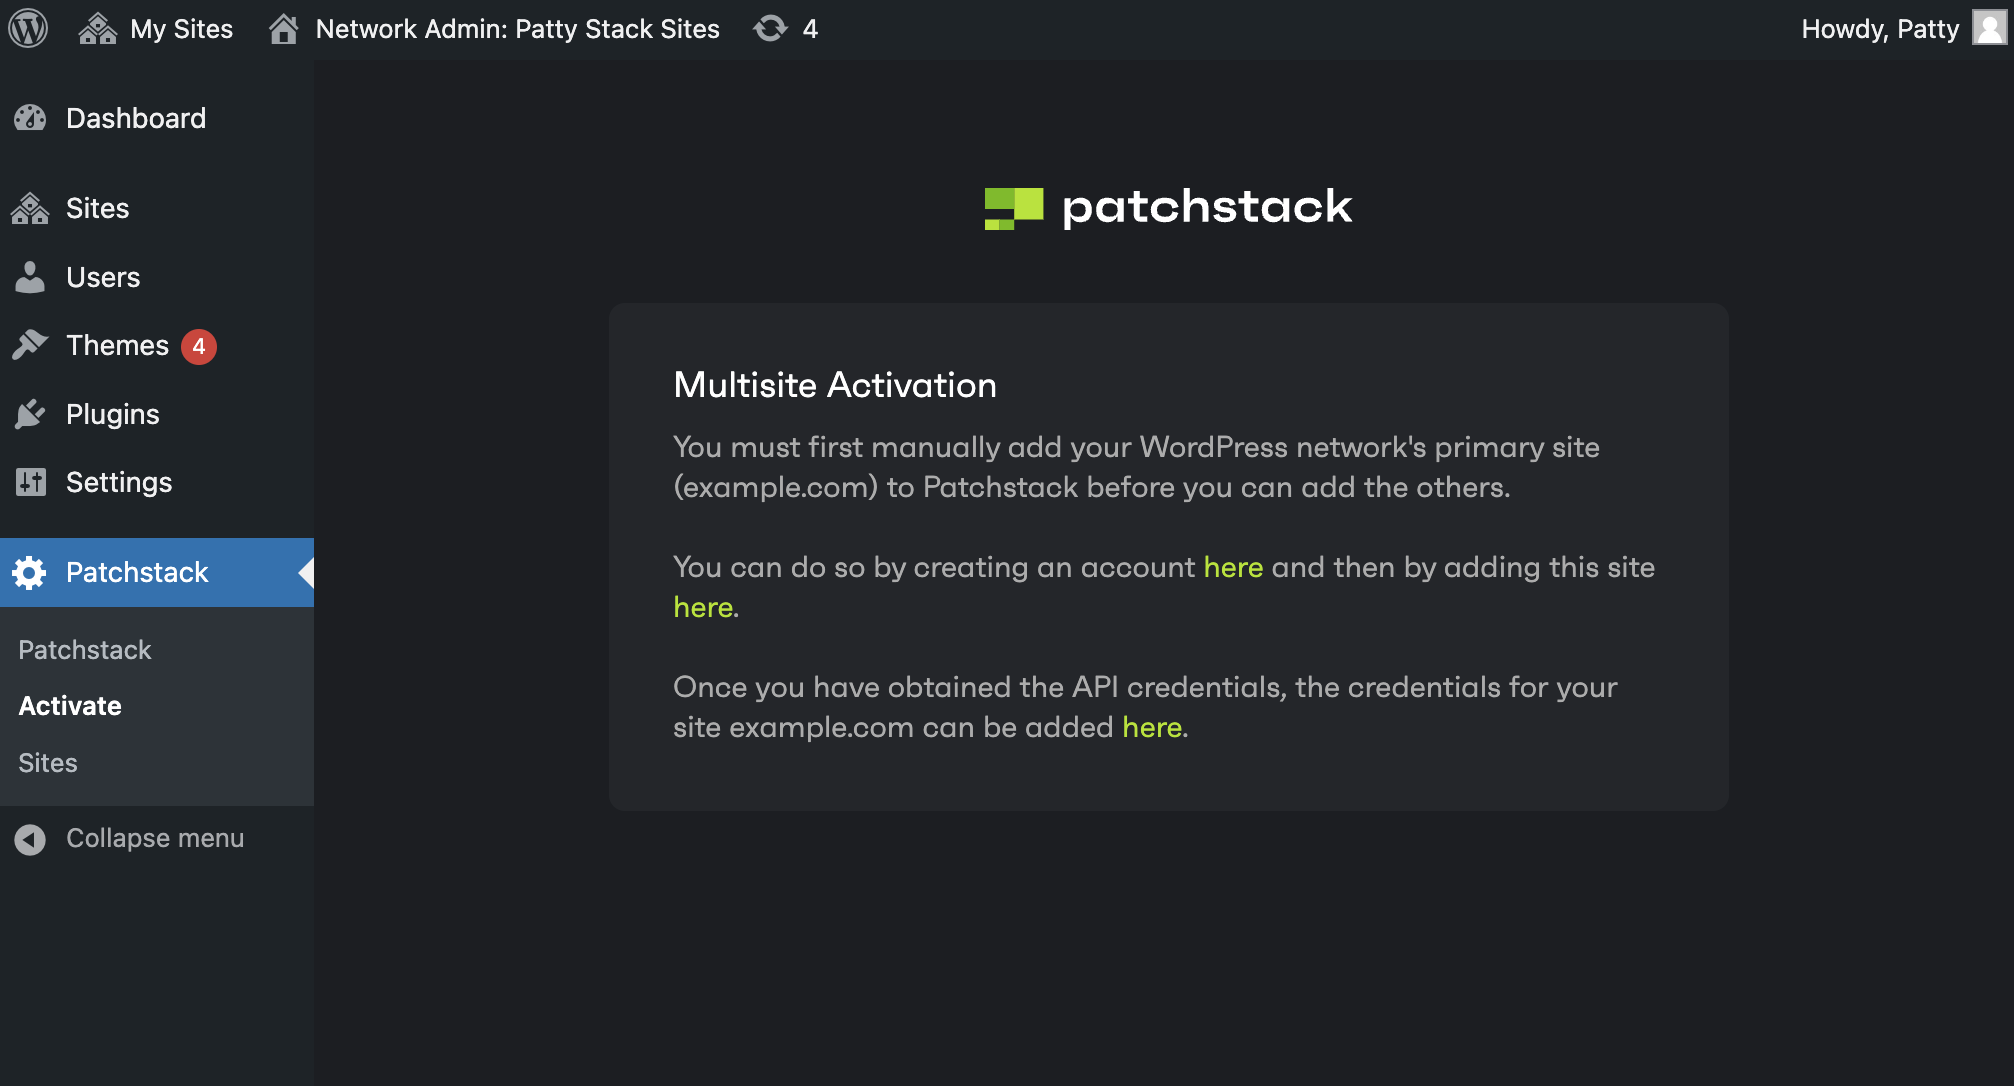
6. Click on the last link in this box, then paste the API key to that field, and click “Sync”
7. Your main site is now connected and synchronized with Patchstack
8. You should see a success screen in Patchstack App and in your plugin as well
## Step #3 - Connecting the subsites
[Section titled “Step #3 - Connecting the subsites”](#step-3---connecting-the-subsites)
To connect the subsites, repeat the process in **step 1** - add your site to Patchstack App, and then get the plugin API key.
1. In your Network Admin, navigate to **Patchstack** > **Sites**
2. You’ll see screen as such: 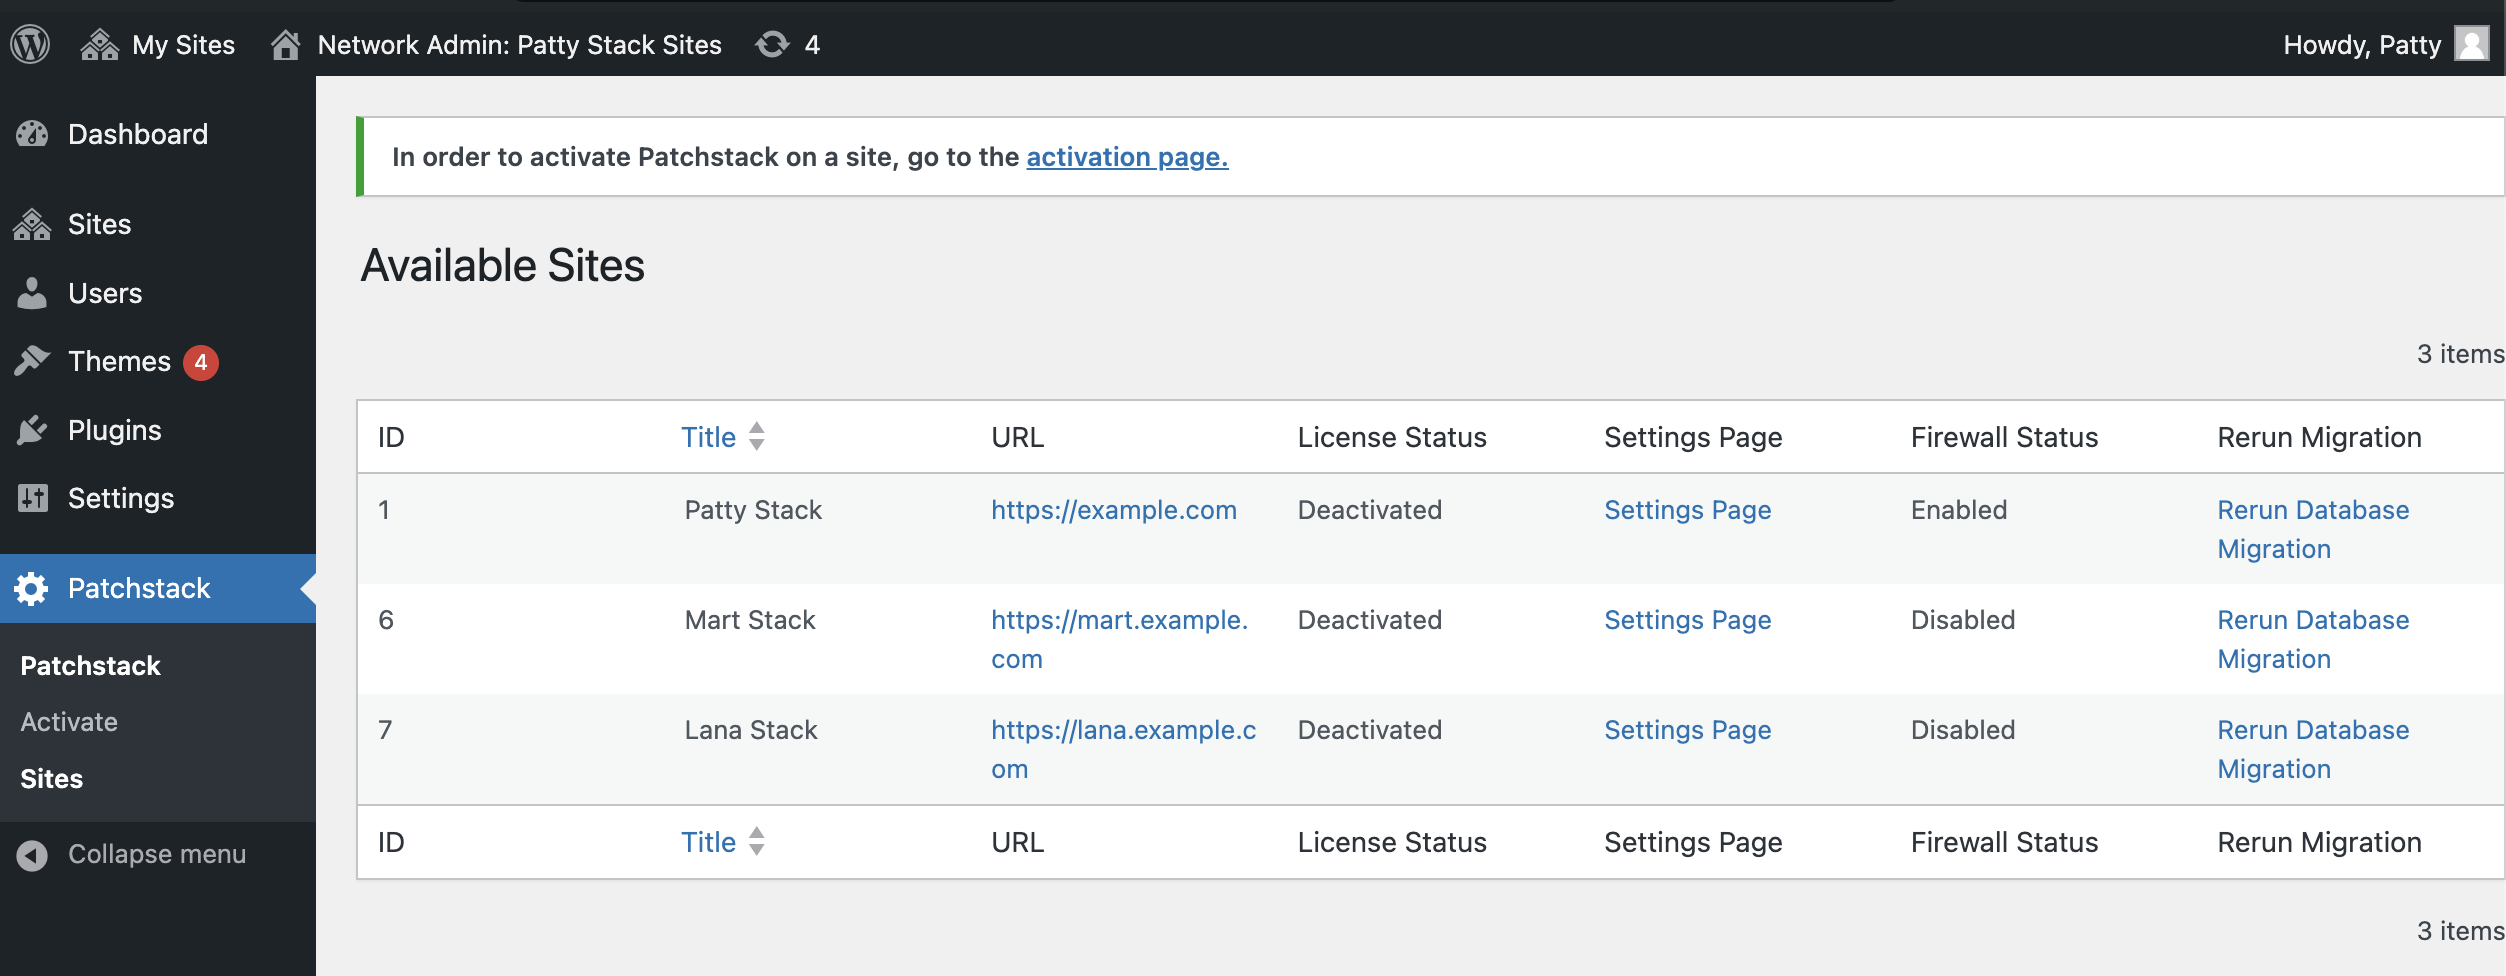
3. To add an API key to the corresponding site, click “Settings page” and add the API key the same way as you did for the main site
## Rerunning the database migration
[Section titled “Rerunning the database migration”](#rerunning-the-database-migration)
In some certain scenarios, you may encounter database errors on your error logs about Patchstack database tables, when running the multisite environment. For that, you will need to rerun the database migrations.
This can be done when you navigate to: **Network Admin** > **Patchstack** > **Sites** and click on **Rerun Database Migration** from there for your sites.
## Conclusion
[Section titled “Conclusion”](#conclusion)
You will have to add every subsite separately to the Patchstack App and insert the plugin API keys to every subsite. After adding a site successfully, you’ll see stats of your site on your WordPress admin. 
If you need further help, don’t hesitate to reach out to us via live chat at the bottom right corner!
# Drupal Installation
## Notes
[Section titled “Notes”](#notes)
* At this time, access to (S)FTP is required in order to upload the module manually.
* The Drupal module will be made available through composer and Drupal.org in 2025.
## Requirements
[Section titled “Requirements”](#requirements)
* Drupal core version 9.4+
* PHP 5.6+
* Access to (S)FTP
## Installation
[Section titled “Installation”](#installation)
Follow these steps to install the Patchstack connector on your Drupal site.
1. Download the Drupal connector [here](https://downloads.patchstack.com/patchstack-drupal-connector.zip).
2. Connect to (S)FTP of your Drupal site.
3. Navigate to **/web/modules/** and unzip the contents of the zip file into this folder.
4. Confirm that the **/web/modules/patchstack/** folder exists and this folder contains 3 other folders and files. 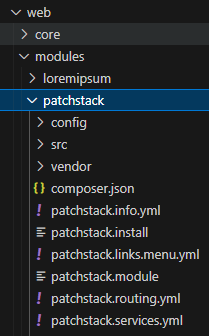
5. Navigate to the administration area (**/admin/**) on your site.
6. Navigate to Extend and scroll down to the Patchstack Security item.
7. Check the box, and click on the Install button. 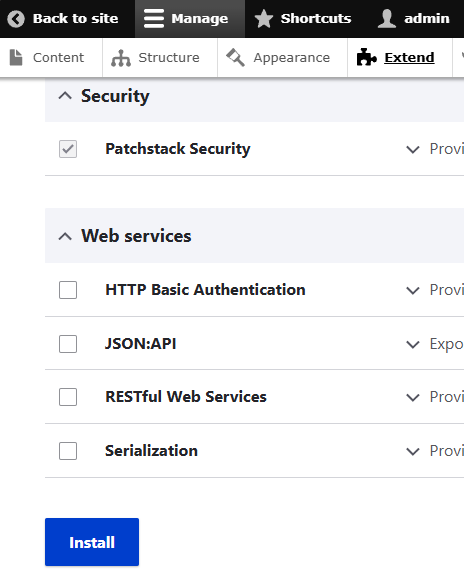
8. After module installation, scroll back down and expand the description to see a “Configure” button. Alternatively, navigate to **/admin/config/development/patchstack** 
9. On this page, enter the API key found on the page of your site in the Patchstack App.
10. Click on the “Save configuration” button. 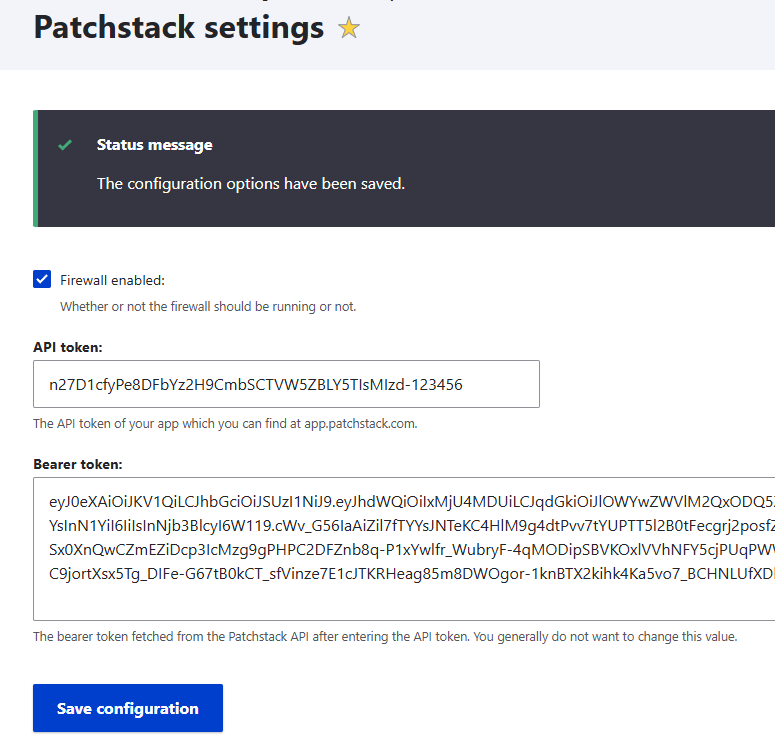
11. After it has been saved, note that the API token is still present in the field and the “Bearer token” field will be filled in. Visit your site in the Patchstack App to view its information and note that it connected to Patchstack.
If you need further help, don’t hesitate to reach out to us via live chat at the bottom right corner!
# Joomla Installation
## Notes
[Section titled “Notes”](#notes)
* The Joomla extension will be made available through Joomla.org in 2025.
## Requirements
[Section titled “Requirements”](#requirements)
* Joomla core version 4+
* PHP 5.6+
## Installation
[Section titled “Installation”](#installation)
Follow these steps to install the Patchstack connector on your Joomla site.
1. Download the Joomla connector [here](https://downloads.patchstack.com/patchstack-joomla-connector.zip).
2. Navigate to the administration area (**/administrator/**) on your site.
3. Navigate to System > Extensions 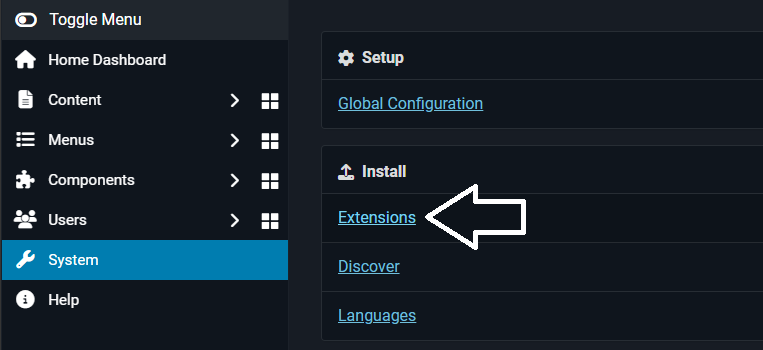
4. On the extension installation page, drag and drop the downloaded .zip file of the connector into the page.
5. After installation, you will be redirected to the Patchstack connector configuration page.
6. On this page, enter the API key found on the page of your site in the Patchstack App. 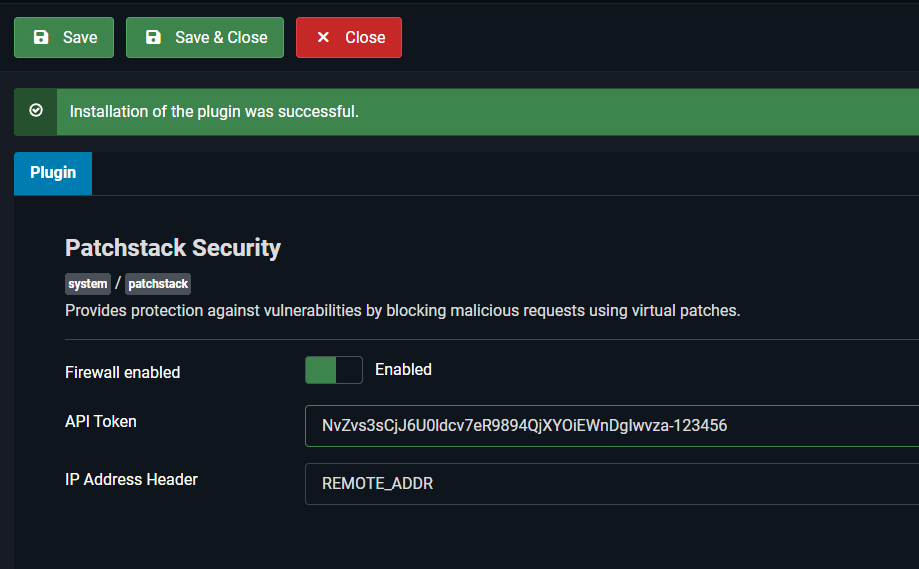
7. Click on the Save button.
8. After it has been saved, note that the API token is still present in the field. Visit your site in the Patchstack App to view its information and note that it connected to Patchstack.
If you need further help, don’t hesitate to reach out to us via live chat at the bottom right corner!
# Introduction
The Patchstack connector is used to connect your Drupal or Joomla site to the Patchstack App. For WordPress, the Patchstack plugin should be installed instead.
* [WordPress Installation](/patchstack-plugin/plugin-introduction/)
* [Drupal Installation](/patchstack-plugin/patchstack-connector/how-to-install-on-drupal/)
* [Joomla Installation](/patchstack-plugin/patchstack-connector/how-to-install-on-joomla/)
# Welcome screen
In case you downloaded and installed the plugin from the WordPress repository or through the WordPress admin, you will see such screen.

You will have to enter your API Key in order to connect your domain to the Patchstack App.\
To find the key, you need to make sure you have added your domain to Patchstack App.
Helpful articles:
* [How to add my domain to the Patchstack App?](/getting-started/adding-your-first-site/)
* [Where do I find the API key?](/faq-troubleshooting/plugin/where-do-i-find-the-api-key/)
In the next article, we’ll see what’s under the hood!
# Introduction
The Patchstack plugin is a WordPress plugin that connects your site with Patchstack App.\
You can find the plugin
* here:
* or when you search for "Patchstack" from your WordPress admin
In the next articles, we’ll take a look at how the plugin works and which options are available to configure from the plugin.
# WP CLI commands
The Patchstack WordPress plugin provides you access to the following WP CLI command as of version 2.1.25.\
Before running this command, the Patchstack WordPress plugin should be installed on the site. You can use the WP CLI command below to install it.
```plaintext
wp plugin install patchstack --activate
```
### wp patchstack activate
[Section titled “wp patchstack activate”](#wp-patchstack-activate)
```plaintext
wp patchstack activate
Example: wp patchstack activate 123456 2b072e8b60402e30d481df351fc08183906254e0
```
This command will connect and activate the license of the Patchstack WordPress plugin. It is important to provide the proper values for the and placeholders.
These values can be found at the following location:
1. Go to the [Patchstack App](https://app.patchstack.com/) and log in
2. Go to **Sites** from the left menu
3. Click on the URL of your site
4. Click on the **Settings** tab
5. On the right side, the API key section contains the full API key
6. Now in order to use this value in the WP CLI:
1. You can either copy this one and as \ you enter the value on the right side of the dash and as \ you enter the left side of the dash
2. Or click on “Looking for the old Site ID and Site Secret Key format? Click here.” and you will be presented with the \ and \ values directly
# WP constants
Patchstack has introduced WordPress constants which can be used in wp-config.php file.
### Disable writing to .htaccess
[Section titled “Disable writing to .htaccess”](#disable-writing-to-htaccess)
To prevent Patchstack from writing rules to the .htaccess file, add the following constant to your wp-config.php file. If rules were previously added to your .htaccess file via the Patchstack App, you will need to remove them manually.
```plaintext
define('PS_DISABLE_HTACCESS', true);
```
### Disable mu-plugin creation
[Section titled “Disable mu-plugin creation”](#disable-mu-plugin-creation)
Patchstack automatically creates a mu-plugin upon installation. To prevent automatic mu-plugin creation, define the PS\_DISABLE\_MU constant in your wp-config.php file.
```plaintext
define('PS_DISABLE_MU', true);
```
# Edit your profile
To edit your account profile in Patchstack mVDP platform, visit [your account page](https://vdp.patchstack.com/vdp/settings)
On the mVDP platform account page, you can change:
* Your official website URL
* Name of the person of contact
* Your timezone
* Add or edit any important notes that our triage team would need to be aware of
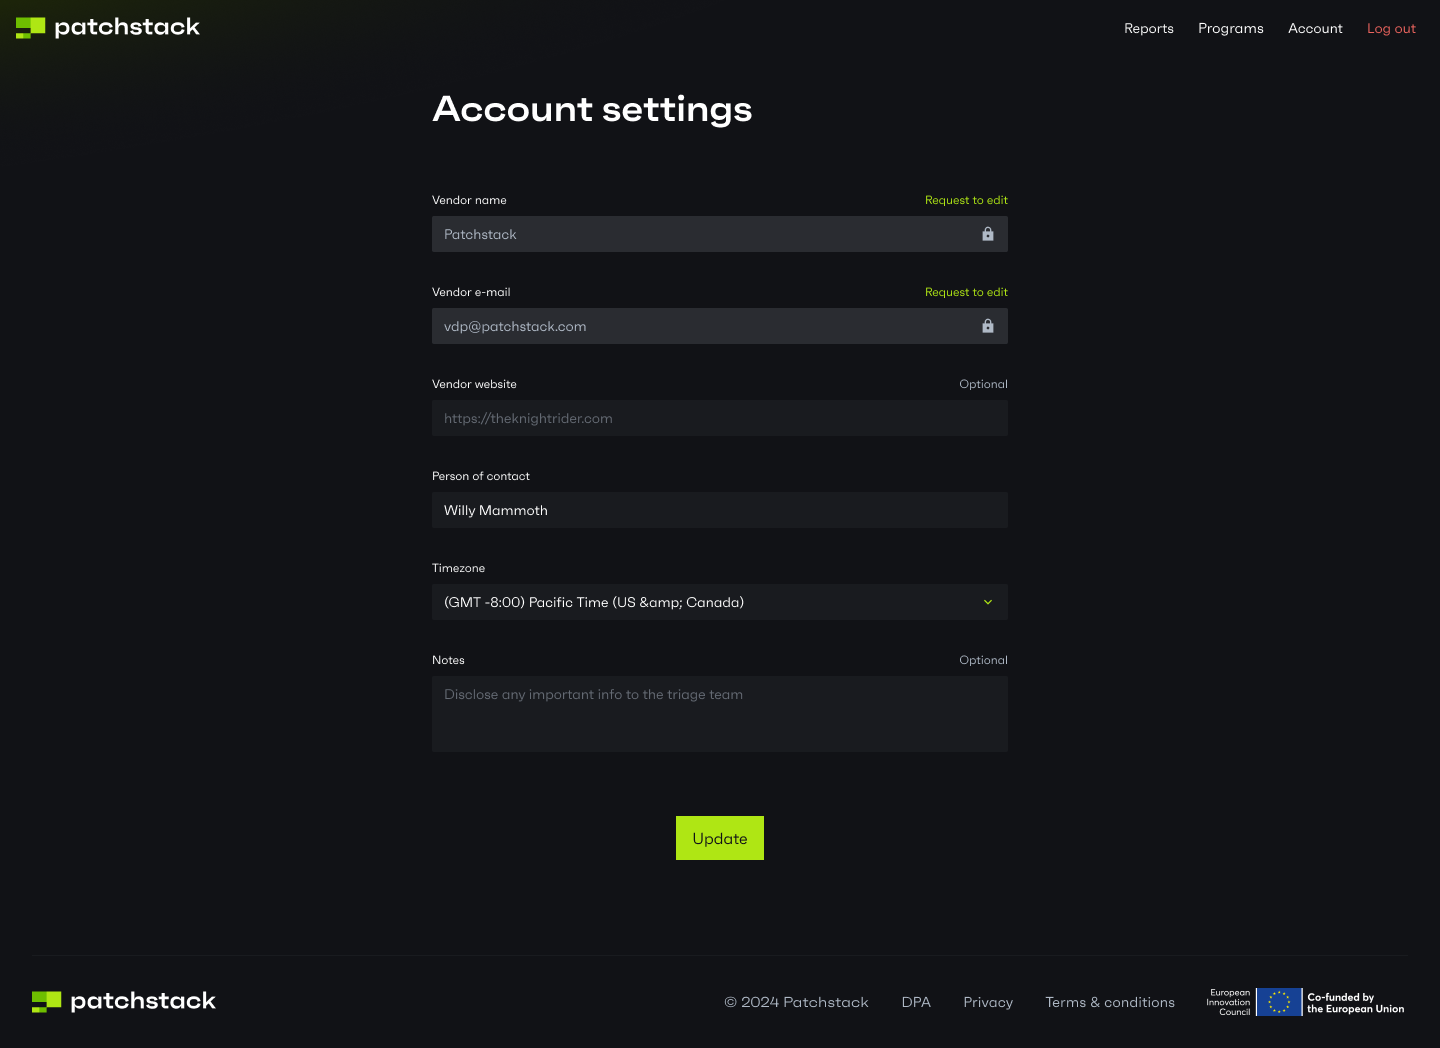
How to change my e-mail address or name in the mVDP platform?
To change your company name or email address where Patchstack will share sensitive information to, you’ll have to request an edit from us.
Write an email to
# Adding software to mVDP
Patchstack accepts all WordPress software (plugins and themes) to be added to its mVDP directory. Here’s a process of listing your first software:
1. Log in to mVDP platform: [vdp.patchstack.com](https://vdp.patchstack.com)
2. Click the green [+ Start new](https://vdp.patchstack.com/start-program) button
3. Fill the form as shown below
4. Add a VDP disclaimer to your software readme.txt file, or security.md in GitHub
Note that if you maintain separate software for free and paid licenses, you will have to add these as completely separate entries.
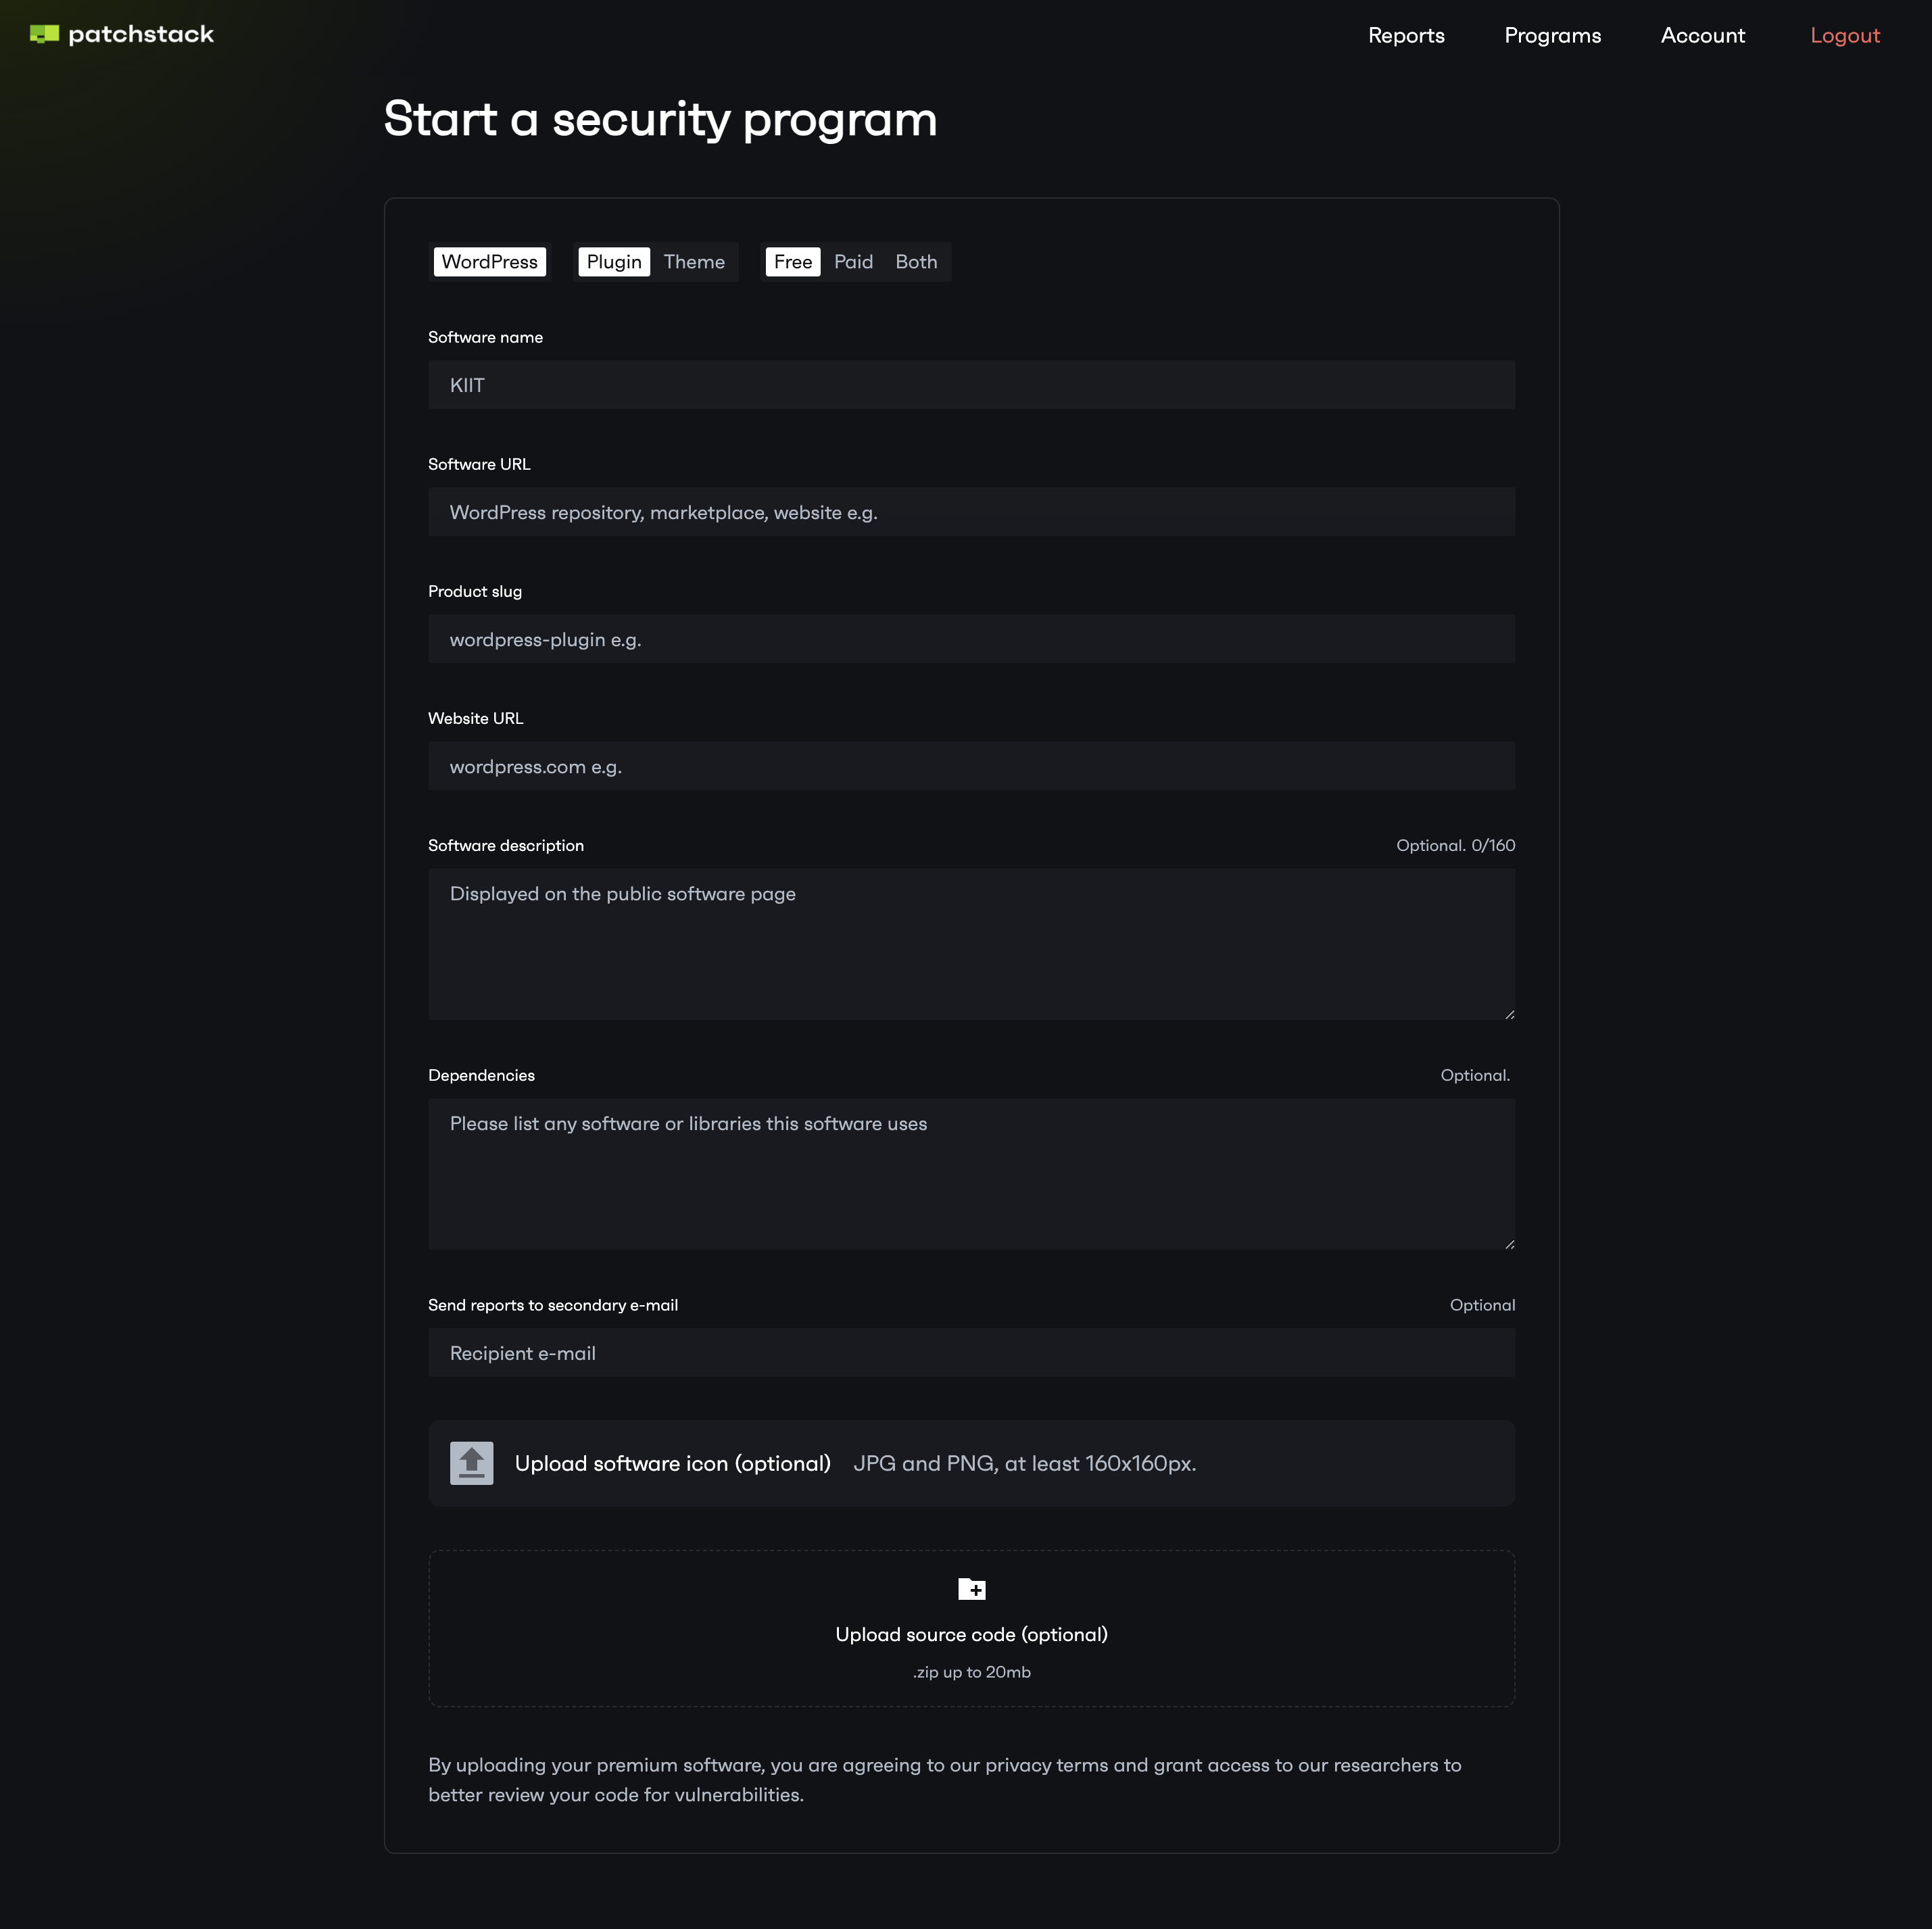
## Form fields
[Section titled “Form fields”](#form-fields)
1. Pick if you are submitting a plugin or a theme
2. Pick, if it’s a free software, or is it a premium-licensed software. You can also choose **Both**, if you cover both plans in one software (also known as a freemium plugin)
3. **Software name** - type the name of this software. This is how it will appear in Patchstack VDP directory and in the vulnerability database
4. **Software URL** - preffered is the software repository URL. If the software is not in WordPress repository, enter any URL that takes to your software website
5. **Product slug** - type a slug that you’d like to be indentified with in Patchstack VDP listing and database entries
6. **Software description** - Write a short description, which will be shown in Patchstack VDP listing
7. **Dependencies** - Write down all the third party software that your software is dependent on
8. **Secondary email** - If you’d like to receive sensitive information about vulnerabilities to another email, you can write down your secondary email
9. **Upload software icon** - This icon will be shown in Patchstack VDP directory and in the vulnerability database
10. **Upload source code** - If your plugin is not available in public repository, you should upload the source code for us to view
Having filled up the form, click **Start program**
Want to add more software?
To add more software:
* Submit the first one
* Add the VDP disclaimer to your software
* Once we have verified it, you are eligible for adding more software
## Finalizing your first software setup
[Section titled “Finalizing your first software setup”](#finalizing-your-first-software-setup)
After submitting the form, you’ll be taken to your added software page. This page will show all the vulnerability and reports statistics about your software in the future.
Before Patchstack can validate your software, you will have to add a VDP disclaimer to your software readme.txt or security.md file in GitHub. The disclaimer can be copied, by clicking the **Copy disclaimer for…** button.
*If you don’t have your project present on the WordPress repository, please e-mail us for verification at *
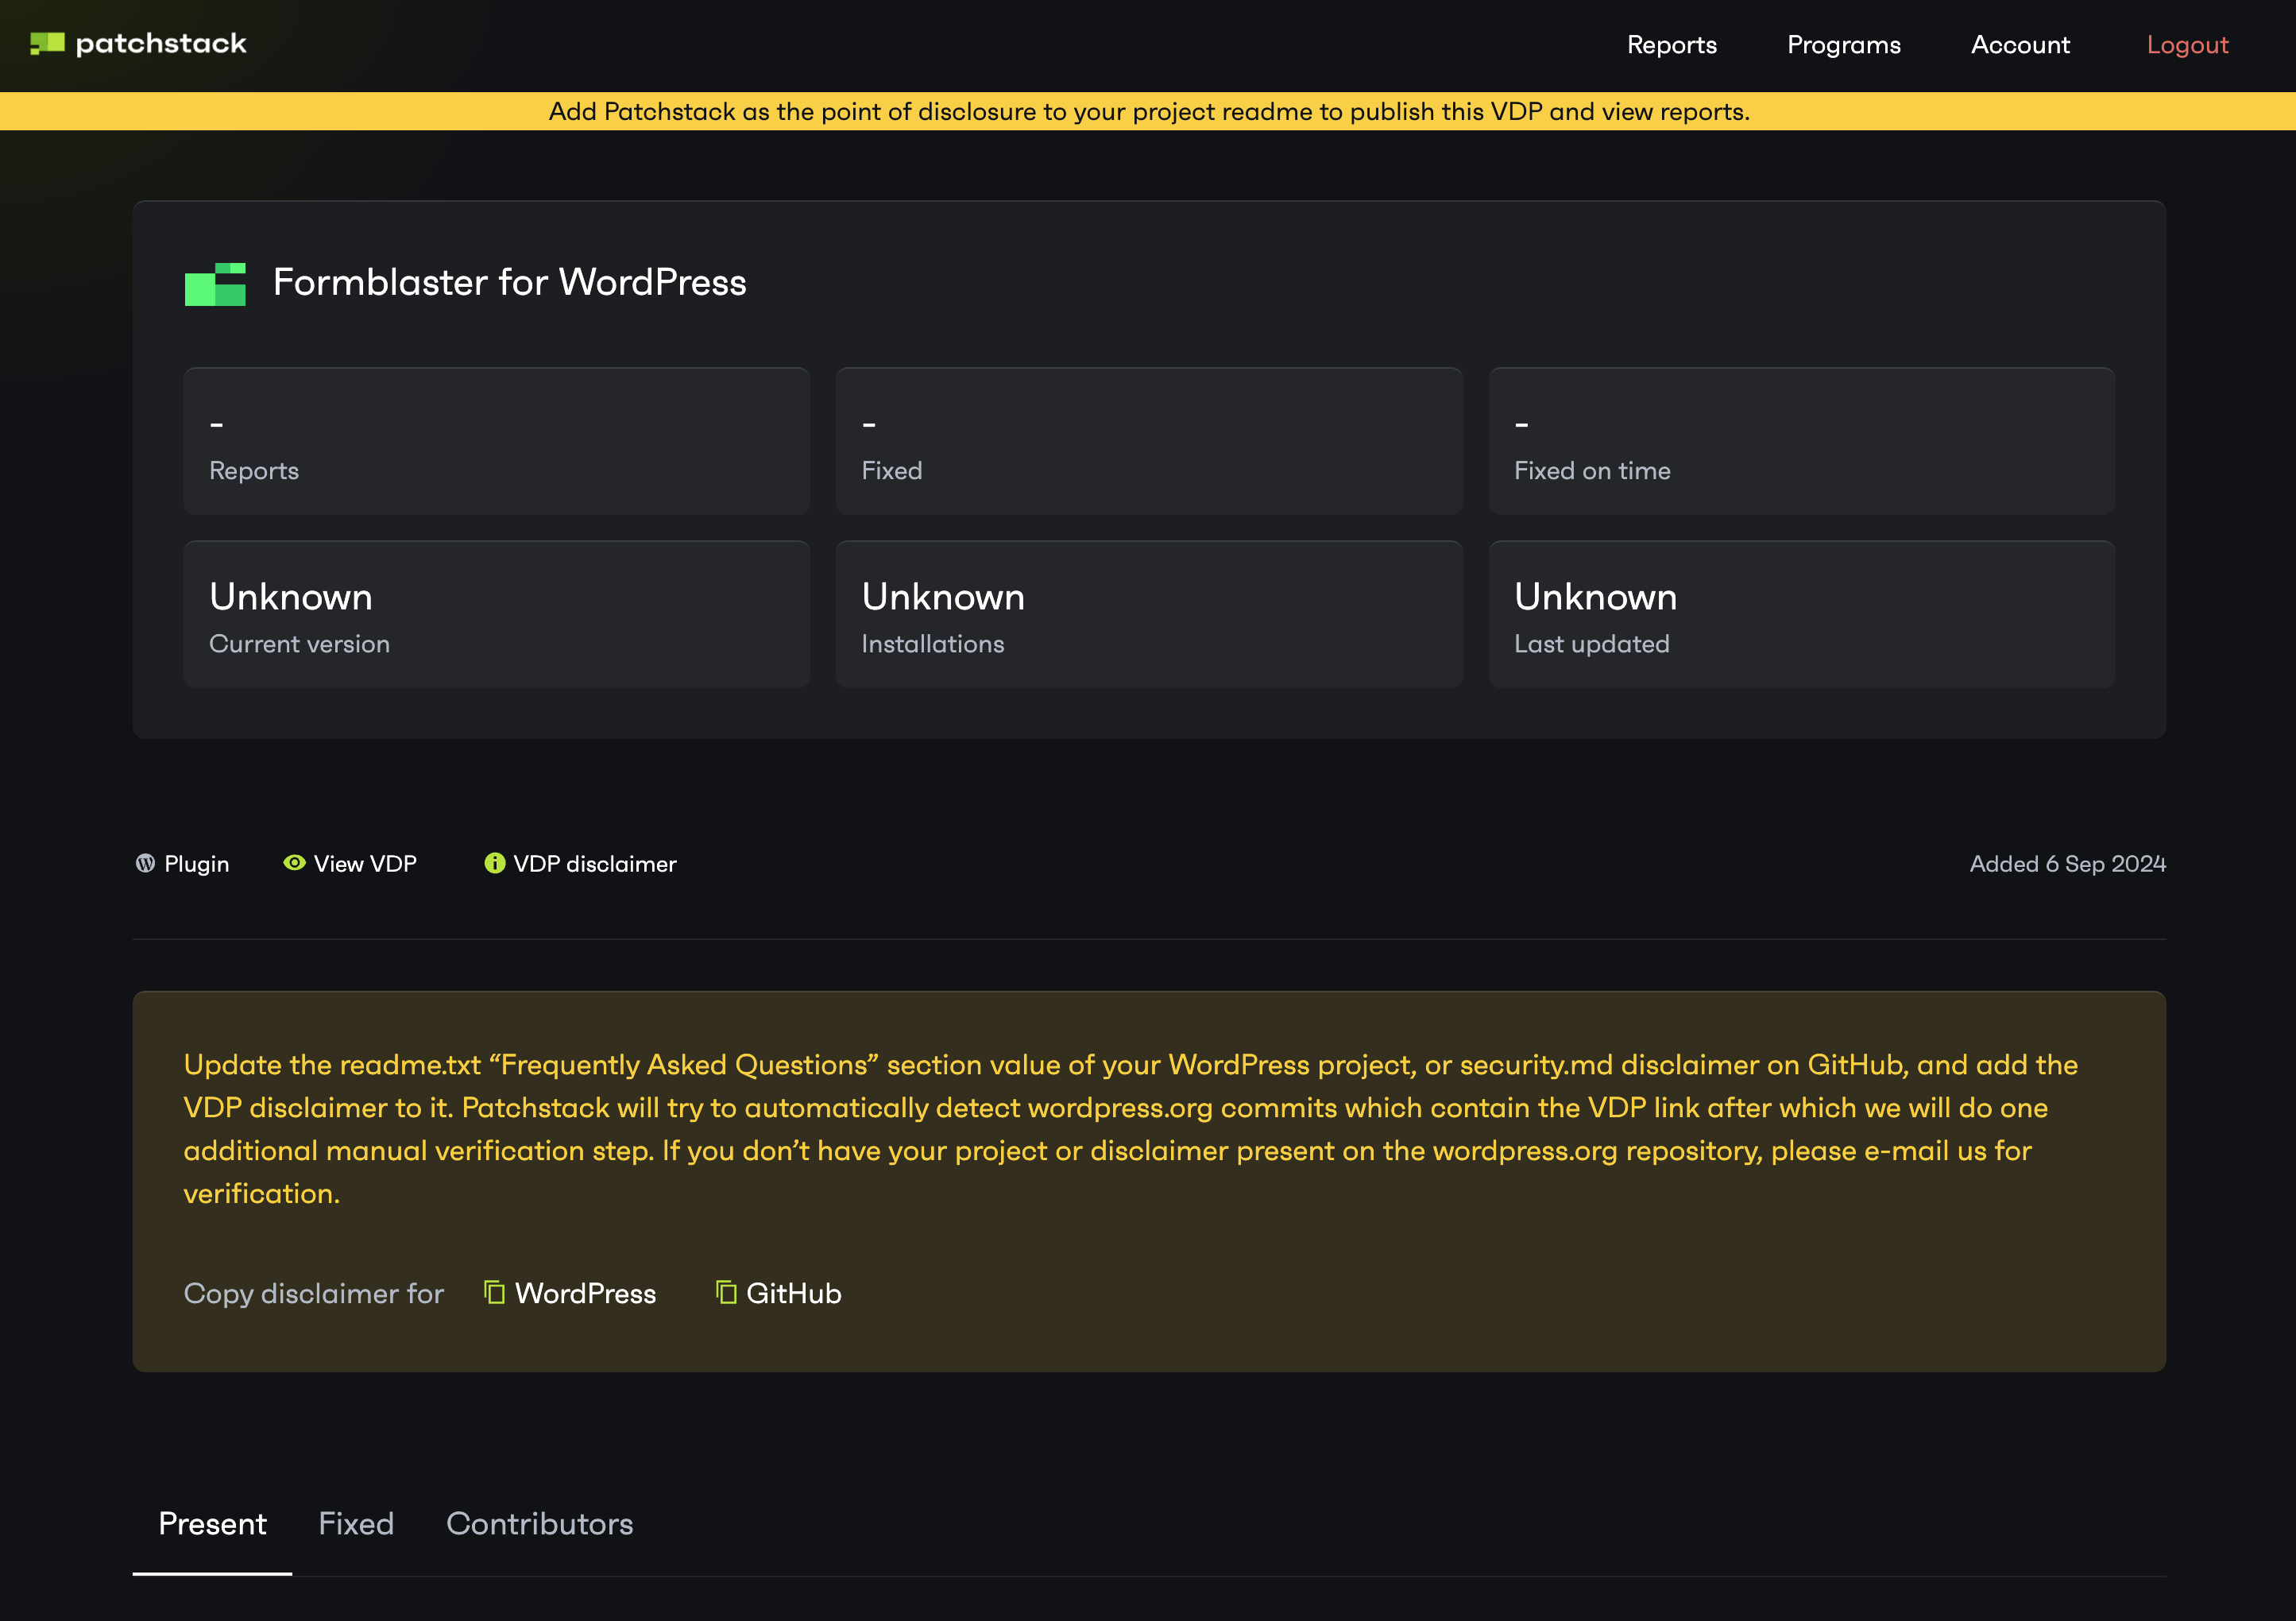
## Adding a disclaimer on different platforms
[Section titled “Adding a disclaimer on different platforms”](#adding-a-disclaimer-on-different-platforms)
Depending on the platform you are using to host you software, you will have to add the VDP disclaimer in different places. Here are some best practices for how to do it.
Tip
Make sure that the disclaimer is visible and easy to find for security researchers.
### WordPress repository
[Section titled “WordPress repository”](#wordpress-repository)
You should add the disclaimer to your `readme.txt` file. The most common place is to add it add it to FAQ section.
### GitHub / Gitlab / Bitbucket
[Section titled “GitHub / Gitlab / Bitbucket”](#github--gitlab--bitbucket)
You should add the disclaimer to your `security.md` and the `readme.md` file. If you don’t have those files, you can create them in the root of your repository.
### Envato Marketplace
[Section titled “Envato Marketplace”](#envato-marketplace)
You should add the disclaimer either to the main description of your component or add it to the **support** tab.
### Product website
[Section titled “Product website”](#product-website)
All websites are different, so there is no one-size-fits-all solution. However we recommend createing a dedicated page for security (e.g. **security** or **report security issues**) and adding the VDP disclaimer there. Next, you should link to this page from the footer of your website, so that it is easy to find.
If you have more components, you can put all the disclaimers on that page.
## Example disclaimer
[Section titled “Example disclaimer”](#example-disclaimer)
This is an example disclaimer, do not paste it to your software, as it includes an example link. You should copy the disclaimer straight from the mVDP platform by clicking the **Copy disclaimer for…** button.
```plaintext
= How can I report security bugs? =
You can report security bugs through the Patchstack Vulnerability Disclosure
Program. The Patchstack team help validate, triage and handle any security
vulnerabilities.
[Report a security vulnerability.](https://patchstack.com/database/vdp/your-software-slug)
```
# Logging into mVDP platform
Patchstack mVDP platform uses an authentication method, which lets you log in by using so called “magic login link”. Once you have entered your account email address, you’ll receive a login link to your email. You will be automatically signed in by clicking this link.
Magic login link expires in 30 minutes. After that, you will need to request another login link.
To get the magic link for logging in to mVDP platform, enter your email here:
# Registering for mVDP
To register an account and begin adding your software to Patchstack mVDP platform, visit [this page](https://vdp.patchstack.com/register).
Note that the email you register with, will also be the one which will receive sensitive vulnerability information from our triage team. 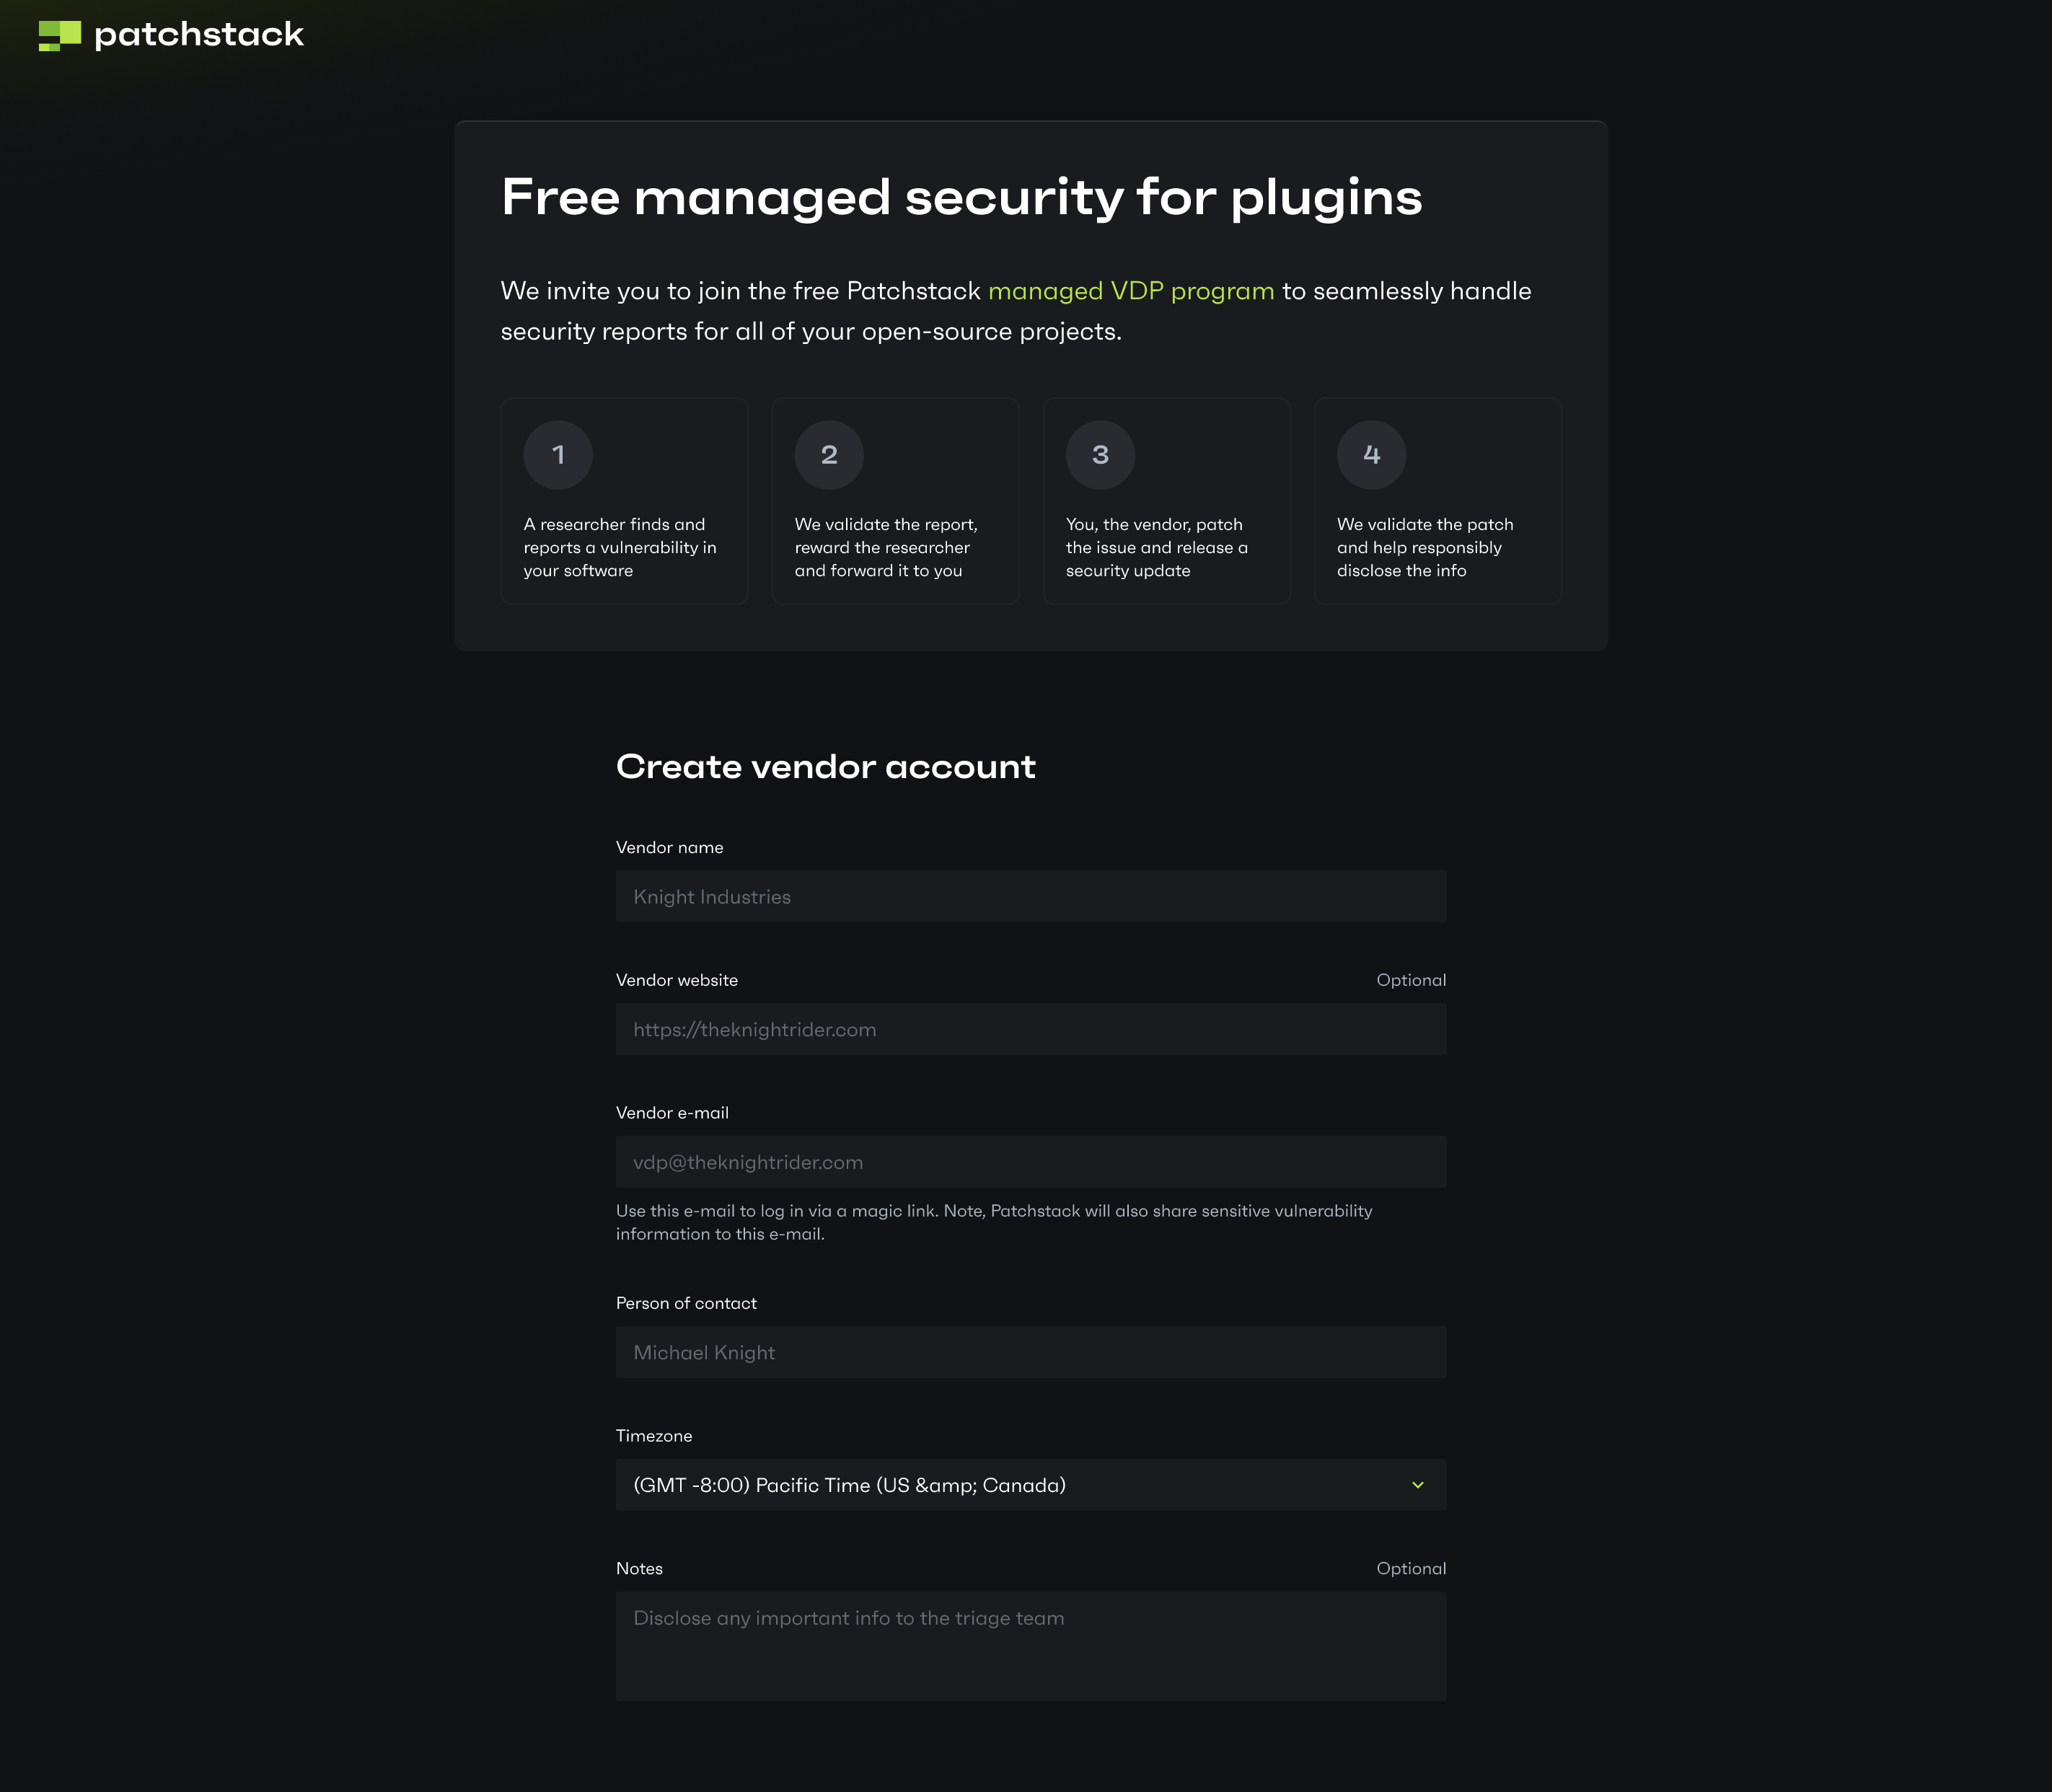
After registering, you will be able to log in and add your software (plugin or theme) to our mVDP platform.
# How is a vulnerability processed?
Patchstack offers a managed vulnerability disclosure program for software owners who prioritize offering secure software to their customers. This program makes communication between researchers and software owners easy and efficient.
Read below, how Patchstack processes vulnerabilities:
### For software listed in Patchstack VDP program
[Section titled “For software listed in Patchstack VDP program”](#for-software-listed-in-patchstack-vdp-program)
1. **Vulnerability found** - Security researcher finds a vulnerability in your software
2. **Reporting to Patchstack** - Researcher reports the vulnerability via your VDP form
3. **Validating the report** - Patchstack validates the reported vulnerability
4. **You are notified** - You’ll receive an email about a vulnerability found in your software. You can log into the mVDP platform to review all the details
5. **Upload your fix** - You can upload the patched version on the mVDP platform
6. **Software release** - Once the patch has been validated by Patchstack, you can release this new version to the public
7. **Patchstack marks as fixed** - Once the new version of the software is released with the vulnerability patched, Patchstack will mark it as fixed in the vulnerability database
### For software not listed in Patchstack VDP program
[Section titled “For software not listed in Patchstack VDP program”](#for-software-not-listed-in-patchstack-vdp-program)
1. **Vulnerability found** - Security researcher finds a vulnerability in your software
2. **Reporting to Patchstack** - Researcher reports the vulnerability to Patchstack
3. **Validating the report** - Patchstack validates the reported vulnerability
4. **You are contacted** - Patchstack’s triage team attempts to contact you via contact details on your website, or in your software files, with details and tips on how to fix this vulnerability. If we don’t get a response within a reasonable timeframe, we may publish the vulnerability within 7 days
5. **Upload your fix** - You can send the patched version of your software back to our triage team via email, to hand it over for patch validation
6. **Software release** - Once the patch has been validated by Patchstack, you can release this new version to the public
7. **Patchstack marks as fixed** - Once the software with patched vulnerability is released, Patchstack marks it as fixed in the database
Having questions regarding vulnerability disclosure?
Check out our [vulnerability disclosure policy](https://patchstack.com/patchstack-vulnerability-disclosure-policy/) or contact our researchers:
# How much does mVDP cost?
Patchstack’s managed Vulnerability Disclosure Program (mVDP) is free for all paid and free plugins and themes. You may set custom bounties for vulnerabilities on your own terms, to motivate researchers even more to spot the security bugs in your code.
# How to add a disclaimer to my software?
There are two ways to add a disclaimer to your software. You can either add it to security.md file, or readme.txt file.
### Copy the disclaimer text
[Section titled “Copy the disclaimer text”](#copy-the-disclaimer-text)
To get a disclaimer text:
1. Visit **Programs** page in mVDP platform
2. Click on the disclaimer icon, and copy the text from that dialogue 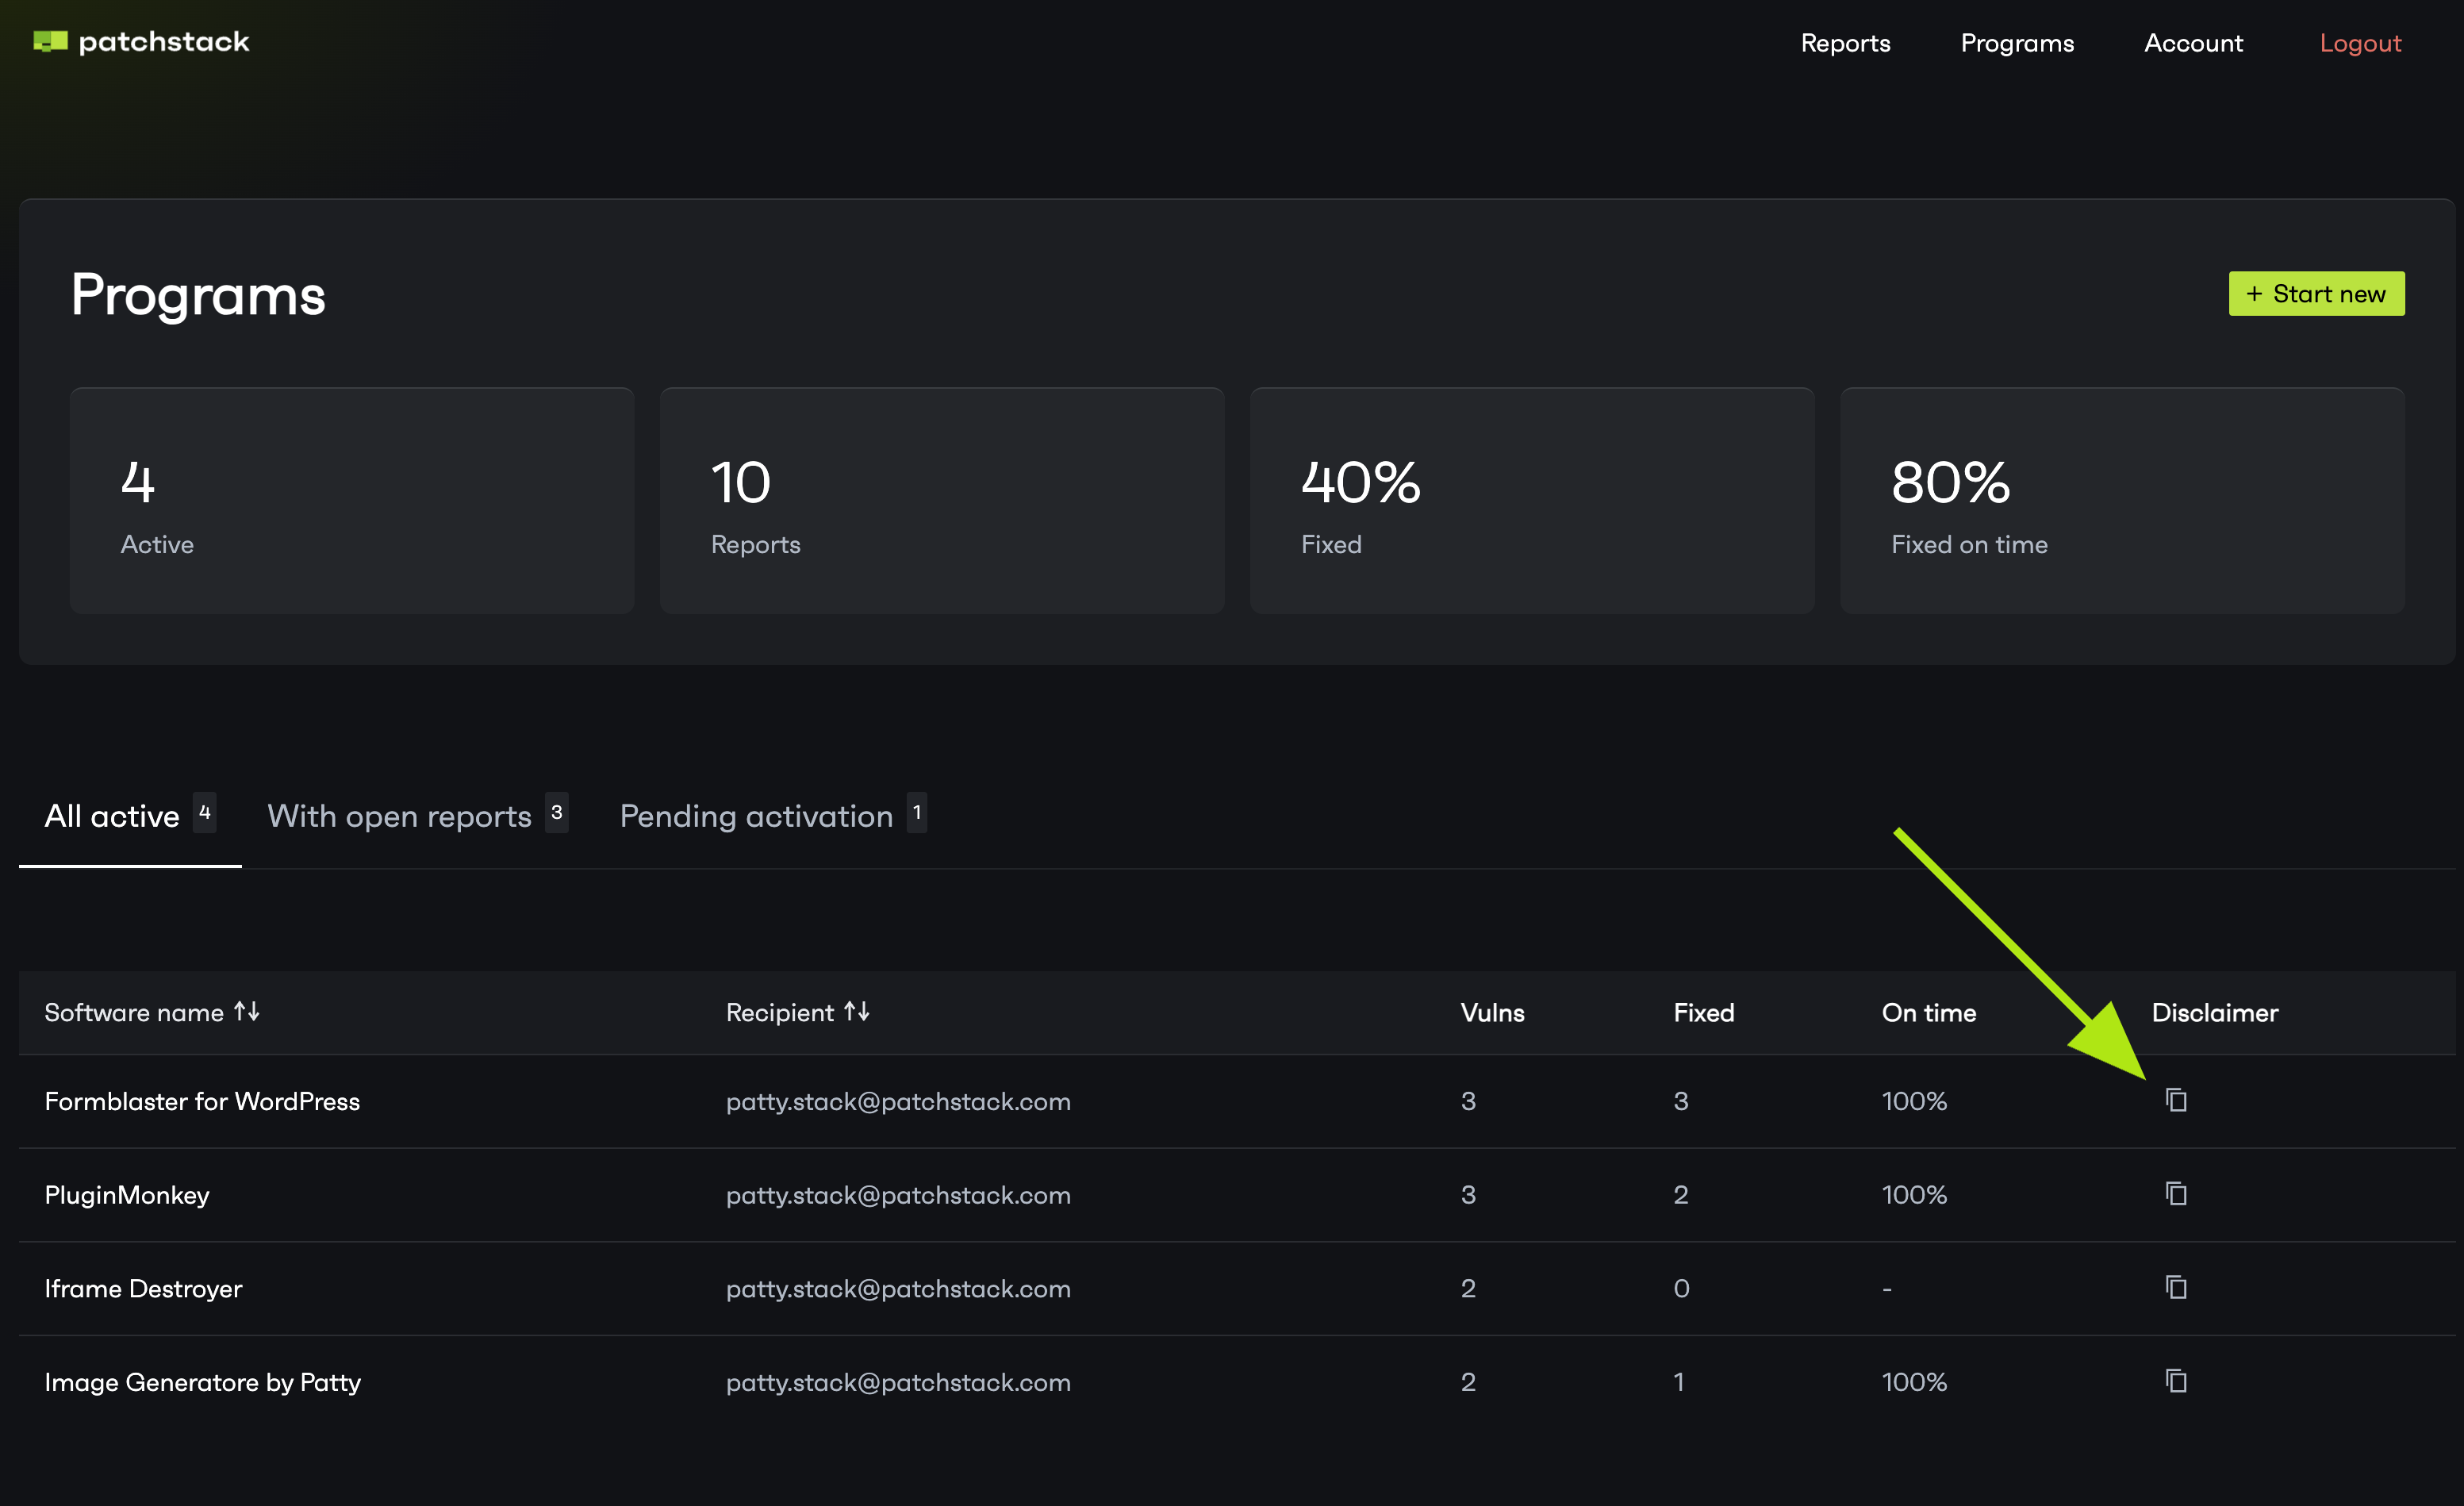
3. Add this text to your readme.txt or security.md file of your software
### Example disclaimer
[Section titled “Example disclaimer”](#example-disclaimer)
This is an example disclaimer, do not paste it to your software, as it includes an example link. You should copy the disclaimer straight from the mVDP platform as shown above.
```plaintext
= How can I report security bugs? =
You can report security bugs through the Patchstack Vulnerability Disclosure
Program. The Patchstack team help validate, triage and handle any security
vulnerabilities.
[Report a security vulnerability.](https://patchstack.com/database/vdp/your-software-slug)
```
# What does "fixed on time" mean?
Baesd on the patch priority of a given plugin vulnerability, Patchstack gives a timely rating for when it’s recommended to have the software patched.
Here are the recommended times for fixing the vulnerabilities based on patch priority:
* **Low patch priority** - 30 days
* **Medium patch priority** - 7 days
* **High patch priority** - immediately
What is patch priority?
To read more about the patch priority rating, read [this article](https://patchstack.com/articles/patchstack-introducing-patchstack-priority/#different-levels-of-patchstack-priority)
# Why do I need to add a disclaimer to my software?
To be listed in our VDP platform, a disclaimer is required in your readme.txt or security.md file of your software. This disclaimer:
* Shows that you as a plugin owner or company take security seriously
* Gives researchers a way to post their vulnerability findings to Patchstack directly and in correct format
* Gives a level of certainty to researchers that the data will be sent to correct place
### Get a disclaimer and publish it
[Section titled “Get a disclaimer and publish it”](#get-a-disclaimer-and-publish-it)
To get a disclaimer text:
1. Visit **Programs** page in mVDP platform
2. Click on the disclaimer icon, and copy the text from that dialogue 
3. Add this text to your readme.txt or security.md file of your software
### Example disclaimer
[Section titled “Example disclaimer”](#example-disclaimer)
This is an example disclaimer, do not paste it to your software, as it includes an example link. You should copy the disclaimer straight from the mVDP platform as shown above.
```plaintext
= How can I report security bugs? =
You can report security bugs through the Patchstack Vulnerability Disclosure
Program. The Patchstack team help validate, triage and handle any security
vulnerabilities.
[Report a security vulnerability.](https://patchstack.com/database/vdp/your-software-slug)
```
# Getting started
### What is a managed vulnerability disclosure program (mVDP)?
[Section titled “What is a managed vulnerability disclosure program (mVDP)?”](#what-is-a-managed-vulnerability-disclosure-program-mvdp)
Managed vulnerability disclosure program (or mVDP) is a free security platform, offered by Patchstack to all third party software vendors. Patchstack’s mVDP platform faciliates efficient communication between software vendors and security researchers, improving the overall efectiveness of security processes. Patchstack has streamlined security management for hundreds of vendors, including Elementor, Slider Revolution, WP Rocket, and many others.
For more information, check out [this page](https://patchstack.com/for-plugins/).
If you want to connect your plugin with Patchstack’s security program, [fill out the form here](https://vdp.patchstack.com/register).
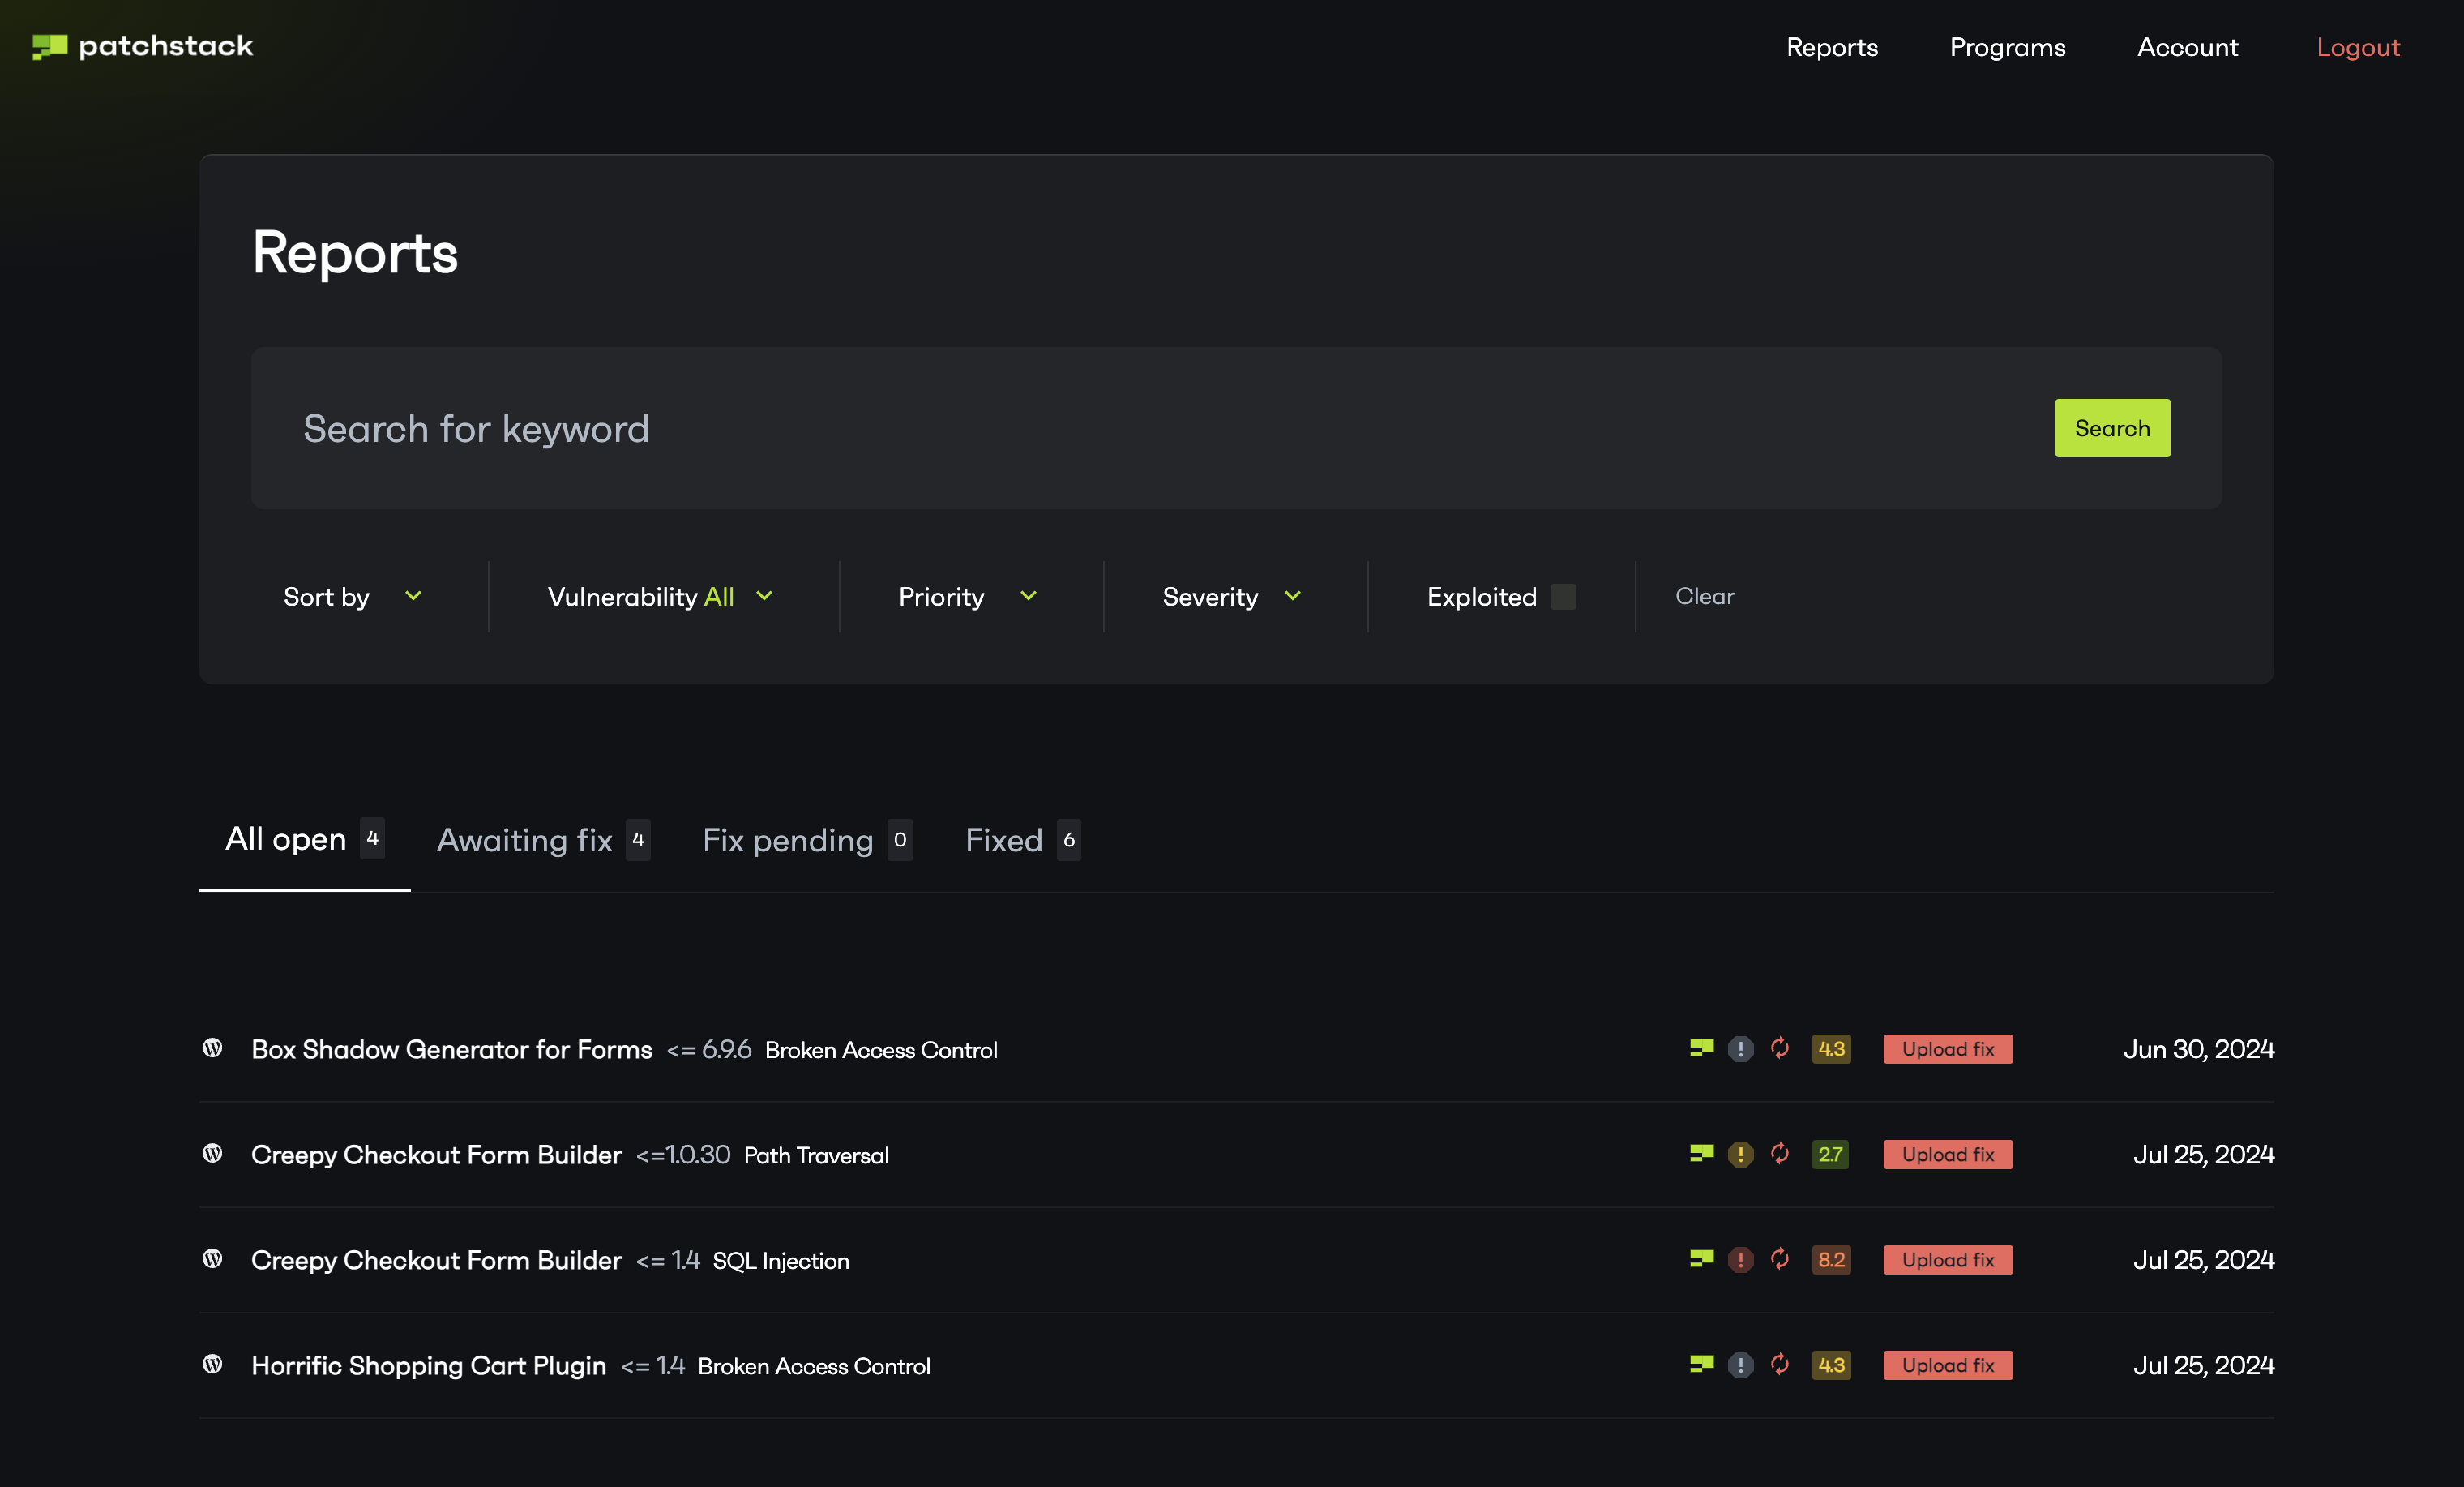
### Why do I need mVDP program?
[Section titled “Why do I need mVDP program?”](#why-do-i-need-mvdp-program)
Having a security program in place raises trust among your customers, while making it easy for security researchers to report found security bugs to you. You will have a central dashboard to keep an eye on all reported security bugs, and track the progress. Efficient communication is the key in keeping your software safe and that’s what Patchstack’s mVDP platform provides.
### How to apply for the mVDP program?
[Section titled “How to apply for the mVDP program?”](#how-to-apply-for-the-mvdp-program)
To apply for the mVDP platform, you need to fill out the form [here](https://vdp.patchstack.com/register)
### How does this benefit security researchers?
[Section titled “How does this benefit security researchers?”](#how-does-this-benefit-security-researchers)
Patchstack incentivizes researchers through a [monthly bounty](https://patchstack.com/bug-bounty/) pool. Researchers receive extra Alliance XP for reporting vulnerabilities in software with a mVDP. Patchstack is also a registered CNA, allowing us to claim CVE records for the researchers findings. This is valuable proof they can use to show their expertise in security on profiles they can showcase to the security community and industry.
### Are premium plugins and themes also accepted?
[Section titled “Are premium plugins and themes also accepted?”](#are-premium-plugins-and-themes-also-accepted)
Yes, mVDP is free for all. When applying, make sure to mark when a plugin has both premium and free versions.
# Program details
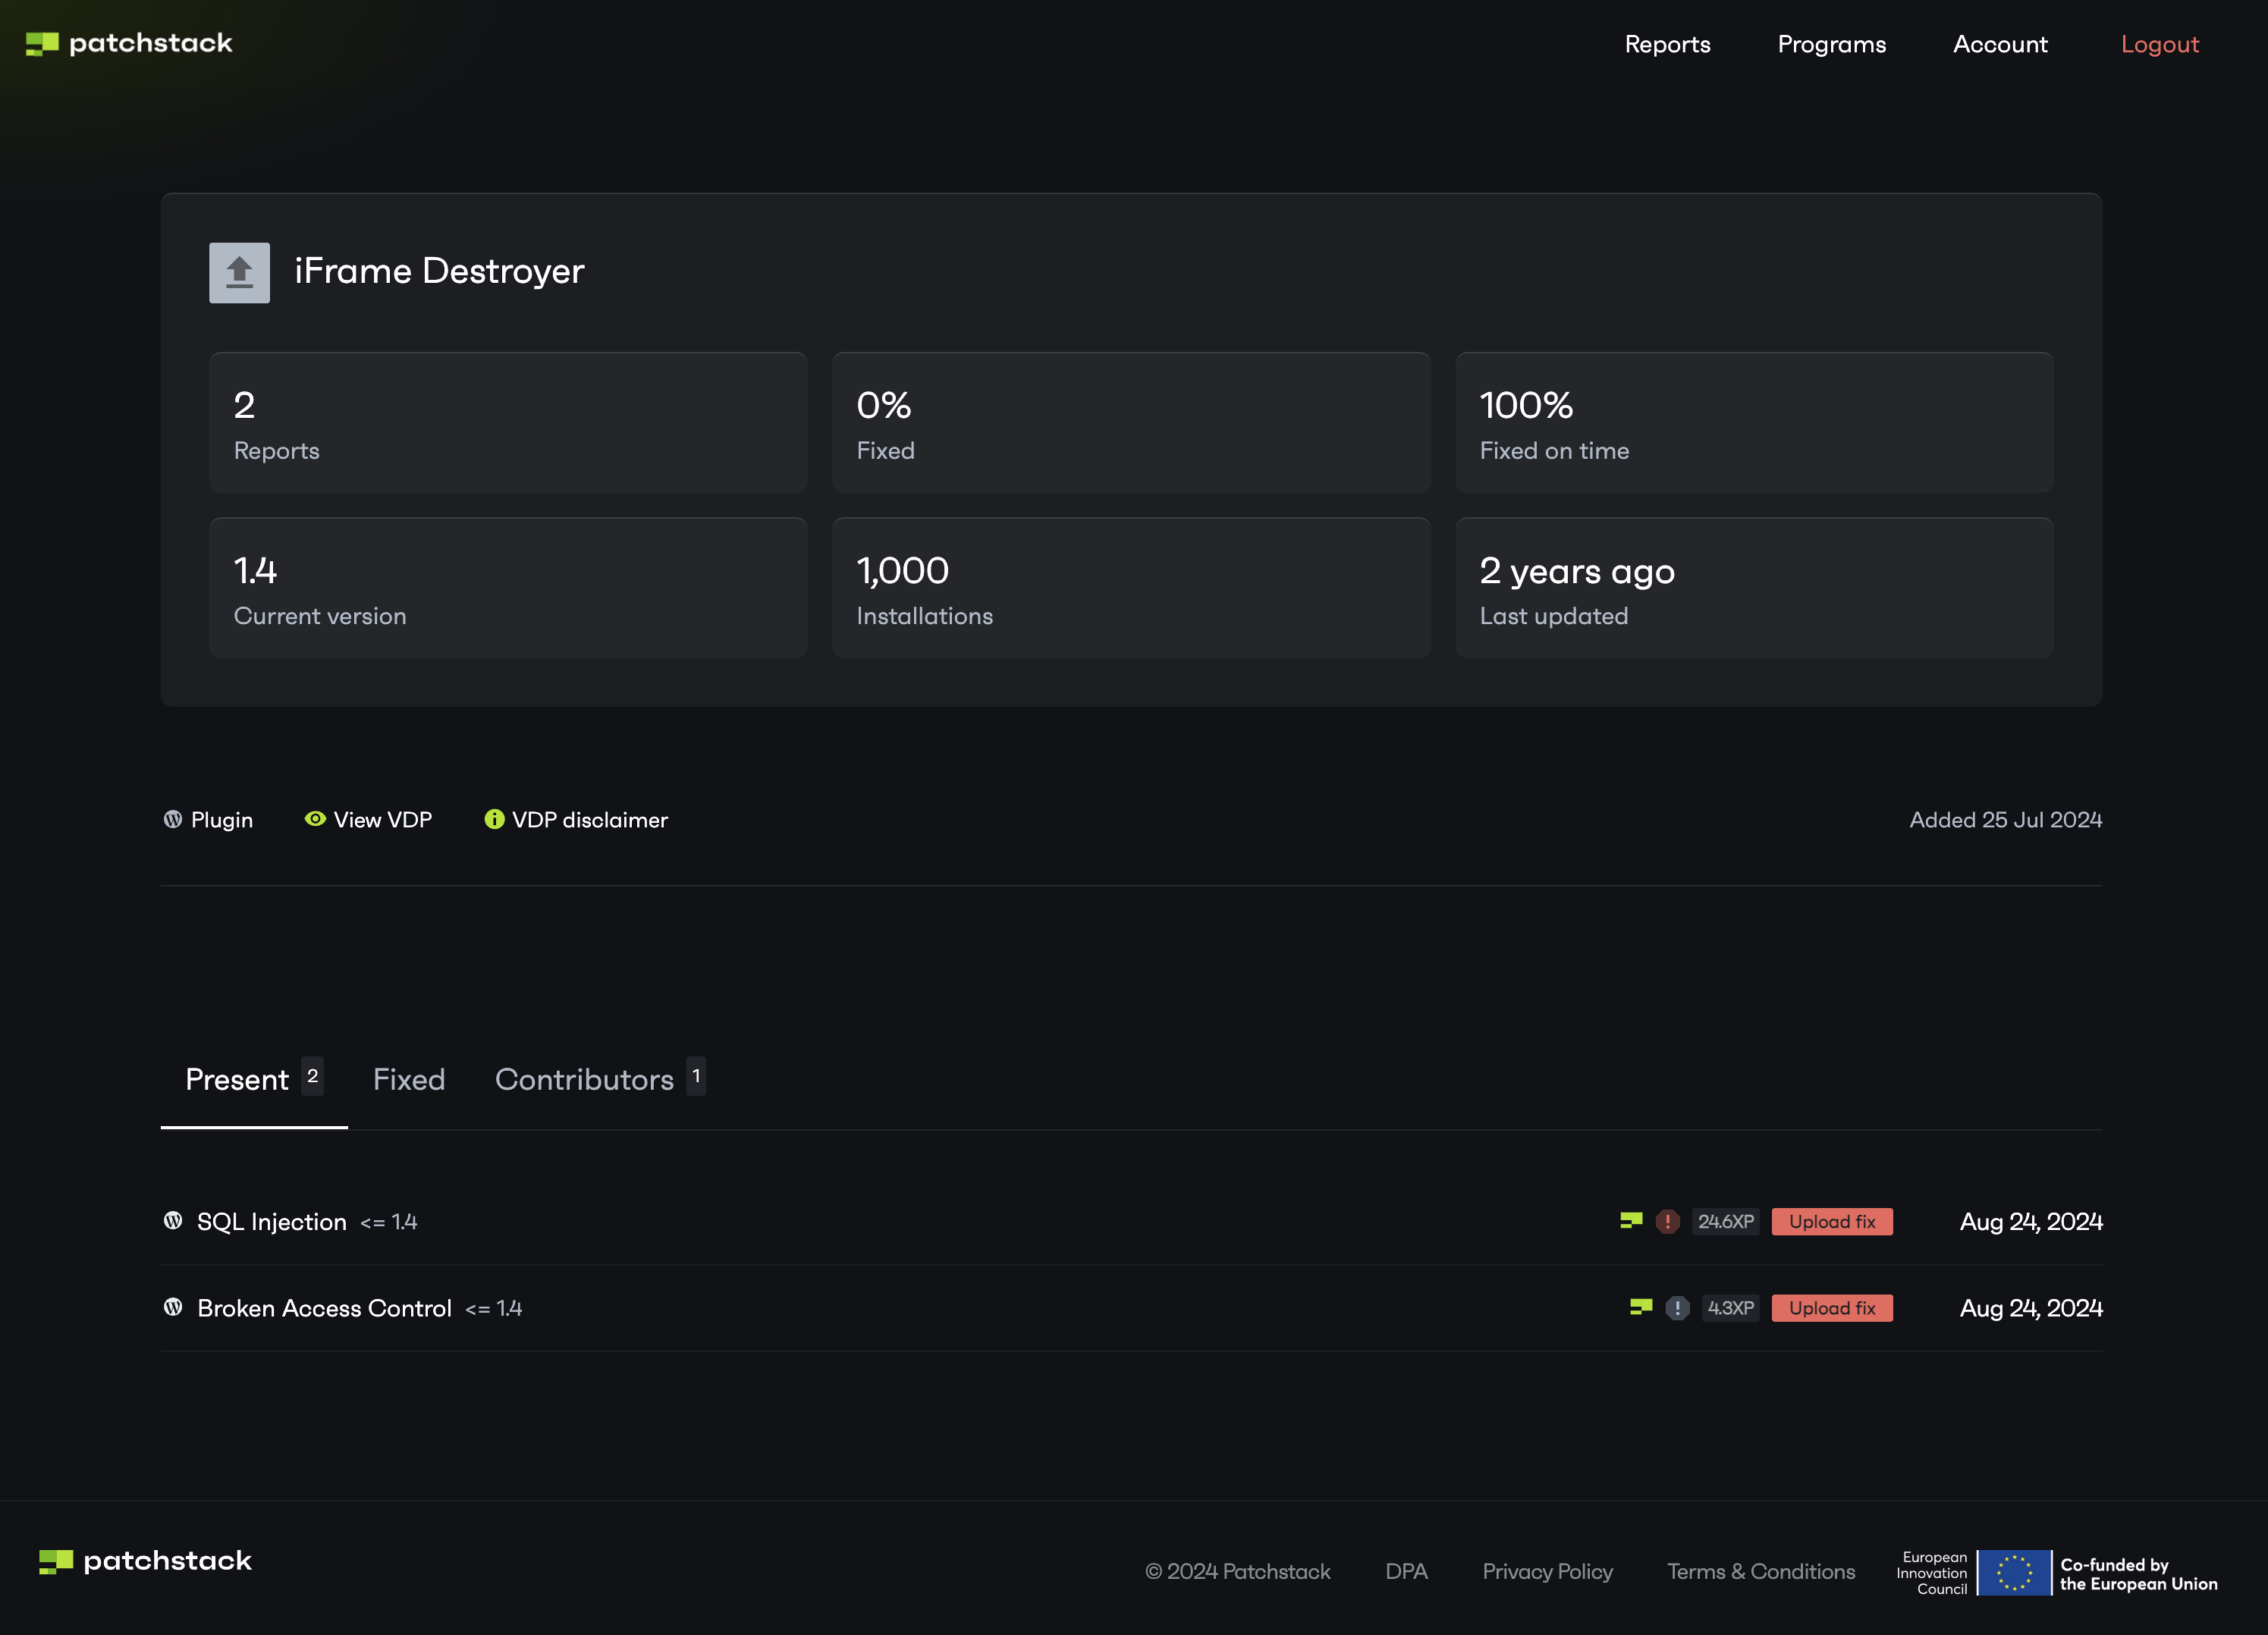
On this page, you can see a complete overview about this software:
* How many vulnerability reports in total have been posted
* The percentage of vulnerabilities that are fixed
* The percentage of vulnerabilities that are [fixed on time](/vulnerability-disclosure-program/faq/what-does-fixed-on-time-mean/)
* What is the current version of your software
* Estimated amount of installations
* When was the last update released for your software
On the right side, you see the date when the software was added to Patchstack VDP program.
### Vulnerability reports table
[Section titled “Vulnerability reports table”](#vulnerability-reports-table)
Below is a table, which shows all the vulnerability reports of this software. The table has 3 tabs:
* Present - these are the vulnerabilities that will need to be fixed as soon as possible
* Fixed - these are the vulnerabilities that have been fixed in the past
* Contributors - shows the names of researchers, who have found the vulnerabilities from your software
Open any report, to view more details of particular vulnerability and see how to fix it. Take a [look at this article](/vulnerability-disclosure-program/reports/uploading-a-security-fix/) to learn how to upload a security fix.
### Vulnerability reports icons in the table
[Section titled “Vulnerability reports icons in the table”](#vulnerability-reports-icons-in-the-table)

The table also shows general information of this vulnerability:
* First icon shows, who published this vulnerability
* Second icon indicates, whether it’s a [low / medium / high patch priority](/faq-troubleshooting/other/list-of-vulnerability-icons/) vulnerability
* We show the XP that is given by Patchstack to the researcher who found the vulnerability
* Click on **Upload fix** in the vulnerabilities table to provide Patchstack a patched version of software
* Vulnerability report publishing date
# Overview
On the programs page, you can see all the projects for which you have set up a vulnerability disclosure program. 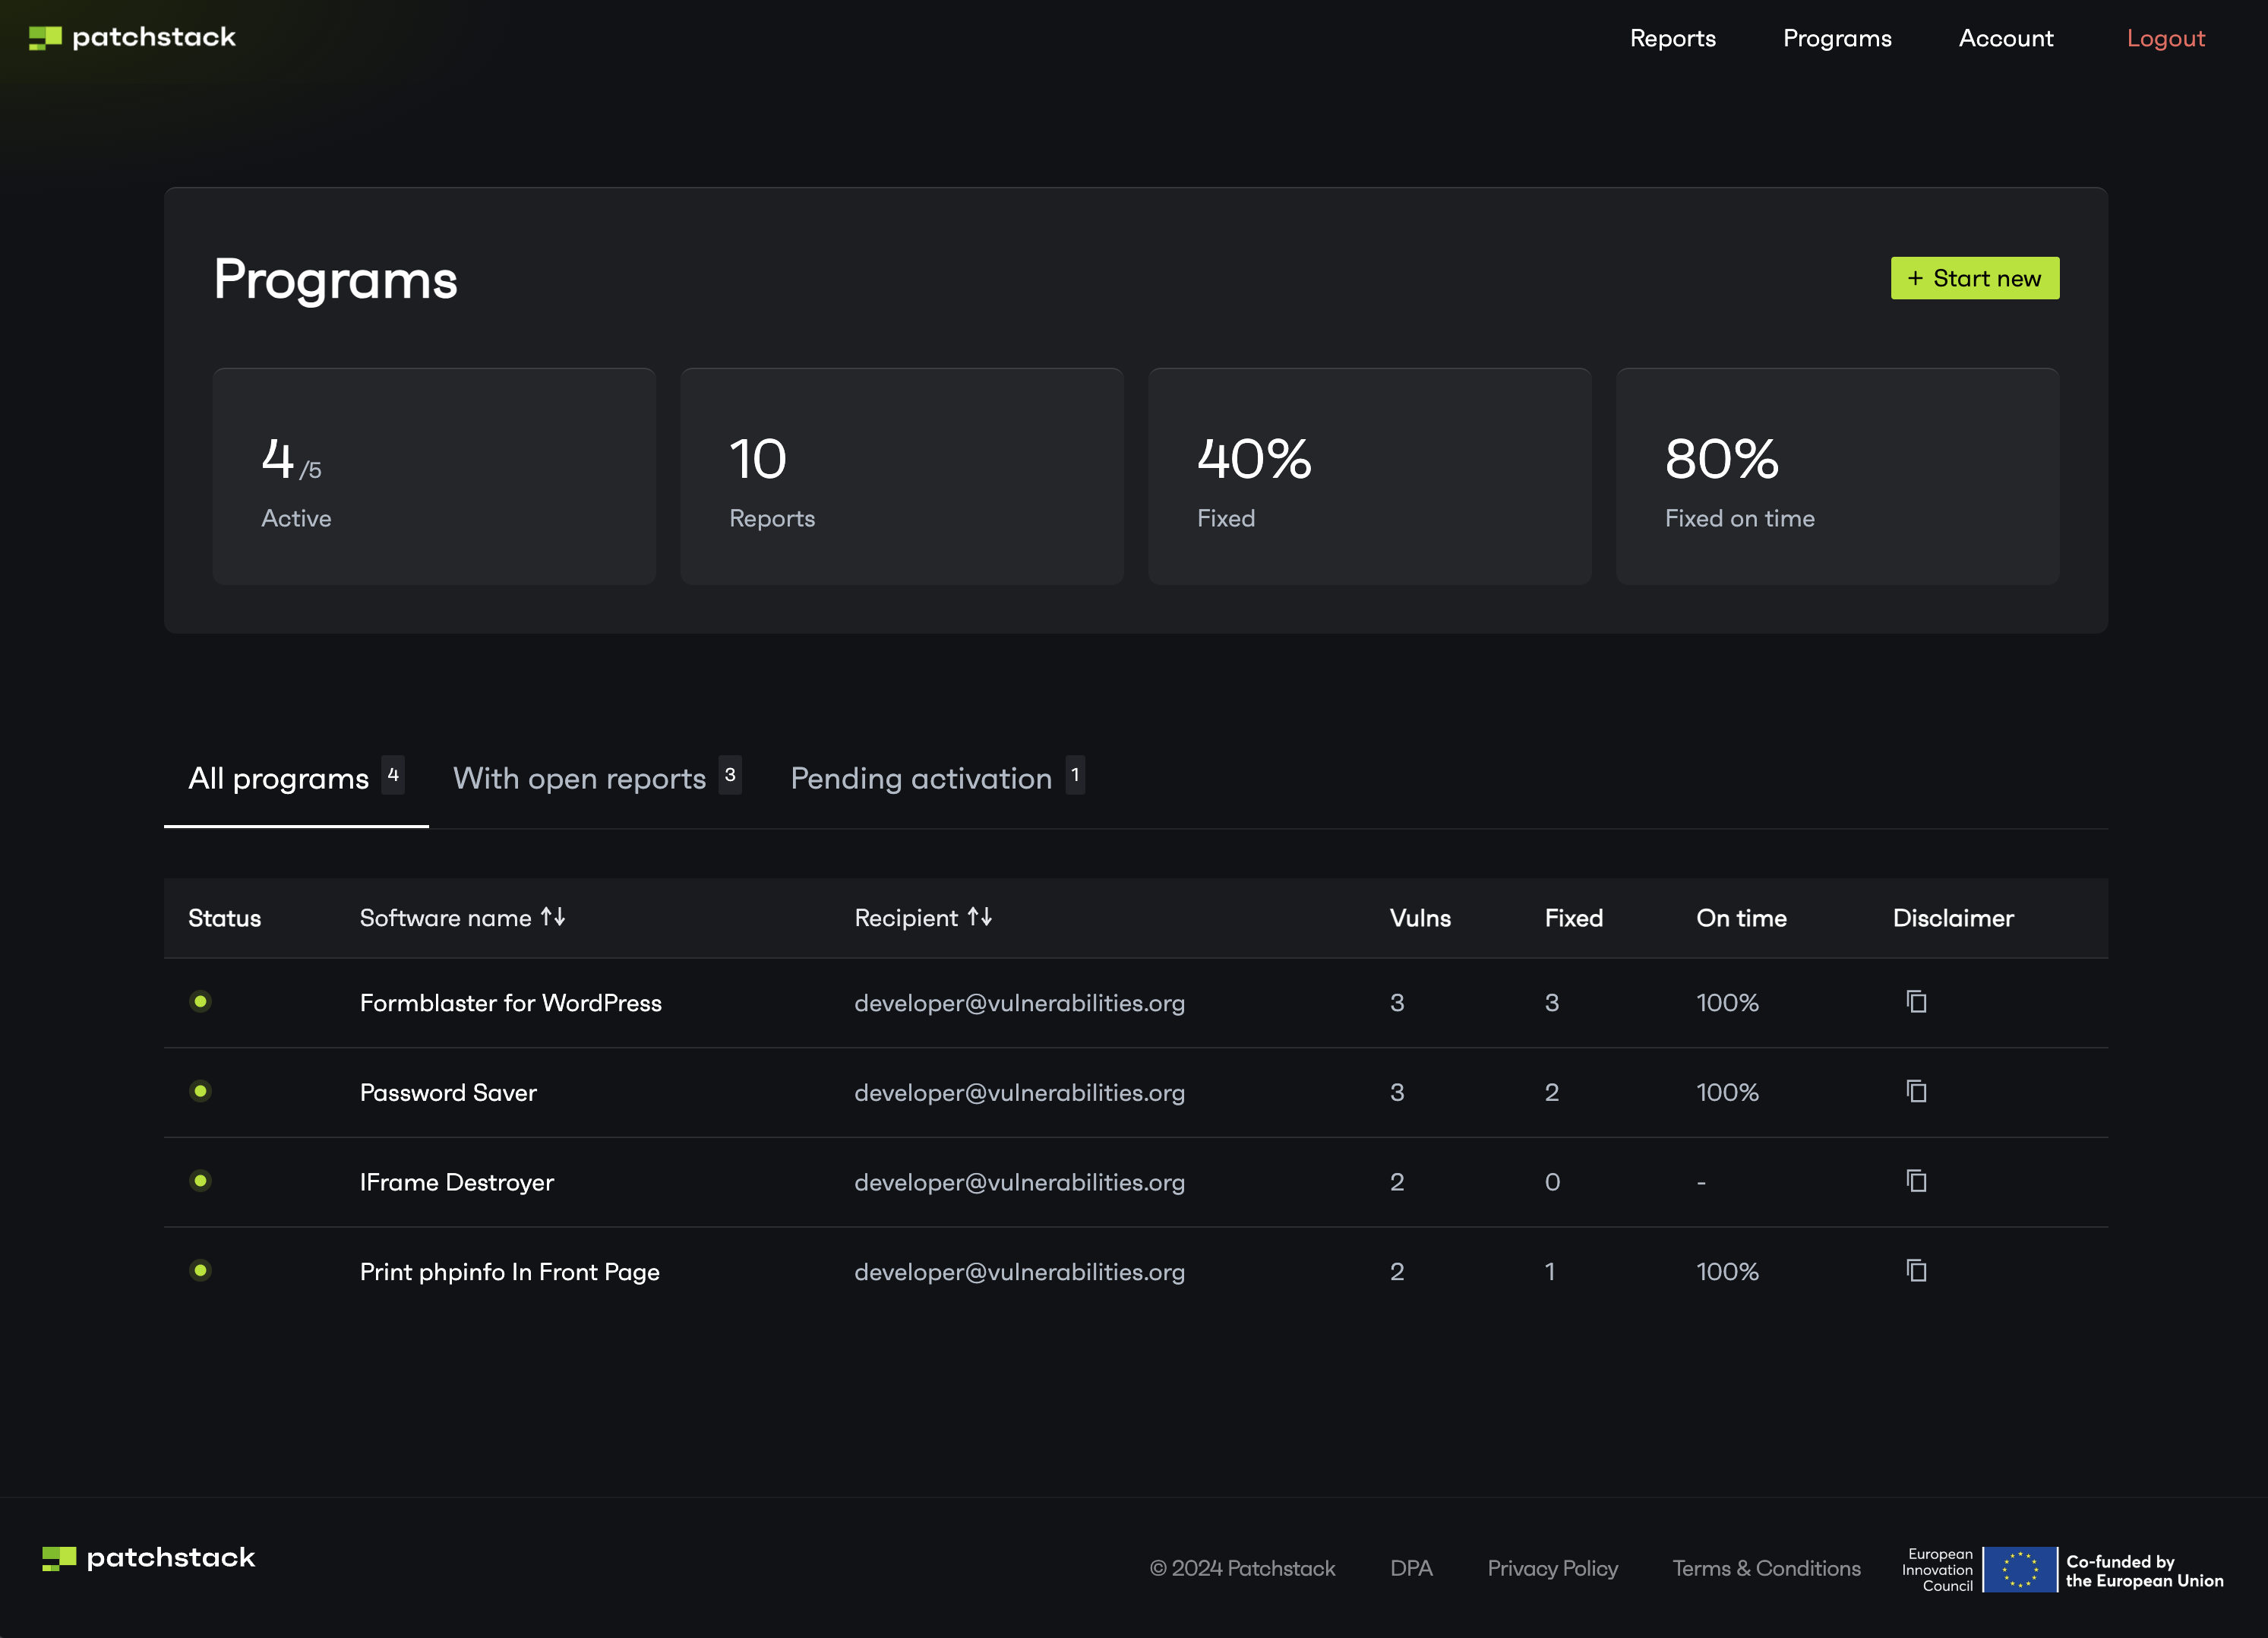
The table shows:
* Status of your program
* Green dot: accepted and active
* Red dot: pending review and validation from Patchstack
* Which email address will receive the vulnerability reports for which software
* How many vulnerabilities have been found in particular program
* How many of these vulnerabilities are fixed
* How many vulnerabilities have been fixed on time
From this page, you can copy a disclaimer of this particular program, to add it to your software files. Read more: [How to add a disclaimer to my software](/vulnerability-disclosure-program/faq/how-to-add-a-disclaimer-to-my-software/)
To view the details of your security program, click on the program name in the table.
# Report details
**On the report details page, you can see all the details regarding this particular vulnerability.**
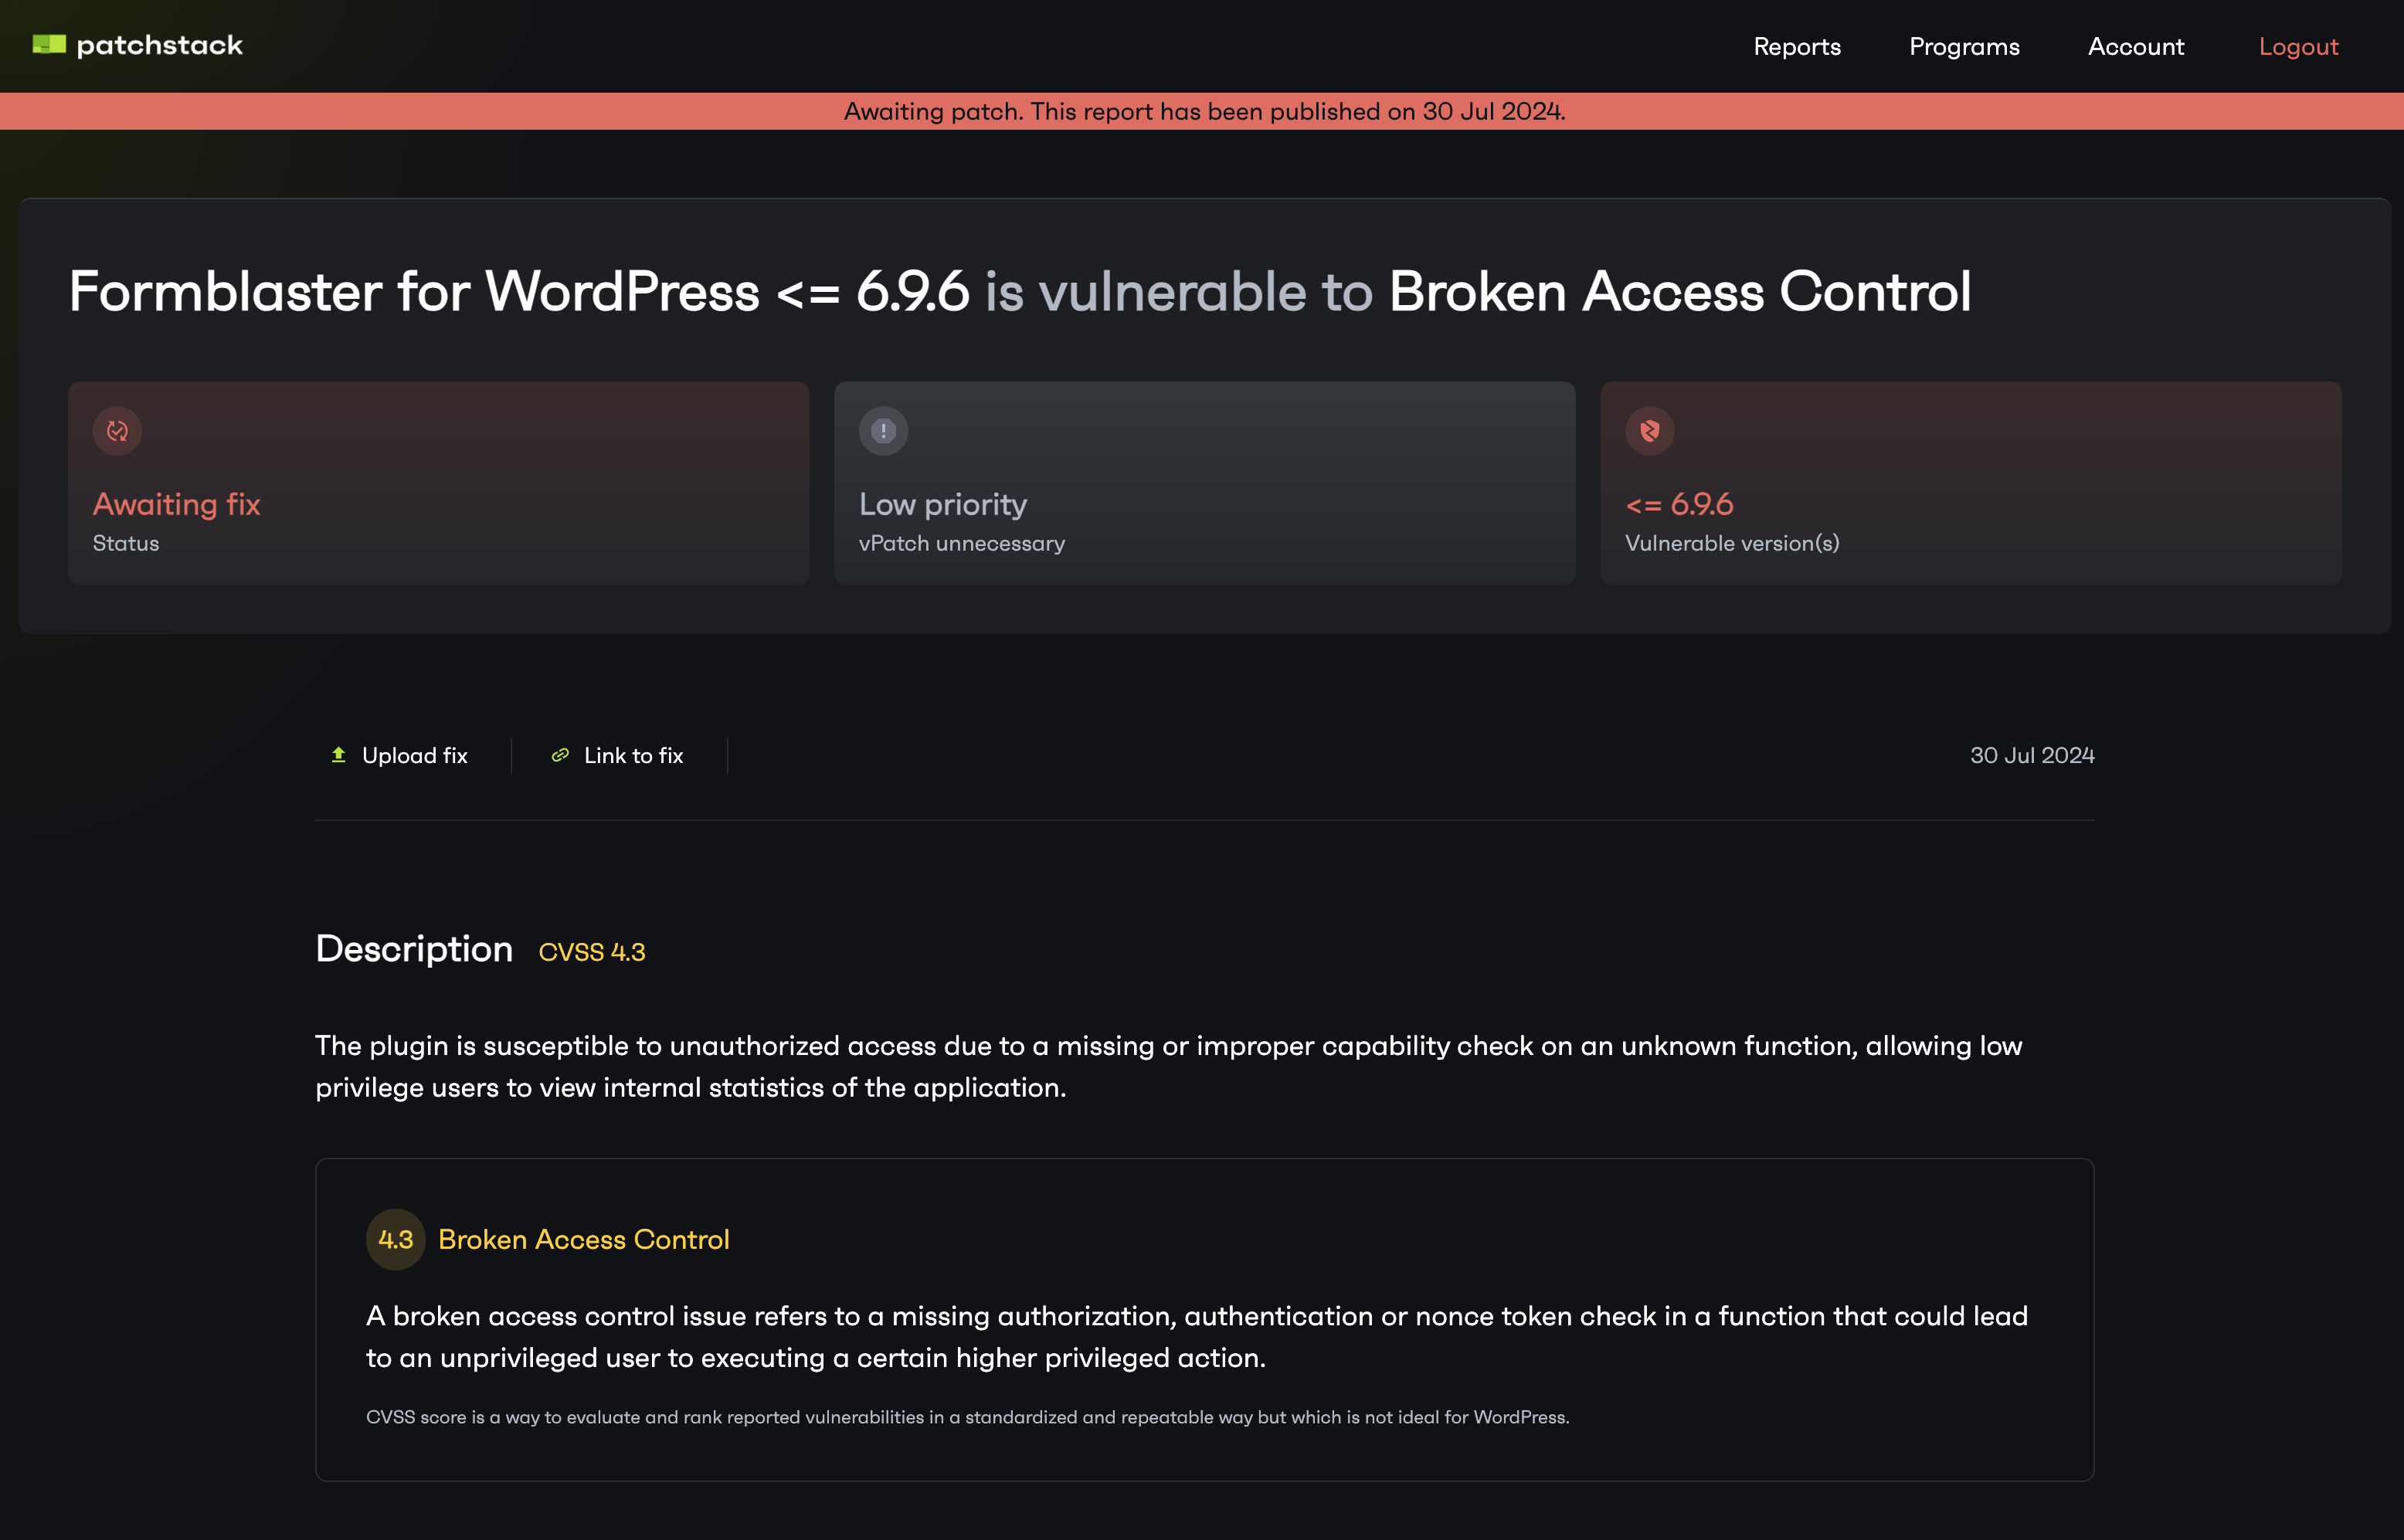
### General information
[Section titled “General information”](#general-information)
At the top section, you can see the current status of this vulnerability, the Patchstack [patch priority rating](https://patchstack.com/articles/patchstack-introducing-patchstack-priority/#different-levels-of-patchstack-priority), and which versions of your software are affected by this vulnerability. Patchstack uses different icons throughout the platform, you can read more about the [icons definitions here](/faq-troubleshooting/other/list-of-vulnerability-icons).
Under that, you can see the CVSS score for this entry, with an explanatory message of what makes this finding a vulnerability.
On the right side, it shows the date when this vulnerability was published.
### How to reproduce
[Section titled “How to reproduce”](#how-to-reproduce)
To see how this vulnerability can be exploited, scroll down to the section called **How to reproduce**. The researchers post the details there, sometimes with screenshots or videos attached. 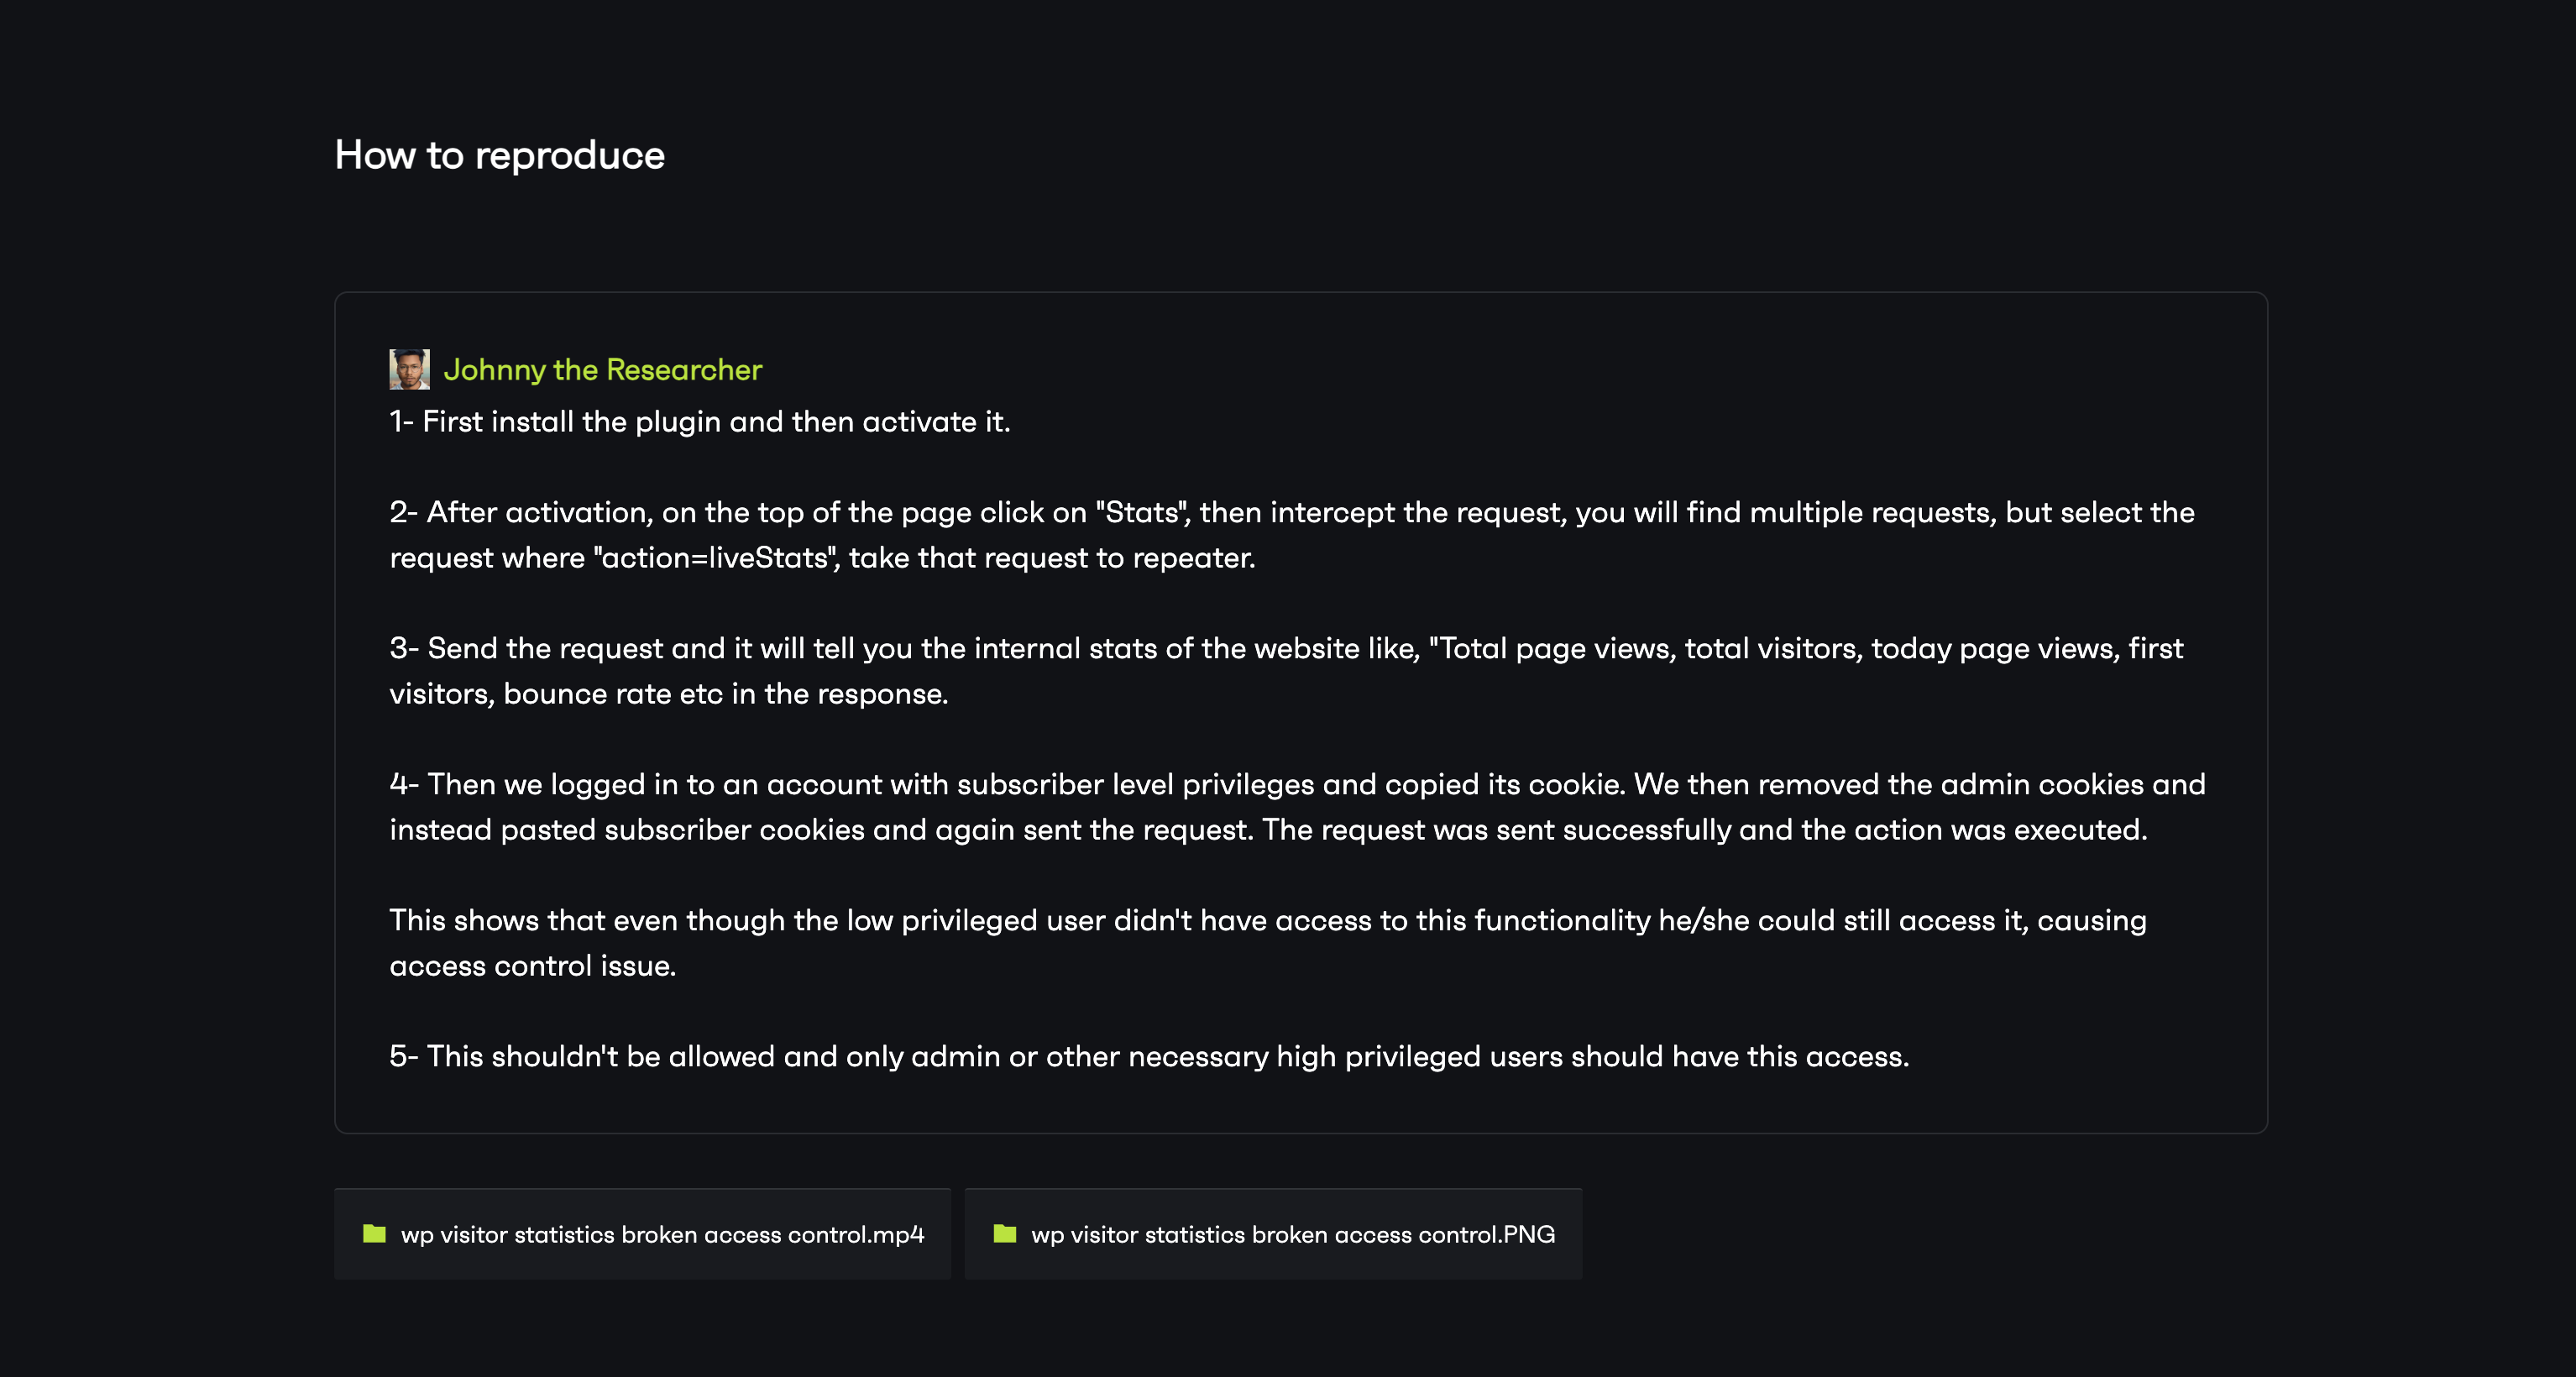
### How to disclose
[Section titled “How to disclose”](#how-to-disclose)
You can upload the fixed version of your software straight from this page. Scroll to **How to disclose** section of the page, to upload the .zip file of your software/code. Alternatively, you can send us a link to your code, by clicking **Link to fix** at the top of this page.
To read more about uploading the security fix, and how the process works in general, [check this article](/vulnerability-disclosure-program/reports/uploading-a-security-fix). 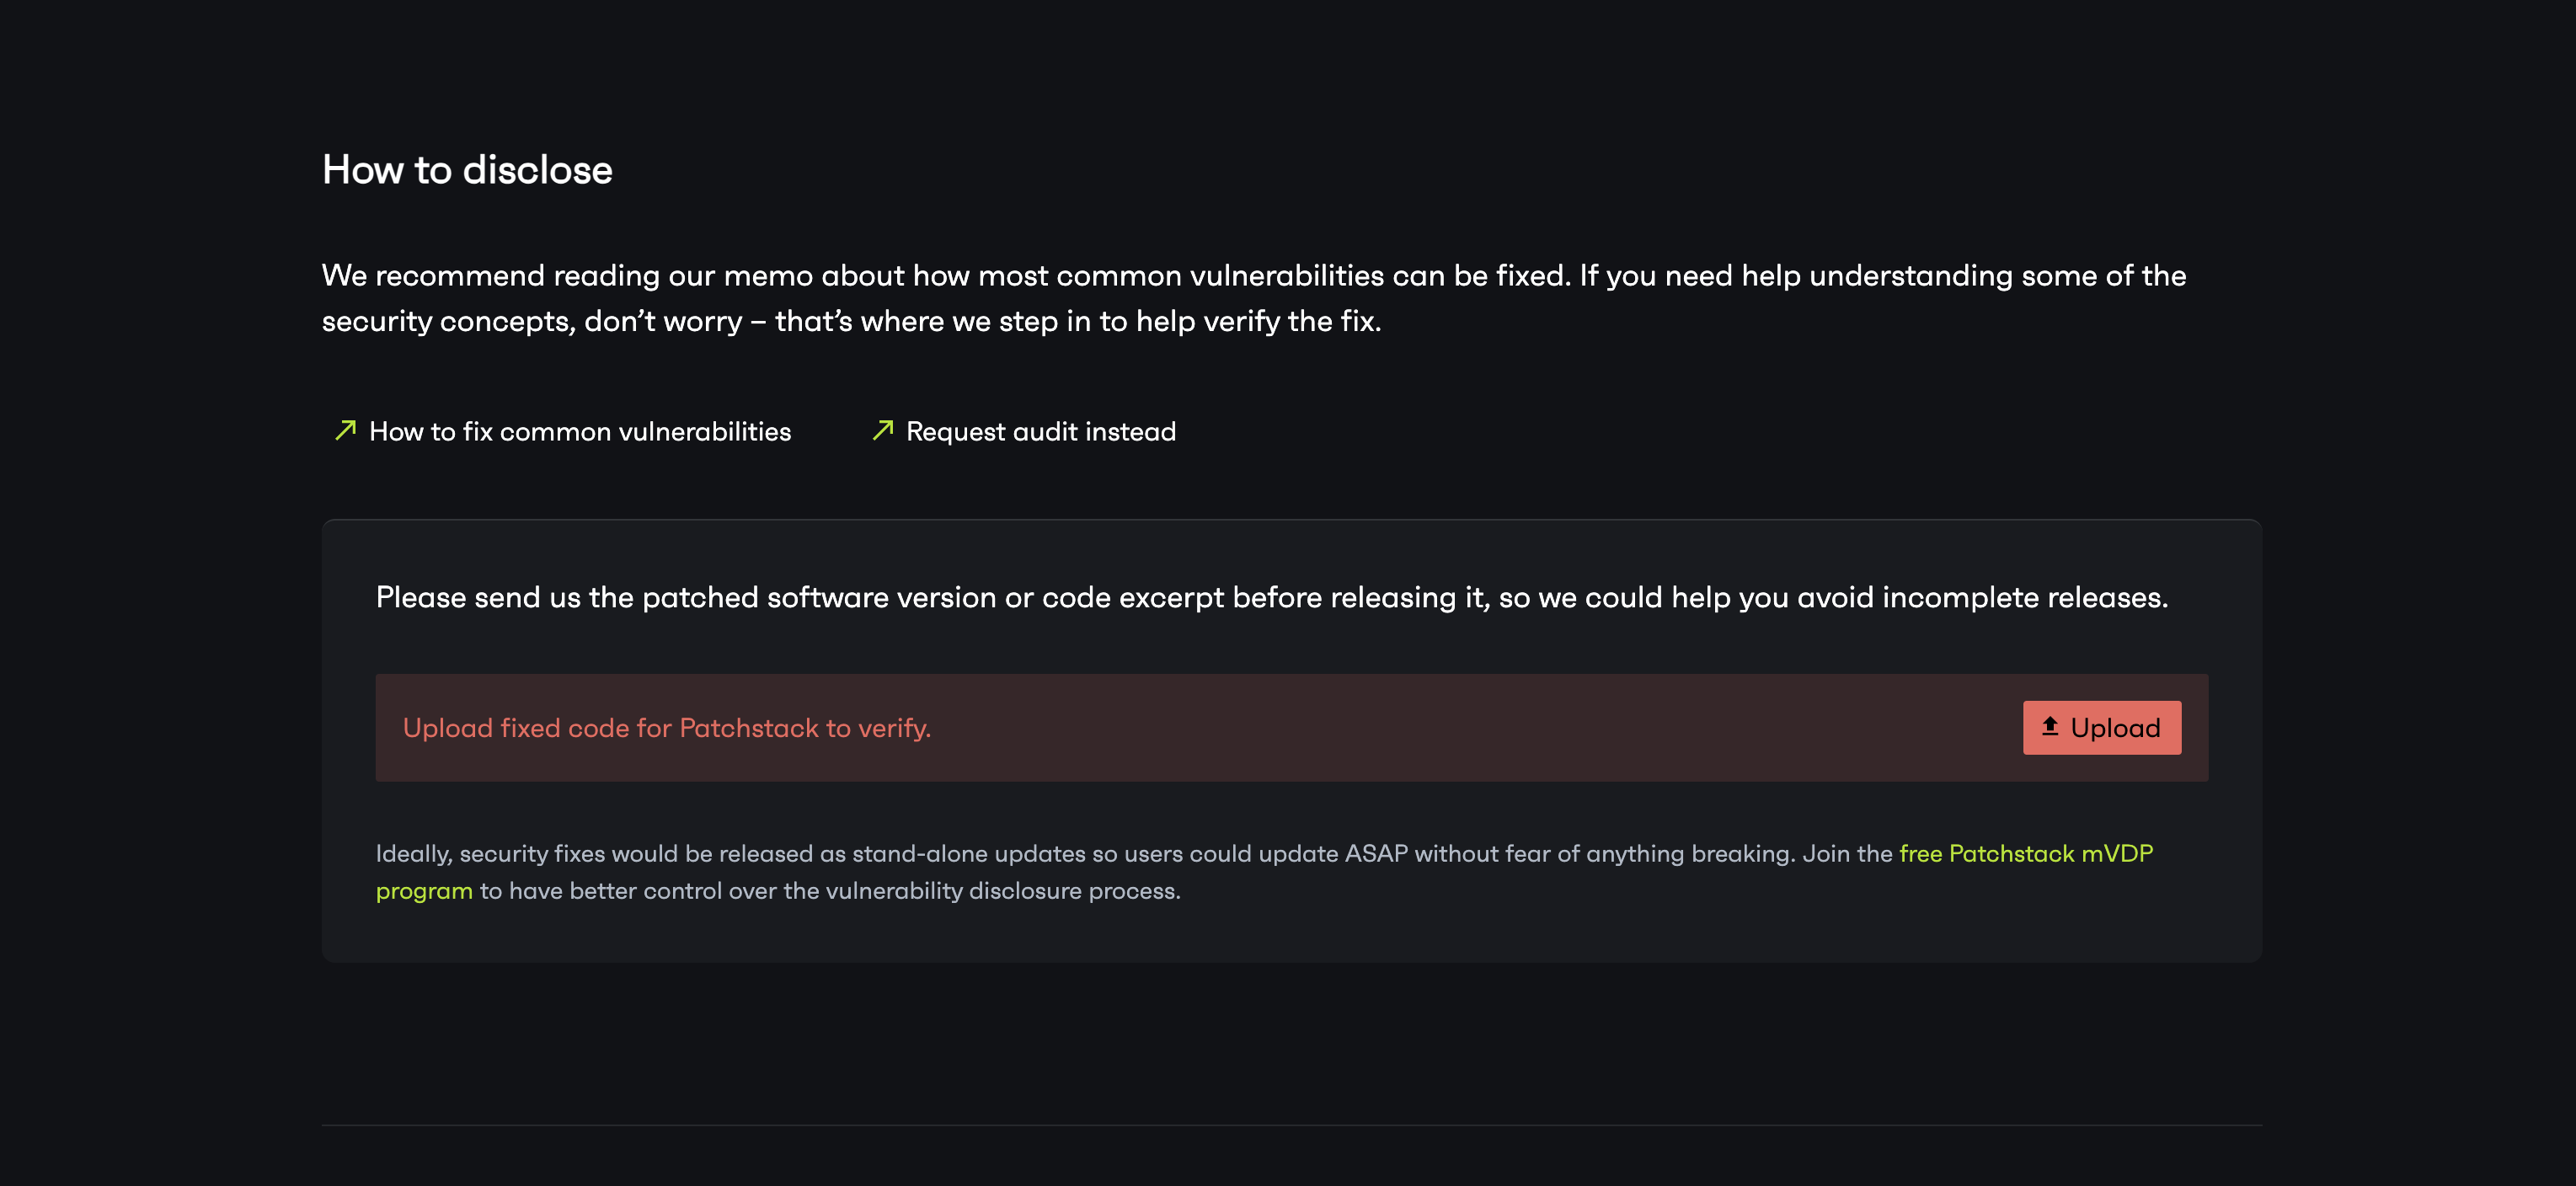
### Disclosure details
[Section titled “Disclosure details”](#disclosure-details)
The last section shows all the following details:
* Software name
* Vulnerable versions
* OWASP Top 10 - vulnerability type by OWASP Top 10 classification
* Type - whether the software type is a plugin or a theme
* Classification - vulnerability class
* Patch priority - level of priority regarding patching (low / medium / high)
* CVE ID - unique ID number for identifying this vulnerability in the Common Vulnerabilities and Exposures database
* CVSS severity - the Common Vulnerability Scoring System rating
* Required privilege - which is the minimum user role necessary to perform the attack
* Developer - name of the vendor
* Credits - name of the researcher who reported this vulnerability 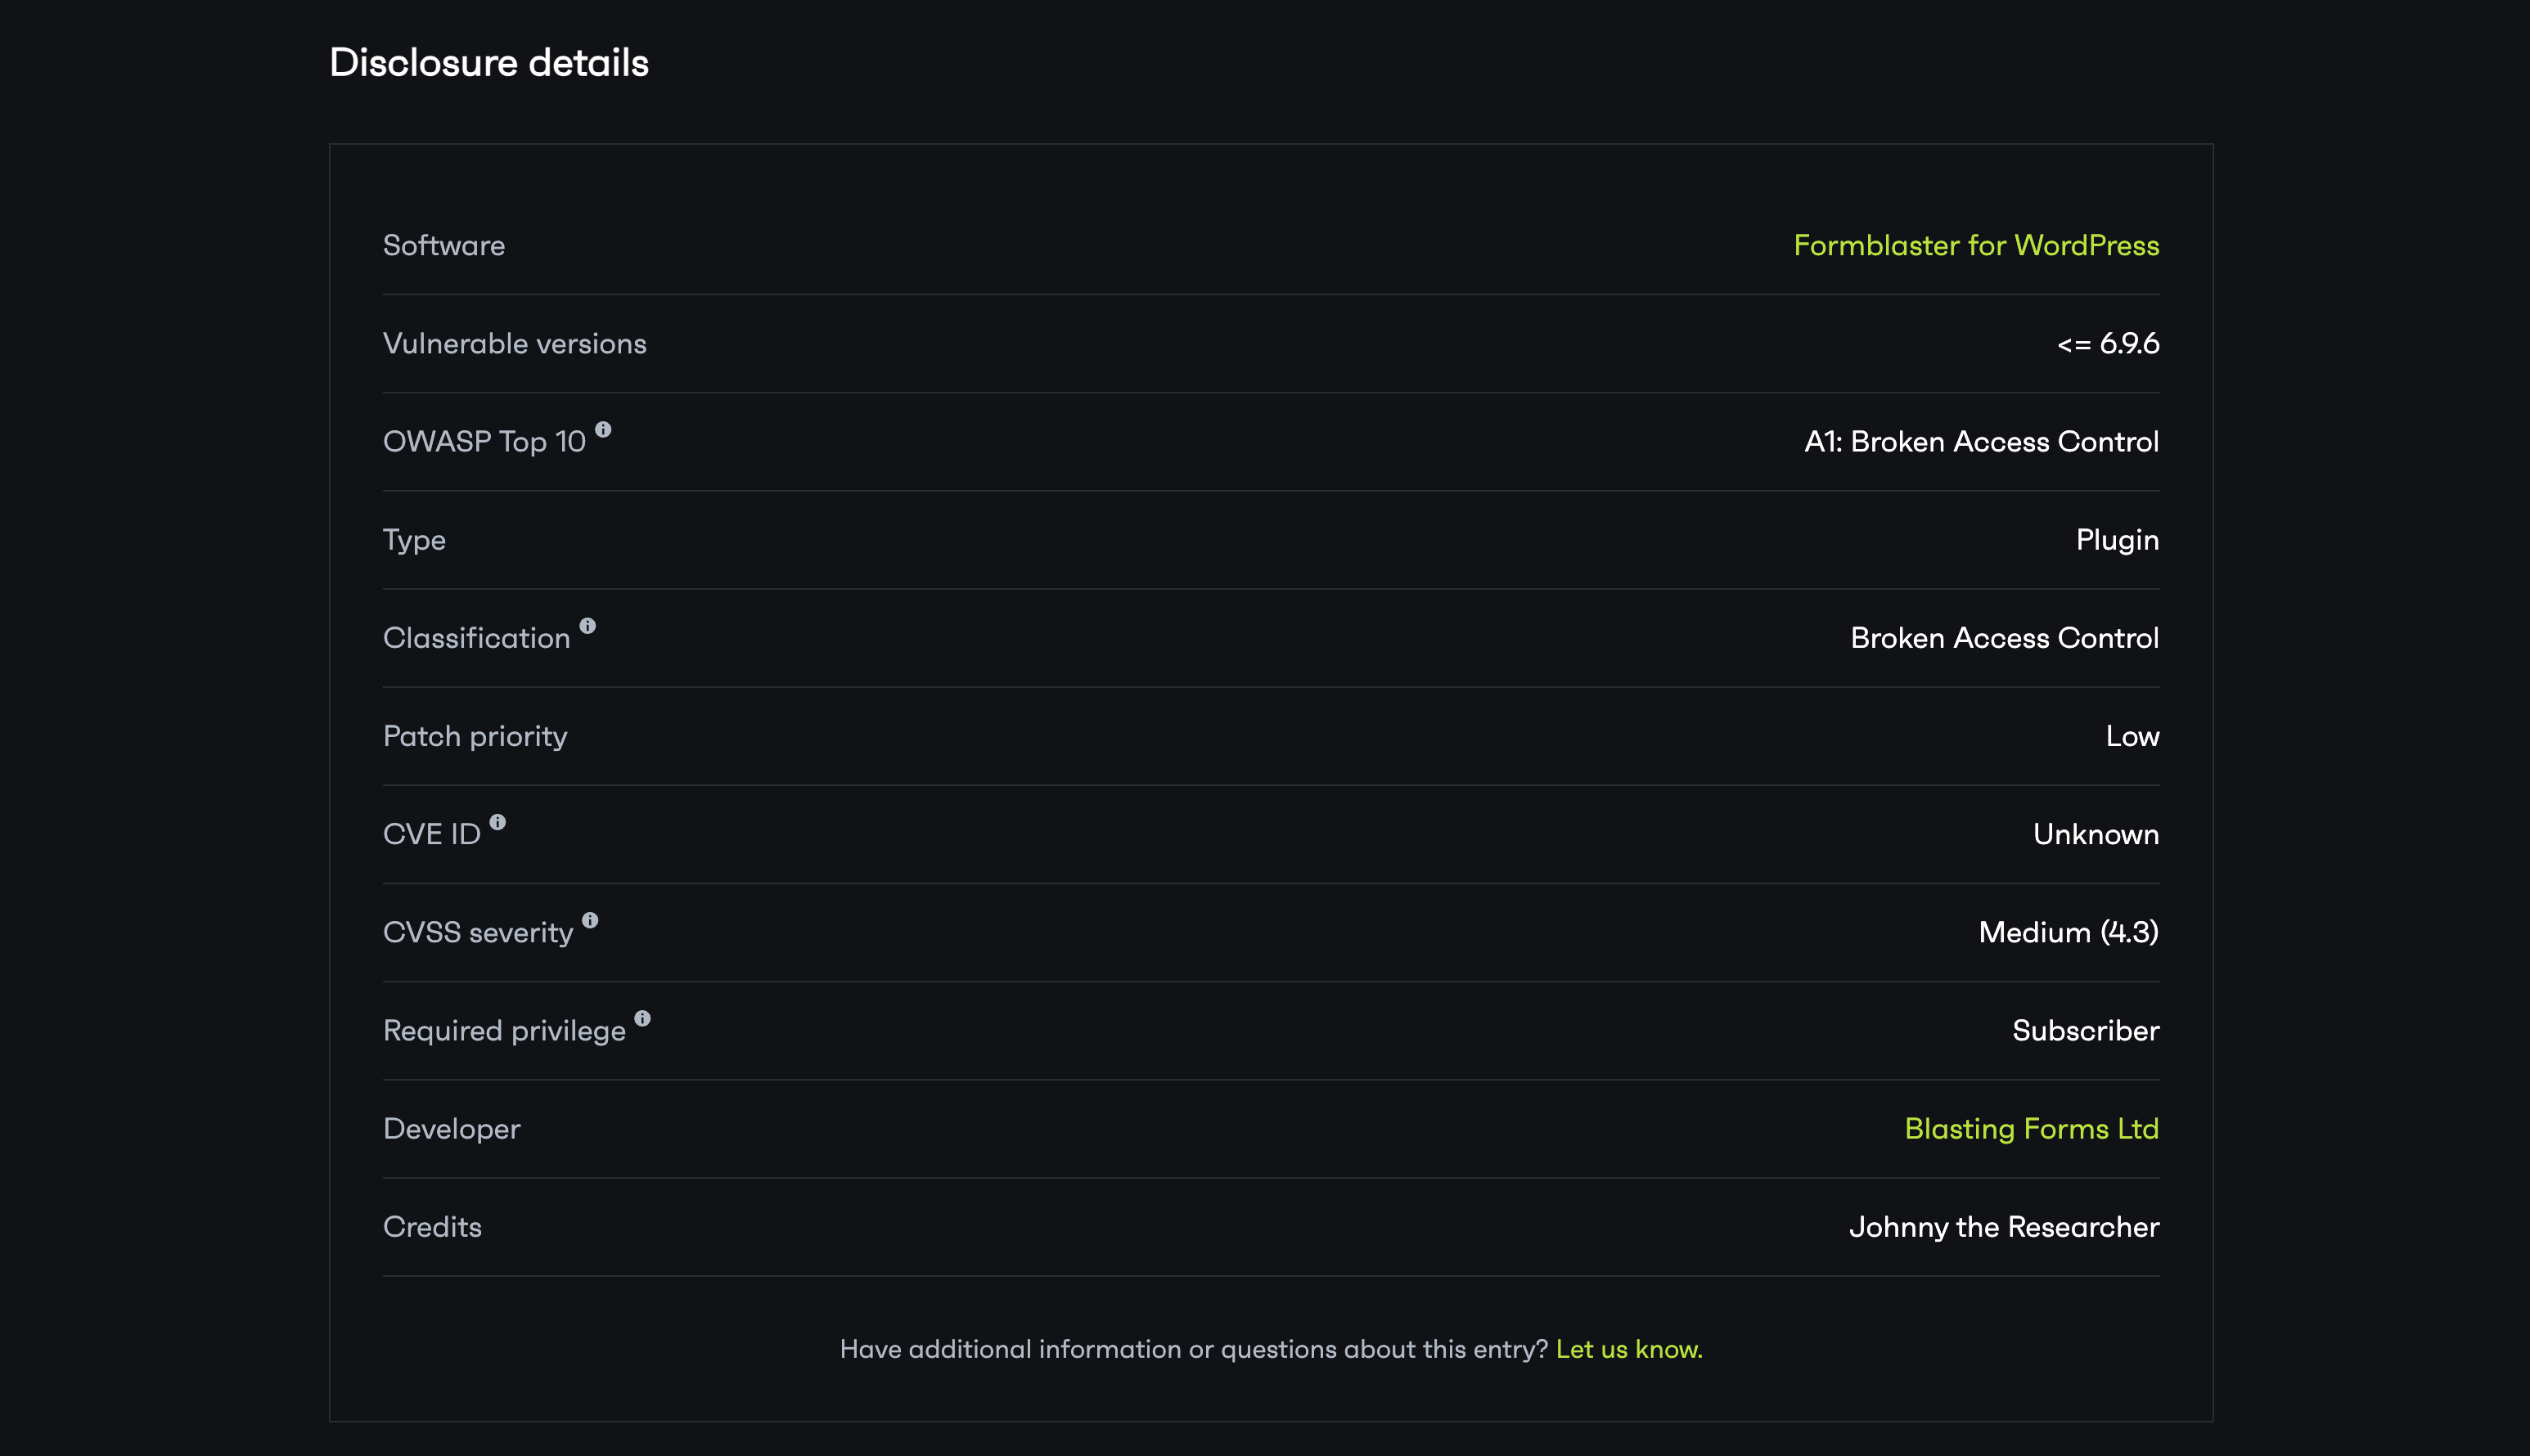
# Vulnerability reports dashboard
In your vulnerability reports dashboard, you can see all the data about all the vulnerability reports that have been submitted for your software. In this article, we’ll explain all the details about what the reports dashboard shows you.
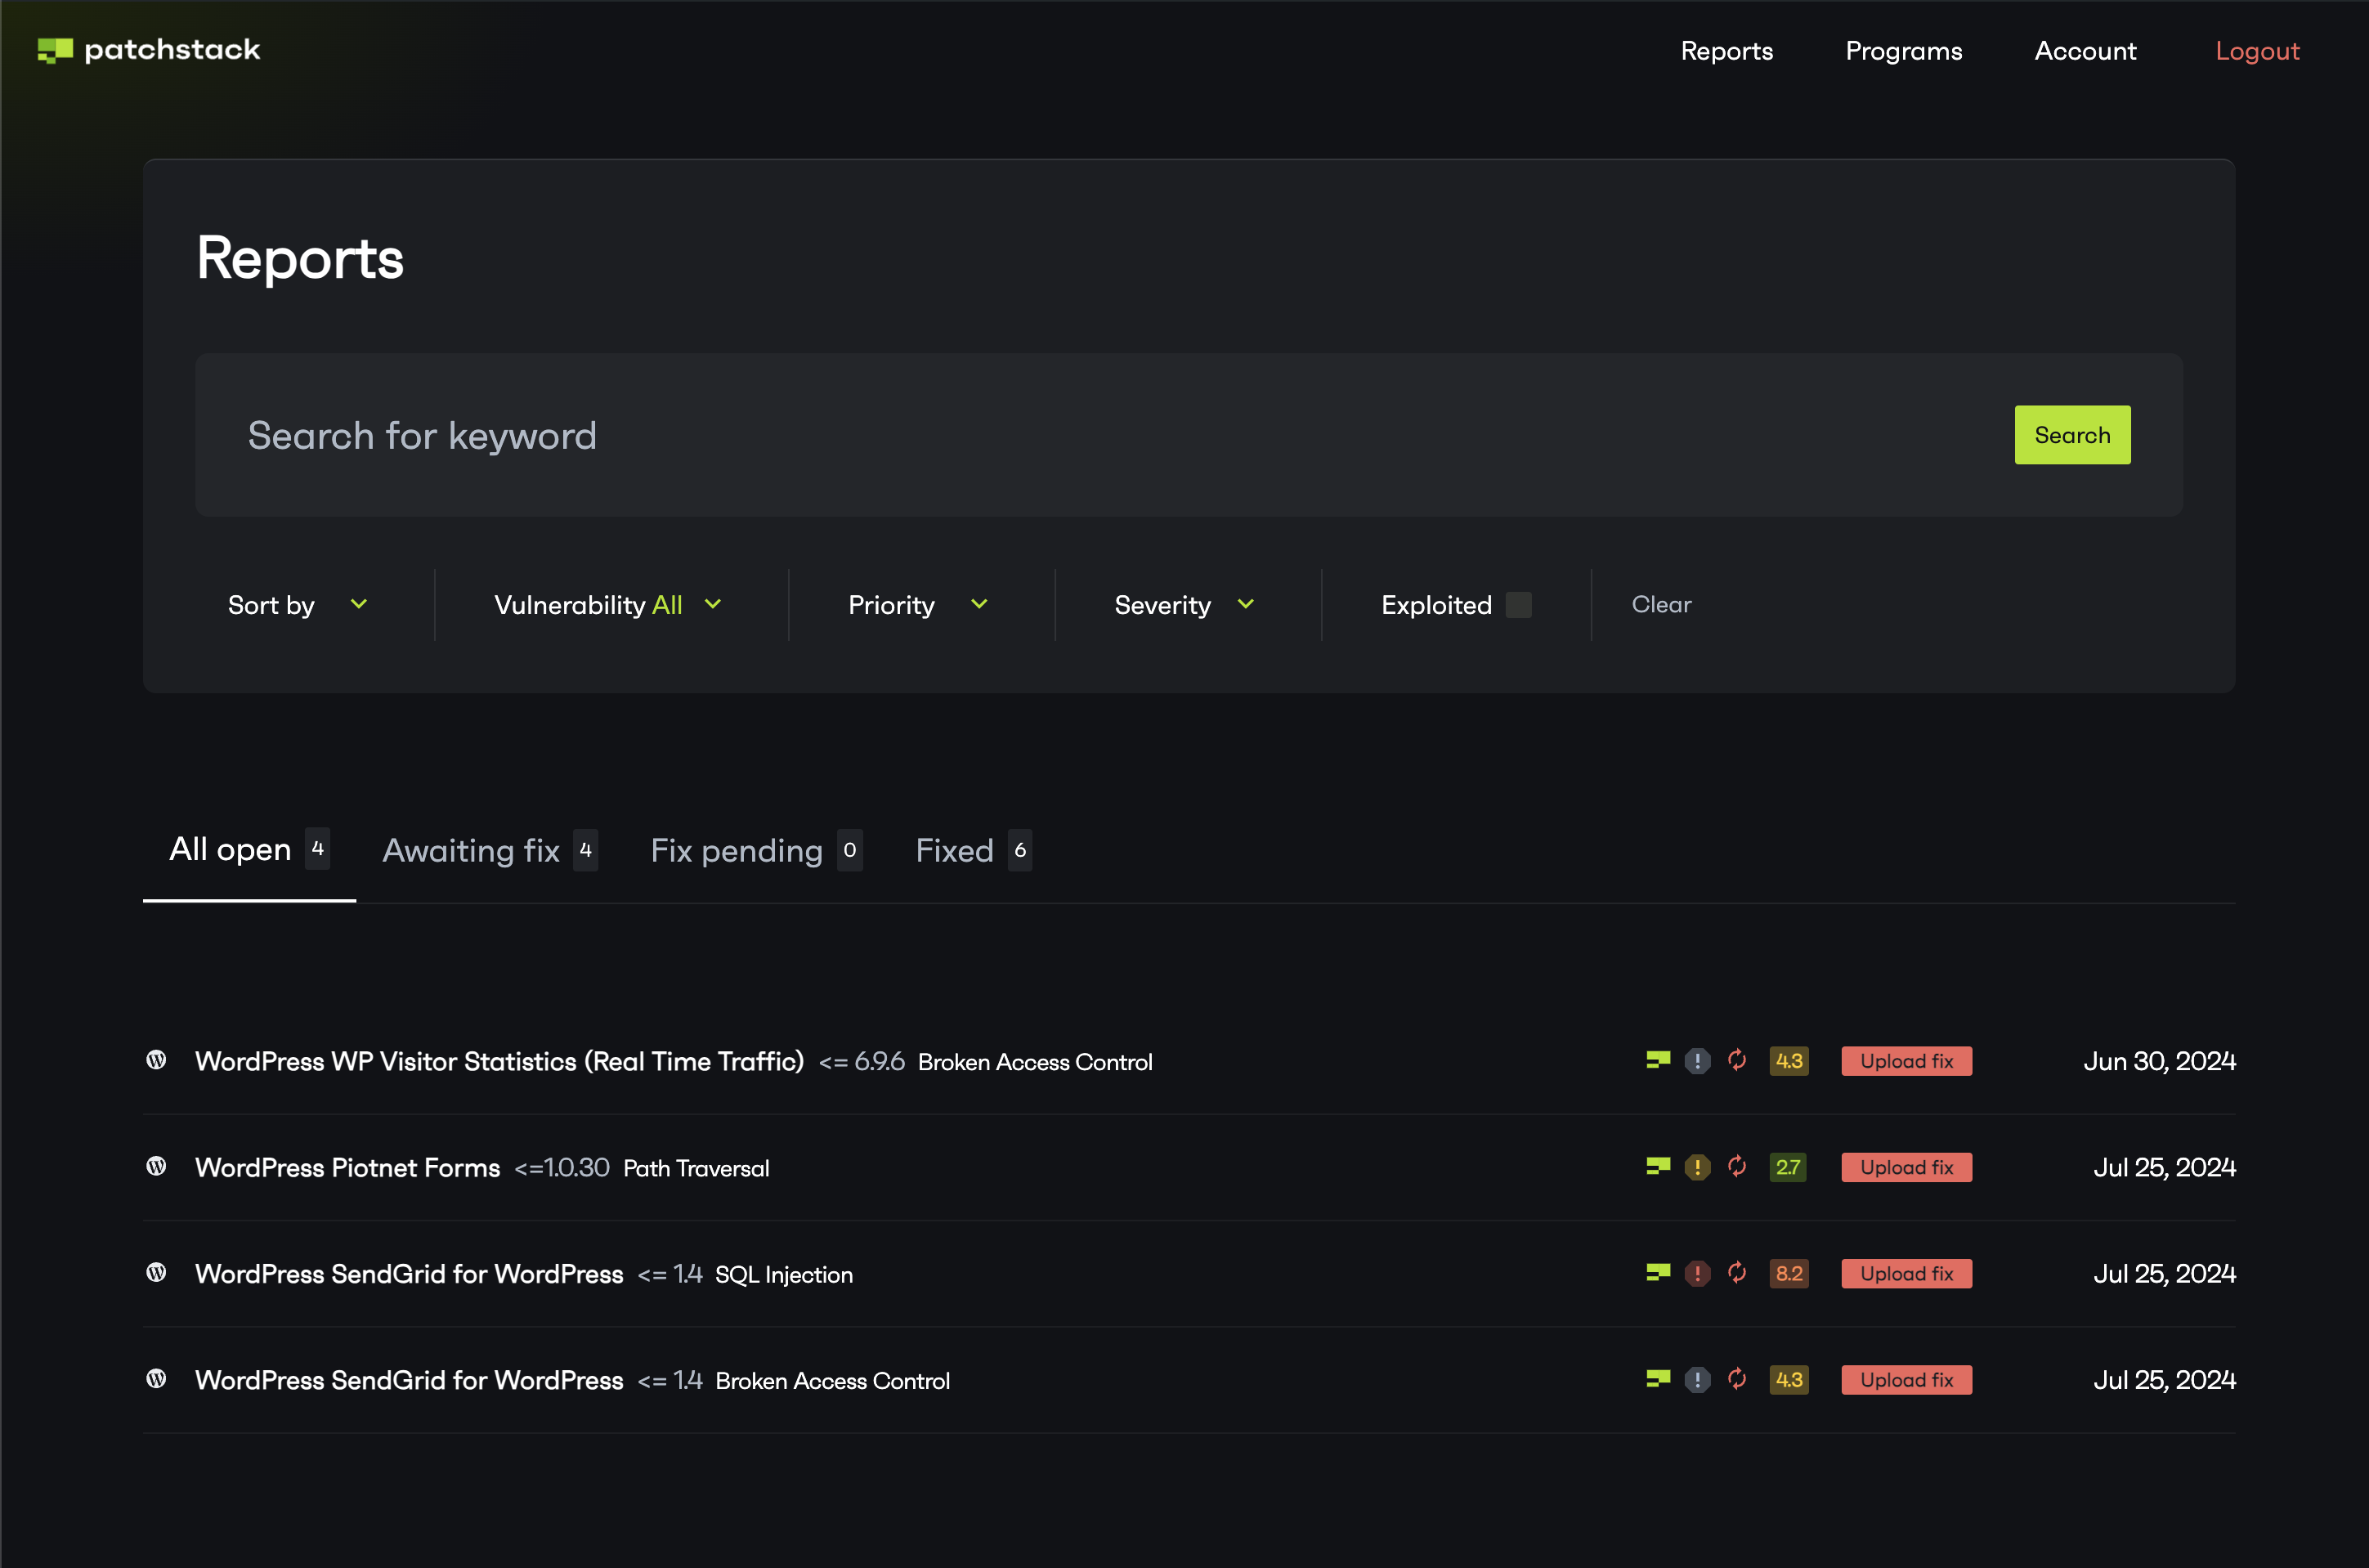
### Sort and search vulnerabilities
[Section titled “Sort and search vulnerabilities”](#sort-and-search-vulnerabilities)
To find specific vulnerabilities, or search for a certain plugin or theme of yours, you can use the filters and searchbar. You can sort your vulnerability reports by following filters
* **Sort by** - newest / oldest
* **Vulnerability type**
* **Patch priority** - low / medium / high
* **Vulnerability severity (CVSS)** - low / medium / high / critical
* **Exploited** - choose if the vulnerability is known to be exploited
### Vulnerability entries and icons
[Section titled “Vulnerability entries and icons”](#vulnerability-entries-and-icons)

The entries are listed in the table. Each row shows:
* CMS of that software
* Name of the software
* Versions that are affected
* The [icons](/faq-troubleshooting/other/list-of-vulnerability-icons) on the right show the severity score and patch priority level, as well as who published this vulnerability
* On the right side, is a publish date of this vulnerability
By clicking on an entry row, you can see a detailed view of this vulnerability. To understand the icons that are listed in the table, see [this article](/faq-troubleshooting/other/list-of-vulnerability-icons/).
# Uploading a security fix
The users of mVDP program can send a security patch direcrtly to us from the platform.
To send a patched version of your software:
* Log in to mVDP platform ()
* Click **Reports**
* Open your vulnerability report
* Click **Upload fix** to upload a .zip file of your patched plugin version
* OR click **Link to fix** and post us a link to your patched code
After sending the patched code, our team will review and validate all the security fixes.
How to fix common vulnerabilities?
We have crafted an article about how to fix the most common vulnerabilities found in software. Read [this article](https://patchstack.com/articles/common-plugin-vulnerabilities-how-to-fix-them/) to get more insights