Adding your first site
In this article, we will show, how you can add and connect your first website with Patchstack App. You can watch this tutorial video below, or follow the steps in the next chapter.
Steps for adding your first site
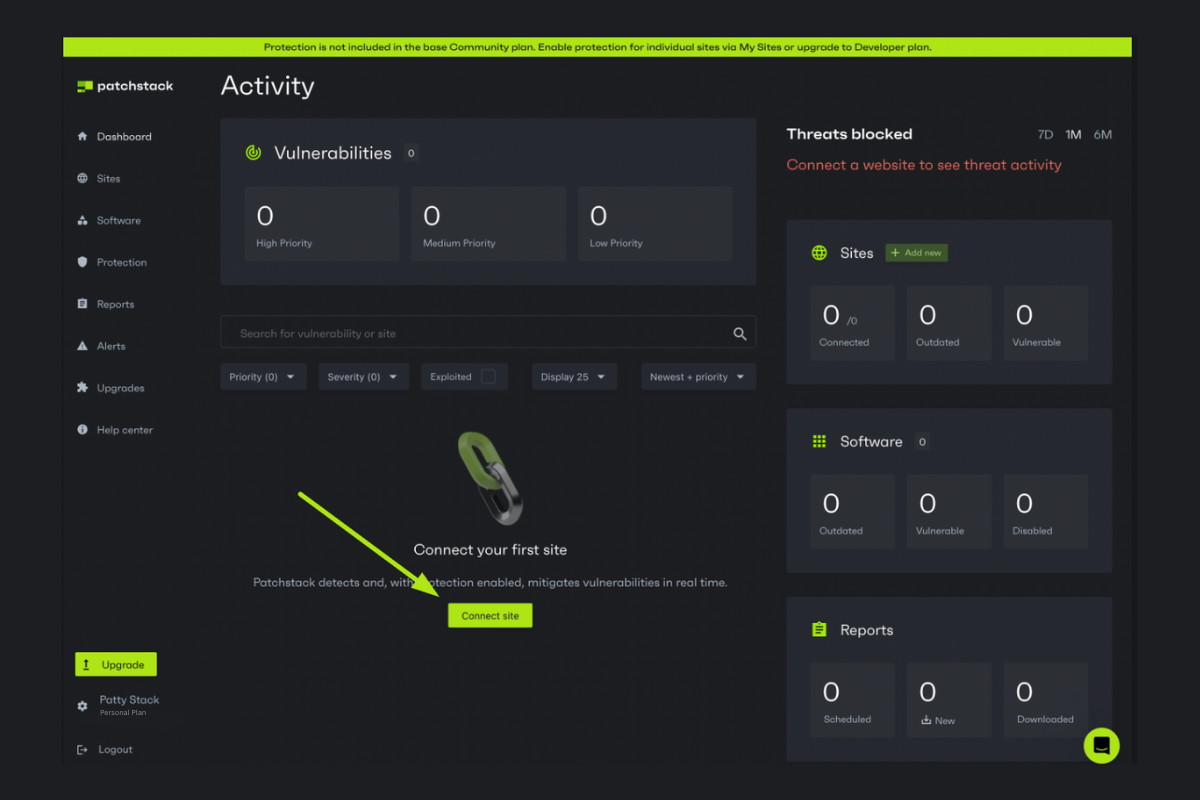
Section titled “Steps for adding your first site”To add the first site, make sure you are logged into Patchstack App. Then follow these steps.
- Navigate to Dashboard. Then, click on the green Connect site button.
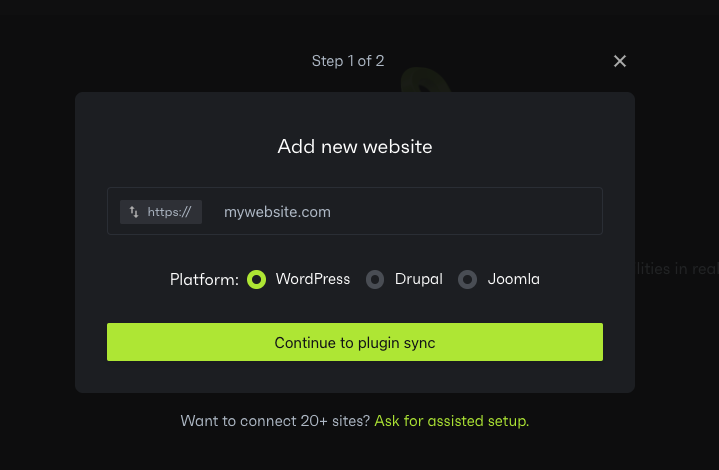
 A dialogue will open asking you for your domain URL.
 - Enter the domain name to the input. You can switch between http/https by clicking on the arrows
- Click Continue to plugin sync
- You will be taken to the next step, where you can get the API key or download the plugin .zip file.
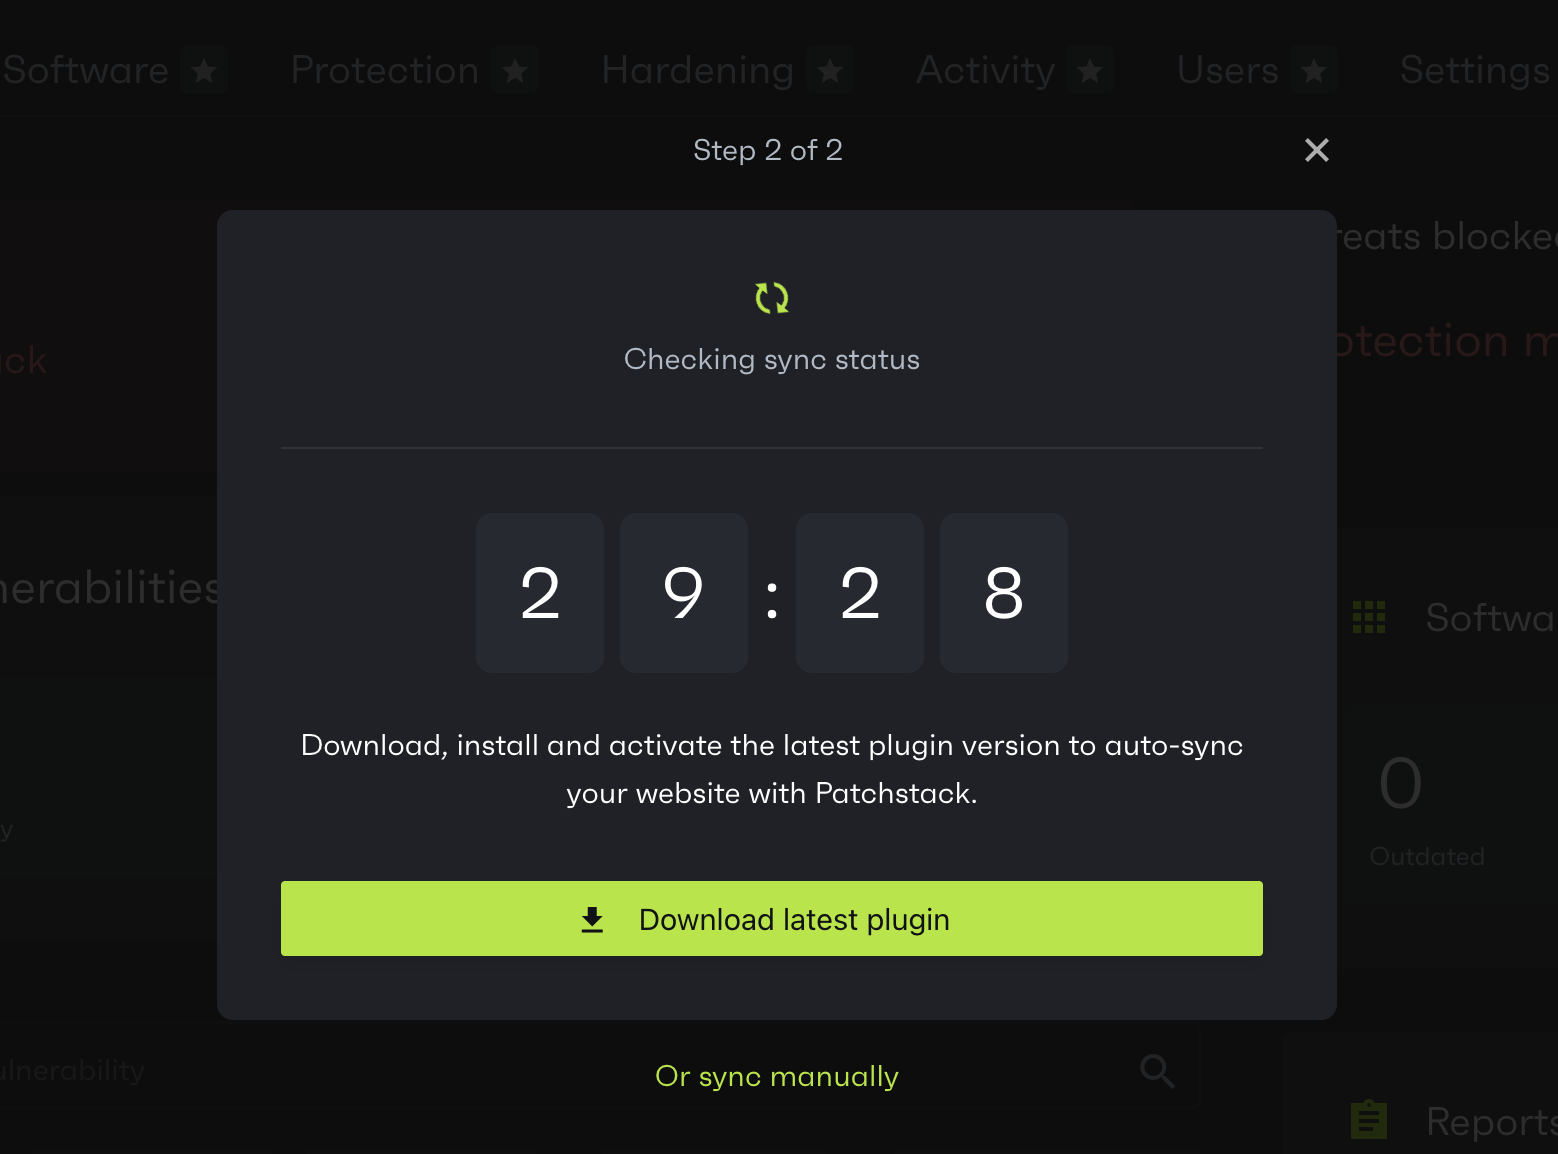
- If you upload the Patchstack plugin to your site within 30 minutes, Patchstack will automatically sync all the data. In case this 30 minute exceeds, then you need to click Resync in the dialogue, after uploading the plugin.
- To install the plugin, follow these steps.
What if I already had the Patchstack plugin installed before adding it to Patchstack App?
If you already have the Patchstack plugin installed on your site, you can click Or sync manually in the Patchstack App site adding flow, and get the API key. You will have to insert this API key into your WordPress plugin. To do that, go to wp-admin > Settings > Security > Change API key. Copy the key there and click Sync