
Adding a site
Adding a site to Patchstack is relatively easy. Here is a simple guide on how to add and connect a site to Patchstack App:
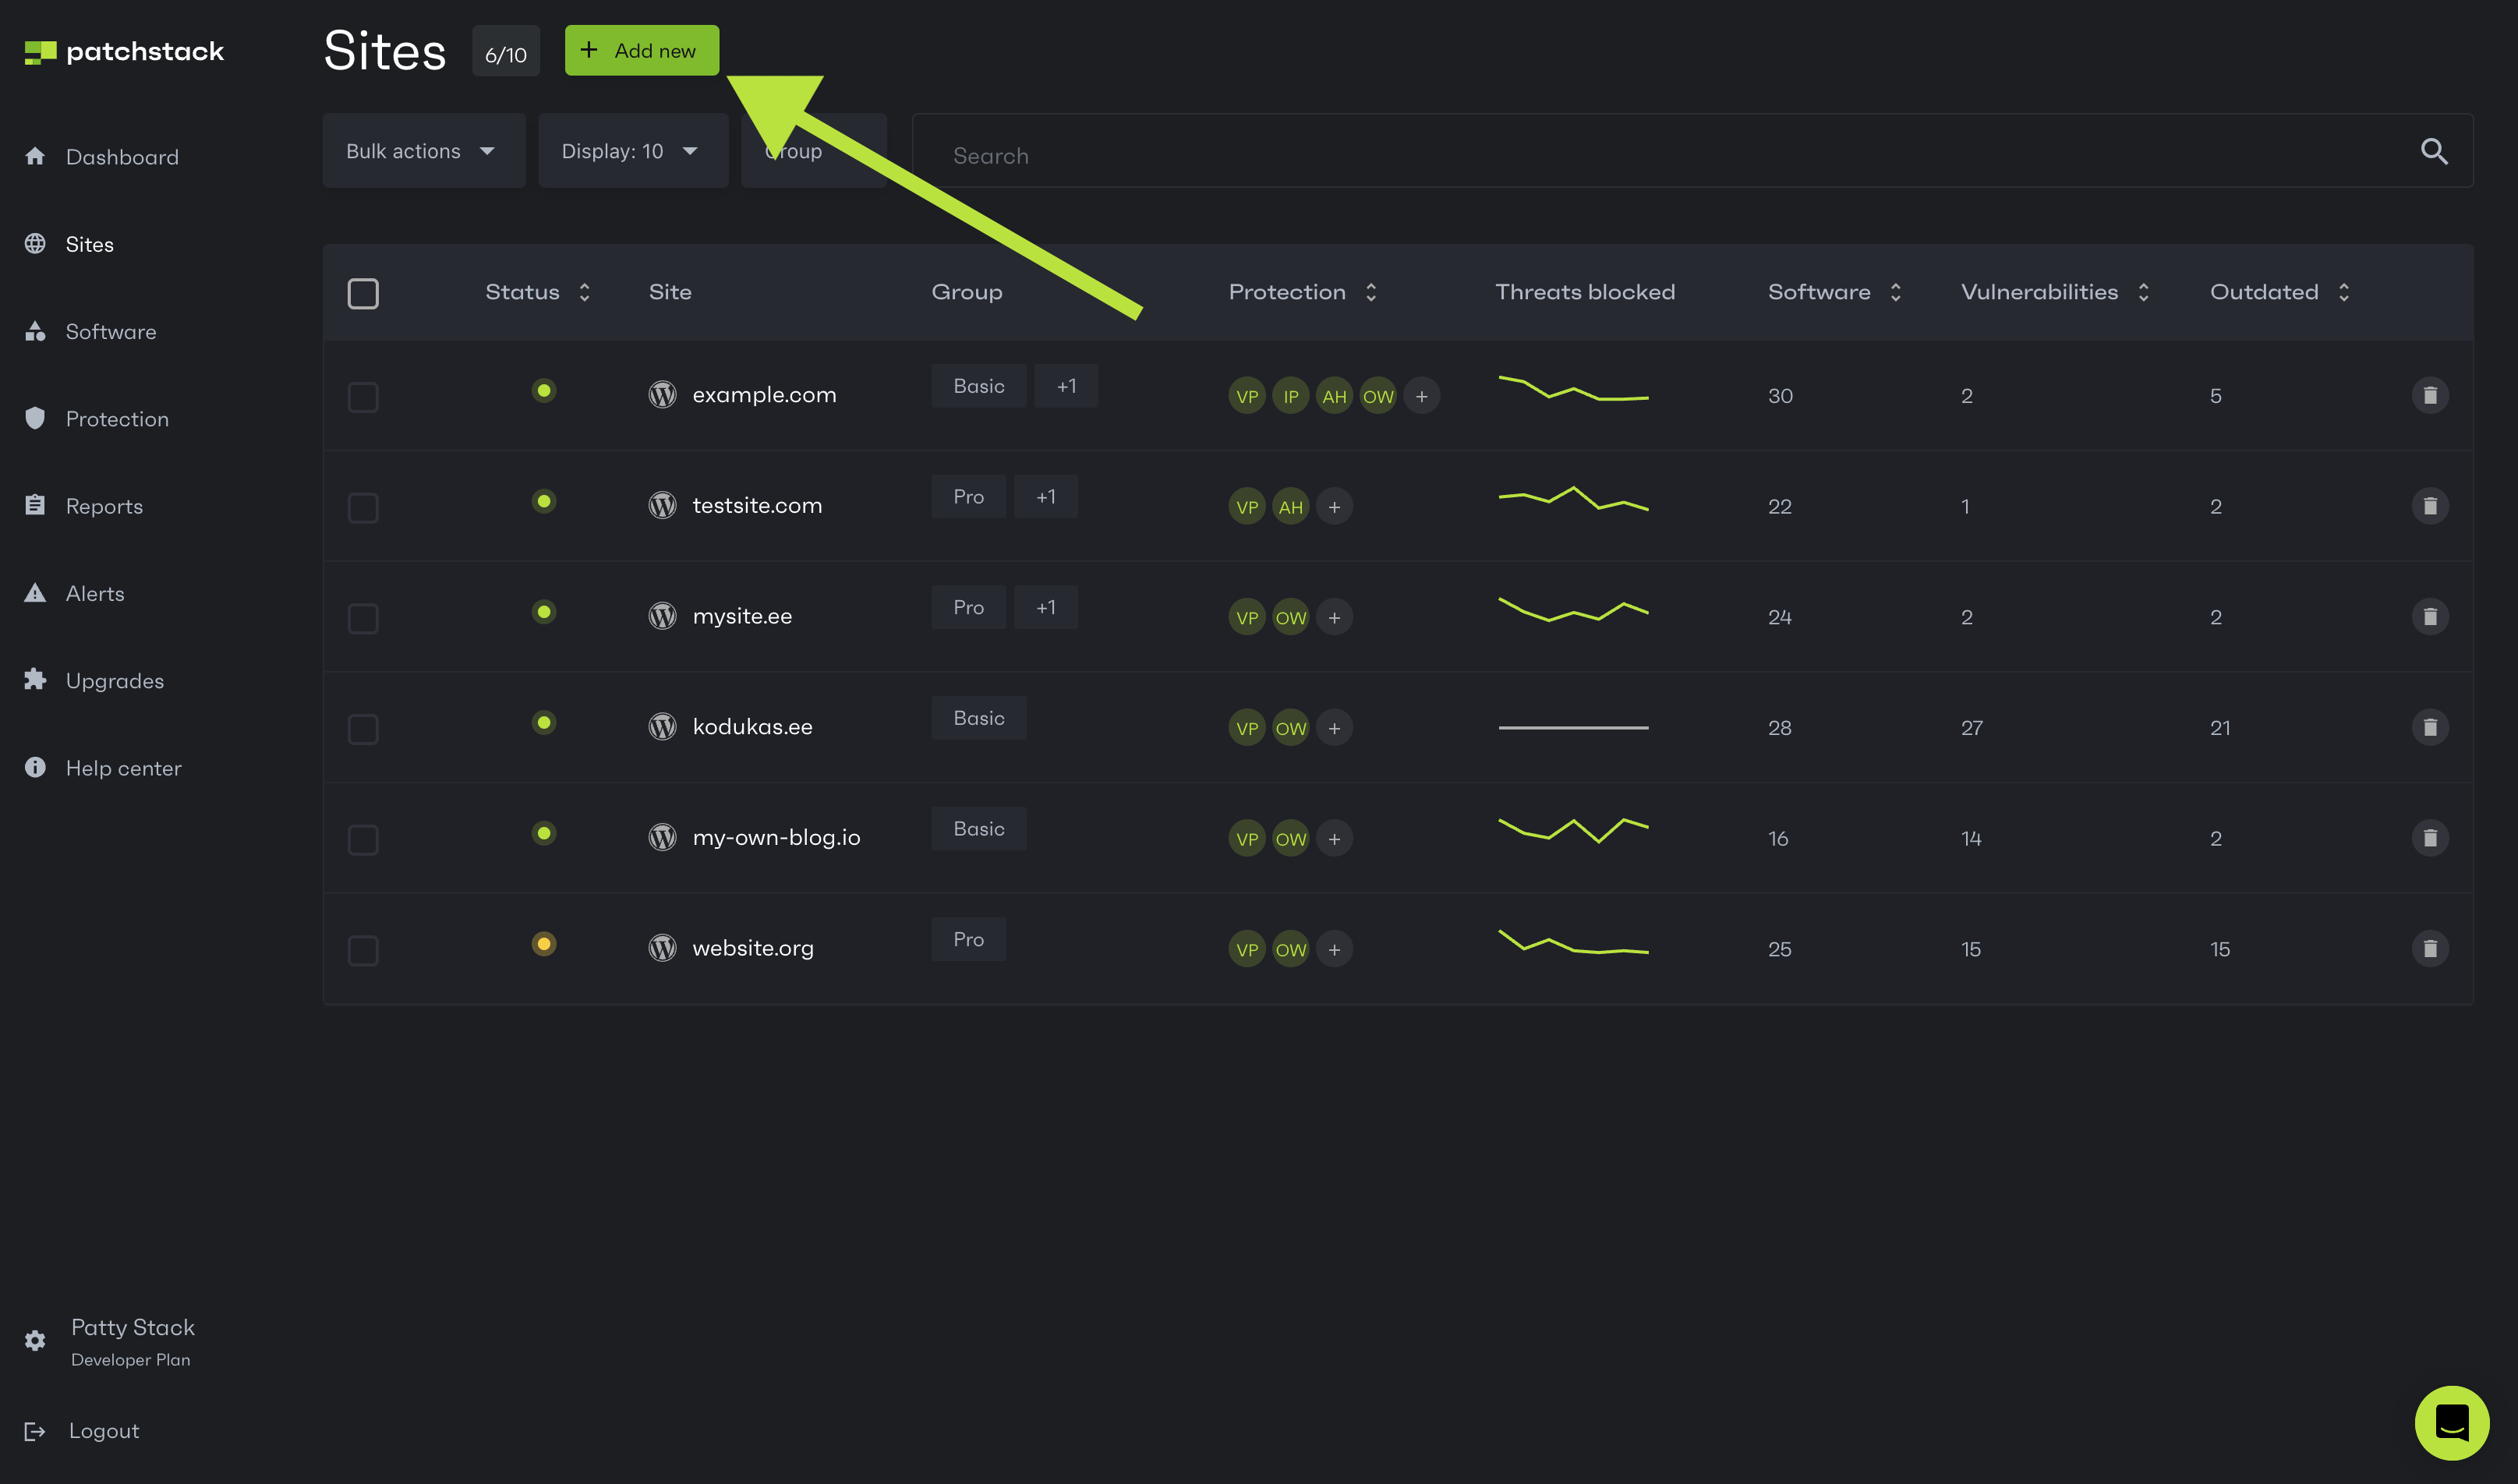
- Navigate to the Sites view in Patchstack App
- Click on + Add new button.
- Type your domain name into the popup and choose your platform:
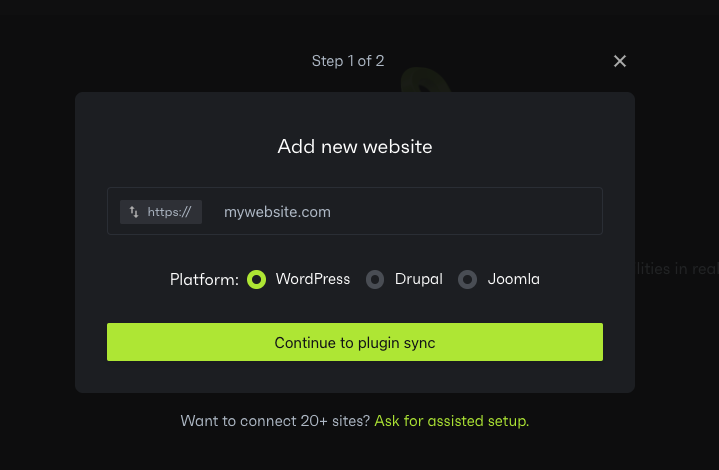
- Click on Continue to plugin/connector sync.
- In case you chose WordPress, continue with the steps below. For other platforms, follow the guide for the one you picked: Drupal instructions, or JavaScript / Node.js instructions
- You will be taken to the next step, where you can follow the next instructions.
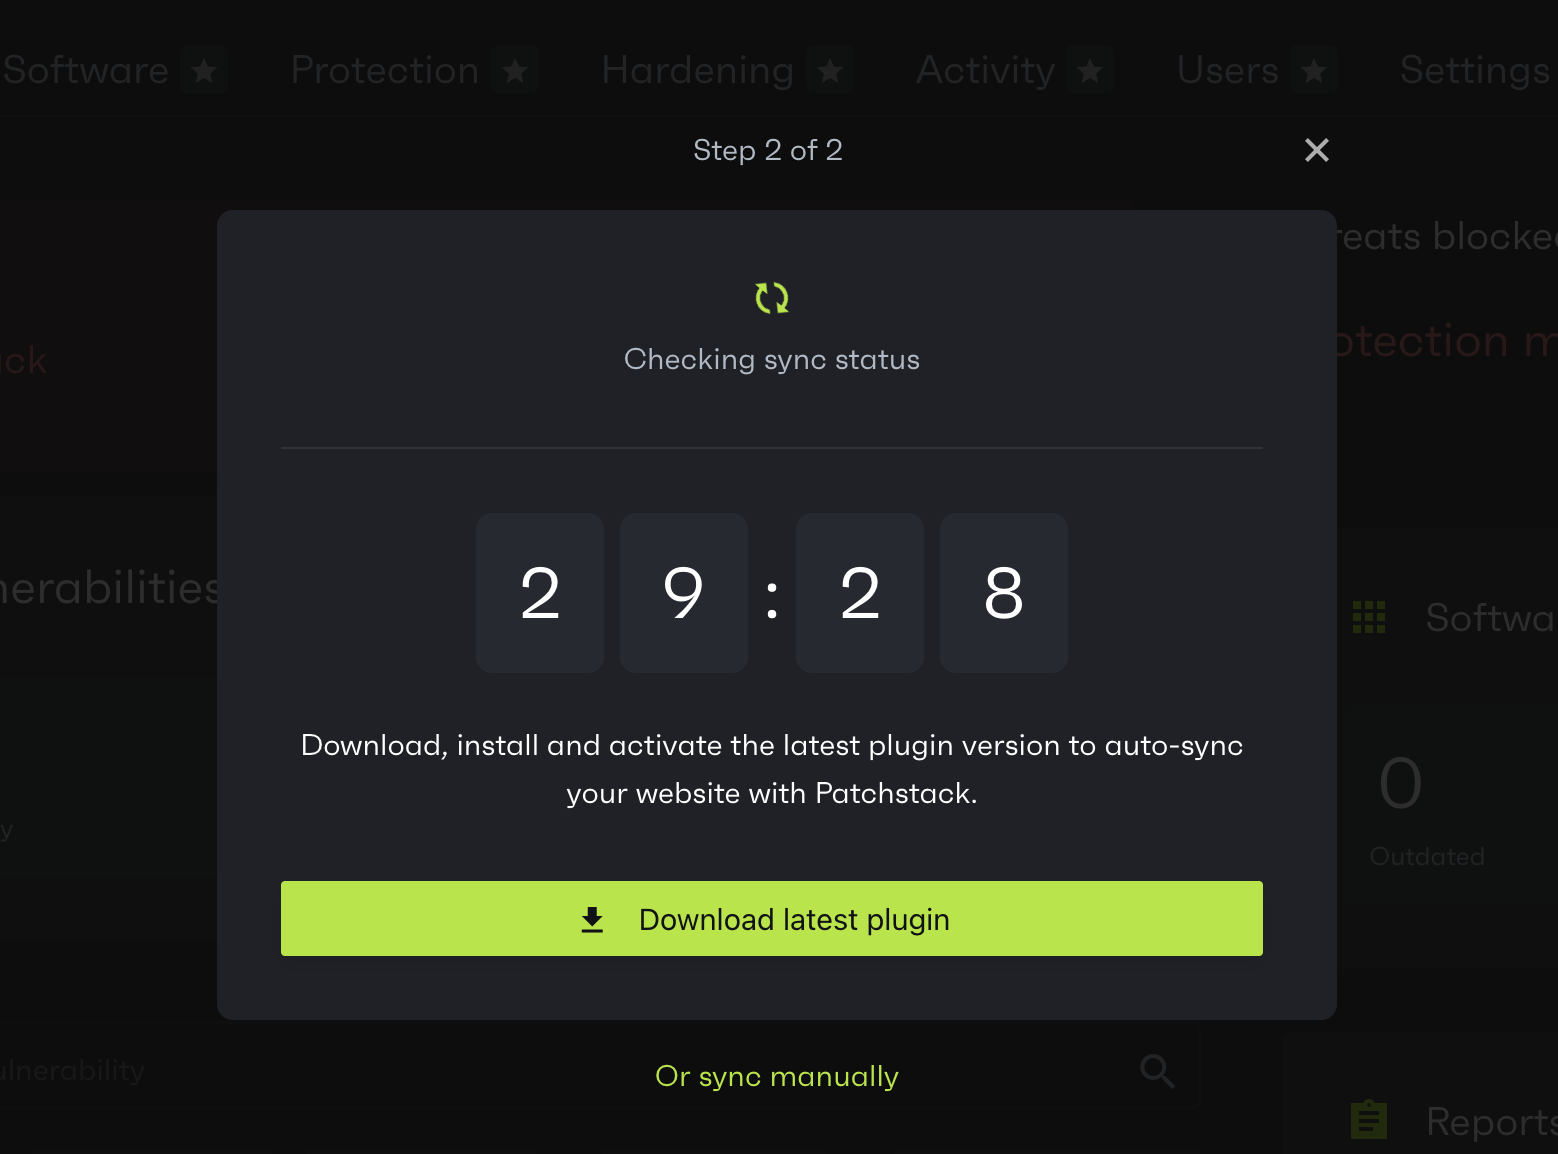
- Click Download latest plugin
- Upload the plugin .zip file to your WordPress site by visiting /wp-admin > Plugins > Add New > Upload Plugin
- Activate the plugin
JavaScript and Node.js projects do not need this flow. Pick AI-assisted instead and copy the message the app shows you into the assistant that built your website. The assistant installs @patchstack/connect and hands you back a link; paste it into the same panel to attach the site to your account. Tick Connect this website to my account automatically before copying and the message carries a one-day key for your account instead: the site is then created already attached to you, and the panel notices it by itself with nothing to paste. If the assistant still hands you a link (a message copied yesterday no longer connects), the paste field works as before. If the assistant refuses to run the install, see My AI assistant blocked a Connect command. See Pulse sites overview for what those sites look like in the app.
If you need further help, don’t hesitate to reach out to us via live chat at the bottom right corner!