Creating a trigger
New triggers can be created on the Developer and Enterprise plan only.
You can create a trigger by clicking on + Create Trigger on the Alerts page in Patchstack App or by navigating here: https://app.patchstack.com/alerts/create.

How to set up an alert trigger
Section titled “How to set up an alert trigger”- Give your trigger a name by typing it into Trigger Title field.
- Select the condition of when the alert is triggered from the dropdown
-
The dropdown includes the following conditions:
- Component Event
- Outdated - sends an alert, when a component on your site is outdated
- Vulnerable - sends an alert, when a component on your site is vulnerable
- WordPress Activity Event
- User Logged In - sends an alert, when someone logs in to WordPress
- User Registered - sends an alert, when a new account is created in WordPress
- Post Deleted - sends an alert, when a post is deleted from WordPress
- Post Trashed - sends an alert, when a post is sent to the trash in WordPress
- Attachment Uploaded - sends an alert, when an attachment is uploaded to WordPress
- Plugin Installed - sends an alert, when a new plugin gets installed on WordPress
- Plugin Deactivated - sends an alert, when a plugin is deactivated on WordPress
- Plugin Activated - sends an alert, when a plugin is activated on WordPress
- Firewall Logs Event
- Match IP - sends an alert, when your site gets visited from a certain URL
- Match URL - sends an alert, when a certain URL gets visited
- Match Payload - sends an alert, when a certain payload is submitted
- Component Event
- Depending on a condition, you may be asked to set additional parameters to the conditions.
For example by choosing "Match IP", you will have to choose, whether the status has to equal or be bigger than the code you type.
You will see the conclusion of your built rule before saving it (see the image below).
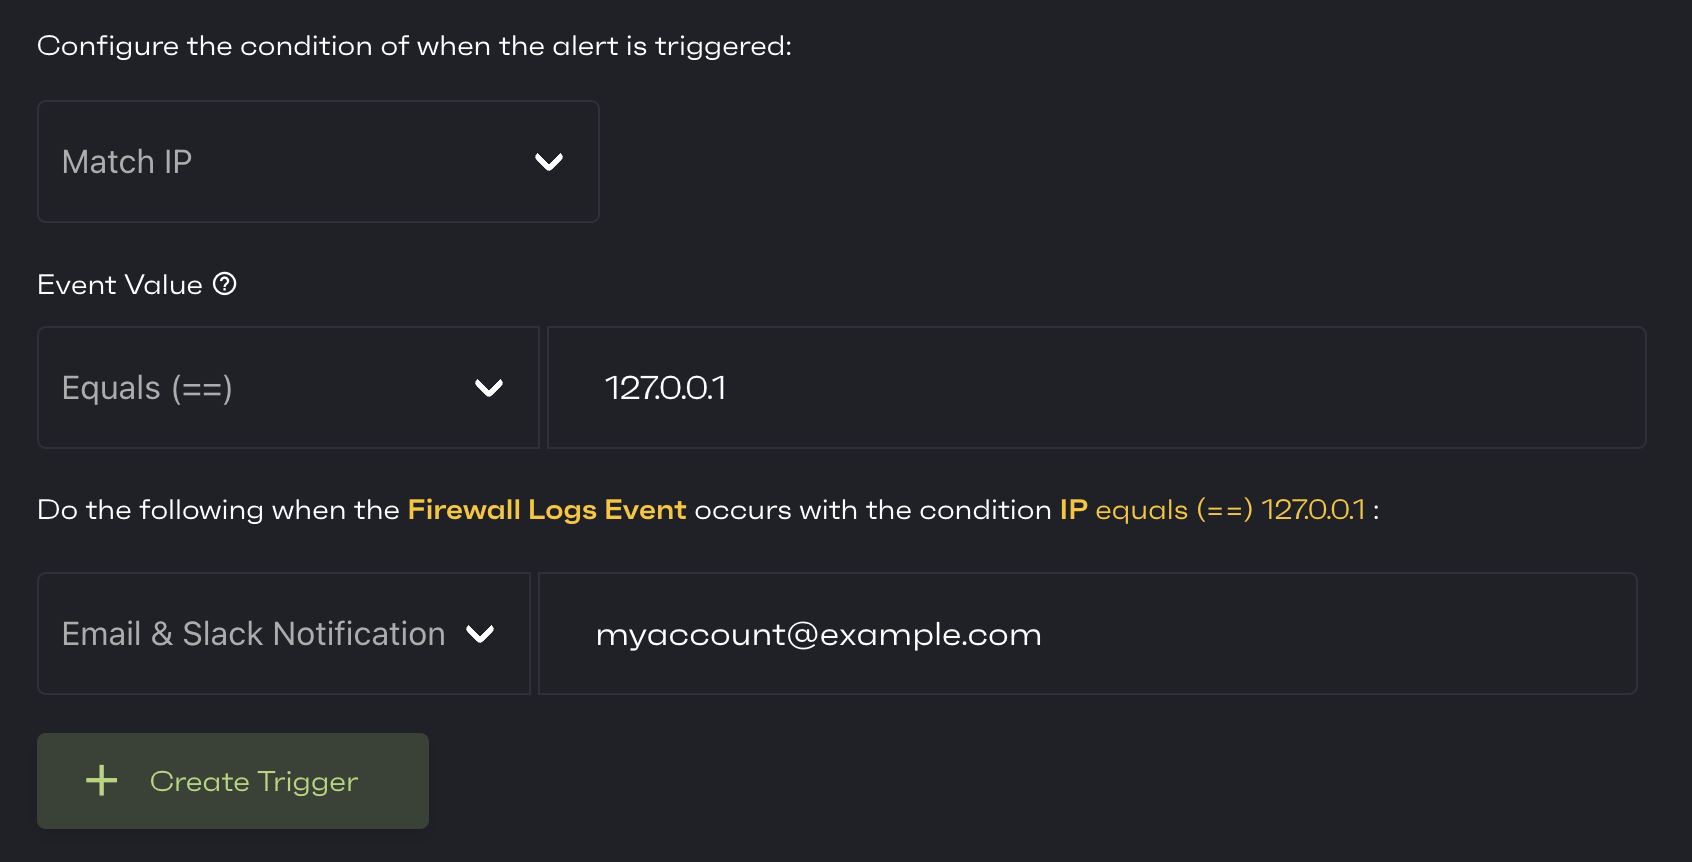
- The next step is to choose whether you would like to get notified to your email, Slack channel, or both.
- After having set your rules, click on + Create Trigger.
- You will be then directed back to the Alerts page where you can see your new trigger on the right side of the page.